
User Manual
Page 30
...the first time 48 Opening the display panel 48 Turning on the power 49 Setting up your software 49 Registering your computer with Toshiba 50 Adding optional external devices 50 Adding memory (optional 50 Installing a memory module 51 Removing a memory module 57 Checking total ... 61 Recovering to a custom size partition 63 Recovering without changing the internal storage drive partitions 66 Creating recovery DVDs/media 68 Restoring from recovery DVDs/media 71 Erasing the Internal Storage Drive 73 Checking the internal storage drive operating status 74 Installing drivers and ...
...the first time 48 Opening the display panel 48 Turning on the power 49 Setting up your software 49 Registering your computer with Toshiba 50 Adding optional external devices 50 Adding memory (optional 50 Installing a memory module 51 Removing a memory module 57 Checking total ... 61 Recovering to a custom size partition 63 Recovering without changing the internal storage drive partitions 66 Creating recovery DVDs/media 68 Restoring from recovery DVDs/media 71 Erasing the Internal Storage Drive 73 Checking the internal storage drive operating status 74 Installing drivers and ...
User Manual
Page 31
...; Explorer 102 Starting a program using the Search programs and files field 103 Saving your work 103 Printing your work 105 Backing up your work 106 Restoring your work 106
...; Explorer 102 Starting a program using the Search programs and files field 103 Saving your work 103 Printing your work 105 Backing up your work 106 Restoring your work 106
User Manual
Page 59
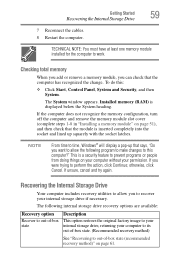
... on your computer without your computer to its out-of-box state. (Recommended recovery method) See "Recovering to out-of -box state Description This option restores the original factory image to time, Windows® will display a pop-up that says, "Do you can check that the module is displayed below the...
... on your computer without your computer to its out-of-box state. (Recommended recovery method) See "Recovering to out-of -box state Description This option restores the original factory image to time, Windows® will display a pop-up that says, "Do you can check that the module is displayed below the...
User Manual
Page 60
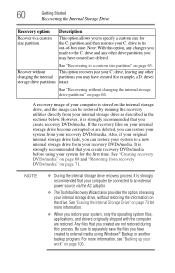
...Storage Drive Recovery option Recover to a custom size partition Description This option allows you to specify a custom size for the C: partition and then restores your C: drive, leaving any other drive partitions you may have created (for example, a D: drive) storage drive partitions intact. See "... Also, if your original internal storage drive fails, you made to an external power source via the AC adaptor. ❖ The Toshiba Recovery Wizard also provides the option of your system for the first time. However, it is strongly recommended that you create recovery DVDs...
...Storage Drive Recovery option Recover to a custom size partition Description This option allows you to specify a custom size for the C: partition and then restores your C: drive, leaving any other drive partitions you may have created (for example, a D: drive) storage drive partitions intact. See "... Also, if your original internal storage drive fails, you made to an external power source via the AC adaptor. ❖ The Toshiba Recovery Wizard also provides the option of your system for the first time. However, it is strongly recommended that you create recovery DVDs...
User Manual
Page 61
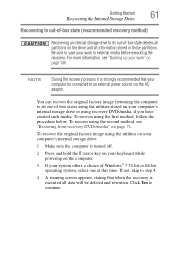
..., stating that your system offers a choice of Windows® 7 32-bit or 64-bit operating system, select one at this time. For more information, see "Restoring from recovery DVDs/media" on the drive and all information stored in those partitions. Click Yes to continue. To recover the original factory image using...
..., stating that your system offers a choice of Windows® 7 32-bit or 64-bit operating system, select one at this time. For more information, see "Restoring from recovery DVDs/media" on the drive and all information stored in those partitions. Click Yes to continue. To recover the original factory image using...
User Manual
Page 64
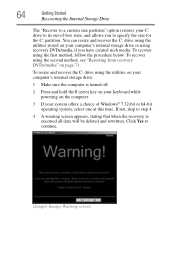
...key on your keyboard while powering on page 71. 64 Getting Started Recovering the Internal Storage Drive The "Recover to a custom size partition" option restores your computer's internal storage drive or using recovery DVDs/media, if you to specify the size for the C: partition. To recover using the ...second method, see "Restoring from recovery DVDs/media" on the computer. 3 If your system offers a choice of -box state, and allows you have created such media....
...key on your keyboard while powering on page 71. 64 Getting Started Recovering the Internal Storage Drive The "Recover to a custom size partition" option restores your computer's internal storage drive or using recovery DVDs/media, if you to specify the size for the C: partition. To recover using the ...second method, see "Restoring from recovery DVDs/media" on the computer. 3 If your system offers a choice of -box state, and allows you have created such media....
User Manual
Page 66
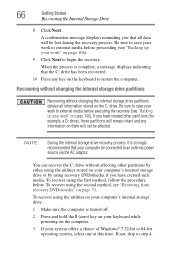
... using the utilities stored on your work " on page 106). 9 Click Next to restart the computer. If not, skip to external media before proceeding (see "Restoring from recovery DVDs/media" on the computer. 3 If your keyboard while powering on page 71. To recover using the first method, follow the procedure below...
... using the utilities stored on your work " on page 106). 9 Click Next to restart the computer. If not, skip to external media before proceeding (see "Restoring from recovery DVDs/media" on the computer. 3 If your keyboard while powering on page 71. To recover using the first method, follow the procedure below...
User Manual
Page 68
...If the recovery files on the C: drive will be lost during the recovery process. Also, if your original internal storage drive fails, you can restore your system from your recovery DVDs/media. Creating recovery DVDs/media It is complete, a message displays, indicating that the C: drive has been ...recovered. 9 Press any key on page 106). 8 Click Next to restart the computer. A confirmation message displays reminding you that you can restore your system to a new internal storage drive from your recovery DVDs/media. Be sure to save your work to external media before proceeding (see...
...If the recovery files on the C: drive will be lost during the recovery process. Also, if your original internal storage drive fails, you can restore your system from your recovery DVDs/media. Creating recovery DVDs/media It is complete, a message displays, indicating that the C: drive has been ...recovered. 9 Press any key on page 106). 8 Click Next to restart the computer. A confirmation message displays reminding you that you can restore your system to a new internal storage drive from your recovery DVDs/media. Be sure to save your work to external media before proceeding (see...
User Manual
Page 69
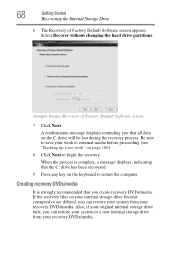
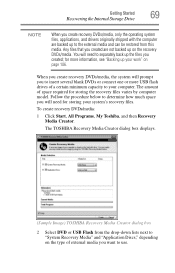
... your work" on page 106. To create recovery DVDs/media: 1 Click Start, All Programs, My Toshiba, and then Recovery Media Creator. The TOSHIBA Recovery Media Creator dialog box displays. (Sample Image) TOSHIBA Recovery Media Creator dialog box 2 Select DVD or USB Flash from this media. When you create recovery... DVDs/media, the system will need to separately back up the files you created are backed up to the external media and can be restored from the drop-...
... your work" on page 106. To create recovery DVDs/media: 1 Click Start, All Programs, My Toshiba, and then Recovery Media Creator. The TOSHIBA Recovery Media Creator dialog box displays. (Sample Image) TOSHIBA Recovery Media Creator dialog box 2 Select DVD or USB Flash from this media. When you create recovery... DVDs/media, the system will need to separately back up the files you created are backed up to the external media and can be restored from the drop-...

User Manual
Page 70
...system recovery files are copying files to a USB flash drive, connect a USB flash drive of the required minimum capacity (as specified in the TOSHIBA Recovery Media Creator utility dialog box. 6 Follow the on-screen prompts to complete the copy process. NOTE If you are copying the recovery files...space required for example, "1 of 3," "2 of 3," etc.), so that you are stored. For example, you have created with the preceding steps, see "Restoring from recovery DVDs/media" on page 71. All information stored on your DVDs or USB flash drive(s) will know in which order to insert the...
...system recovery files are copying files to a USB flash drive, connect a USB flash drive of the required minimum capacity (as specified in the TOSHIBA Recovery Media Creator utility dialog box. 6 Follow the on-screen prompts to complete the copy process. NOTE If you are copying the recovery files...space required for example, "1 of 3," "2 of 3," etc.), so that you are stored. For example, you have created with the preceding steps, see "Restoring from recovery DVDs/media" on page 71. All information stored on your DVDs or USB flash drive(s) will know in which order to insert the...
User Manual
Page 71
...If you have created to external media using Windows® Backup or another backup program. Be sure to save the files you can restore your work to a custom size partition ❖ Recover without changing the internal storage drive partitions For more information, see "Creating ...Recover to external media before executing the recovery (see "Recovering the Internal Storage Drive" on page 68. NOTE When you created are restored. For more information on these options, see "Backing up your system from recovery DVDs/media The recovery process deletes information stored on ...
...If you have created to external media using Windows® Backup or another backup program. Be sure to save the files you can restore your work to a custom size partition ❖ Recover without changing the internal storage drive partitions For more information, see "Creating ...Recover to external media before executing the recovery (see "Recovering the Internal Storage Drive" on page 68. NOTE When you created are restored. For more information on these options, see "Backing up your system from recovery DVDs/media The recovery process deletes information stored on ...
User Manual
Page 73
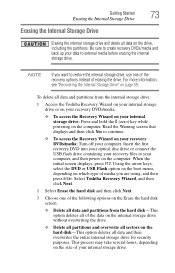
... the internal storage drive will delete all data and partitions from the internal storage drive: 1 Access the Toshiba Recovery Wizard on your internal storage drive or on your recovery DVDs/media. ❖ To access the ...Wizard on your internal storage drive: Press and hold the 0 (zero) key while powering on the computer. Select Toshiba Recovery Wizard, and then click Next. 2 Select Erase the hard disk and then click Next. 3 Choose one of...the Warning screen that displays and then click Yes to restore the internal storage drive, use one of your computer, and then power on page 59.
... the internal storage drive will delete all data and partitions from the internal storage drive: 1 Access the Toshiba Recovery Wizard on your internal storage drive or on your recovery DVDs/media. ❖ To access the ...Wizard on your internal storage drive: Press and hold the 0 (zero) key while powering on the computer. Select Toshiba Recovery Wizard, and then click Next. 2 Select Erase the hard disk and then click Next. 3 Choose one of...the Warning screen that displays and then click Yes to restore the internal storage drive, use one of your computer, and then power on page 59.
User Manual
Page 74
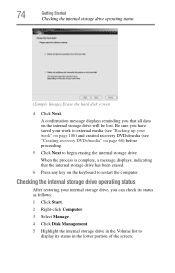
... page 68) before proceeding. 5 Click Next to display its status in the lower portion of the screen. Checking the internal storage drive operating status After restoring your work to external media (see "Backing up your internal storage drive, you have saved your work " on page 106) and created recovery DVDs/media...
... page 68) before proceeding. 5 Click Next to display its status in the lower portion of the screen. Checking the internal storage drive operating status After restoring your work to external media (see "Backing up your internal storage drive, you have saved your work " on page 106) and created recovery DVDs/media...
User Manual
Page 106
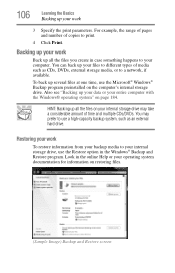
..., such as CDs, DVDs, external storage media, or to a network, if available. Backing up your work Back up all the files on restoring files. (Sample Image) Backup and Restore screen To back up several files at one time, use the Microsoft® Windows® Backup program preinstalled on page 184. You may... take a considerable amount of time and multiple CDs/DVDs. You can back up your files to different types of copies to print. 4 Click Print. Restoring your work 3 Specify the print parameters. 106 Learning the Basics Backing up your work To...
..., such as CDs, DVDs, external storage media, or to a network, if available. Backing up your work Back up all the files on restoring files. (Sample Image) Backup and Restore screen To back up several files at one time, use the Microsoft® Windows® Backup program preinstalled on page 184. You may... take a considerable amount of time and multiple CDs/DVDs. You can back up your files to different types of copies to print. 4 Click Print. Restoring your work 3 Specify the print parameters. 106 Learning the Basics Backing up your work To...

User Manual
Page 107
Learning the Basics Using the optical disc drive 107 TECHNICAL NOTE: When restoring files, the backup program prompts you if you try to overwrite a file that were not available on previous video platforms. These features include wide-screen ...
Learning the Basics Using the optical disc drive 107 TECHNICAL NOTE: When restoring files, the backup program prompts you if you try to overwrite a file that were not available on previous video platforms. These features include wide-screen ...
User Manual
Page 166
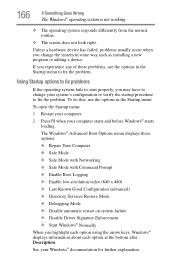
...; Safe Mode with Command Prompt ❖ Enable Boot Logging ❖ Enable low-resolution video (640 x 480) ❖ Last Known Good Configuration (advanced) ❖ Directory Services Restore Mode ❖ Debugging Mode ❖ Disable automatic restart on system failure ❖ Disable Driver Signature Enforcement ❖ Start Windows® Normally When you experience any...
...; Safe Mode with Command Prompt ❖ Enable Boot Logging ❖ Enable low-resolution video (640 x 480) ❖ Last Known Good Configuration (advanced) ❖ Directory Services Restore Mode ❖ Debugging Mode ❖ Disable automatic restart on system failure ❖ Disable Driver Signature Enforcement ❖ Start Windows® Normally When you experience any...

User Manual
Page 182
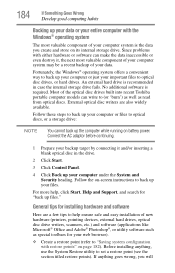
...documents and other important files. Get familiar with all your programs and data files from much easier and more difficult and time-consuming restoration procedures, and to -use to supplement the information in just prior to the installation. Your local computer store or book store ...data files. Take advantage of your Windows® operating system configuration-and saves them for backing up these steps to create a restore point using the System Restore utility: 1 Click Start, Control Panel, System and Security, and then System. Follow these programs as well as you change ...
...documents and other important files. Get familiar with all your programs and data files from much easier and more difficult and time-consuming restoration procedures, and to -use to supplement the information in just prior to the installation. Your local computer store or book store ...data files. Take advantage of your Windows® operating system configuration-and saves them for backing up these steps to create a restore point using the System Restore utility: 1 Click Start, Control Panel, System and Security, and then System. Follow these programs as well as you change ...

User Manual
Page 183
...time, and displays a message that you can re-establish your Windows® configuration using the saved restore point. Other restore points may contain restore points that the restore point was created, and then the computer will now be easily understood in the future, such as ...later time, you did not create. To do this: 1 Click Start, All Programs, Accessories, System Tools, and then System Restore. 2 Select Recommended restore or Choose a different restore point, and then click Next. The timestamp and description of the System Properties window appears. 3 Click Create... 4 In the ...
...time, and displays a message that you can re-establish your Windows® configuration using the saved restore point. Other restore points may contain restore points that the restore point was created, and then the computer will now be easily understood in the future, such as ...later time, you did not create. To do this: 1 Click Start, All Programs, Accessories, System Tools, and then System Restore. 2 Select Recommended restore or Choose a different restore point, and then click Next. The timestamp and description of the System Properties window appears. 3 Click Create... 4 In the ...
User Manual
Page 184
... files to (or 'burn') as well as special toolbars for "back up files." Most of the optical disc drives built into recent Toshiba portable computer models can make the data inaccessible or even destroy it and/or inserting a blank optical disc in case the internal storage drive... External optical disc writers are a few tips to help , click Start, Help and Support, and search for your web browser). ❖ Create a restore point (refer to back up your files. Connect the AC adaptor before continuing. 1 Prepare your backup target by connecting it , the next most valuable ...
... files to (or 'burn') as well as special toolbars for "back up files." Most of the optical disc drives built into recent Toshiba portable computer models can make the data inaccessible or even destroy it and/or inserting a blank optical disc in case the internal storage drive... External optical disc writers are a few tips to help , click Start, Help and Support, and search for your web browser). ❖ Create a restore point (refer to back up your files. Connect the AC adaptor before continuing. 1 Prepare your backup target by connecting it , the next most valuable ...

User Manual
Page 185
... data has changed , or starting at step 1 if any of your back up critical data. 2 Create a restore point. 3 Install one installation at a time, creating restore points immediately before connecting a new hardware item to the computer. Always carefully follow directions carefully! This will make it... page 184). ❖ Have your critical data has changed . If the device is connected first, it may be able to easily restore the Windows® operating system to the state it much easier to the installation, undoing any changes that the installation process introduced. ❖...
... data has changed , or starting at step 1 if any of your back up critical data. 2 Create a restore point. 3 Install one installation at a time, creating restore points immediately before connecting a new hardware item to the computer. Always carefully follow directions carefully! This will make it... page 184). ❖ Have your critical data has changed . If the device is connected first, it may be able to easily restore the Windows® operating system to the state it much easier to the installation, undoing any changes that the installation process introduced. ❖...


