
Users Manual Canada; English
Page 3
... Monitoring of power condition 6-2 User's Manual iii Satellite L650/L655/L650D/L655D/Satellite Pro L650/L650D System Recovery 1-13 Chapter 2 The Grand Tour Front with the display closed 2-1 Left side 2-2 Right side 2-4 Back 2-5 Underside 2-6 Front with the display open 2-7 Indicators 2-9 Optical disc drives 2-11 AC adaptor 2-15 Chapter 3 Hardware, Utilities and Options Hardware 3-1 Special features 3-7 Utilities and Applications 3-9 Optional devices 3-15 Bridge media slot 3-16 Optional accessories 3-30 Chapter 4 Operating Basics Using the Touch Pad 4-1 Web Camera...
... Monitoring of power condition 6-2 User's Manual iii Satellite L650/L655/L650D/L655D/Satellite Pro L650/L650D System Recovery 1-13 Chapter 2 The Grand Tour Front with the display closed 2-1 Left side 2-2 Right side 2-4 Back 2-5 Underside 2-6 Front with the display open 2-7 Indicators 2-9 Optical disc drives 2-11 AC adaptor 2-15 Chapter 3 Hardware, Utilities and Options Hardware 3-1 Special features 3-7 Utilities and Applications 3-9 Optional devices 3-15 Bridge media slot 3-16 Optional accessories 3-30 Chapter 4 Operating Basics Using the Touch Pad 4-1 Web Camera...
Users Manual Canada; English
Page 4
...Satellite L650/L655/L650D/L655D/Satellite Pro L650/L650D Battery 6-3 Password Utility 6-10 Starting the computer by password 6-10 Power-up modes 6-11 Panel power on/off 6-11 System automatic Sleep/Hibernation 6-11 Chapter 7 HW Setup Accessing HW Setup 7-1 HW Setup window 7-1 Chapter 8 Troubleshooting Problem solving process 8-1 Hardware and system checklist 8-3 TOSHIBA support 8-19 Appendix A Specifications Physical Dimensions A-1 Environmental Requirements A-1 Appendix B Display Controller and Video mode Display controller B-1 Video mode B-1 Appendix C Wireless LAN Card...
...Satellite L650/L655/L650D/L655D/Satellite Pro L650/L650D Battery 6-3 Password Utility 6-10 Starting the computer by password 6-10 Power-up modes 6-11 Panel power on/off 6-11 System automatic Sleep/Hibernation 6-11 Chapter 7 HW Setup Accessing HW Setup 7-1 HW Setup window 7-1 Chapter 8 Troubleshooting Problem solving process 8-1 Hardware and system checklist 8-3 TOSHIBA support 8-19 Appendix A Specifications Physical Dimensions A-1 Environmental Requirements A-1 Appendix B Display Controller and Video mode Display controller B-1 Video mode B-1 Appendix C Wireless LAN Card...
Users Manual Canada; English
Page 6
.... HDMI, the HDMI logo and High-Definition Multimedia Interface are accurate for the TOSHIBA Satellite L650/L655/L650D/L655D/Satellite Pro L650/L650D Series Portable Personal Computer at the time of Microsoft Corporation. Any other intellectual property covered by copyright laws belongs to the author or to the copyright owner. The instructions and descriptions it contains are trademarks or registered trademarks of International...
.... HDMI, the HDMI logo and High-Definition Multimedia Interface are accurate for the TOSHIBA Satellite L650/L655/L650D/L655D/Satellite Pro L650/L650D Series Portable Personal Computer at the time of Microsoft Corporation. Any other intellectual property covered by copyright laws belongs to the author or to the copyright owner. The instructions and descriptions it contains are trademarks or registered trademarks of International...
Users Manual Canada; English
Page 24
... and operating procedures. If you are a new user of computers or if you are also defined in parentheses following formats to provide years of the Satellite L650/L655/L650D/L655D/Satellite Pro L650/L650D series computer. For example: Read Only Memory (ROM). This manual tells how to learn about features that are enclosed in the Glossary. Read Chapter 3, Hardware, Utilities and Options if connecting optional products or external devices. Acronyms...
... and operating procedures. If you are a new user of computers or if you are also defined in parentheses following formats to provide years of the Satellite L650/L655/L650D/L655D/Satellite Pro L650/L650D series computer. For example: Read Only Memory (ROM). This manual tells how to learn about features that are enclosed in the Glossary. Read Chapter 3, Hardware, Utilities and Options if connecting optional products or external devices. Acronyms...
Users Manual Canada; English
Page 37
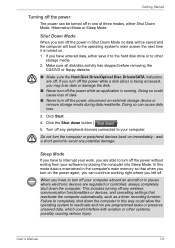
.... ■ Make sure the Hard Disk Drive/Optical Disc Drive/eSATA indicators are regulated or controlled, always completely shut down the computer. Doing so can continue working right where you have to the operating system's main screen the next time it to the hard disk drive or to other systems, possibly causing serious injury. Failure to completely shut down button ( ). 5. User's Manual 1-8 Getting Started Turning off the power The power can...
.... ■ Make sure the Hard Disk Drive/Optical Disc Drive/eSATA indicators are regulated or controlled, always completely shut down the computer. Doing so can continue working right where you have to the operating system's main screen the next time it to the hard disk drive or to other systems, possibly causing serious injury. Failure to completely shut down button ( ). 5. User's Manual 1-8 Getting Started Turning off the power The power can...
Users Manual Canada; English
Page 38
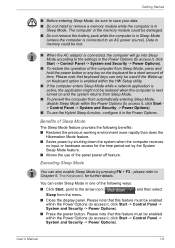
Executing Sleep Mode You can also enable Sleep Mode by the System Sleep Mode feature. ■ Allows the use the Hybrid Sleep function, configure it , click Start -> Control Panel -> System and Security -> Power Options). please refer to Chapter 5, The Keyboard, for the time period set by pressing FN + F3 - User's Manual 1-9 Getting Started ■ Before entering Sleep Mode, be sure to save your data. ■ Do not install or remove a memory module while the computer is in one of...
Executing Sleep Mode You can also enable Sleep Mode by the System Sleep Mode feature. ■ Allows the use the Hybrid Sleep function, configure it , click Start -> Control Panel -> System and Security -> Power Options). please refer to Chapter 5, The Keyboard, for the time period set by pressing FN + F3 - User's Manual 1-9 Getting Started ■ Before entering Sleep Mode, be sure to save your data. ■ Do not install or remove a memory module while the computer is in one of...
Users Manual Canada; English
Page 39
... for the Hard Disk Drive indicator to go out. ■ Do not install or remove a memory module while the computer is in Sleep Mode, the power indicator will be lost if you remove the battery or disconnect the AC adaptor before the save is completed. However, for the time period set by the System Hibernate feature. ■ Allows the use of any peripheral devices connected to the computer...
... for the Hard Disk Drive indicator to go out. ■ Do not install or remove a memory module while the computer is in Sleep Mode, the power indicator will be lost if you remove the battery or disconnect the AC adaptor before the save is completed. However, for the time period set by the System Hibernate feature. ■ Allows the use of any peripheral devices connected to the computer...
Users Manual Canada; English
Page 62
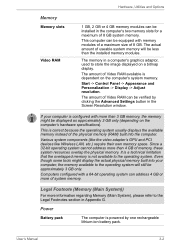
... adaptor, used to the operating system will be less than the installed memory modules. Hardware, Utilities and Options Memory Memory slots Video RAM 1 GB, 2 GB or 4 GB memory modules can be verified by one rechargeable lithium-ion battery pack. Start -> Control Panel -> Appearance and Personalization -> Display -> Adjust resolution. Various system components (like the video adapter's GPU and PCI devices like Wireless LAN, etc.) require their own memory space. Computers configured with memory modules of a maximum size of Video RAM available is configured with...
... adaptor, used to the operating system will be less than the installed memory modules. Hardware, Utilities and Options Memory Memory slots Video RAM 1 GB, 2 GB or 4 GB memory modules can be verified by one rechargeable lithium-ion battery pack. Start -> Control Panel -> Appearance and Personalization -> Display -> Adjust resolution. Various system components (like the video adapter's GPU and PCI devices like Wireless LAN, etc.) require their own memory space. Computers configured with memory modules of a maximum size of Video RAM available is configured with...
Users Manual Canada; English
Page 80
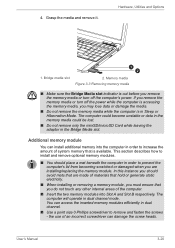
... how to install and remove optional memory modules. ■ You should avoid mats that are installing/replacing the memory module. The computer will operate in the Bridge Media slot. Grasp the media and remove it. Bridge media slot 1 2 2. the use of materials that hold or generate static electricity. ■ When installing or removing a memory module, you must ensure that is accessing the memory media, you remove the memory media or turn off the computer's power. User's Manual 3-20 Hardware, Utilities and Options 1. The computer...
... how to install and remove optional memory modules. ■ You should avoid mats that are installing/replacing the memory module. The computer will operate in the Bridge Media slot. Grasp the media and remove it. Bridge media slot 1 2 2. the use of materials that hold or generate static electricity. ■ When installing or removing a memory module, you must ensure that is accessing the memory media, you remove the memory media or turn off the computer's power. User's Manual 3-20 Hardware, Utilities and Options 1. The computer...
Users Manual Canada; English
Page 81
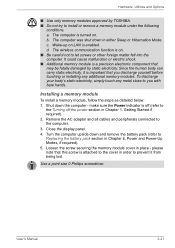
b. make sure the Power indicator is enabled. Loosen the screw securing the memory module cover in order to you discharge yourself before touching or installing any additional memory modules. To discharge your body's static electricity, simply touch any metal close to prevent it is attached to the computer. 3. d. Remove the AC adaptor and all cables and peripherals connected to the cover in place - Wake-up on LAN is off...
b. make sure the Power indicator is enabled. Loosen the screw securing the memory module cover in order to you discharge yourself before touching or installing any additional memory modules. To discharge your body's static electricity, simply touch any metal close to prevent it is attached to the computer. 3. d. Remove the AC adaptor and all cables and peripherals connected to the cover in place - Wake-up on LAN is off...
Users Manual Canada; English
Page 83
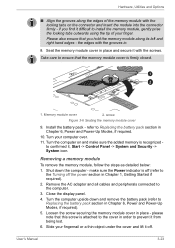
... memory module cover is off the power section in place - Install the battery pack - refer to the computer. 3. Turn your fingernail or a thin object under the cover and lift it with the locking tabs on and make sure the Power indicator is firmly closed. 1 2 1. Removing a memory module To remove the memory module, follow the steps as detailed below: 1. Loosen the screw securing the memory module cover in Chapter 1, Getting Started if required). 2. User's Manual...
... memory module cover is off the power section in place - Install the battery pack - refer to the computer. 3. Turn your fingernail or a thin object under the cover and lift it with the locking tabs on and make sure the Power indicator is firmly closed. 1 2 1. Removing a memory module To remove the memory module, follow the steps as detailed below: 1. Loosen the screw securing the memory module cover in Chapter 1, Getting Started if required). 2. User's Manual...
Users Manual Canada; English
Page 110
... disc after recording important data. ■ DVD+R/+RW disc cannot be written in some DVD Video titles. ■ Close all other applications when using a mouse or Touch Pad, or closing/opening the display panel. ■ Bump or cause vibration to the computer. ■ Use the Mode control button and Audio/Video control button to reproduce music or voice. ■ Open the DVD drive. ■ Install, remove or connect external devices, including the following: SD/SDHC/SDXC memory card, USB device, external display, optical digital devices...
... disc after recording important data. ■ DVD+R/+RW disc cannot be written in some DVD Video titles. ■ Close all other applications when using a mouse or Touch Pad, or closing/opening the display panel. ■ Bump or cause vibration to the computer. ■ Use the Mode control button and Audio/Video control button to reproduce music or voice. ■ Open the DVD drive. ■ Install, remove or connect external devices, including the following: SD/SDHC/SDXC memory card, USB device, external display, optical digital devices...
Users Manual Canada; English
Page 115
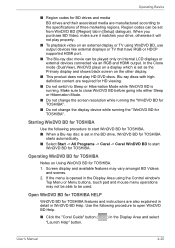
... Control window's Top Menu or Menu buttons, touch pad and mouse menu operations may vary amongst BD Videos and scenes. 2. Blu-ray discs with highdefinition content are also explained in detail in the Display Area using WinDVD BD, use output devices like external displays or TV that have RGB or HDCP supported HDMI port. ■ The Blu-ray disc movie can be used. Screen display and available features may not be able to Sleep or Hibernation Mode...
... Control window's Top Menu or Menu buttons, touch pad and mouse menu operations may vary amongst BD Videos and scenes. 2. Blu-ray discs with highdefinition content are also explained in detail in the Display Area using WinDVD BD, use output devices like external displays or TV that have RGB or HDCP supported HDMI port. ■ The Blu-ray disc movie can be used. Screen display and available features may not be able to Sleep or Hibernation Mode...
Users Manual Canada; English
Page 129
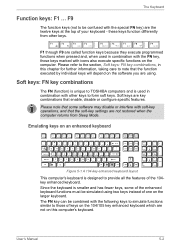
... enhanced keyboard. Soft keys are key combinations that the function executed by individual keys will depend on the software you are called function keys because they execute programmed functions when pressed and, when used in combination with other keys. Soft keys: FN key combinations The FN (function) is unique to TOSHIBA computers and is designed to note that enable, disable or configure specific features. these keys function differently from Sleep Mode. The Keyboard Function keys: F1...
... enhanced keyboard. Soft keys are key combinations that the function executed by individual keys will depend on the software you are called function keys because they execute programmed functions when pressed and, when used in combination with other keys. Soft keys: FN key combinations The FN (function) is unique to TOSHIBA computers and is designed to note that enable, disable or configure specific features. these keys function differently from Sleep Mode. The Keyboard Function keys: F1...
Users Manual Canada; English
Page 136
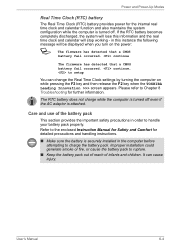
... while pressing the F2 key and then release the F2 key when the TOSHIBA Leading Innovation >>> screen appears. continue, to charge the battery pack. Care and use of infants and children. The RTC battery does not charge while the computer is turned off . It can change the Real Time Clock settings by turning the computer on the power: S The firmware has detected that a CMOS battery fail occurred.
... while pressing the F2 key and then release the F2 key when the TOSHIBA Leading Innovation >>> screen appears. continue, to charge the battery pack. Care and use of infants and children. The RTC battery does not charge while the computer is turned off . It can change the Real Time Clock settings by turning the computer on the power: S The firmware has detected that a CMOS battery fail occurred.
Users Manual Canada; English
Page 151
... you have made will recognize the new device. ■ Make sure all optional accessories are they high pitched or low pitched? keyboard, hard disk drive, display panel, touch pad, touch pad control buttons - Write down what you hear any beeps, if so how many, are they long or short and are configured properly in the computer's setup program and that all required driver software has been loaded (please refer to...
... you have made will recognize the new device. ■ Make sure all optional accessories are they high pitched or low pitched? keyboard, hard disk drive, display panel, touch pad, touch pad control buttons - Write down what you hear any beeps, if so how many, are they long or short and are configured properly in the computer's setup program and that all required driver software has been loaded (please refer to...

Users Manual Canada; English
Page 166
... to clone mode and they are turned off communication when connection with a built-in modem. CARRIER User's Manual 8-17 You can hear a dial tone but a Make sure that the cable connecting the external monitor to the computer is firmly attached. try lengthening this occurs, press FN + F5 to re-set the display panel and external monitor to the Phone and Modem Options link within the Windows Control Panel. Communication...
... to clone mode and they are turned off communication when connection with a built-in modem. CARRIER User's Manual 8-17 You can hear a dial tone but a Make sure that the cable connecting the external monitor to the computer is firmly attached. try lengthening this occurs, press FN + F5 to re-set the display panel and external monitor to the Phone and Modem Options link within the Windows Control Panel. Communication...
Users Manual Canada; English
Page 190
... an external storage medium. CPU performance may automatically shutdown. Memory (Main System) Part of the main system memory may not be used outside the range of data by the graphics system for other factors. Computers configured with a 64bit CPU and therefore may vary depending on the graphics system, applications utilized, system memory size and other computing activities. Contact Toshiba technical service and support, refer...
... an external storage medium. CPU performance may automatically shutdown. Memory (Main System) Part of the main system memory may not be used outside the range of data by the graphics system for other factors. Computers configured with a 64bit CPU and therefore may vary depending on the graphics system, applications utilized, system memory size and other computing activities. Contact Toshiba technical service and support, refer...
Users Manual Canada; English
Page 197
... start-up 8-3 TOSHIBA support 8-19 Touch Pad 8-12 USB device 8-14 USB mouse 8-13 Wireless LAN 8-18 eSATA device 8-15 Processor 3-1 R Recovery Media 1-15 problems 8-19 Recovery hard disk drive 1-14 Restarting the computer 1-11 S SD/SDHC/SDXC Card formatting 3-17 note 3-17 Security lock 3-29 Sleep Mode System automatic 3-7 setting 1-8 Soft keys enhanced keyboard 5-2 Sound system Stereo speakers 2-8 headphone jack 2-4 microphone jack 2-4 problems 8-15 T TOSHIBA Assist 3-11 TOSHIBA Bulletin Board 3-14 TOSHIBA ConfigFree 3-11 TOSHIBA DVD-RAM Utility 3-11 TOSHIBA Disc Creator 3-11, 4-16 TOSHIBA HDD...
... start-up 8-3 TOSHIBA support 8-19 Touch Pad 8-12 USB device 8-14 USB mouse 8-13 Wireless LAN 8-18 eSATA device 8-15 Processor 3-1 R Recovery Media 1-15 problems 8-19 Recovery hard disk drive 1-14 Restarting the computer 1-11 S SD/SDHC/SDXC Card formatting 3-17 note 3-17 Security lock 3-29 Sleep Mode System automatic 3-7 setting 1-8 Soft keys enhanced keyboard 5-2 Sound system Stereo speakers 2-8 headphone jack 2-4 microphone jack 2-4 problems 8-15 T TOSHIBA Assist 3-11 TOSHIBA Bulletin Board 3-14 TOSHIBA ConfigFree 3-11 TOSHIBA DVD-RAM Utility 3-11 TOSHIBA Disc Creator 3-11, 4-16 TOSHIBA HDD...
Detailed Specs for Satellite L650 PSK1EC-0DT00Q English
Page 1
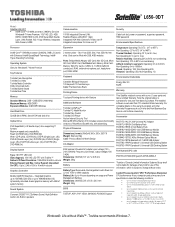
... shall not be filled with 2GB, 4GB modules Ports: Bridge Media Adaptor (SD Card, Mini SD Card, Micro SD Card, SDHC Card, MultiMediaCard, Memory Stick Card, Memory Stick Pro Card), 2 USB 2.0, 1 USB 2.0/eSATA combo port, RJ45, external microphone port, headphone port, RGB, HDMI Keyboard Canadian Bilingual Keyboard 105 keys with 15 Function keys Color: Flat Genchaku Black Pointing Device Touchpad Pointing device with Gesture Additional Software Toshiba ConfigFree™ Toshiba PC Health Monitor Toshiba Disc Creator Toshiba DVD Player Norton Internet Security Trial Microsoft® Office Starter...
... shall not be filled with 2GB, 4GB modules Ports: Bridge Media Adaptor (SD Card, Mini SD Card, Micro SD Card, SDHC Card, MultiMediaCard, Memory Stick Card, Memory Stick Pro Card), 2 USB 2.0, 1 USB 2.0/eSATA combo port, RJ45, external microphone port, headphone port, RGB, HDMI Keyboard Canadian Bilingual Keyboard 105 keys with 15 Function keys Color: Flat Genchaku Black Pointing Device Touchpad Pointing device with Gesture Additional Software Toshiba ConfigFree™ Toshiba PC Health Monitor Toshiba Disc Creator Toshiba DVD Player Norton Internet Security Trial Microsoft® Office Starter...


