
User Guide
Page 9
...transmit antenna) that it does not emit RF field in the 5.15 GHz to 5.85 GHz bands. consult Safety Code 6, obtainable from windows to the licensed service, this device must ensure that the antenna is located or pointed such that is installed outdoors is subject to co-...channel Mobile Satellite systems. High power radars are allocated as primary users of Industry Canada. The term "IC" before the equipment certification number only signifies that...
...transmit antenna) that it does not emit RF field in the 5.15 GHz to 5.85 GHz bands. consult Safety Code 6, obtainable from windows to the licensed service, this device must ensure that the antenna is located or pointed such that is installed outdoors is subject to co-...channel Mobile Satellite systems. High power radars are allocated as primary users of Industry Canada. The term "IC" before the equipment certification number only signifies that...

User Guide
Page 15
CE Compliance CE Compliance does not apply to systems with RSS-129, RSS-133 Industry Canada. consult Safety Code 6, obtainable from windows to the following two conditions: (1) this device may cause undesired operation of this device. The term "IC" before the equipment certification ...in strict accordance with the manufacturer's instructions as described in excess of Health Canada limits for the general population; 15 Regulatory Information The TOSHIBA Wireless WAN Card must ensure that the antenna is located or pointed such that it does not emit RF field in the user documentation...
CE Compliance CE Compliance does not apply to systems with RSS-129, RSS-133 Industry Canada. consult Safety Code 6, obtainable from windows to the following two conditions: (1) this device may cause undesired operation of this device. The term "IC" before the equipment certification ...in strict accordance with the manufacturer's instructions as described in excess of Health Canada limits for the general population; 15 Regulatory Information The TOSHIBA Wireless WAN Card must ensure that the antenna is located or pointed such that it does not emit RF field in the user documentation...

User Guide
Page 29
...other countries. Bluetooth word mark and logos are owned by Toshiba is a registered trademark of Synaptics, Inc. Computer Disposal Information As part of their respective companies. 29 Trademarks Satellite, ConfigFree, and eco utility are registered trademarks of SD ...or trademarks of MultiMediaCard Association. Microsoft, Outlook, Windows, and Windows Media are trademarks or registered trademarks of Microsoft Corporation in and recycling programs. For details, please visit www.laptops.toshiba.com/green. and/or Toshiba Corporation. TouchPad is a registered trademark of ...
...other countries. Bluetooth word mark and logos are owned by Toshiba is a registered trademark of Synaptics, Inc. Computer Disposal Information As part of their respective companies. 29 Trademarks Satellite, ConfigFree, and eco utility are registered trademarks of SD ...or trademarks of MultiMediaCard Association. Microsoft, Outlook, Windows, and Windows Media are trademarks or registered trademarks of Microsoft Corporation in and recycling programs. For details, please visit www.laptops.toshiba.com/green. and/or Toshiba Corporation. TouchPad is a registered trademark of ...
User Guide
Page 32
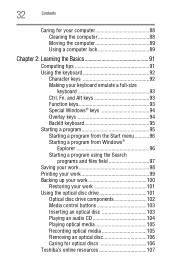
...your keyboard emulate a full-size keyboard 93 Ctrl, Fn, and Alt keys 93 Function keys 93 Special Windows® keys 94 Overlay keys 94 Backlit keyboard 95 Starting a program 95 Starting a program from the Start menu...........96 Starting... a program from Windows® Explorer 96 Starting a program using the Search programs and files field 97 Saving your work 98 Printing ...Recording optical media 105 Removing an optical disc 106 Caring for optical discs 106 Toshiba's online resources 107
...your keyboard emulate a full-size keyboard 93 Ctrl, Fn, and Alt keys 93 Function keys 93 Special Windows® keys 94 Overlay keys 94 Backlit keyboard 95 Starting a program 95 Starting a program from the Start menu...........96 Starting... a program from Windows® Explorer 96 Starting a program using the Search programs and files field 97 Saving your work 98 Printing ...Recording optical media 105 Removing an optical disc 106 Caring for optical discs 106 Toshiba's online resources 107

User Guide
Page 35
... easy to fix 163 Problems when you turn on the computer............164 The Windows® operating system is not working ..167 Using Startup options to fix problems 167 Internet problems 168 The Windows® operating system can help you 169 Fixing a problem with Device Manager... 181 Data and system configuration backup in the Windows® operating system 182 If you need further assistance 186 Before you contact Toshiba 186 Contacting Toshiba 187 Other Toshiba Internet Web sites 188 Toshiba's worldwide offices 188 Appendix A: Hot Keys/TOSHIBA Cards 190 Hot Key Cards 190 Using the...
... easy to fix 163 Problems when you turn on the computer............164 The Windows® operating system is not working ..167 Using Startup options to fix problems 167 Internet problems 168 The Windows® operating system can help you 169 Fixing a problem with Device Manager... 181 Data and system configuration backup in the Windows® operating system 182 If you need further assistance 186 Before you contact Toshiba 186 Contacting Toshiba 187 Other Toshiba Internet Web sites 188 Toshiba's worldwide offices 188 Appendix A: Hot Keys/TOSHIBA Cards 190 Hot Key Cards 190 Using the...
User Guide
Page 39
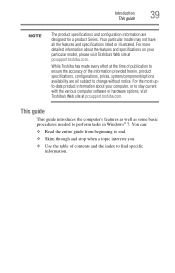
For more detailed information about your particular model, please visit Toshiba's Web site at the time of publication to ensure the accuracy of contents and the index to end. ❖ Skim through and stop when a topic ..., or to stay current with the various computer software or hardware options, visit Toshiba's Web site at pcsupport.toshiba.com. While Toshiba has made every effort at pcsupport.toshiba.com. Your particular model may not have all subject to perform tasks in Windows® 7. This guide This guide introduces the computer's features as well as...
For more detailed information about your particular model, please visit Toshiba's Web site at the time of publication to ensure the accuracy of contents and the index to end. ❖ Skim through and stop when a topic ..., or to stay current with the various computer software or hardware options, visit Toshiba's Web site at pcsupport.toshiba.com. While Toshiba has made every effort at pcsupport.toshiba.com. Your particular model may not have all subject to perform tasks in Windows® 7. This guide This guide introduces the computer's features as well as...
User Guide
Page 51
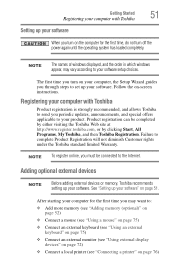
..., you must be completed by either visiting the Toshiba Web site at http://www.register.toshiba.com, or by clicking Start, All Programs, My Toshiba, and then Toshiba Registration. NOTE The names of windows displayed, and the order in which windows appear, may want to: ❖ Add more... -screen instructions. Product registration can be connected to the Internet. See "Setting up your software. Registering your computer with Toshiba 51 Setting up your software When you may vary according to your software setup choices. Adding optional external devices NOTE Before ...
..., you must be completed by either visiting the Toshiba Web site at http://www.register.toshiba.com, or by clicking Start, All Programs, My Toshiba, and then Toshiba Registration. NOTE The names of windows displayed, and the order in which windows appear, may want to: ❖ Add more... -screen instructions. Product registration can be connected to the Internet. See "Setting up your software. Registering your computer with Toshiba 51 Setting up your software When you may vary according to your software setup choices. Adding optional external devices NOTE Before ...
User Guide
Page 53
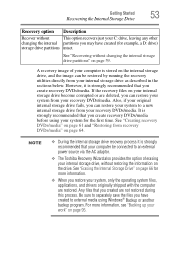
..., you can be connected to an external power source via the AC adaptor. ❖ The Toshiba Recovery Wizard also provides the option of your computer is strongly recommended that you create recovery DVDs/media before using Windows® Backup or another backup program. For more information. ❖ When you restore your recovery...
..., you can be connected to an external power source via the AC adaptor. ❖ The Toshiba Recovery Wizard also provides the option of your computer is strongly recommended that you create recovery DVDs/media before using Windows® Backup or another backup program. For more information. ❖ When you restore your recovery...
User Guide
Page 56
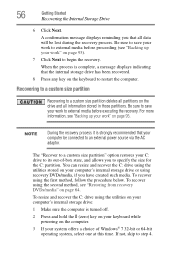
... your keyboard while powering on page 95. To recover using the utilities on the drive and all data will be connected to its out-of Windows® 7 32-bit or 64-bit operating system, select one at this time. Recovering to a custom size partition Recovering to a custom size partition deletes all...
... your keyboard while powering on page 95. To recover using the utilities on the drive and all data will be connected to its out-of Windows® 7 32-bit or 64-bit operating system, select one at this time. Recovering to a custom size partition Recovering to a custom size partition deletes all...
User Guide
Page 59
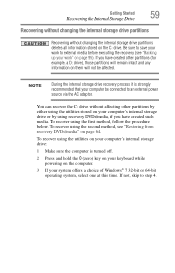
... up your work to external media before executing the recovery (see "Restoring from recovery DVDs/media" on the computer. 3 If your system offers a choice of Windows® 7 32-bit or 64-bit operating system, select one at this time. Getting Started Recovering the Internal Storage Drive 59 Recovering without changing the...
... up your work to external media before executing the recovery (see "Restoring from recovery DVDs/media" on the computer. 3 If your system offers a choice of Windows® 7 32-bit or 64-bit operating system, select one at this time. Getting Started Recovering the Internal Storage Drive 59 Recovering without changing the...
User Guide
Page 64
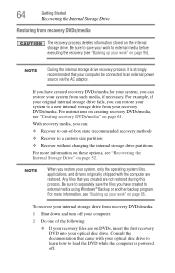
... created to external media before executing the recovery (see "Recovering the Internal Storage Drive" on page 95. To recover your work to external media using Windows® Backup or another backup program. Be sure to separately save your internal storage drive from recovery DVDs/media: 1 Shut down and turn off . 64...
... created to external media before executing the recovery (see "Recovering the Internal Storage Drive" on page 95. To recover your work to external media using Windows® Backup or another backup program. Be sure to separately save your internal storage drive from recovery DVDs/media: 1 Shut down and turn off . 64...

User Guide
Page 72
...) Video port right side of computer To enable/disable the TouchPad, do one of the Windows Control Panel. Using external display devices Your computer comes with a built-in the Windows Control Panel. 72 Getting Started Using external display devices NOTE TouchPad setting options vary by sliding...TouchPad™ is enabled by default. NOTE Alternately, you can disable only the tapping feature. For more information, please visit www.support.toshiba.com, and enter the phrase "Mouse pointer jumps around as you can still use the Mouse Properties option in display, but you can...
...) Video port right side of computer To enable/disable the TouchPad, do one of the Windows Control Panel. Using external display devices Your computer comes with a built-in the Windows Control Panel. 72 Getting Started Using external display devices NOTE TouchPad setting options vary by sliding...TouchPad™ is enabled by default. NOTE Alternately, you can disable only the tapping feature. For more information, please visit www.support.toshiba.com, and enter the phrase "Mouse pointer jumps around as you can still use the Mouse Properties option in display, but you can...

User Guide
Page 75
...; External monitor and TV (extended desktop) ❖ Swap-Switch primary display between internal display and external monitor when using extended desktop (Sample Image) Display options window 3 Release the Fn key. Getting Started Using an external keyboard 75 ❖ TV (or other external video device) only ❖ External monitor and TV simultaneously...
...; External monitor and TV (extended desktop) ❖ Swap-Switch primary display between internal display and external monitor when using extended desktop (Sample Image) Display options window 3 Release the Fn key. Getting Started Using an external keyboard 75 ❖ TV (or other external video device) only ❖ External monitor and TV simultaneously...
User Guide
Page 77
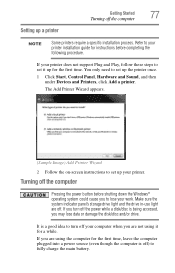
... being accessed, you may lose data or damage the disk/disc and/or drive. If your printer installation guide for instructions before shutting down the Windows® operating system could cause you are not using the computer for the first time. If you are off the computer 77 NOTE Some printers...
... being accessed, you may lose data or damage the disk/disc and/or drive. If your printer installation guide for instructions before shutting down the Windows® operating system could cause you are not using the computer for the first time. If you are off the computer 77 NOTE Some printers...
User Guide
Page 79
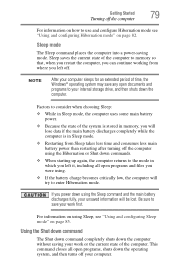
.... Factors to consider when choosing Sleep: ❖ While in Sleep mode, the computer uses some main battery power. ❖ Because the state of time, the Windows® operating system may save any open documents and programs to memory so that, when you restart the computer, you can continue working from Sleep...
.... Factors to consider when choosing Sleep: ❖ While in Sleep mode, the computer uses some main battery power. ❖ Because the state of time, the Windows® operating system may save any open documents and programs to memory so that, when you restart the computer, you can continue working from Sleep...

User Guide
Page 80
By default, pressing your computer using the Power Options feature. The Power Options window appears. Start button Shut down button (Sample Image) Shut down button 2 Click the Shut down the operating system, and then turns off. The computer closes ...
By default, pressing your computer using the Power Options feature. The Power Options window appears. Start button Shut down button (Sample Image) Shut down button 2 Click the Shut down the operating system, and then turns off. The computer closes ...
User Guide
Page 81
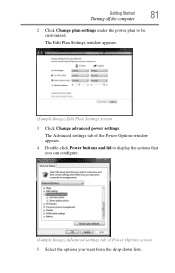
The Advanced settings tab of the Power Options window appears. 4 Double-click Power buttons and lid to be customized. The Edit Plan Settings window appears. (Sample Image) Edit Plan Settings screen 3 Click Change advanced power settings. Getting Started Turning off the computer 81 2 Click Change plan settings under the power plan to display the actions that you can configure. (Sample Image) Advanced settings tab of Power Options screen 5 Select the options you want from the drop-down lists.
The Advanced settings tab of the Power Options window appears. 4 Double-click Power buttons and lid to be customized. The Edit Plan Settings window appears. (Sample Image) Edit Plan Settings screen 3 Click Change advanced power settings. Getting Started Turning off the computer 81 2 Click Change plan settings under the power plan to display the actions that you can configure. (Sample Image) Advanced settings tab of Power Options screen 5 Select the options you want from the drop-down lists.

User Guide
Page 83
... the display, and then turns off the computer 83 2 Click Hibernate in the pop-up menu. To use any of the Power Options window appears. The Power Options window appears. 2 Click Change plan settings under the power plan to enable them using the Power Options feature. 1 Click Start, Control Panel, System and... Hibernation mode by either pressing the power button or closing the display panel. You can place the computer into Hibernation mode. The Edit Plan Settings window appears. (Sample Image) Edit Plan Settings screen 3 Click Change advanced power settings.
... the display, and then turns off the computer 83 2 Click Hibernate in the pop-up menu. To use any of the Power Options window appears. The Power Options window appears. 2 Click Change plan settings under the power plan to enable them using the Power Options feature. 1 Click Start, Control Panel, System and... Hibernation mode by either pressing the power button or closing the display panel. You can place the computer into Hibernation mode. The Edit Plan Settings window appears. (Sample Image) Edit Plan Settings screen 3 Click Change advanced power settings.
User Guide
Page 85
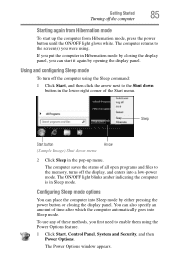
.... Configuring Sleep mode options You can start up menu. If you put the computer in Hibernation mode by closing the display panel. The Power Options window appears. Using and configuring Sleep mode To turn off the computer using the Sleep command: 1 Click Start, and then click the arrow next to enable...
.... Configuring Sleep mode options You can start up menu. If you put the computer in Hibernation mode by closing the display panel. The Power Options window appears. Using and configuring Sleep mode To turn off the computer using the Sleep command: 1 Click Start, and then click the arrow next to enable...
User Guide
Page 86
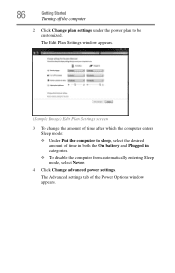
The Edit Plan Settings window appears. (Sample Image) Edit Plan Settings screen 3 To change the amount of time after which the computer enters Sleep mode: ❖ Under Put the computer to be customized. 86 Getting Started Turning off the computer 2 Click Change plan settings under the power plan to sleep, select the desired amount of time in both the On battery and Plugged in categories. ❖ To disable the computer from automatically entering Sleep mode, select Never. 4 Click Change advanced power settings. The Advanced settings tab of the Power Options window appears.
The Edit Plan Settings window appears. (Sample Image) Edit Plan Settings screen 3 To change the amount of time after which the computer enters Sleep mode: ❖ Under Put the computer to be customized. 86 Getting Started Turning off the computer 2 Click Change plan settings under the power plan to sleep, select the desired amount of time in both the On battery and Plugged in categories. ❖ To disable the computer from automatically entering Sleep mode, select Never. 4 Click Change advanced power settings. The Advanced settings tab of the Power Options window appears.


