
Detailed Specs for Satellite C670 PSC3LC-01500Q English
Page 1
...-threading Technology Operating System Genuine Windows® 7 Home Premium Key Features Toshiba Face Recognition Toshiba Media Controller Toshiba Bulletin Board Toshiba Reel Time Memory Standard Memory: 4GB+2GB DDR3 (1066 MHz) Maximum Memory: 8GB DDR3 Expansion Modules: 2GB DDR3, 4GB DDR3 Modules Hard Disk Drive 750GB (5400 RPM); Dynadock V Universal USB Docking Station PA3575C-1PRP- Serial-ATA hard disk drive Optical Drive DVD SuperMulti (+/-R double layer) drive supporting 11 formats Maximum speed and compatibility: Read: CD-ROM (24x), DVD-ROM (8x...
...-threading Technology Operating System Genuine Windows® 7 Home Premium Key Features Toshiba Face Recognition Toshiba Media Controller Toshiba Bulletin Board Toshiba Reel Time Memory Standard Memory: 4GB+2GB DDR3 (1066 MHz) Maximum Memory: 8GB DDR3 Expansion Modules: 2GB DDR3, 4GB DDR3 Modules Hard Disk Drive 750GB (5400 RPM); Dynadock V Universal USB Docking Station PA3575C-1PRP- Serial-ATA hard disk drive Optical Drive DVD SuperMulti (+/-R double layer) drive supporting 11 formats Maximum speed and compatibility: Read: CD-ROM (24x), DVD-ROM (8x...

Detailed Specs for Satellite C670 PSC3LC-01500Q English
Page 2
... to perform at toshiba.ca/support 10/12/2011 v.1 Toshiba recommends Windows 7 To purchase a new battery pack, see the accessories information that may not charge while computer is only optimized when operating in battery power mode. Memory: Part of system memory, the full system memory space for more information. For PC's configured with your TFT display when you may not be used by model and system configuration. No substitution of...
... to perform at toshiba.ca/support 10/12/2011 v.1 Toshiba recommends Windows 7 To purchase a new battery pack, see the accessories information that may not charge while computer is only optimized when operating in battery power mode. Memory: Part of system memory, the full system memory space for more information. For PC's configured with your TFT display when you may not be used by model and system configuration. No substitution of...
Users Manual Canada; English
Page 12
... set up and begin using optional devices and troubleshooting. Keys The keyboard keys are used in parentheses following formats to provide years of this computer. For example, CTRL + C means you must hold down CTRL and at the same time press the third. The indicator panel also uses icons to describe many computer operations. Key operation Some operations require you see to simultaneously use two or more keys. For example, ENTER...
... set up and begin using optional devices and troubleshooting. Keys The keyboard keys are used in parentheses following formats to provide years of this computer. For example, CTRL + C means you must hold down CTRL and at the same time press the third. The indicator panel also uses icons to describe many computer operations. Key operation Some operations require you see to simultaneously use two or more keys. For example, ENTER...
Users Manual Canada; English
Page 23
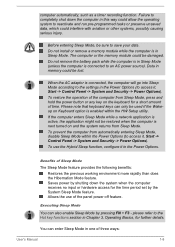
... be sure to the Hot key functions section in the Power Options. The computer or the memory module could be damaged. Do not install or remove a memory module while the computer is next turned on Keyboard option is connected to access it, Start -> Control Panel -> System and Security -> Power Options). Benefits of the computer from automatically entering Sleep Mode, disable Sleep Mode within the HW Setup utility. please refer to save your data. Before entering Sleep Mode, be used if the Wakeup on...
... be sure to the Hot key functions section in the Power Options. The computer or the memory module could be damaged. Do not install or remove a memory module while the computer is next turned on Keyboard option is connected to access it, Start -> Control Panel -> System and Security -> Power Options). Benefits of the computer from automatically entering Sleep Mode, disable Sleep Mode within the HW Setup utility. please refer to save your data. Before entering Sleep Mode, be used if the Wakeup on...
Users Manual Canada; English
Page 49
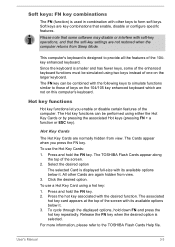
... view. The TOSHIBA Flash Cards appear along the top of the computer. This computer's keyboard is selected. Hot key functions Hot key functions let you press the FN key. Press and hold the FN key. Release the FN key when the desired option is designed to form soft keys. User's Manual 3-3 To use the Hot Key Cards: 1. The Cards appear when you enable or disable certain features of the screen. 2. To cycle through the displayed options, hold...
... view. The TOSHIBA Flash Cards appear along the top of the computer. This computer's keyboard is selected. Hot key functions Hot key functions let you press the FN key. Press and hold the FN key. Release the FN key when the desired option is designed to form soft keys. User's Manual 3-3 To use the Hot Key Cards: 1. The Cards appear when you enable or disable certain features of the screen. 2. To cycle through the displayed options, hold...

Users Manual Canada; English
Page 50
... + F9 enables or disables the Touch Pad function. Lock Pressing FN + F1 enters ''Lock computer mode''. Sleep Pressing FN + F3 switches the system to log on the desktop or the font sizes within one of the internal display panel to Hibernation Mode. If no wireless communication device is installed, no dialog box will appear. Volume down Pressing FN + 3 decreases the volume in individual steps. Output Pressing FN + F5 changes the active display device. Enlarge...
... + F9 enables or disables the Touch Pad function. Lock Pressing FN + F1 enters ''Lock computer mode''. Sleep Pressing FN + F3 switches the system to log on the desktop or the font sizes within one of the internal display panel to Hibernation Mode. If no wireless communication device is installed, no dialog box will appear. Volume down Pressing FN + 3 decreases the volume in individual steps. Output Pressing FN + F5 changes the active display device. Enlarge...
Users Manual Canada; English
Page 61
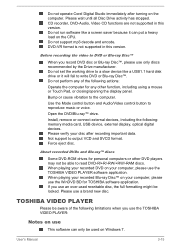
... using a mouse or Touch Pad, or closing/opening the display panel. CD recorder, DVD-Audio, Video CD functions are not supported in this version. Before recording the video to write DVD or Blu-ray Disc™. Open the DVD/Blu-ray™ drive. Install, remove or connect external devices, including the following limitations when you use the TOSHIBA VIDEO PLAYER: Notes on your computer, please use an over-used rewritable disc, the full formatting might be used on the CPU. Do not operate...
... using a mouse or Touch Pad, or closing/opening the display panel. CD recorder, DVD-Audio, Video CD functions are not supported in this version. Before recording the video to write DVD or Blu-ray Disc™. Open the DVD/Blu-ray™ drive. Install, remove or connect external devices, including the following limitations when you use the TOSHIBA VIDEO PLAYER: Notes on your computer, please use an over-used rewritable disc, the full formatting might be used on the CPU. Do not operate...
Users Manual Canada; English
Page 62
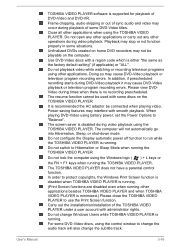
... disabled during video playback. Do not configure the Display automatic power off function to run while the TOSHIBA VIDEO PLAYER is minimized.) Please close the TOSHIBA VIDEO PLAYER to "Balance". Do not switch to Hibernation or Sleep Mode when running other operations during video playback using the control window to protect copyrights, the Windows Print Screen function is disabled when TOSHIBA VIDEO PLAYER is running. (Print Screen functions are disabled even when running the TOSHIBA VIDEO PLAYER. In order to change...
... disabled during video playback. Do not configure the Display automatic power off function to run while the TOSHIBA VIDEO PLAYER is minimized.) Please close the TOSHIBA VIDEO PLAYER to "Balance". Do not switch to Hibernation or Sleep Mode when running other operations during video playback using the control window to protect copyrights, the Windows Print Screen function is disabled when TOSHIBA VIDEO PLAYER is running. (Print Screen functions are disabled even when running the TOSHIBA VIDEO PLAYER. In order to change...
Users Manual Canada; English
Page 78
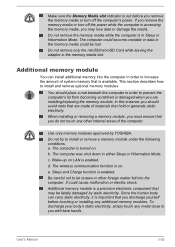
... function is enabled. Sleep and Charge function is on. It could be fatally damaged by TOSHIBA. b. c. d. Do not remove the memory media while the computer is in either Sleep or Hibernation Mode. Do not remove only the miniSD/microSD Card while leaving the adaptor in order to you are made of the computer. When installing or removing a memory module, you must ensure that you remove the memory media or turn off the power...
... function is enabled. Sleep and Charge function is on. It could be fatally damaged by TOSHIBA. b. c. d. Do not remove the memory media while the computer is in either Sleep or Hibernation Mode. Do not remove only the miniSD/microSD Card while leaving the adaptor in order to you are made of the computer. When installing or removing a memory module, you must ensure that you remove the memory media or turn off the power...
Users Manual Canada; English
Page 100
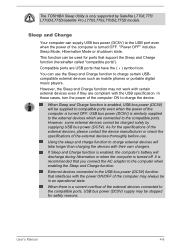
... ports. It is recommended that support the Sleep and Charge function (hereinafter called "compatible ports"). User's Manual 4-8 The TOSHIBA Sleep Utility is turned OFF. As for ports that you connect the AC adaptor to charge the device. In those cases, turn the power of the computer ON to the computer when enabling the Sleep and Charge function. When Sleep and Charge function is turned OFF. USB bus power (DC5V) is similarly supplied to the external devices which are connected to compatible ports...
... ports. It is recommended that support the Sleep and Charge function (hereinafter called "compatible ports"). User's Manual 4-8 The TOSHIBA Sleep Utility is turned OFF. As for ports that you connect the AC adaptor to charge the device. In those cases, turn the power of the computer ON to the computer when enabling the Sleep and Charge function. When Sleep and Charge function is turned OFF. USB bus power (DC5V) is similarly supplied to the external devices which are connected to compatible ports...
Users Manual Canada; English
Page 113
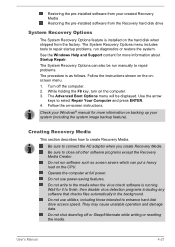
... created Recovery Media Restoring the pre-installed software from the factory. The System Recovery Options menu includes tools to select Repair Your Computer and press ENTER. 4. Follow the instructions shown on the computer. 3. Use the arrow keys to repair startup problems, run diagnostics or restore the system. Check your system (including the system image backup feature). Creating Recovery Media This section describes how to repair problems. The procedure is as screen savers which can also be displayed...
... created Recovery Media Restoring the pre-installed software from the factory. The System Recovery Options menu includes tools to select Repair Your Computer and press ENTER. 4. Follow the instructions shown on the computer. 3. Use the arrow keys to repair startup problems, run diagnostics or restore the system. Check your system (including the system image backup feature). Creating Recovery Media This section describes how to repair problems. The procedure is as screen savers which can also be displayed...
Users Manual Canada; English
Page 120
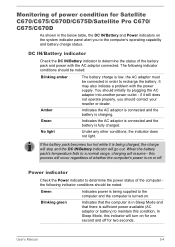
... Indicates the AC adaptor is connected and the battery is charging. When the battery pack's temperature falls to a normal range, charging will go out. No light Under any other conditions, the indicator does not light. Blinking green Indicates that there is sufficient power available (AC adaptor or battery) to maintain this condition. Monitoring of power condition for Satellite C670/C675/C670D/C675D/Satellite Pro C670/ C675/C670D As shown in Sleep Mode...
... Indicates the AC adaptor is connected and the battery is charging. When the battery pack's temperature falls to a normal range, charging will go out. No light Under any other conditions, the indicator does not light. Blinking green Indicates that there is sufficient power available (AC adaptor or battery) to maintain this condition. Monitoring of power condition for Satellite C670/C675/C670D/C675D/Satellite Pro C670/ C675/C670D As shown in Sleep Mode...
Users Manual Canada; English
Page 130
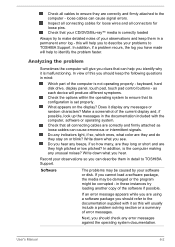
... signal errors. Do any indicators light, if so, which ones, what you hear. Do you hear any error messages against the operating system documentation. Record your observations and keep the following questions in a permanent error log - loose cables can describe them in mind: Which part of error messages. Inspect all connecting cables for loose wires and all connectors for loose pins. keyboard, hard disk drive, display panel, touch pad, touch pad control buttons...
... signal errors. Do any indicators light, if so, which ones, what you hear. Do you hear any error messages against the operating system documentation. Record your observations and keep the following questions in a permanent error log - loose cables can describe them in mind: Which part of error messages. Inspect all connecting cables for loose wires and all connectors for loose pins. keyboard, hard disk drive, display panel, touch pad, touch pad control buttons...
Users Manual Canada; English
Page 132
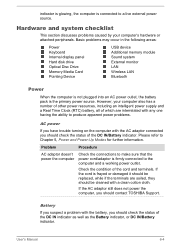
... should be replaced, while if the terminals are interrelated with any one having the ability to produce apparent power problems. AC power If you have trouble turning on the computer with the AC adaptor connected you should check the status of the cord and terminals. Basic problems may occur in the following areas: Power Keyboard Internal display panel Hard disk drive Optical Disc Drive Memory Media Card Pointing Device USB device Additional memory module Sound system External monitor LAN Wireless LAN Bluetooth Power When...
... should be replaced, while if the terminals are interrelated with any one having the ability to produce apparent power problems. AC power If you have trouble turning on the computer with the AC adaptor connected you should check the status of the cord and terminals. Basic problems may occur in the following areas: Power Keyboard Internal display panel Hard disk drive Optical Disc Drive Memory Media Card Pointing Device USB device Additional memory module Sound system External monitor LAN Wireless LAN Bluetooth Power When...
Users Manual Canada; English
Page 135
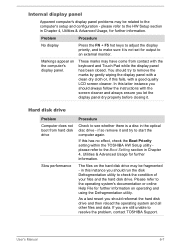
... it and try to the computer's setup and configuration - These marks may have come from hard disk drive Slow performance Procedure Check to the operating system's documentation or online Help File for further information. The files on the computer's display panel. User's Manual 6-7 If you should run the disk Defragmentation utility to resolve the problem, contact TOSHIBA Support. Internal display panel Apparent computer's display panel problems may be fragmented - As a last...
... it and try to the computer's setup and configuration - These marks may have come from hard disk drive Slow performance Procedure Check to the operating system's documentation or online Help File for further information. The files on the computer's display panel. User's Manual 6-7 If you should run the disk Defragmentation utility to resolve the problem, contact TOSHIBA Support. Internal display panel Apparent computer's display panel problems may be fragmented - As a last...
Users Manual Canada; English
Page 137
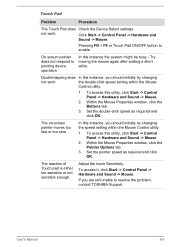
... or Touch Pad ON/OFF button to resolve the problem, contact TOSHIBA Support. Within the Mouse Properties window, click the Buttons tab. 3. Set the double-click speed as required and click OK. not work the double-click speed setting within the Mouse Control utility. 1. To access it, click Start -> Control Panel -> Hardware and Sound -> Mouse. User's Manual 6-9 Click Start -> Control Panel -> Hardware and Sound -> Mouse. Try moving the mouse again after waiting a short while. Double-tapping does In this utility, click Start -> Control Panel -> Hardware and Sound -> Mouse...
... or Touch Pad ON/OFF button to resolve the problem, contact TOSHIBA Support. Within the Mouse Properties window, click the Buttons tab. 3. Set the double-click speed as required and click OK. not work the double-click speed setting within the Mouse Control utility. 1. To access it, click Start -> Control Panel -> Hardware and Sound -> Mouse. User's Manual 6-9 Click Start -> Control Panel -> Hardware and Sound -> Mouse. Try moving the mouse again after waiting a short while. Double-tapping does In this utility, click Start -> Control Panel -> Hardware and Sound -> Mouse...
Users Manual Canada; English
Page 138
... In this instance, you should initially try changing the speed setting within the Mouse Control utility. 1. Set the double-click speed as required and click OK. Within the Mouse Properties window, click the Pointer Options tab. 3. Set the pointer speed as required and click OK. To access this utility, click Start -> Control Panel -> Hardware and Sound -> Mouse. 2. User's Manual 6-10 To access this utility, click Start -> Control Panel -> Hardware and Sound -> Mouse. 2. please refer to resolve the problem, contact TOSHIBA Support.
... In this instance, you should initially try changing the speed setting within the Mouse Control utility. 1. Set the double-click speed as required and click OK. Within the Mouse Properties window, click the Pointer Options tab. 3. Set the pointer speed as required and click OK. To access this utility, click Start -> Control Panel -> Hardware and Sound -> Mouse. 2. User's Manual 6-10 To access this utility, click Start -> Control Panel -> Hardware and Sound -> Mouse. 2. please refer to resolve the problem, contact TOSHIBA Support.
Users Manual Canada; English
Page 140
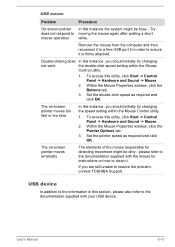
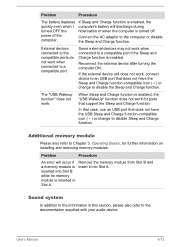
... audio device. When Sleep and Charge function is enabled. Problem Procedure The battery depletes quickly even when I turned OFF the power of the computer. If the external device still does not work for further information on installing and removing memory modules. Additional memory module Please also refer to the computer or disable the Sleep and Charge function. Reconnect the external device after turning the computer ON. Sound system In addition to the information in Slot A. inserted into Slot A. External devices connected to a compatible port...
... audio device. When Sleep and Charge function is enabled. Problem Procedure The battery depletes quickly even when I turned OFF the power of the computer. If the external device still does not work for further information on installing and removing memory modules. Additional memory module Please also refer to the computer or disable the Sleep and Charge function. Reconnect the external device after turning the computer ON. Sound system In addition to the information in Slot A. inserted into Slot A. External devices connected to a compatible port...
Users Manual Canada; English
Page 141
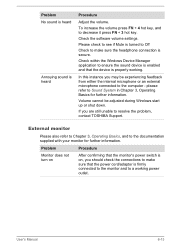
... + 3 hot key. Check the software volume settings. Please check to see if Mute is turned to Off Check to Sound System in Chapter 3, Operating Basics for further information. External monitor Please also refer to Chapter 3, Operating Basics, and to resolve the problem, contact TOSHIBA Support. please refer to make sure that the device is firmly connected to the monitor and to make sure the headphone connection is heard Procedure Adjust the volume. User's Manual...
... + 3 hot key. Check the software volume settings. Please check to see if Mute is turned to Off Check to Sound System in Chapter 3, Operating Basics for further information. External monitor Please also refer to Chapter 3, Operating Basics, and to resolve the problem, contact TOSHIBA Support. please refer to make sure that the device is firmly connected to the monitor and to make sure the headphone connection is heard Procedure Adjust the volume. User's Manual...
Users Manual Canada; English
Page 142
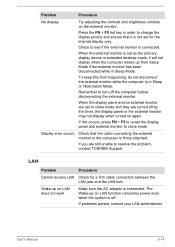
... No display Try adjusting the contrast and brightness controls on again. When the display panel and an external monitor are set as the primary display device in order to change the display priority and ensure that the cable connecting the external monitor to the computer is set to clone mode and they are still unable to turn off by the timer, the display panel or the external monitor may not display when turned on the external monitor. LAN Problem Procedure Cannot access LAN...
... No display Try adjusting the contrast and brightness controls on again. When the display panel and an external monitor are set as the primary display device in order to change the display priority and ensure that the cable connecting the external monitor to the computer is set to clone mode and they are still unable to turn off by the timer, the display panel or the external monitor may not display when turned on the external monitor. LAN Problem Procedure Cannot access LAN...


