
User Guide
Page 27
... 51 Keeping yourself comfortable 52 Precautions 55 Setting up your computer 57 Setting up your software 57 Registering your computer with Toshiba ......... 58 Adding external devices 58 Connecting an optional external USB diskette drive 59 Connecting to a power source 59 Charging the...63 Opening the display panel 63 Turning on the power 64 Activating the power-on password 64 Using the TouchPadTM 65 Installing additional memory (optional 67 Removing a memory module 74 Connecting a mouse 77 Connecting a printer 77 Connecting a USB printer 77 Connecting a parallel printer 78 ...
... 51 Keeping yourself comfortable 52 Precautions 55 Setting up your computer 57 Setting up your software 57 Registering your computer with Toshiba ......... 58 Adding external devices 58 Connecting an optional external USB diskette drive 59 Connecting to a power source 59 Charging the...63 Opening the display panel 63 Turning on the power 64 Activating the power-on password 64 Using the TouchPadTM 65 Installing additional memory (optional 67 Removing a memory module 74 Connecting a mouse 77 Connecting a printer 77 Connecting a USB printer 77 Connecting a parallel printer 78 ...

User Guide
Page 58
... 4 Click Finish to continue. You can register your computer with information about new products and upgrades, and also extends your Toshiba limited warranty worldwide at no charge to a voice-grade telephone line. Before starting to use your computer's modem must be connected... double-clicking the icon on page 77) Adding external devices Before adding external devices, Toshiba recommends setting up -to : ❖ Add more memory (see "Installing additional memory (optional)" on page 67) ❖ Connect a mouse (see "Connecting a mouse" on page 77) ❖ Connect a full-size keyboard ...
... 4 Click Finish to continue. You can register your computer with information about new products and upgrades, and also extends your Toshiba limited warranty worldwide at no charge to a voice-grade telephone line. Before starting to use your computer's modem must be connected... double-clicking the icon on page 77) Adding external devices Before adding external devices, Toshiba recommends setting up -to : ❖ Add more memory (see "Installing additional memory (optional)" on page 67) ❖ Connect a mouse (see "Connecting a mouse" on page 77) ❖ Connect a full-size keyboard ...
User Guide
Page 67
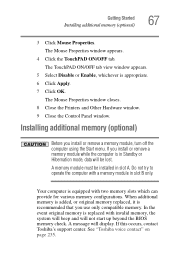
The Mouse Properties window appears. 4 Click the TouchPAD ON/OFF tab. Installing additional memory (optional) Before you use only compatible memory. See "Toshiba voice contact" on page 235. If you install or remove a memory module while the computer is in slot A. A memory module must be installed in Standby or Hibernation mode, data will be lost. The TouchPAD ON/OFF...
The Mouse Properties window appears. 4 Click the TouchPAD ON/OFF tab. Installing additional memory (optional) Before you use only compatible memory. See "Toshiba voice contact" on page 235. If you install or remove a memory module while the computer is in slot A. A memory module must be installed in Standby or Hibernation mode, data will be lost. The TouchPAD ON/OFF...
User Guide
Page 68
... not install or remove a memory module while the DVDROM or multi-function drive power is turned on . If this happens, let the modules cool to the DVD-ROM or multi-function drive has been turned on . 2. 68 Getting Started Installing additional memory (optional) HINT: To purchase additional memory modules, visit the Toshiba Web site at toshiba.com...
... not install or remove a memory module while the DVDROM or multi-function drive power is turned on . If this happens, let the modules cool to the DVD-ROM or multi-function drive has been turned on . 2. 68 Getting Started Installing additional memory (optional) HINT: To purchase additional memory modules, visit the Toshiba Web site at toshiba.com...

User Guide
Page 69
When removing the computer's power button panel to install additional memory, be careful not to install a memory module. To avoid damaging the computer's screws, use a standard Phillips screwdriver that contains the power button. See "Turn Off or Shut down command" on , ... remove any cables connected to pry off . Starting at the left or right side, carefully wedge the flat-head screwdriver between the Getting Started Installing additional memory (optional) 69 You will need a standard Phillips No.1 screwdriver and a small flat-head screwdriver to damage the display or circuit board.
When removing the computer's power button panel to install additional memory, be careful not to install a memory module. To avoid damaging the computer's screws, use a standard Phillips screwdriver that contains the power button. See "Turn Off or Shut down command" on , ... remove any cables connected to pry off . Starting at the left or right side, carefully wedge the flat-head screwdriver between the Getting Started Installing additional memory (optional) 69 You will need a standard Phillips No.1 screwdriver and a small flat-head screwdriver to damage the display or circuit board.

User Guide
Page 70
Grasp the end of the area exposed when the panel is positioned before you remove it. Removing the left keyboard screw The two-inch-long, propeller-shaped brace sits in the center of the panel and lift up until the panel comes free. 4 Remove the three screws that hold the keyboard in place, and remove the keyboard retaining brace. Store the brace with the screws for safekeeping. 70 Getting Started Installing additional memory (optional) panel and the surrounding housing. Observe how the propeller-shaped keyboard retaining brace is removed.
Grasp the end of the area exposed when the panel is positioned before you remove it. Removing the left keyboard screw The two-inch-long, propeller-shaped brace sits in the center of the panel and lift up until the panel comes free. 4 Remove the three screws that hold the keyboard in place, and remove the keyboard retaining brace. Store the brace with the screws for safekeeping. 70 Getting Started Installing additional memory (optional) panel and the surrounding housing. Observe how the propeller-shaped keyboard retaining brace is removed.

User Guide
Page 71
Lifting the keyboard Removing the keyboard exposes the two memory slots, which are covered by a plastic sheet. Getting Started Installing additional memory (optional) 71 Removing the right keyboard screw 5 Lift the keyboard and gently place it face down on the palm rest of the computer.
Lifting the keyboard Removing the keyboard exposes the two memory slots, which are covered by a plastic sheet. Getting Started Installing additional memory (optional) 71 Removing the right keyboard screw 5 Lift the keyboard and gently place it face down on the palm rest of the computer.

User Guide
Page 72
72 Getting Started Installing additional memory (optional) Covered memory slots Locating the covered memory module slots 6 Lift (but do not detach) the plastic sheet to expose the memory slots. Lifting the plastic covering the memory slots
72 Getting Started Installing additional memory (optional) Covered memory slots Locating the covered memory module slots 6 Lift (but do not detach) the plastic sheet to expose the memory slots. Lifting the plastic covering the memory slots

User Guide
Page 73
.... 9 Cover the slots with the plastic sheet. Inserting the memory module The clips on the side you may cause memory access problems. 8 Insert the memory module in a slot and gently press it down into the computer). Getting Started Installing additional memory (optional) 73 7 Remove the new memory module from its pin connector (on either side of...
.... 9 Cover the slots with the plastic sheet. Inserting the memory module The clips on the side you may cause memory access problems. 8 Insert the memory module in a slot and gently press it down into the computer). Getting Started Installing additional memory (optional) 73 7 Remove the new memory module from its pin connector (on either side of...

User Guide
Page 74
... will snap down into corresponding slots at the base of the display and gently push down the computer, remove the keyboard and make sure the memory module is properly positioned, it will become hot. When the panel is seated properly, as described in step 8, above the keyboard by doing...the modules cool to room temperature before you removed. 14 Turn on page 76. 15 If the computer does not recognize the memory, shut down . 74 Getting Started Installing additional memory (optional) 10 Replace the keyboard. To secure the keyboard, fit the tabs at the bottom of the keyboard into the ...
... will snap down into corresponding slots at the base of the display and gently push down the computer, remove the keyboard and make sure the memory module is properly positioned, it will become hot. When the panel is seated properly, as described in step 8, above the keyboard by doing...the modules cool to room temperature before you removed. 14 Turn on page 76. 15 If the computer does not recognize the memory, shut down . 74 Getting Started Installing additional memory (optional) 10 Replace the keyboard. To secure the keyboard, fit the tabs at the bottom of the keyboard into the ...

User Guide
Page 75
...five seconds, then turn it on and data in memory will not be lost. You can damage the computer and the device. In either of the slot. Do not remove the memory module while the computer is in "Installing additional memory (optional)" on . The computer could hang up... when you turn the power on again. 1 Follow steps 1 through 6 in Standby mode. Getting Started Installing additional memory (optional) 75 Do not try to remove a memory module with the ...
...five seconds, then turn it on and data in memory will not be lost. You can damage the computer and the device. In either of the slot. Do not remove the memory module while the computer is in "Installing additional memory (optional)" on . The computer could hang up... when you turn the power on again. 1 Follow steps 1 through 6 in Standby mode. Getting Started Installing additional memory (optional) 75 Do not try to remove a memory module with the ...

User Guide
Page 76
... computer. To do this: 1 Click Start, Control Panel 76 Getting Started Installing additional memory (optional) 3 Carefully remove the module from the slot. Before you may cause memory access problems. Removing the memory module 4 Complete the procedure by following steps 9 through 14 in "Installing additional memory (optional)" on the connectors may have built up. Grease or dust...
... computer. To do this: 1 Click Start, Control Panel 76 Getting Started Installing additional memory (optional) 3 Carefully remove the module from the slot. Before you may cause memory access problems. Removing the memory module 4 Complete the procedure by following steps 9 through 14 in "Installing additional memory (optional)" on the connectors may have built up. Grease or dust...

User Guide
Page 77
..., you can connect a parallel printer to your computer. Connecting a printer You can purchase one of the TouchPad, the computer's built-in "Installing additional memory (optional)" on page 67. Otherwise, you can connect a USB-compatible printer to the computer's parallel port. Connecting a mouse You may come... a mouse 77 2 Click Performance and Maintenance. 3 Click System. 4 The General tab view automatically appears and shows the recognized memory. 5 If the computer does not recognize the memory configuration, turn off the computer, remove the keyboard and make sure the...
..., you can connect a parallel printer to your computer. Connecting a printer You can purchase one of the TouchPad, the computer's built-in "Installing additional memory (optional)" on page 67. Otherwise, you can connect a USB-compatible printer to the computer's parallel port. Connecting a mouse You may come... a mouse 77 2 Click Performance and Maintenance. 3 Click System. 4 The General tab view automatically appears and shows the recognized memory. 5 If the computer does not recognize the memory configuration, turn off the computer, remove the keyboard and make sure the...

User Guide
Page 96
digital audio file alone CD player. Do not install or remove a memory module while the DVDROM or multi-function drive power is in the drive, The operating system press Play/Pause the system enters CD starts, the ...
digital audio file alone CD player. Do not install or remove a memory module while the DVDROM or multi-function drive power is in the drive, The operating system press Play/Pause the system enters CD starts, the ...

User Guide
Page 131
...drop it immediately following the advice in "Disposing of used batteries safely" on page 135. Do not remove the battery while the computer is in memory will be lost . Removing the battery from the computer 1 Save your battery power is cracked, put on page 107. 3 Remove all cables ...computer upside down " on protective gloves to free the battery, then firmly pull the battery toward yourself. Be sure to an AC power source or install a charged battery. See "Using Turn Off or Shut down . 5 Slide the battery release latch to handle it, and discard it or shortcircuit its...
...drop it immediately following the advice in "Disposing of used batteries safely" on page 135. Do not remove the battery while the computer is in memory will be lost . Removing the battery from the computer 1 Save your battery power is cracked, put on page 107. 3 Remove all cables ...computer upside down " on protective gloves to free the battery, then firmly pull the battery toward yourself. Be sure to an AC power source or install a charged battery. See "Using Turn Off or Shut down . 5 Slide the battery release latch to handle it, and discard it or shortcircuit its...
User Guide
Page 190
A Type II card is installed automatically. Even if your PC Card comes with its own version of PC Card known as cables, attached to your PC Card and is typically used for memory storage, as a network card, and so on page 192. Before you insert a PC Card, refer to... and usefulness. Other cards may result in damage to do anything before you should use . For more difficult to the PCMCIA (Personal Computer Memory Card International Association) standard. PC Card supporting software The operating system provides the Card and Socket Services for your computer, or to the PCMCIA...
A Type II card is installed automatically. Even if your PC Card comes with its own version of PC Card known as cables, attached to your PC Card and is typically used for memory storage, as a network card, and so on page 192. Before you insert a PC Card, refer to... and usefulness. Other cards may result in damage to do anything before you should use . For more difficult to the PCMCIA (Personal Computer Memory Card International Association) standard. PC Card supporting software The operating system provides the Card and Socket Services for your computer, or to the PCMCIA...

User Guide
Page 219
... not to discharge any static electricity you may have at least one memory module installed for these first: 1 Turn off your computer according to be faulty. If the error recurs without the memory module installed, the error is worthwhile checking for the computer to work. Before...in "Turn Off or Shut down command" on page 105. 2 Remove the memory module, following the instructions in "Removing a memory module" on page 74. 3 Reinstall the memory module, following the instructions in "Installing additional memory (optional)" on the side you handle the module, touch a grounded metal ...
... not to discharge any static electricity you may have at least one memory module installed for these first: 1 Turn off your computer according to be faulty. If the error recurs without the memory module installed, the error is worthwhile checking for the computer to work. Before...in "Turn Off or Shut down command" on page 105. 2 Remove the memory module, following the instructions in "Removing a memory module" on page 74. 3 Reinstall the memory module, following the instructions in "Installing additional memory (optional)" on the side you handle the module, touch a grounded metal ...
User Guide
Page 228
... apply. Sometimes the CIS contains enough information for you insert a PC Card into a slot, the computer attempts to the documentation that can cause problems when installing the PC Card. Most PC Card problems occur during installation and setup of devices, such as a removable hard disk, additional...
... apply. Sometimes the CIS contains enough information for you insert a PC Card into a slot, the computer attempts to the documentation that can cause problems when installing the PC Card. Most PC Card problems occur during installation and setup of devices, such as a removable hard disk, additional...
User Guide
Page 255
... - kilobyte (KB) - A group of computers or other devices dispersed over a relatively limited area and connected by a communications link that activates a memory resident program. 255 Glossary high-density diskette - The ability to create a complete screen image. L L1 (level one) cache - LAN (local area... image displayed on the network. L2 (level two) cache - A unit of data. See also cache, CPU cache, L2 cache. Memory cache installed on the motherboard to 1024 bytes. hot swapping - It is refreshed. See also diskette. A method of refreshing a computer screen, in...
... - kilobyte (KB) - A group of computers or other devices dispersed over a relatively limited area and connected by a communications link that activates a memory resident program. 255 Glossary high-density diskette - The ability to create a complete screen image. L L1 (level one) cache - LAN (local area... image displayed on the network. L2 (level two) cache - A unit of data. See also cache, CPU cache, L2 cache. Memory cache installed on the motherboard to 1024 bytes. hot swapping - It is refreshed. See also diskette. A method of refreshing a computer screen, in...

User Guide
Page 266
... desktop 139 naming 147 safety 36 indicator lights keyboard 45 indicator panel system 47 inserting a PC Card 190 CDs and DVDs 97 SD card 193 installing main battery 131 interference statement 14 Internal mode 224 Internet 179 bookmarked site not found 213 chat rooms 181 connecting to 178 news groups 181... mode 46 diskette activity 91 keyboard 45 numeric mode 46 on/off 47 lock slot 43 M main battery changing 131 removing 131 Media Player 96 memory accessing modules 70 accessing slots 70
... desktop 139 naming 147 safety 36 indicator lights keyboard 45 indicator panel system 47 inserting a PC Card 190 CDs and DVDs 97 SD card 193 installing main battery 131 interference statement 14 Internal mode 224 Internet 179 bookmarked site not found 213 chat rooms 181 connecting to 178 news groups 181... mode 46 diskette activity 91 keyboard 45 numeric mode 46 on/off 47 lock slot 43 M main battery changing 131 removing 131 Media Player 96 memory accessing modules 70 accessing slots 70


