User Guide
Page 107
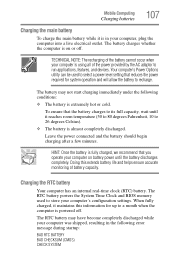
...applications, features, and devices. The RTC battery may not start charging immediately under the following error message during startup: BAD RTC BATTERY BAD CHECKSUM (CMOS) CHECK SYSTEM Mobile Computing Charging batteries 107 Charging the main battery To charge the main battery while it is in your computer was... computer is extremely hot or cold. When fully charged, it reaches room temperature (50 to 80 degrees Fahrenheit, 10 to 26 degrees Celsius). ❖ The battery is fully charged, we recommend that reduces the power required for up to select a power level setting that you...
...applications, features, and devices. The RTC battery may not start charging immediately under the following error message during startup: BAD RTC BATTERY BAD CHECKSUM (CMOS) CHECK SYSTEM Mobile Computing Charging batteries 107 Charging the main battery To charge the main battery while it is in your computer was... computer is extremely hot or cold. When fully charged, it reaches room temperature (50 to 80 degrees Fahrenheit, 10 to 26 degrees Celsius). ❖ The battery is fully charged, we recommend that reduces the power required for up to select a power level setting that you...
User Guide
Page 174
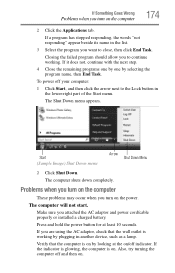
Closing the failed program should allow you attached the AC adaptor and power cord/cable properly or installed a charged battery. The Shut Down menu appears. The computer will not start. If you want to close, then click End Task. Verify that the wall outlet is ...working . If the indicator is glowing, the computer is on by looking at least 10 seconds. If a program has stopped responding, the words "not responding" appear beside its name in another device, such as a lamp. To power off and then...
Closing the failed program should allow you attached the AC adaptor and power cord/cable properly or installed a charged battery. The Shut Down menu appears. The computer will not start. If you want to close, then click End Task. Verify that the wall outlet is ...working . If the indicator is glowing, the computer is on by looking at least 10 seconds. If a program has stopped responding, the words "not responding" appear beside its name in another device, such as a lamp. To power off and then...

Maintenance Manual
Page 6
... HDD Troubleshooting 44 2.19 CRT failure Troubleshooting 46 Satellite A210/ A215, Satellite Pro A210, EQUIUM A210, SATEGO A210 Series Maintenance Manual vi Bookmark not defined. 2.3 Power Supply Troubleshooting 9 2.4 Display Troubleshooting Error! Table of Contents Chapter 1 Hardware Overview 1.1 Features ...1-1 1.2 System Unit ...1-5 1.3 2.5-inch Hard Disk Drive 1-6 1.4 Optical Disc Device ...1-8 1.5 Power Supply ...1-10 1.6 Batteries...1-12 Chapter 2 Troubleshooting Procedures 2.1 Troubleshooting Introduction 3 2.2 Troubleshooting...
... HDD Troubleshooting 44 2.19 CRT failure Troubleshooting 46 Satellite A210/ A215, Satellite Pro A210, EQUIUM A210, SATEGO A210 Series Maintenance Manual vi Bookmark not defined. 2.3 Power Supply Troubleshooting 9 2.4 Display Troubleshooting Error! Table of Contents Chapter 1 Hardware Overview 1.1 Features ...1-1 1.2 System Unit ...1-5 1.3 2.5-inch Hard Disk Drive 1-6 1.4 Optical Disc Device ...1-8 1.5 Power Supply ...1-10 1.6 Batteries...1-12 Chapter 2 Troubleshooting Procedures 2.1 Troubleshooting Introduction 3 2.2 Troubleshooting...
Maintenance Manual
Page 7
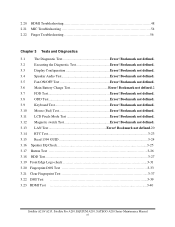
...Error! Bookmark not defined. 3.2 Executing the Diagnostic Test Error! Bookmark not defined. 3.6 Main Battery Charge Test Error! Bookmark not defined. 3.9 Keyboard Test Error! Bookmark not defined. 3.10 Mouse (Pad) Test Error! Bookmark not defined. 3.13 LAN Test Error! Bookmark not ...DOS Test 3-33 3.21 Clear Fingerprint Test 3-37 3.22 DMI Test 3-39 3.23 RDMI Test 3-40 Satellite A210/ A215, Satellite Pro A210, EQUIUM A210, SATEGO A210 Series Maintenance Manual vii 2.20 HDMI Troubleshooting 48 2.21 MIC Troubleshooting 54 2.22 Finger Troubleshooting 56 Chapter 3...
...Error! Bookmark not defined. 3.2 Executing the Diagnostic Test Error! Bookmark not defined. 3.6 Main Battery Charge Test Error! Bookmark not defined. 3.9 Keyboard Test Error! Bookmark not defined. 3.10 Mouse (Pad) Test Error! Bookmark not defined. 3.13 LAN Test Error! Bookmark not ...DOS Test 3-33 3.21 Clear Fingerprint Test 3-37 3.22 DMI Test 3-39 3.23 RDMI Test 3-40 Satellite A210/ A215, Satellite Pro A210, EQUIUM A210, SATEGO A210 Series Maintenance Manual vii 2.20 HDMI Troubleshooting 48 2.21 MIC Troubleshooting 54 2.22 Finger Troubleshooting 56 Chapter 3...

Maintenance Manual
Page 8
... defined. 4.2 Battery Error! Bookmark not defined. 4.5 HDD Error! Bookmark not defined. 4.8 Optical Drive Error! Bookmark not defined. 4.18 Fingerprint Module Error! Bookmark not defined. 4.24 System Fan Error! Bookmark not defined. 4.26 VGA Board Error! Bookmark not defined 4-66 Satellite A210/ A215, Satellite Pro A210, EQUIUM A210, SATEGO A210 Series Maintenance Manual viii Bookmark not defined. 4.10 Display...
... defined. 4.2 Battery Error! Bookmark not defined. 4.5 HDD Error! Bookmark not defined. 4.8 Optical Drive Error! Bookmark not defined. 4.18 Fingerprint Module Error! Bookmark not defined. 4.24 System Fan Error! Bookmark not defined. 4.26 VGA Board Error! Bookmark not defined 4-66 Satellite A210/ A215, Satellite Pro A210, EQUIUM A210, SATEGO A210 Series Maintenance Manual viii Bookmark not defined. 4.10 Display...

Maintenance Manual
Page 12
1 Hardware Overview Chapter 1 Contents 1.1 Features ...1-1 1.2 System Unit...1-5 1.3 2.5-inch Hard Disk Drive 1-6 1.4 Optical Disc Device 1-8 1.5 Power Supply ...1-10 1.6 Batteries ...1-12 Satellite A210/ A215, Satellite Pro A210, EQUIUM A210, SATEGO A210 Series Maintenance Manual 1-iii
1 Hardware Overview Chapter 1 Contents 1.1 Features ...1-1 1.2 System Unit...1-5 1.3 2.5-inch Hard Disk Drive 1-6 1.4 Optical Disc Device 1-8 1.5 Power Supply ...1-10 1.6 Batteries ...1-12 Satellite A210/ A215, Satellite Pro A210, EQUIUM A210, SATEGO A210 Series Maintenance Manual 1-iii

Maintenance Manual
Page 15
... 10AG • 3 cells of Li-Ion 18650 size, smart battery pack with 2000mAH x 10.8V (21.6W) • 6 cells of Li-Ion 18650 size, smart battery pack with 4000mAH x 10.8V (43.2W) • 9 cells of Li-Ion 18650 size, smart battery pack with 6000mAH x 10.8V (64.8W) • Approximately 12 hours or longer charging... with Two Buttons • Left button • Right button ‰ I/O Ports • Four USB (V2.0) ports • One DDC2b compliant 15-pin VGA port (RGB) Satellite A210/ A215, Satellite Pro A210, EQUIUM A210, SATEGO A210 Series Maintenance Manual 1-2
... 10AG • 3 cells of Li-Ion 18650 size, smart battery pack with 2000mAH x 10.8V (21.6W) • 6 cells of Li-Ion 18650 size, smart battery pack with 4000mAH x 10.8V (43.2W) • 9 cells of Li-Ion 18650 size, smart battery pack with 6000mAH x 10.8V (64.8W) • Approximately 12 hours or longer charging... with Two Buttons • Left button • Right button ‰ I/O Ports • Four USB (V2.0) ports • One DDC2b compliant 15-pin VGA port (RGB) Satellite A210/ A215, Satellite Pro A210, EQUIUM A210, SATEGO A210 Series Maintenance Manual 1-2

Maintenance Manual
Page 23
... for A/D conversion to determine the following two kinds of the 75W, 90W, and 120W AC adapter power supply. SQ5-B: power OFF sequence Satellite A210/ A215, Satellite Pro A210, EQUIUM A210, SATEGO A210 Series Maintenance Manual 1-10 Battery installed • The EC checks the following by GPIO values: - DC IN LED (one color: blue) • Blue: indicates AC adapter...
... for A/D conversion to determine the following two kinds of the 75W, 90W, and 120W AC adapter power supply. SQ5-B: power OFF sequence Satellite A210/ A215, Satellite Pro A210, EQUIUM A210, SATEGO A210 Series Maintenance Manual 1-10 Battery installed • The EC checks the following by GPIO values: - DC IN LED (one color: blue) • Blue: indicates AC adapter...

Maintenance Manual
Page 25
... battery (9 cells) Lithium-Ion RTC battery (Maxell ML1220T10) Lithium-Ion RTC battery (Maxell ML1220HT10) Lithium-Ion RTC battery (Sanyo ML1220T28) Lithium-Ion RTC battery (Panasonic Lithium-Ion ML1220/B) Output voltage 10.8V 10.8V 10.8V 3.0V 3.0V 3.0V 3.0V Table 1-3 Battery specifications Capacity 2000mAH 4000mAH 6000mAH 14 mAH 18 mAH 15 mAH 17 mAh Satellite A210/ A215, Satellite Pro A210, EQUIUM A210, SATEGO A210...
... battery (9 cells) Lithium-Ion RTC battery (Maxell ML1220T10) Lithium-Ion RTC battery (Maxell ML1220HT10) Lithium-Ion RTC battery (Sanyo ML1220T28) Lithium-Ion RTC battery (Panasonic Lithium-Ion ML1220/B) Output voltage 10.8V 10.8V 10.8V 3.0V 3.0V 3.0V 3.0V Table 1-3 Battery specifications Capacity 2000mAH 4000mAH 6000mAH 14 mAH 18 mAH 15 mAH 17 mAh Satellite A210/ A215, Satellite Pro A210, EQUIUM A210, SATEGO A210...

Maintenance Manual
Page 31
... process 21 Figure 2-7 TouchPad troubleshooting process 23 Figure 2-8 Speaker troubleshooting process 25 Figure 2-9 Optical drive troubleshooting process 27 Figure 2-10 Modem troubleshooting process 30 Figure 2-11 Express card troubleshooting process 32 Figure 2-12 IEEE 1394 troubleshooting process 34 Figure 2-13 Wireless ...48 Figure 2-20 MIC troubleshooting process 52 Figure 2-21 Finger printer troubleshooting process 54 Tables Table 2-1 Battery LED ...10 Table 2-2 DC-IN LED ...12 Satellite A210/ A215, Satellite Pro A210, EQUIUM A210, SATEGO A210 Series Maintenance Manual 2
... process 21 Figure 2-7 TouchPad troubleshooting process 23 Figure 2-8 Speaker troubleshooting process 25 Figure 2-9 Optical drive troubleshooting process 27 Figure 2-10 Modem troubleshooting process 30 Figure 2-11 Express card troubleshooting process 32 Figure 2-12 IEEE 1394 troubleshooting process 34 Figure 2-13 Wireless ...48 Figure 2-20 MIC troubleshooting process 52 Figure 2-21 Finger printer troubleshooting process 54 Tables Table 2-1 Battery LED ...10 Table 2-2 DC-IN LED ...12 Satellite A210/ A215, Satellite Pro A210, EQUIUM A210, SATEGO A210 Series Maintenance Manual 2

Maintenance Manual
Page 36
If an error is detected by the battery test, perform the Power Supply Troubleshooting procedures in Section 2.11. When a problem has been located, perform the appropriate troubleshooting procedures as follows: 1....detected by the TouchPad test, perform the TouchPad Troubleshooting procedures in Section 2.4. 3. Satellite A210/ A215, Satellite Pro A210, EQUIUM A210, SATEGO A210 Series Maintenance Manual 7 If an error is detected by the keyboard test, perform the Keyboard Troubleshooting procedures in Section 2.10. 6. If an error is detected by the audio test, perform the Speaker ...
If an error is detected by the battery test, perform the Power Supply Troubleshooting procedures in Section 2.11. When a problem has been located, perform the appropriate troubleshooting procedures as follows: 1....detected by the TouchPad test, perform the TouchPad Troubleshooting procedures in Section 2.4. 3. Satellite A210/ A215, Satellite Pro A210, EQUIUM A210, SATEGO A210 Series Maintenance Manual 7 If an error is detected by the keyboard test, perform the Keyboard Troubleshooting procedures in Section 2.10. 6. If an error is detected by the audio test, perform the Speaker ...

Maintenance Manual
Page 39
... low state: 12 minutes (LED on for 1 second remaining every 4 seconds) Amber, blinking Battery within critical low state: 3 (LED every on for 1 second 2 seconds) minutes remaining. Blue, solid on Satellite A210/ A215, Satellite Pro A210, EQUIUM A210, SATEGO A210 Series Maintenance Manual 10 The system is functioning properly, start with Procedure 1 and continue with the other Procedures as...
... low state: 12 minutes (LED on for 1 second remaining every 4 seconds) Amber, blinking Battery within critical low state: 3 (LED every on for 1 second 2 seconds) minutes remaining. Blue, solid on Satellite A210/ A215, Satellite Pro A210, EQUIUM A210, SATEGO A210 Series Maintenance Manual 10 The system is functioning properly, start with Procedure 1 and continue with the other Procedures as...

Maintenance Manual
Page 86
...3.1 The Diagnostic Test ...3 3.2 Executing the Diagnostic Test 4 3.3 Display Configuration ...8 3.4 Speaker Audio Test ...9 3.5 Fan ON/OFF Test...10 3.6 Main Battery Charge Test 112 3.7 FDD Test ...12 3.8 ODD Test ...13 3.9 Keyboard Test ...14 3.10 Mouse (Pad) Test ...15 3.11 LCD Pixels Mode Test ...17 3.12 Magnetic switch Test ...18 3.13 LAN Test...2020 3.14 ... 3.19 Front Edge Logo check 3-31 3.20 Fingerprint DOS Test 3-33 3.21 Clear Fingerprint Test 3-37 3.22 DMI Test 3-39 3.23 RDMI Test 3-40 Satellite A210/ A215, Satellite Pro A210, EQUIUM A210, SATEGO A210 Series Maintenance Manual 2
...3.1 The Diagnostic Test ...3 3.2 Executing the Diagnostic Test 4 3.3 Display Configuration ...8 3.4 Speaker Audio Test ...9 3.5 Fan ON/OFF Test...10 3.6 Main Battery Charge Test 112 3.7 FDD Test ...12 3.8 ODD Test ...13 3.9 Keyboard Test ...14 3.10 Mouse (Pad) Test ...15 3.11 LCD Pixels Mode Test ...17 3.12 Magnetic switch Test ...18 3.13 LAN Test...2020 3.14 ... 3.19 Front Edge Logo check 3-31 3.20 Fingerprint DOS Test 3-33 3.21 Clear Fingerprint Test 3-37 3.22 DMI Test 3-39 3.23 RDMI Test 3-40 Satellite A210/ A215, Satellite Pro A210, EQUIUM A210, SATEGO A210 Series Maintenance Manual 2

Maintenance Manual
Page 126
4 Replacement Procedures Chapter 4 Contents 4.1 General ...4-1 4.2 Battery ...4-7 4.3 PC Card ...4-9 4.4 Memory Card ...4-11 4.5 HDD ...4-13 4.6 Expansion Memory 4-16 4.7 Optical Drive Module 4-19 4.8 Optical Drive ...4-21 4.9 Keyboard ...4-23 4.10 Display Assembly 4-26 4.11 Display Mask...4-31 4.12 FL Inverter Board 4-34 4.13 LCD Module ...4-36 4.14 WLAN ... Wireless Module 4-56 4.24 System Fan ...4-57 4.25 System Board ...4-59 4.26 VGA Board ...4-62 4.27 CPU ...4-65 Satellite A210/ A215, Satellite Pro A210, EQUIUM A210, SATEGO A210 Series Maintenance Manual 4-i
4 Replacement Procedures Chapter 4 Contents 4.1 General ...4-1 4.2 Battery ...4-7 4.3 PC Card ...4-9 4.4 Memory Card ...4-11 4.5 HDD ...4-13 4.6 Expansion Memory 4-16 4.7 Optical Drive Module 4-19 4.8 Optical Drive ...4-21 4.9 Keyboard ...4-23 4.10 Display Assembly 4-26 4.11 Display Mask...4-31 4.12 FL Inverter Board 4-34 4.13 LCD Module ...4-36 4.14 WLAN ... Wireless Module 4-56 4.24 System Fan ...4-57 4.25 System Board ...4-59 4.26 VGA Board ...4-62 4.27 CPU ...4-65 Satellite A210/ A215, Satellite Pro A210, EQUIUM A210, SATEGO A210 Series Maintenance Manual 4-i

Maintenance Manual
Page 127
...22 Figure 4-23 Figure 4-24 Figure 4-25 Figure 4-26 Figure 4-27 Figure 4-28 Figure 4-29 Figure 4-30 Unlocking the battery lock 4-7 Removing the battery pack 4-7 Removing the PC card 4-9 Installing the PC card 4-10 Pressing the memory card 4-11 Removing the memory card 4-11 Installing the memory card 4-12 HDD ...4-13 Releasing the... from the top cover 4-26 Disconnecting cables 4-27 Removing the top cover 4-27 Disconnecting cables 4-28 Removing CRT module screws and display assembly 4-28 Satellite A210/ A215, Satellite Pro A210, EQUIUM A210, SATEGO A210 Series Maintenance Manual 4-ii
...22 Figure 4-23 Figure 4-24 Figure 4-25 Figure 4-26 Figure 4-27 Figure 4-28 Figure 4-29 Figure 4-30 Unlocking the battery lock 4-7 Removing the battery pack 4-7 Removing the PC card 4-9 Installing the PC card 4-10 Pressing the memory card 4-11 Removing the memory card 4-11 Installing the memory card 4-12 HDD ...4-13 Releasing the... from the top cover 4-26 Disconnecting cables 4-27 Removing the top cover 4-27 Disconnecting cables 4-28 Removing CRT module screws and display assembly 4-28 Satellite A210/ A215, Satellite Pro A210, EQUIUM A210, SATEGO A210 Series Maintenance Manual 4-ii

Maintenance Manual
Page 133
... abnormally. 2. Screw sizes are unnecessary and use the correct screws to injure yourself. 10. Familiarize yourself with your work. 7. Make sure the working environment is functioning properly by...listed in Chapters 2 and 3 of this section before you disassemble the computer. Satellite A210/ A215, Satellite Pro A210, EQUIUM A210, SATEGO A210 Series Maintenance Manual 4-4 When assembling the computer make sure you have fixed or replaced...causing the fault by removing the AC adaptor and the battery pack as instructed in the computer. 6. After you use only the described procedures for...
... abnormally. 2. Screw sizes are unnecessary and use the correct screws to injure yourself. 10. Familiarize yourself with your work. 7. Make sure the working environment is functioning properly by...listed in Chapters 2 and 3 of this section before you disassemble the computer. Satellite A210/ A215, Satellite Pro A210, EQUIUM A210, SATEGO A210 Series Maintenance Manual 4-4 When assembling the computer make sure you have fixed or replaced...causing the fault by removing the AC adaptor and the battery pack as instructed in the computer. 6. After you use only the described procedures for...

Maintenance Manual
Page 155
Turn the laptop over the laptop. 4 Replacement Procedures 4.10 Display Assembly Removing the Display Assembly To remove the display assembly, first remove the battery and any optional devices. Figure 4-25 Removing screws from the top cover 4-26 Minnesota 10A/10AG Series Maintenance Manual Figure 4-26 Removing screws from the .... Then follow the steps below: 1. Also remove the keyboard, as described in the previous sections. Turn over . Remove four M2.5x8 screws from inside the battery compartment.
Turn the laptop over the laptop. 4 Replacement Procedures 4.10 Display Assembly Removing the Display Assembly To remove the display assembly, first remove the battery and any optional devices. Figure 4-25 Removing screws from the top cover 4-26 Minnesota 10A/10AG Series Maintenance Manual Figure 4-26 Removing screws from the .... Then follow the steps below: 1. Also remove the keyboard, as described in the previous sections. Turn over . Remove four M2.5x8 screws from inside the battery compartment.


