

User Guide
Page 12
... equipment except in the countries/regions in your computer. Not all models. NOTE This device works on all devices are available on passive scan only. 12 JAPAN APPROVALS INSTITUTE FOR TELECOMMUNICATIONS EQUIPMENT Approval Number: D01-1128JP TELECOM ENGINEERING CENTER Approval Number: 03NY.A0018, 03GZDA0017 The following restrictions apply: ❖ Do not...
... equipment except in the countries/regions in your computer. Not all models. NOTE This device works on all devices are available on passive scan only. 12 JAPAN APPROVALS INSTITUTE FOR TELECOMMUNICATIONS EQUIPMENT Approval Number: D01-1128JP TELECOM ENGINEERING CENTER Approval Number: 03NY.A0018, 03GZDA0017 The following restrictions apply: ❖ Do not...

User Guide
Page 24
... potential for co-location requirements. consult Safety Code 6, obtainable from legal communications or ISM radio wave radiated devices. Taiwan Article 12 Article 14 Without permission granted by the DGT or NCC, any other antenna or transmitter. The low power radio-frequency devices ..., enterprise, or user is minimized. 24 Exposure to approved low power radio-frequency devices. Nevertheless, the Bluetooth® Adaptor from TOSHIBA is achieved. This device and its antenna(s) must be co-located or operating in compliance with Wireless LAN transceiver for human contact...
... potential for co-location requirements. consult Safety Code 6, obtainable from legal communications or ISM radio wave radiated devices. Taiwan Article 12 Article 14 Without permission granted by the DGT or NCC, any other antenna or transmitter. The low power radio-frequency devices ..., enterprise, or user is minimized. 24 Exposure to approved low power radio-frequency devices. Nevertheless, the Bluetooth® Adaptor from TOSHIBA is achieved. This device and its antenna(s) must be co-located or operating in compliance with Wireless LAN transceiver for human contact...

User Guide
Page 54
If the latches and cutouts do not line up correctly, repeat steps 12-13. latch latch (Sample Illustration) Pressing down on the top edge of the module to seat the module into the latches at approximately a 30-degree ... side of the module. These latches should be completely inserted into place securely with the corresponding cutouts in place. 54 Getting Started Adding memory (optional) 12 Firmly press the memory module into the memory slot's socket at the sides of the socket.
If the latches and cutouts do not line up correctly, repeat steps 12-13. latch latch (Sample Illustration) Pressing down on the top edge of the module to seat the module into the latches at approximately a 30-degree ... side of the module. These latches should be completely inserted into place securely with the corresponding cutouts in place. 54 Getting Started Adding memory (optional) 12 Firmly press the memory module into the memory slot's socket at the sides of the socket.
User Guide
Page 86
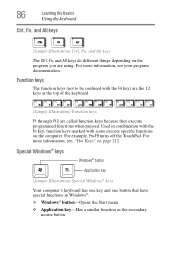
... has one key and one button that have special functions in combination with the Fn key, function keys marked with the Fn key) are the 12 keys at the top of the keyboard. (Sample Illustration) Function keys F1 through F12 are using. 86 Learning the Basics Using the keyboard Ctrl, Fn...
... has one key and one button that have special functions in combination with the Fn key, function keys marked with the Fn key) are the 12 keys at the top of the keyboard. (Sample Illustration) Function keys F1 through F12 are using. 86 Learning the Basics Using the keyboard Ctrl, Fn...

User Guide
Page 231
...Settings. (These options are unavailable if wireless devices have Internet Explorer® start after switching profiles, type: C:\Program Files\Internet Explorer\IEXPLORE.EXE 12 Click OK. For example, to Profile. 3 Click Add. The Add Profile screen appears. 5 Enter the name of the profile you want... to capture for this profile. 10 If connecting with your Toshiba Computer ConfigFree® Utilities To create a profile: 231 1 Click the icon in the Windows® operating system after switching to this program ...
...Settings. (These options are unavailable if wireless devices have Internet Explorer® start after switching profiles, type: C:\Program Files\Internet Explorer\IEXPLORE.EXE 12 Click OK. For example, to Profile. 3 Click Add. The Add Profile screen appears. 5 Enter the name of the profile you want... to capture for this profile. 10 If connecting with your Toshiba Computer ConfigFree® Utilities To create a profile: 231 1 Click the icon in the Windows® operating system after switching to this program ...

