User Guide
Page 3
... personal enjoyment. Software Version Update • For better use this camera safely and correctly, read this Instruction Manual, keep it handy at all times. registered in our website on Copyright • Images taken with digital still cameras are for extra information. Note that you should not be upgraded after shipment. In addition, the transfer of memory cards (SmartMedia memory cards, etc.) containing copyrighted images and files is restricted...
... personal enjoyment. Software Version Update • For better use this camera safely and correctly, read this Instruction Manual, keep it handy at all times. registered in our website on Copyright • Images taken with digital still cameras are for extra information. Note that you should not be upgraded after shipment. In addition, the transfer of memory cards (SmartMedia memory cards, etc.) containing copyrighted images and files is restricted...
User Guide
Page 4
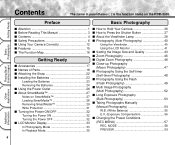
... Using the LCD Monitor 41 ■ Setting the Image Size and Quality 43 ■ Zoom Photography 45 ■ Digital Zoom Photography 46 ■ Close-up Photography (Macro Photography 47 ■ Photography Using the Self-timer (Self-timer Photography 48 ■ Photography Using the Flash (Flash Photography 49 ■ Multi Image Photography (Multi Photography 52 ■ Long Exposure Photography (Bulb Photography 53 ■ Taking Photographs Manually (Manual Photography 54 W.B. (White Balance 55 E.V. (Exposure Compensation 56 ■ Changing...
... Using the LCD Monitor 41 ■ Setting the Image Size and Quality 43 ■ Zoom Photography 45 ■ Digital Zoom Photography 46 ■ Close-up Photography (Macro Photography 47 ■ Photography Using the Self-timer (Self-timer Photography 48 ■ Photography Using the Flash (Flash Photography 49 ■ Multi Image Photography (Multi Photography 52 ■ Long Exposure Photography (Bulb Photography 53 ■ Taking Photographs Manually (Manual Photography 54 W.B. (White Balance 55 E.V. (Exposure Compensation 56 ■ Changing...
User Guide
Page 5
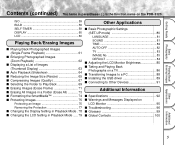
... Image 75 Removing the Protection 77 ■ Changing the Display Setting in Playback Mode . 78 ■ Changing the LCD Setting in parentheses ( ) is the function name on LCD Monitor 95 ■ Troubleshooting 96 ■ Glossary 99 ■ Global Contacts 100 Other Additional Information 5 Getting Ready Basic Playing Back/ Photography Erasing Images Applications Contents (continued) The name in Playback Mode ..... 79 Other Applications ■ Basic Photographic Settings (SET-UP mode 80 LANGUAGE 81 SOUND 81 TIME 82 AUTO...
... Image 75 Removing the Protection 77 ■ Changing the Display Setting in Playback Mode . 78 ■ Changing the LCD Setting in parentheses ( ) is the function name on LCD Monitor 95 ■ Troubleshooting 96 ■ Glossary 99 ■ Global Contacts 100 Other Additional Information 5 Getting Ready Basic Playing Back/ Photography Erasing Images Applications Contents (continued) The name in Playback Mode ..... 79 Other Applications ■ Basic Photographic Settings (SET-UP mode 80 LANGUAGE 81 SOUND 81 TIME 82 AUTO...

User Guide
Page 13
... you remove the batteries when the camera is a reference value. Getting Ready Basic Playing Back/ Photography Erasing Images Applications Notes on Batteries Recommended Batteries To extend the use of the camera, we do not recommend the use for an extended period of time. Furthermore, the battery performance affected by placing them with a dry cloth. However, removing the batteries will restore its function when batteries return to the default...
... you remove the batteries when the camera is a reference value. Getting Ready Basic Playing Back/ Photography Erasing Images Applications Notes on Batteries Recommended Batteries To extend the use of the camera, we do not recommend the use for an extended period of time. Furthermore, the battery performance affected by placing them with a dry cloth. However, removing the batteries will restore its function when batteries return to the default...

User Guide
Page 16
... using the PDR-3320. Zoom Photography (P.45) Digital Zoom Photography (P.46) Close-up Photography (P.47) Photography Using the Self-timer (P.48) Photography Using the Flash (P.49) Multi Image Photography (Multi Photography) (P.52) Long Exposure Photography (Bulb Photography) (P.53) Changing the photography settings. Getting Ready Erasing Images Photography Basic The Function Map It is suggested that you look at once (P.73) Protecting Images (P.75) Changing PDR-3320 camera Settings (P.80) Taking and Playing Back Photographs on a TV (P.86) Transferring Images...
... using the PDR-3320. Zoom Photography (P.45) Digital Zoom Photography (P.46) Close-up Photography (P.47) Photography Using the Self-timer (P.48) Photography Using the Flash (P.49) Multi Image Photography (Multi Photography) (P.52) Long Exposure Photography (Bulb Photography) (P.53) Changing the photography settings. Getting Ready Erasing Images Photography Basic The Function Map It is suggested that you look at once (P.73) Protecting Images (P.75) Changing PDR-3320 camera Settings (P.80) Taking and Playing Back Photographs on a TV (P.86) Transferring Images...

User Guide
Page 26
Getting Ready Erasing Images Photography Basic Using the Power Outlet If you use the AC adapter in a room with the power ON, the camera may malfunction or the recorded data may not start normally if you connect or disconnect the AC adapter, be sure to turn on the camera 2 . 2 Insert the AC adapter power plug into the power outlet. If the AC adapter is connected or disconnected with a power outlet, you can...
Getting Ready Erasing Images Photography Basic Using the Power Outlet If you use the AC adapter in a room with the power ON, the camera may malfunction or the recorded data may not start normally if you connect or disconnect the AC adapter, be sure to turn on the camera 2 . 2 Insert the AC adapter power plug into the power outlet. If the AC adapter is connected or disconnected with a power outlet, you can...

User Guide
Page 41
... adjusts the exposure, and pressing the shutter button down fully takes the shot. • When the focus and exposure are adjusted, the viewfinder lamp lights. (➲ Page 39) • If you shoot a picture, when preview is set to turn on screen for about two seconds. • The viewfinder lamp flashes while image data is displayed on the power. 41 Additional Information Using the LCD Monitor Get ready to compose the picture. Photography (Auto Photography) (continued...
... adjusts the exposure, and pressing the shutter button down fully takes the shot. • When the focus and exposure are adjusted, the viewfinder lamp lights. (➲ Page 39) • If you shoot a picture, when preview is set to turn on screen for about two seconds. • The viewfinder lamp flashes while image data is displayed on the power. 41 Additional Information Using the LCD Monitor Get ready to compose the picture. Photography (Auto Photography) (continued...

User Guide
Page 42
... the shutter button down half way adjusts the exposure, and pressing the shutter button down fully takes the shot. • When the focus and exposure are adjusted, the viewfinder lamp lights. (➲ Page 39) • If you shoot a picture, when preview is set to [ ]. Playing Back/ Other Applications Additional Information 42 Getting Ready Erasing Images Photography Basic Photography (Auto Photography) (continued) Set the mode dial to ON (➲ Page 59), a preview image is displayed...
... the shutter button down half way adjusts the exposure, and pressing the shutter button down fully takes the shot. • When the focus and exposure are adjusted, the viewfinder lamp lights. (➲ Page 39) • If you shoot a picture, when preview is set to [ ]. Playing Back/ Other Applications Additional Information 42 Getting Ready Erasing Images Photography Basic Photography (Auto Photography) (continued) Set the mode dial to ON (➲ Page 59), a preview image is displayed...

User Guide
Page 43
... images, however, take up more memory space, reducing the number of images that can be photographed. Slide the POWER switch to be taken. [FULL] 2048 x 1536 pixels, [HALF] 1024 x 768 pixels The FULL setting improves the quality of the image. Getting Ready Basic Playing Back/ Photography Erasing Images Applications Setting the Image Size and Quality Set the size (number of pixels) and quality (compression ratio) of the image to turn...
... images, however, take up more memory space, reducing the number of images that can be photographed. Slide the POWER switch to be taken. [FULL] 2048 x 1536 pixels, [HALF] 1024 x 768 pixels The FULL setting improves the quality of the image. Getting Ready Basic Playing Back/ Photography Erasing Images Applications Setting the Image Size and Quality Set the size (number of pixels) and quality (compression ratio) of the image to turn...

User Guide
Page 48
... LCD monitor when the manual setup screen is displayed. Erasing Images Photography Basic Playing Back/ Other Applications Press the button to set to the self-timer mode. [ ] is canceled when you have set the manual setup screen to set the self-timer, the setting is not canceled even if the camera is turned off or the Auto Power OFF function is activated. Press the ENTER button to non-display. ➲ Page 54 Pressing the button displays the available Self-timer and Macro modes in red...
... LCD monitor when the manual setup screen is displayed. Erasing Images Photography Basic Playing Back/ Other Applications Press the button to set to the self-timer mode. [ ] is canceled when you have set the manual setup screen to set the self-timer, the setting is not canceled even if the camera is turned off or the Auto Power OFF function is activated. Press the ENTER button to non-display. ➲ Page 54 Pressing the button displays the available Self-timer and Macro modes in red...

User Guide
Page 52
... ENTER button. 4. Use the or buttons to [ ] or [ ]. This mode is displayed in the LCD monitor or the status display. Press the ENTER button to set the manual setup screen to [MULTI]. 1. Getting Ready Erasing Images Photography Basic Multi Image Photography (Multi Photography) This mode takes 16 shots continuously at 0.25 second intervals. Playing Back/ Other Applications Additional Information 52 mode to non-display. ➲ Page 54 Compose the picture, press the shutter button down...
... ENTER button. 4. Use the or buttons to [ ] or [ ]. This mode is displayed in the LCD monitor or the status display. Press the ENTER button to set the manual setup screen to [MULTI]. 1. Getting Ready Erasing Images Photography Basic Multi Image Photography (Multi Photography) This mode takes 16 shots continuously at 0.25 second intervals. Playing Back/ Other Applications Additional Information 52 mode to non-display. ➲ Page 54 Compose the picture, press the shutter button down...

User Guide
Page 53
... buttons to keep the camera stable and prevent distorted images. Press the (MENU) button. 2. It takes about twice the set exposure time. Set the REC. Use the or buttons to their icons. mode ➲ Page 58 [ ] and [ ] are displayed in the LCD monitor and the arrow directs to select [REC.MODE] and press the button. 3. Press the ENTER button to set the manual setup screen to non-display. ➲ Page 54 Compose the picture, press the shutter button...
... buttons to keep the camera stable and prevent distorted images. Press the (MENU) button. 2. It takes about twice the set exposure time. Set the REC. Use the or buttons to their icons. mode ➲ Page 58 [ ] and [ ] are displayed in the LCD monitor and the arrow directs to select [REC.MODE] and press the button. 3. Press the ENTER button to set the manual setup screen to non-display. ➲ Page 54 Compose the picture, press the shutter button...

User Guide
Page 54
... buttons to select the set the conditions again. • The settings are saved even if the camera is turned off function is activated. IMPORTANT • If you remove or insert the batteries or disconnect or connect the AC adapter, the manual photography settings will return to [ ]. Getting Ready Taking Photographs Manually (Manual Photography) You can manually adjust conditions such as white balance and exposure compensation, and take photographs at each press of the manual setup screen...
... buttons to select the set the conditions again. • The settings are saved even if the camera is turned off function is activated. IMPORTANT • If you remove or insert the batteries or disconnect or connect the AC adapter, the manual photography settings will return to [ ]. Getting Ready Taking Photographs Manually (Manual Photography) You can manually adjust conditions such as white balance and exposure compensation, and take photographs at each press of the manual setup screen...

User Guide
Page 55
... fixes the setting. Memo • Photography is used to set the white balance when taking photographs under specific lighting conditions. This setting allows you to take photographs. The camera is ready to take photographs. [AUTO] : Automatic adjustment (default) [ ] : Photography outdoors [ ] : Photography in cool white fluorescent light [ ] : Photography in standard fluorescent light [ ] : Photography in incandescent light Other Additional Information 55 Getting Ready Basic Playing Back/ Photography Erasing Images Applications Taking Photographs Manually...
... fixes the setting. Memo • Photography is used to set the white balance when taking photographs under specific lighting conditions. This setting allows you to take photographs. The camera is ready to take photographs. [AUTO] : Automatic adjustment (default) [ ] : Photography outdoors [ ] : Photography in cool white fluorescent light [ ] : Photography in standard fluorescent light [ ] : Photography in incandescent light Other Additional Information 55 Getting Ready Basic Playing Back/ Photography Erasing Images Applications Taking Photographs Manually...

User Guide
Page 57
... camera is turned OFF or the Auto Power OFF function is displayed. Set the mode dial to select the desired setting from the tab menu, and press the ENTER button. The REC MENU is activated. The tab menu 2 is displayed on the LCD monitor when selecting [LCD]. ☞ REC. MODE 1SHOT PREVIEW 1SHOT ISO MULTI BULB BULB SELF-TIMER 10 SEC DISPLAY ON LCD SET Use the or buttons to [ ] or [ ]. Press the (MENU) button. This saves the settings...
... camera is turned OFF or the Auto Power OFF function is displayed. Set the mode dial to select the desired setting from the tab menu, and press the ENTER button. The REC MENU is activated. The tab menu 2 is displayed on the LCD monitor when selecting [LCD]. ☞ REC. MODE 1SHOT PREVIEW 1SHOT ISO MULTI BULB BULB SELF-TIMER 10 SEC DISPLAY ON LCD SET Use the or buttons to [ ] or [ ]. Press the (MENU) button. This saves the settings...

User Guide
Page 74
... be formatted on the LCD monitor. Hold down the erase button for two seconds. Make sure that [FORMAT] is selected, the last image frame appears on the camera before use the or buttons to select [FORMAT] 1 . FRAME ALL FORMAT To reset the image number, use . IMPORTANT • The SmartMedia™ must be formatted if it is displayed. To cancel resetting of the screen. The ERASE menu is write-protected (➲ Page 31). Erasing Images Photography Basic Playing Back...
... be formatted on the LCD monitor. Hold down the erase button for two seconds. Make sure that [FORMAT] is selected, the last image frame appears on the camera before use the or buttons to select [FORMAT] 1 . FRAME ALL FORMAT To reset the image number, use . IMPORTANT • The SmartMedia™ must be formatted if it is displayed. To cancel resetting of the screen. The ERASE menu is write-protected (➲ Page 31). Erasing Images Photography Basic Playing Back...

User Guide
Page 80
... 82 TIME TV ➲ Page 83 AUTO OFF IMAGE No. ➲ Page 83 TV DEFAULT ➲ Page 84 IMAGE No. Erasing Images Photography Basic Playing Back/ Other Applications Use the or buttons to select the item you to set up the environment for using your camera in memory even if the camera is called "setup". DEFAULT English ON SET 1MIN PAL SET SET 80 Additional Information Getting Ready Basic Photographic Settings (SET-UP mode...
... 82 TIME TV ➲ Page 83 AUTO OFF IMAGE No. ➲ Page 83 TV DEFAULT ➲ Page 84 IMAGE No. Erasing Images Photography Basic Playing Back/ Other Applications Use the or buttons to select the item you to set up the environment for using your camera in memory even if the camera is called "setup". DEFAULT English ON SET 1MIN PAL SET SET 80 Additional Information Getting Ready Basic Photographic Settings (SET-UP mode...

User Guide
Page 96
.... Troubleshooting Getting Ready Erasing Images Photography Basic Playing Back/ First check the warning displayed on the SmartMedia™. P.28 P.28 • Load a new SmartMedia™. • Erase photographed images or change the mode dial setting. Remove the write-protection or replace with new batteries. - - Either press the shutter button fully down, or change the size and quality to heat it and then load it into the camera just before you take a picture...
.... Troubleshooting Getting Ready Erasing Images Photography Basic Playing Back/ First check the warning displayed on the SmartMedia™. P.28 P.28 • Load a new SmartMedia™. • Erase photographed images or change the mode dial setting. Remove the write-protection or replace with new batteries. - - Either press the shutter button fully down, or change the size and quality to heat it and then load it into the camera just before you take a picture...

User Guide
Page 97
.... The playback image is write-protected Camera malfunction. The subject is not clean. Select a different folder to Auto, Red-Eye Reduction or P.49 Forced Flash mode. Nothing happens when I used the flash. Remove the write-protection. Remove the write-protection. Wait until charging is out of focus. The batteries are exhausted. Getting Ready Basic Playing Back/ Photography Erasing Images Applications Troubleshooting (continued) Problem I cannot use the buttons and switches. The image is completed before pressing the shutter button. P.47...
.... The playback image is write-protected Camera malfunction. The subject is not clean. Select a different folder to Auto, Red-Eye Reduction or P.49 Forced Flash mode. Nothing happens when I used the flash. Remove the write-protection. Remove the write-protection. Wait until charging is out of focus. The batteries are exhausted. Getting Ready Basic Playing Back/ Photography Erasing Images Applications Troubleshooting (continued) Problem I cannot use the buttons and switches. The image is completed before pressing the shutter button. P.47...
User Guide
Page 99
... as digital still cameras see a white subject as matching the white balance. ● SmartMedia™ Name of a recording medium defined by first adjusting the balance to suit the color of the light changes, the human eye adapts so that meet the PC Card Standard. ● Red-Eye Effect The phenomenon where people's eyes sometimes appear red in image processing software for most personal computers. ● JPEG A file format used in the picture when you use a flash...
... as digital still cameras see a white subject as matching the white balance. ● SmartMedia™ Name of a recording medium defined by first adjusting the balance to suit the color of the light changes, the human eye adapts so that meet the PC Card Standard. ● Red-Eye Effect The phenomenon where people's eyes sometimes appear red in image processing software for most personal computers. ● JPEG A file format used in the picture when you use a flash...
