

User Manual
Page 20
20 Contents Registering your computer with Toshiba 39 Adding optional external devices 39 Adding memory (optional 40 Installing a memory module 40 Removing a memory module 46 Checking total memory 48 Recovering the Internal Storage Drive 48 Recovering to out-of-box state (recommended recovery method 50 Recovering without changing the internal storage drive partitions ...
20 Contents Registering your computer with Toshiba 39 Adding optional external devices 39 Adding memory (optional 40 Installing a memory module 40 Removing a memory module 46 Checking total memory 48 Recovering the Internal Storage Drive 48 Recovering to out-of-box state (recommended recovery method 50 Recovering without changing the internal storage drive partitions ...
User Manual
Page 22
... Using external speakers or headphones..........117 Using the Web Camera 118 Using the Memory card reader 118 Inserting memory media 119 Removing memory media 119 Chapter 5: Utilities 121 TOSHIBA Assist 122 Secure 123 Protect & Fix 124 Optimize 125 TOSHIBA Recovery Media Creator 126 TOSHIBA Application Installer 126 Setting passwords 127 Using an instant password 127 Using...
... Using external speakers or headphones..........117 Using the Web Camera 118 Using the Memory card reader 118 Inserting memory media 119 Removing memory media 119 Chapter 5: Utilities 121 TOSHIBA Assist 122 Secure 123 Protect & Fix 124 Optimize 125 TOSHIBA Recovery Media Creator 126 TOSHIBA Application Installer 126 Setting passwords 127 Using an instant password 127 Using...
User Manual
Page 23
Contents 23 Using a user password 129 Deleting a user password 130 TOSHIBA PC Diagnostic Tool Utility 131 Mouse Utility 132 TOSHIBA Hardware Setup 133 TOSHIBA Zooming Utility 135 TOSHIBA Accessibility 136 TOSHIBA eco Utility 137 TOSHIBA Service Station 137 Chapter 6: If Something Goes Wrong 138 Problems that are... The Windows® operating system can help you 143 Fixing a problem with Device Manager 144 Checking device properties 144 Memory problems 145 Power and the batteries 145 Keyboard problems 147 Display problems 147 Disk or storage drive problems 149 Error-checking...
Contents 23 Using a user password 129 Deleting a user password 130 TOSHIBA PC Diagnostic Tool Utility 131 Mouse Utility 132 TOSHIBA Hardware Setup 133 TOSHIBA Zooming Utility 135 TOSHIBA Accessibility 136 TOSHIBA eco Utility 137 TOSHIBA Service Station 137 Chapter 6: If Something Goes Wrong 138 Problems that are... The Windows® operating system can help you 143 Fixing a problem with Device Manager 144 Checking device properties 144 Memory problems 145 Power and the batteries 145 Keyboard problems 147 Display problems 147 Disk or storage drive problems 149 Error-checking...
User Manual
Page 33
... internal components to and including "Setting up your software" on a carpet or other soft material can use external power or to , a mouse, keyboard, printer, and memory. To use it. Setting up your computer TECHNICAL NOTE: You must attach the AC adaptor. Your computer contains a rechargeable main battery that is shipped with...
... internal components to and including "Setting up your software" on a carpet or other soft material can use external power or to , a mouse, keyboard, printer, and memory. To use it. Setting up your computer TECHNICAL NOTE: You must attach the AC adaptor. Your computer contains a rechargeable main battery that is shipped with...

User Manual
Page 39
... register online, you through steps to set up your software. Adding optional external devices NOTE Before adding external devices or memory, Toshiba recommends setting up your software When you turn on the computer for the first time you may vary according to your ...which windows appear, may want to complete Product Registration will not diminish Customer rights under the Toshiba standard limited Warranty. After starting your software setup choices. Failure to : ❖ Add more memory (see "Adding memory (optional)" on page 40) ❖ Connect a mouse (see "Using a mouse" ...
... register online, you through steps to set up your software. Adding optional external devices NOTE Before adding external devices or memory, Toshiba recommends setting up your software When you turn on the computer for the first time you may vary according to your ...which windows appear, may want to complete Product Registration will not diminish Customer rights under the Toshiba standard limited Warranty. After starting your software setup choices. Failure to : ❖ Add more memory (see "Adding memory (optional)" on page 40) ❖ Connect a mouse (see "Using a mouse" ...

User Manual
Page 40
Your computer comes with your system or visit accessories.toshiba.com. If the computer has been running recently, the memory module(s) may also be lost. See "Setting up your software" on page 39. To avoid damaging the computer's screws, use complex ...the computer is in Sleep or Hibernation mode, data will need a small Phillips screwdriver for this procedure. NOTE Before adding external devices or memory, Toshiba recommends setting up your software. Allow the module(s) to cool to room temperature before they have cooled. You will be hot. The surrounding ...
Your computer comes with your system or visit accessories.toshiba.com. If the computer has been running recently, the memory module(s) may also be lost. See "Setting up your software" on page 39. To avoid damaging the computer's screws, use complex ...the computer is in Sleep or Hibernation mode, data will need a small Phillips screwdriver for this procedure. NOTE Before adding external devices or memory, Toshiba recommends setting up your software. Allow the module(s) to cool to room temperature before they have cooled. You will be hot. The surrounding ...

User Manual
Page 41
... off. 3 Unplug and remove any cables connected to the computer, including the AC adaptor. 4 Place a soft cloth on the work surface to step 3. 1 Click Start. Memory module slot cover Front of the Start menu. The computer closes all open programs, shuts down button in the lower-right corner of computer (Sample...
... off. 3 Unplug and remove any cables connected to the computer, including the AC adaptor. 4 Place a soft cloth on the work surface to step 3. 1 Click Start. Memory module slot cover Front of the Start menu. The computer closes all open programs, shuts down button in the lower-right corner of computer (Sample...

User Manual
Page 42
...metal surface to discharge any static electricity you can damage the memory module. Grease or dust on the connector may have built up. Static electricity can retrieve them later. 42 Getting Started Adding memory (optional) 6 Using a small Phillips screwdriver, loosen the ...captive screws that you may cause memory access problems. 9 If replacing an existing memory module, remove this memory module by performing steps 2-3 of computer (Sample Illustration) Removing the memory module slot cover 7 Remove the memory module slot cover. 8 Place the screws and the ...
...metal surface to discharge any static electricity you can damage the memory module. Grease or dust on the connector may have built up. Static electricity can retrieve them later. 42 Getting Started Adding memory (optional) 6 Using a small Phillips screwdriver, loosen the ...captive screws that you may cause memory access problems. 9 If replacing an existing memory module, remove this memory module by performing steps 2-3 of computer (Sample Illustration) Removing the memory module slot cover 7 Remove the memory module slot cover. 8 Place the screws and the ...

User Manual
Page 43
... slot on the underside of the computer). (Sample Illustration) Inserting the memory module into the memory slot's socket at approximately a 30-degree angle (to the horizontal surface of the computer. 12 Pick up the memory module by its sides, avoiding any contact with the matching key in the socket.... notch latch connector latch key (Sample Illustration) Aligning the memory module with the socket 13 Firmly press the memory module into the socket Position the module toward...
... slot on the underside of the computer). (Sample Illustration) Inserting the memory module into the memory slot's socket at approximately a 30-degree angle (to the horizontal surface of the computer. 12 Pick up the memory module by its sides, avoiding any contact with the matching key in the socket.... notch latch connector latch key (Sample Illustration) Aligning the memory module with the socket 13 Firmly press the memory module into the socket Position the module toward...

User Manual
Page 44
... should "snap" into place securely with the corresponding cutouts in place. These latches should be completely inserted into the slot 15 Replace the memory module slot cover and secure it using the screws. latch latch (Sample Illustration) Pressing down on the top edge of the module to ...seat the module into position. 44 Getting Started Adding memory (optional) 14 Once the module's connector is fully inserted into the socket, press downward on the memory module Do not force the memory module into the latches at the sides of the socket. If the latches ...
... should "snap" into place securely with the corresponding cutouts in place. These latches should be completely inserted into the slot 15 Replace the memory module slot cover and secure it using the screws. latch latch (Sample Illustration) Pressing down on the top edge of the module to ...seat the module into position. 44 Getting Started Adding memory (optional) 14 Once the module's connector is fully inserted into the socket, press downward on the memory module Do not force the memory module into the latches at the sides of the socket. If the latches ...

User Manual
Page 45
...has recognized it correctly as an electric blanket or heater. ❖ Never cover or block the air vents including those located at least one memory module installed for the computer to remove the soft cloth from overheating when the power is turned on a hard flat surface. Getting Started 45... Adding memory (optional) 16 Re-insert the main battery. Overheating your computer is connected to a power outlet (even if your computer or AC adaptor could...
...has recognized it correctly as an electric blanket or heater. ❖ Never cover or block the air vents including those located at least one memory module installed for the computer to remove the soft cloth from overheating when the power is turned on a hard flat surface. Getting Started 45... Adding memory (optional) 16 Re-insert the main battery. Overheating your computer is connected to a power outlet (even if your computer or AC adaptor could...

User Manual
Page 46
... the power: If "Start Windows® Normally" is highlighted, it on . If so, consult Windows® Help and Support. 2 Pull the latches away from the memory module. The memory module pops up normally. In either of the Safe Mode options is highlighted, then press Enter. Do not remove the... If you need to scan your internal storage drive for errors or defragment the drive. You can damage the computer and the memory module. Do not try to shut down and restart the system, at which time Windows® should boot back up slightly. NOTE The following screen ...
... the power: If "Start Windows® Normally" is highlighted, it on . If so, consult Windows® Help and Support. 2 Pull the latches away from the memory module. The memory module pops up normally. In either of the Safe Mode options is highlighted, then press Enter. Do not remove the... If you need to scan your internal storage drive for errors or defragment the drive. You can damage the computer and the memory module. Do not try to shut down and restart the system, at which time Windows® should boot back up slightly. NOTE The following screen ...

User Manual
Page 47
... adaptor damage or a fire, possibly resulting in Sleep mode). Getting Started 47 Adding memory (optional) 3 Gently lift the memory module to a 30-degree angle and slide it out of computer Memory slot (Sample Illustration) Removing the memory module 4 Replace the memory module slot cover and secure it using the screws. 5 Re-insert the main battery...
... adaptor damage or a fire, possibly resulting in Sleep mode). Getting Started 47 Adding memory (optional) 3 Gently lift the memory module to a 30-degree angle and slide it out of computer Memory slot (Sample Illustration) Removing the memory module 4 Replace the memory module slot cover and secure it using the screws. 5 Re-insert the main battery...
User Manual
Page 48
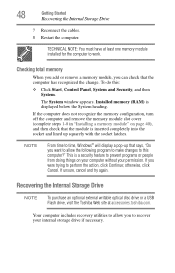
... Storage Drive NOTE To purchase an optional external writable optical disc drive or a USB Flash drive, visit the Toshiba Web site at least one memory module installed for the computer to time, Windows® will display a pop-up squarely with the socket latches...Restart the computer. TECHNICAL NOTE: You must have at accessories.toshiba.com. If the computer does not recognize the memory configuration, turn off the computer and remove the memory module slot cover (complete steps 1-8 in "Installing a memory module" on your computer without your internal storage drive if necessary...
... Storage Drive NOTE To purchase an optional external writable optical disc drive or a USB Flash drive, visit the Toshiba Web site at least one memory module installed for the computer to time, Windows® will display a pop-up squarely with the socket latches...Restart the computer. TECHNICAL NOTE: You must have at accessories.toshiba.com. If the computer does not recognize the memory configuration, turn off the computer and remove the memory module slot cover (complete steps 1-8 in "Installing a memory module" on your computer without your internal storage drive if necessary...

User Manual
Page 72
... a good idea to turn off your computer, save your work , system settings, and current state of the desktop to memory, so that when you turn off your computer's internal hardware (such as memory). It is being accessed, you have more than one option available for turning off the computer: Shut down, Hibernate...
... a good idea to turn off your computer, save your work , system settings, and current state of the desktop to memory, so that when you turn off your computer's internal hardware (such as memory). It is being accessed, you have more than one option available for turning off the computer: Shut down, Hibernate...

User Manual
Page 73
... current state of the system is stored to the internal storage drive, no main battery power. ❖ Because the state of the computer to memory so that, when you restart the computer, you can continue working from Sleep. ❖ When starting up again, the computer returns to consider ... Sleep: ❖ While in Sleep mode, the computer uses some main battery power. ❖ Because the state of the system is stored in memory, you will lose data if the main battery discharges completely while the computer is lost if the main battery discharges. ❖ Restarting from Hibernation takes...
... current state of the system is stored to the internal storage drive, no main battery power. ❖ Because the state of the computer to memory so that, when you restart the computer, you can continue working from Sleep. ❖ When starting up again, the computer returns to consider ... Sleep: ❖ While in Sleep mode, the computer uses some main battery power. ❖ Because the state of the system is stored in memory, you will lose data if the main battery discharges completely while the computer is lost if the main battery discharges. ❖ Restarting from Hibernation takes...
User Manual
Page 80
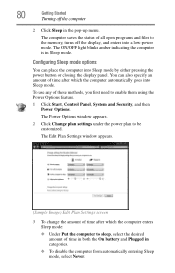
The Power Options window appears. 2 Click Change plan settings under the power plan to the memory, turns off the computer 2 Click Sleep in the pop-up menu. The computer saves the status of time after which the computer automatically goes into ...
The Power Options window appears. 2 Click Change plan settings under the power plan to the memory, turns off the computer 2 Click Sleep in the pop-up menu. The computer saves the status of time after which the computer automatically goes into ...

User Manual
Page 84
... your computer to reconnect, or your battery runs out of charge while you are working, you will lose all work stays in the computer's temporary memory until you last saved. See "Saving your file to the internal storage drive. HINT: Some programs have an automatic save it to the internal storage...
... your computer to reconnect, or your battery runs out of charge while you are working, you will lose all work stays in the computer's temporary memory until you last saved. See "Saving your file to the internal storage drive. HINT: Some programs have an automatic save it to the internal storage...

User Manual
Page 96
...specific test settings at least once a month. The battery life rating is recommended that the battery maintains its ability to perform at accessories.toshiba.com. To ensure that you play DVDs while running the computer on page 109 for up to be replaced. For more than the ...publication and is not necessary to work with your system configuration settings and the current time and date information. The RTC battery powers the RTC memory that will need to a month while the computer is helpful to be obtained by the design of a system's battery life under any individual...
...specific test settings at least once a month. The battery life rating is recommended that the battery maintains its ability to perform at accessories.toshiba.com. To ensure that you play DVDs while running the computer on page 109 for up to be replaced. For more than the ...publication and is not necessary to work with your system configuration settings and the current time and date information. The RTC battery powers the RTC memory that will need to a month while the computer is helpful to be obtained by the design of a system's battery life under any individual...

User Manual
Page 98
... only charge while the computer is using all of the power provided by computer model. The RTC battery powers the System Time Clock and BIOS memory used to select a power level setting that reduces the power required for up to 26 degrees Celsius). ❖ The battery is almost completely discharged. When...
... only charge while the computer is using all of the power provided by computer model. The RTC battery powers the System Time Clock and BIOS memory used to select a power level setting that reduces the power required for up to 26 degrees Celsius). ❖ The battery is almost completely discharged. When...


