

User Guide
Page 36
... bottom module. 3 Gently lift the memory module to go into Safe Mode, then shut down and restart the system, at which time Windows® should boot back up slightly.
... bottom module. 3 Gently lift the memory module to go into Safe Mode, then shut down and restart the system, at which time Windows® should boot back up slightly.
User Guide
Page 40
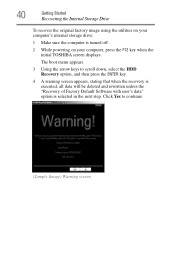
... recover the original factory image using the utilities on your computer's internal storage drive: 1 Make sure the computer is selected in the next step. The boot menu appears. 3 Using the arrow keys to continue. (Sample Image) Warning screen Click Yes to scroll down, select the HDD Recovery option, and then press... the "Recovery of Factory Default Software with user's data" option is turned off. 2 While powering on your computer, press the F12 key when the initial TOSHIBA screen displays.
... recover the original factory image using the utilities on your computer's internal storage drive: 1 Make sure the computer is selected in the next step. The boot menu appears. 3 Using the arrow keys to continue. (Sample Image) Warning screen Click Yes to scroll down, select the HDD Recovery option, and then press... the "Recovery of Factory Default Software with user's data" option is turned off. 2 While powering on your computer, press the F12 key when the initial TOSHIBA screen displays.
User Guide
Page 42
...to back up your work" on your internal storage drive to factory default state and attempts to save C:\Users data to begin the recovery. The boot menu appears. 3 Using the arrow keys to restart the computer. When the recovery process is turned off. 2 While powering on page 68. ...Drive 8 Click Next to C:\Backup. Recovering of factory default software with user's data" recovers your computer, press the F12 key when the initial TOSHIBA screen displays. The directory structure will be copied into your private account, you will be moved to this folder during the recovery process.
...to back up your work" on your internal storage drive to factory default state and attempts to save C:\Users data to begin the recovery. The boot menu appears. 3 Using the arrow keys to restart the computer. When the recovery process is turned off. 2 While powering on page 68. ...Drive 8 Click Next to C:\Backup. Recovering of factory default software with user's data" recovers your computer, press the F12 key when the initial TOSHIBA screen displays. The directory structure will be copied into your private account, you will be moved to this folder during the recovery process.

User Guide
Page 45
If you have created other partitions by using recovery media, if you have created such media. The boot menu appears. 3 Using the arrow keys to external media before executing the recovery (see "Restoring from recovery media" on your work to scroll down, select ... the computer is turned off. 2 While powering on page 68). To recover using the utilities on your computer, press the F12 key when the initial TOSHIBA screen displays. To recover using the first method, follow the procedure below.
If you have created other partitions by using recovery media, if you have created such media. The boot menu appears. 3 Using the arrow keys to external media before executing the recovery (see "Restoring from recovery media" on your work to scroll down, select ... the computer is turned off. 2 While powering on page 68). To recover using the utilities on your computer, press the F12 key when the initial TOSHIBA screen displays. To recover using the first method, follow the procedure below.
User Guide
Page 48
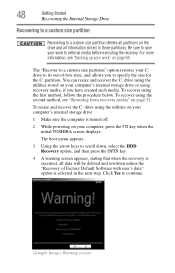
..." on your computer, press the F12 key when the initial TOSHIBA screen displays. The "Recover to a custom size partition" option restores your work " on your computer's internal storage drive: 1 Make sure the computer is turned off. 2 While powering on page 52. The boot menu appears. 3 Using the arrow keys to scroll down...
..." on your computer, press the F12 key when the initial TOSHIBA screen displays. The "Recover to a custom size partition" option restores your work " on your computer's internal storage drive: 1 Make sure the computer is turned off. 2 While powering on page 52. The boot menu appears. 3 Using the arrow keys to scroll down...

User Guide
Page 53
...Getting Started 53 Recovering the Internal Storage Drive To recover your internal storage drive from the drive. 8 Follow the on your computer. The boot menu displays. 4 Using the arrow keys, select the DVD option or the USB Flash option, depending on which type of media you want...; Recover without changing the hard drive partitions-If you want to recover the C: drive to restart the computer. Click Yes to continue. 6 When the Toshiba Recovery Wizard opens and the "Selecting a process" screen displays, select Recovery of Factory Default Software, and then click Next. 7 Select one of the ...
...Getting Started 53 Recovering the Internal Storage Drive To recover your internal storage drive from the drive. 8 Follow the on your computer. The boot menu displays. 4 Using the arrow keys, select the DVD option or the USB Flash option, depending on which type of media you want...; Recover without changing the hard drive partitions-If you want to recover the C: drive to restart the computer. Click Yes to continue. 6 When the Toshiba Recovery Wizard opens and the "Selecting a process" screen displays, select Recovery of Factory Default Software, and then click Next. 7 Select one of the ...
User Guide
Page 54
...back up your computer, and then power on your computer. Using the arrow keys, select the DVD or USB Flash option on the boot menu, depending on which type of media you want to restore the internal storage drive, use one of the following options on the Erase...drive. ❖ Delete all partitions and overwrite all sectors on your recovery media: Turn off your computer, press the F12 key when the initial TOSHIBA screen displays. For more information, see "Recovering the Internal Storage Drive" on the drive, including the partitions. 54 Getting Started Erasing the Internal ...
...back up your computer, and then power on your computer. Using the arrow keys, select the DVD or USB Flash option on the boot menu, depending on which type of media you want to restore the internal storage drive, use one of the following options on the Erase...drive. ❖ Delete all partitions and overwrite all sectors on your recovery media: Turn off your computer, press the F12 key when the initial TOSHIBA screen displays. For more information, see "Recovering the Internal Storage Drive" on the drive, including the partitions. 54 Getting Started Erasing the Internal ...
User Guide
Page 101
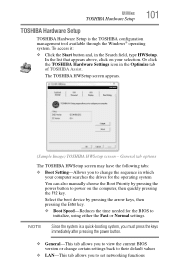
... Start button and, in the Optimize tab of TOSHIBA Assist. General tab options The TOSHIBA HWSetup screen may have the following tabs: ❖ Boot Setting-Allows you to set networking functions Select the boot device by pressing the power button to initialize, ...Since the system is the TOSHIBA configuration management tool available through the Windows® operating system. The TOSHIBA HWSetup screen appears. (Sample Image) TOSHIBA HWSetup screen - Utilities TOSHIBA Hardware Setup 101 TOSHIBA Hardware Setup TOSHIBA Hardware Setup is a quick-booting system, you must press ...
... Start button and, in the Optimize tab of TOSHIBA Assist. General tab options The TOSHIBA HWSetup screen may have the following tabs: ❖ Boot Setting-Allows you to set networking functions Select the boot device by pressing the power button to initialize, ...Since the system is the TOSHIBA configuration management tool available through the Windows® operating system. The TOSHIBA HWSetup screen appears. (Sample Image) TOSHIBA HWSetup screen - Utilities TOSHIBA Hardware Setup 101 TOSHIBA Hardware Setup TOSHIBA Hardware Setup is a quick-booting system, you must press ...

User Guide
Page 102
...tab allows you to set a user password ❖ Display-This tab allows you to select the internal LCD and/or external monitor when the computer boots up. ❖ Keyboard-This tab allows you to set conditions for the port that appears above, click on the computer to the USB port ...and Charge Your computer can only be used for USB. In the list that supports the USB Sleep and Charge function (hereinafter called "compatible port"). TOSHIBA Sleep Utility This utility displays whether the "USB Sleep and Charge function" is in the Search field, type Sleep Utility. You can use the "...
...tab allows you to set a user password ❖ Display-This tab allows you to select the internal LCD and/or external monitor when the computer boots up. ❖ Keyboard-This tab allows you to set conditions for the port that appears above, click on the computer to the USB port ...and Charge Your computer can only be used for USB. In the list that supports the USB Sleep and Charge function (hereinafter called "compatible port"). TOSHIBA Sleep Utility This utility displays whether the "USB Sleep and Charge function" is in the Search field, type Sleep Utility. You can use the "...
User Guide
Page 111
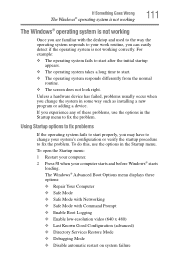
... Windows® operating system is not working 111 The Windows® operating system is not working Once you are familiar with Command Prompt ❖ Enable Boot Logging ❖ Enable low-resolution video (640 x 480) ❖ Last Known Good Configuration (advanced) ❖ Directory Services Restore Mode ❖...takes a long time to fix the problem. If you may have to change the system in the Startup menu. The Windows® Advanced Boot Options menu displays these problems, use the options in some way such as installing a new program or adding a device. To open the ...
... Windows® operating system is not working 111 The Windows® operating system is not working Once you are familiar with Command Prompt ❖ Enable Boot Logging ❖ Enable low-resolution video (640 x 480) ❖ Last Known Good Configuration (advanced) ❖ Directory Services Restore Mode ❖...takes a long time to fix the problem. If you may have to change the system in the Startup menu. The Windows® Advanced Boot Options menu displays these problems, use the options in some way such as installing a new program or adding a device. To open the ...
User Guide
Page 142
... in which data flows from bootstrap program (as the video adapter, disk drives, and ports. boot-To start up by its internal storage drives to locate the startup files. boot setting (startup sequence)-The order in read-only memory (ROM), containing the information the computer needs...developed to allow for the startup files in "pulling itself up the computer. Basic Input/Output System (BIOS)-See BIOS. The term "boot" originates from one device to enable recording and playback of high-definition video (HD). Under the default startup sequence, the computer looks for...
... in which data flows from bootstrap program (as the video adapter, disk drives, and ports. boot-To start up by its internal storage drives to locate the startup files. boot setting (startup sequence)-The order in read-only memory (ROM), containing the information the computer needs...developed to allow for the startup files in "pulling itself up the computer. Basic Input/Output System (BIOS)-See BIOS. The term "boot" originates from one device to enable recording and playback of high-definition video (HD). Under the default startup sequence, the computer looks for...
User Guide
Page 151
A Flash drive is receiving power. See also boot. ROM (Read-Only Memory)-Non-volatile memory that occur one at a time sequentially over a single channel. See also BIOS, memory. S Secure Digital (SD)-A small, portable, ... reloading the operating system without turning the computer off. telephone systems and direct-connect modems. The RJ11 connector is used on it up. reboot-See boot, restart. select-To highlight or otherwise specify text, data, or graphics with reboot. 151 Glossary Random Access Memory-See RAM.
A Flash drive is receiving power. See also boot. ROM (Read-Only Memory)-Non-volatile memory that occur one at a time sequentially over a single channel. See also BIOS, memory. S Secure Digital (SD)-A small, portable, ... reloading the operating system without turning the computer off. telephone systems and direct-connect modems. The RJ11 connector is used on it up. reboot-See boot, restart. select-To highlight or otherwise specify text, data, or graphics with reboot. 151 Glossary Random Access Memory-See RAM.
