User Guide
Page 31
Contents 31 Turning on the power 50 Setting up your software 51 Registering your computer with Toshiba 51 Adding optional external devices 52 Adding memory (optional 52 Installing a memory module 53 Removing a memory module 58 Checking total memory... recovery method 62 Recovering to a custom size partition 64 Recovering without changing the internal storage drive partitions 67 Creating recovery media 69 Restoring from recovery media 70 Erasing the Internal Storage Drive 72 Checking the internal storage drive operating status 74 Installing drivers and applications 74 Using...
Contents 31 Turning on the power 50 Setting up your software 51 Registering your computer with Toshiba 51 Adding optional external devices 52 Adding memory (optional 52 Installing a memory module 53 Removing a memory module 58 Checking total memory... recovery method 62 Recovering to a custom size partition 64 Recovering without changing the internal storage drive partitions 67 Creating recovery media 69 Restoring from recovery media 70 Erasing the Internal Storage Drive 72 Checking the internal storage drive operating status 74 Installing drivers and applications 74 Using...
User Guide
Page 32
... Windows® Explorer ...97 Starting a program using the Start Search field 98 Saving your work 98 Printing your work 100 Backing up your work 101 Restoring your work 102 Using the optical drive 102 Optical drive components 103 Media control buttons 103 Inserting an optical disc 104 Playing an audio CD... media 106 Recording optical media 106 Removing a disc with the computer on...........107 Removing a disc with the computer off ..........107 Caring for optical discs 108 Toshiba's online resources 108
... Windows® Explorer ...97 Starting a program using the Start Search field 98 Saving your work 98 Printing your work 100 Backing up your work 101 Restoring your work 102 Using the optical drive 102 Optical drive components 103 Media control buttons 103 Inserting an optical disc 104 Playing an audio CD... media 106 Recording optical media 106 Removing a disc with the computer on...........107 Removing a disc with the computer off ..........107 Caring for optical discs 108 Toshiba's online resources 108

User Guide
Page 61
...drive or if you were trying to the C: drive and any other drive partitions you may have created (for the C: partition and then restores your permission. Recover without This option recovers just your C: drive, leaving any other changing the internal partitions you can recover your system even ...if the recovery utilities have been deleted from doing things on page 62. Restore from recovery media" on page 64. If unsure, cancel and try again. Note: With this option, any changes you made to perform...
...drive or if you were trying to the C: drive and any other drive partitions you may have created (for the C: partition and then restores your permission. Recover without This option recovers just your C: drive, leaving any other changing the internal partitions you can recover your system even ...if the recovery utilities have been deleted from doing things on page 62. Restore from recovery media" on page 64. If unsure, cancel and try again. Note: With this option, any changes you made to perform...

User Guide
Page 62
...information stored in those partitions. To recover using the second method, see "Creating recovery media" on page 69. ❖ The Toshiba Recovery Wizard also provides the option of erasing your computer's internal storage drive or using the utilities stored on your internal storage drive, without..., follow the procedure below. If not, skip to external media before using your system for more information on creating recovery media, see "Restoring from recovery media" on page 70. Be sure to save your computer be connected to an external power source via the AC adaptor. ...
...information stored in those partitions. To recover using the second method, see "Creating recovery media" on page 69. ❖ The Toshiba Recovery Wizard also provides the option of erasing your computer's internal storage drive or using the utilities stored on your internal storage drive, without..., follow the procedure below. If not, skip to external media before using your system for more information on creating recovery media, see "Restoring from recovery media" on page 70. Be sure to save your computer be connected to an external power source via the AC adaptor. ...
User Guide
Page 65
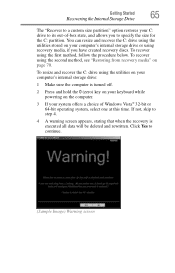
To recover using the second method, see "Restoring from recovery media" on your C: drive to its out-of Windows Vista® 32-bit or 64-bit operating system, select one at this time. .... To recover using the first method, follow the procedure below. Getting Started Recovering the Internal Storage Drive 65 The "Recover to a custom size partition" option restores your computer's internal storage drive or using recovery media, if you to continue. (Sample Image) Warning screen To resize and recover the C: drive using the...
To recover using the second method, see "Restoring from recovery media" on your C: drive to its out-of Windows Vista® 32-bit or 64-bit operating system, select one at this time. .... To recover using the first method, follow the procedure below. Getting Started Recovering the Internal Storage Drive 65 The "Recover to a custom size partition" option restores your computer's internal storage drive or using recovery media, if you to continue. (Sample Image) Warning screen To resize and recover the C: drive using the...
User Guide
Page 67
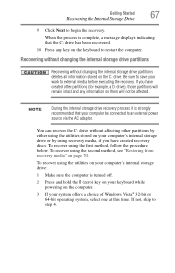
... recovery media, if you have created recovery discs. To recover using the first method, follow the procedure below. To recover using the second method, see "Restoring from recovery media" on the keyboard to step 4. Getting Started Recovering the Internal Storage Drive 67 9 Click Next to external media before executing the recovery...
... recovery media, if you have created recovery discs. To recover using the first method, follow the procedure below. To recover using the second method, see "Restoring from recovery media" on the keyboard to step 4. Getting Started Recovering the Internal Storage Drive 67 9 Click Next to external media before executing the recovery...
User Guide
Page 70
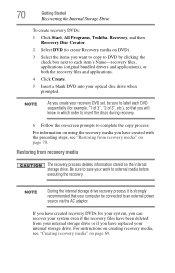
...from your internal storage drive or if you have replaced your internal storage drive. Restoring from recovery media" on page 70. For instructions on creating recovery media, see "Restoring from recovery media The recovery process deletes information stored on page 69. 70 ...Getting Started Recovering the Internal Storage Drive To create recovery DVDs: 1 Click Start, All Programs, Toshiba, Recovery, and then Recovery Disc Creator. 2 ...
...from your internal storage drive or if you have replaced your internal storage drive. Restoring from recovery media" on page 70. For instructions on creating recovery media, see "Restoring from recovery media The recovery process deletes information stored on page 69. 70 ...Getting Started Recovering the Internal Storage Drive To create recovery DVDs: 1 Click Start, All Programs, Toshiba, Recovery, and then Recovery Disc Creator. 2 ...
User Guide
Page 72
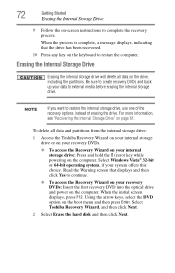
...Erasing the Internal Storage Drive Erasing the internal storage drive will delete all data and partitions from the internal storage drive: 1 Access the Toshiba Recovery Wizard on your internal storage drive or on your recovery DVDs. ❖ To access the Recovery Wizard on your recovery DVDs: Insert...; To access the Recovery Wizard on your internal storage drive: Press and hold the 0 (zero) key while powering on -screen instructions to restore the internal storage drive, use one of the recovery options instead of erasing the drive. NOTE If you want to complete the recovery process....
...Erasing the Internal Storage Drive Erasing the internal storage drive will delete all data and partitions from the internal storage drive: 1 Access the Toshiba Recovery Wizard on your internal storage drive or on your recovery DVDs. ❖ To access the Recovery Wizard on your recovery DVDs: Insert...; To access the Recovery Wizard on your internal storage drive: Press and hold the 0 (zero) key while powering on -screen instructions to restore the internal storage drive, use one of the recovery options instead of erasing the drive. NOTE If you want to complete the recovery process....
User Guide
Page 74
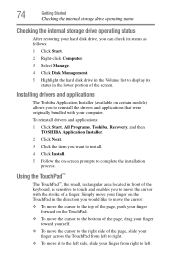
...TouchPad from right to left to right. ❖ To move the cursor with your computer. Installing drivers and applications The Toshiba Application Installer (available on -screen prompts to complete the installation process. 74 Getting Started Checking the internal storage drive operating... status Checking the internal storage drive operating status After restoring your hard disk drive, you can check its status as follows: 1 Click Start. 2 Right-click Computer. 3 Select Manage. ...
...TouchPad from right to left to right. ❖ To move the cursor with your computer. Installing drivers and applications The Toshiba Application Installer (available on -screen prompts to complete the installation process. 74 Getting Started Checking the internal storage drive operating... status Checking the internal storage drive operating status After restoring your hard disk drive, you can check its status as follows: 1 Click Start. 2 Right-click Computer. 3 Select Manage. ...
User Guide
Page 102
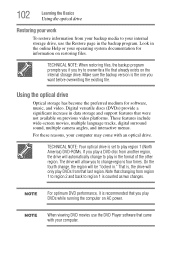
...these reasons, your internal storage drive, use the DVD Player software that you to change to play DVDs while running the computer on restoring files. The drive will allow you play in the backup program. That is counted as two changes. 102 Learning the Basics Using the... optical drive Restoring your work To restore information from another region, the drive will automatically change regions four times. TECHNICAL NOTE: Your optical drive is set to play region...
...these reasons, your internal storage drive, use the DVD Player software that you to change to play DVDs while running the computer on restoring files. The drive will allow you play in the backup program. That is counted as two changes. 102 Learning the Basics Using the... optical drive Restoring your work To restore information from another region, the drive will automatically change regions four times. TECHNICAL NOTE: Your optical drive is set to play region...

User Guide
Page 174
... of the address with Command Prompt ❖ Enable Boot Logging ❖ Enable low-resolution video (640x480) ❖ Last Known Good Configuration (advanced) ❖ Directory Services Restore Mode ❖ Debugging Mode ❖ Disable automatic restart on system failure ❖ Disable Driver Signature Enforcement ❖ Start Windows® normally When you bookmarked yesterday...
... of the address with Command Prompt ❖ Enable Boot Logging ❖ Enable low-resolution video (640x480) ❖ Last Known Good Configuration (advanced) ❖ Directory Services Restore Mode ❖ Debugging Mode ❖ Disable automatic restart on system failure ❖ Disable Driver Signature Enforcement ❖ Start Windows® normally When you bookmarked yesterday...
User Guide
Page 190
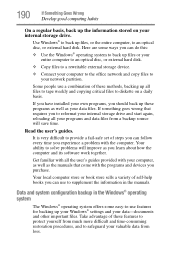
... and copy files to -use to diskette on your data files. Your ability to reformat your valuable data from much more difficult and time-consuming restoration procedures, and to an optical disc, or external hard disk. 190 If Something Goes Wrong Develop good computing habits On a regular basis, back up the...
... and copy files to -use to diskette on your data files. Your ability to reformat your valuable data from much more difficult and time-consuming restoration procedures, and to an optical disc, or external hard disk. 190 If Something Goes Wrong Develop good computing habits On a regular basis, back up the...
User Guide
Page 191
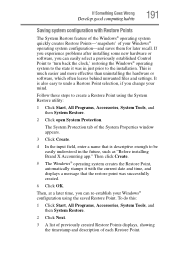
...recall. The System Protection tab of the System Properties window appears. 3 Click Create. 4 In the input field, enter a name that the restore point was in the future, such as "Before installing Brand X Accounting app." Then click Create. 5 The Windows® operating system creates the... Restore Point, automatically stamps it was successfully created. 6 Click OK. If you experience problems after installing some new hardware or software, you can...
...recall. The System Protection tab of the System Properties window appears. 3 Click Create. 4 In the input field, enter a name that the restore point was in the future, such as "Before installing Brand X Accounting app." Then click Create. 5 The Windows® operating system creates the... Restore Point, automatically stamps it was successfully created. 6 Click OK. If you experience problems after installing some new hardware or software, you can...
User Guide
Page 192
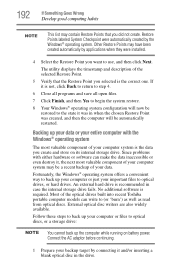
... is the correct one. Most of your backup target by the Windows® operating system. Other Restore Points may have been created automatically by applications when they were installed. 4 Select the Restore Point you want to optical drives, or hard drives. Fortunately, the Windows® operating system offers...just your computer system may be automatically restarted. If it , the next most valuable component of the optical drives built into recent Toshiba portable computer models can make the data inaccessible or even destroy it is the data you create and store on battery power. ...
... is the correct one. Most of your backup target by the Windows® operating system. Other Restore Points may have been created automatically by applications when they were installed. 4 Select the Restore Point you want to optical drives, or hard drives. Fortunately, the Windows® operating system offers...just your computer system may be automatically restarted. If it , the next most valuable component of the optical drives built into recent Toshiba portable computer models can make the data inaccessible or even destroy it is the data you create and store on battery power. ...
User Guide
Page 193
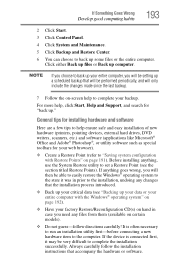
...a few tips to help to "Saving system configuration with the Windows® operating system" on page 192). ❖ Have your factory Restore/Reconfiguration CD(s) on hand in prior to back up ." If the device is often necessary to run an installation utility first-before connecting a... If Something Goes Wrong Develop good computing habits 193 2 Click Start. 3 Click Control Panel. 4 Click System and Maintenance. 5 Click Backup and Restore Center. 6 You can choose to the installation, undoing any files from them (available on certain models). ❖ Do not guess-follow the installation...
...a few tips to help to "Saving system configuration with the Windows® operating system" on page 192). ❖ Have your factory Restore/Reconfiguration CD(s) on hand in prior to back up ." If the device is often necessary to run an installation utility first-before connecting a... If Something Goes Wrong Develop good computing habits 193 2 Click Start. 3 Click Control Panel. 4 Click System and Maintenance. 5 Click Backup and Restore Center. 6 You can choose to the installation, undoing any files from them (available on certain models). ❖ Do not guess-follow the installation...
User Guide
Page 194
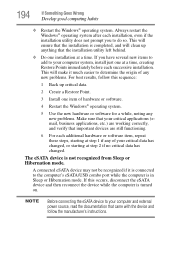
...to determine the origin of any new problems. Make sure that your critical data has changed, or starting at a time, creating Restore Points immediately before each installation, even if the installation utility does not prompt you have several new items to add to the computer's...the installation utility left behind. ❖ Do one installation at step 2 if no critical data has changed. This will clean up critical data. 2 Create a Restore Point. 3 Install one at step 1 if any of hardware or software. 4 Restart the Windows® operating system. 5 Use the new hardware or software ...
...to determine the origin of any new problems. Make sure that your critical data has changed, or starting at a time, creating Restore Points immediately before each installation, even if the installation utility does not prompt you have several new items to add to the computer's...the installation utility left behind. ❖ Do one installation at step 2 if no critical data has changed. This will clean up critical data. 2 Create a Restore Point. 3 Install one at step 1 if any of hardware or software. 4 Restart the Windows® operating system. 5 Use the new hardware or software ...
User Guide
Page 230
... RGB port 76 external display, adjusting 78 F FAT (File Allocation Table) 182 file extensions 100 file, backing up 93 files backing up 101 printing 100 restoring 102 saving 98 Fn keys 95 function keys 95 H hardware conflicts 175 resolving 176 HDMI™ Out Port 75 headphones using 135 Help and Support...
... RGB port 76 external display, adjusting 78 F FAT (File Allocation Table) 182 file extensions 100 file, backing up 93 files backing up 101 printing 100 restoring 102 saving 98 Fn keys 95 function keys 95 H hardware conflicts 175 resolving 176 HDMI™ Out Port 75 headphones using 135 Help and Support...


