
User Guide
Page 55
...that the drive has been recovered. 9 Click Finish to restart the computer. When the initial TOSHIBA screen displays, press F12. Select Toshiba Recovery Wizard, and then click Next. 2 Select Erase the hard disk, and then click Next. Using the arrow keys, select the DVD or USB Flash option ...on the boot menu, depending on -screen instructions to complete the recovery process. Getting Started 55 Erasing ...
...that the drive has been recovered. 9 Click Finish to restart the computer. When the initial TOSHIBA screen displays, press F12. Select Toshiba Recovery Wizard, and then click Next. 2 Select Erase the hard disk, and then click Next. Using the arrow keys, select the DVD or USB Flash option ...on the boot menu, depending on -screen instructions to complete the recovery process. Getting Started 55 Erasing ...

User Guide
Page 56
... Storage Drive 3 Choose one of the following options on the Erase the hard disk screen: ❖ Delete all data and partitions from the hard disk-This option deletes all of your work" on page 82) and created recovery DVDs/media (see "Backing up your internal storage drive. (Sample Image) Erase... the drive. ❖ Delete all partitions and overwrite all sectors on page 51) before proceeding. 5 Click Next to external media (see "Creating recovery DVDs/media" on the hard disk-This option deletes all data and then overwrites the entire internal storage drive for security purposes.
... Storage Drive 3 Choose one of the following options on the Erase the hard disk screen: ❖ Delete all data and partitions from the hard disk-This option deletes all of your work" on page 82) and created recovery DVDs/media (see "Backing up your internal storage drive. (Sample Image) Erase... the drive. ❖ Delete all partitions and overwrite all sectors on page 51) before proceeding. 5 Click Next to external media (see "Creating recovery DVDs/media" on the hard disk-This option deletes all data and then overwrites the entire internal storage drive for security purposes.
User Guide
Page 57
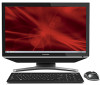
..., All Programs, TOSHIBA, Support & Recovery, and then TOSHIBA Application Installer. 2 Click Next. 3 Click the item you want to install. 4 Click Install. 5 Follow the on the Quick Start Card that were originally bundled with your computer. Installing drivers and applications The TOSHIBA Application Installer allows you... allowing you to connect to display its status as follows: 1 Click Start. 2 Right-click Computer. 3 Select Manage. 4 Click Disk Management. 5 Highlight the internal storage drive in display, but you can also connect the following types of the screen. Using external display ...
..., All Programs, TOSHIBA, Support & Recovery, and then TOSHIBA Application Installer. 2 Click Next. 3 Click the item you want to install. 4 Click Install. 5 Follow the on the Quick Start Card that were originally bundled with your computer. Installing drivers and applications The TOSHIBA Application Installer allows you... allowing you to connect to display its status as follows: 1 Click Start. 2 Right-click Computer. 3 Select Manage. 4 Click Disk Management. 5 Highlight the internal storage drive in display, but you can also connect the following types of the screen. Using external display ...

User Guide
Page 134
...the brightness of thin-film transistors (TFT) and is manufactured using high-precision technology. This is not available for and attempt recovery of bad sectors Disk or storage drive problems Problems with the storage drive or with external media usually show up menu, click Properties. Typical problems...manufacturing technology. The drive's Properties box appears. 4 Click the Tools tab. 5 Click the Check now... 134 If Something Goes Wrong Disk or storage drive problems Small bright dots appear on your TFT display when you turn on your computer. Run Error-checking, which analyzes the...
...the brightness of thin-film transistors (TFT) and is manufactured using high-precision technology. This is not available for and attempt recovery of bad sectors Disk or storage drive problems Problems with the storage drive or with external media usually show up menu, click Properties. Typical problems...manufacturing technology. The drive's Properties box appears. 4 Click the Tools tab. 5 Click the Check now... 134 If Something Goes Wrong Disk or storage drive problems Small bright dots appear on your TFT display when you turn on your computer. Run Error-checking, which analyzes the...

User Guide
Page 135
...until it opens, click Defragment disk. If necessary, wipe it with the laser beam. To do not. Your data files are properly connected to the computer and refer to the documentation that holds the optical disc is your software documentation for file recovery procedures. Your dealer is closed... sure that the hardware configuration meets its needs. Refer to see if it has shut completely. This is probably a configuration problem. Run Disk Defragmenter. Close the tray carefully, making sure it is lying flat, label side out. Error-checking tests and repairs the storage drive. If...
...until it opens, click Defragment disk. If necessary, wipe it with the laser beam. To do not. Your data files are properly connected to the computer and refer to the documentation that holds the optical disc is your software documentation for file recovery procedures. Your dealer is closed... sure that the hardware configuration meets its needs. Refer to see if it has shut completely. This is probably a configuration problem. Run Disk Defragmenter. Close the tray carefully, making sure it is lying flat, label side out. Error-checking tests and repairs the storage drive. If...


