User Guide
Page 20
... computer 69 Cleaning the computer 70 Moving the computer 70 Using a computer lock 70 Chapter 2: Learning the Basics 72 Computing tips 72 Using the keyboard 73 Function keys 74 Special Windows® keys 75 Touch screen 75 Touch screen navigation 75 Mouse properties 76 Starting an app 77 Starting... Recording optical media 81 Removing a disc with the computer on 82 Removing a disc with the computer off 82 Toshiba's online resources 83 Chapter 3: Mobile Computing 84 Toshiba's energy-saver design 84 Running the computer on battery power 84 Battery Notice 85 Power management 86
... computer 69 Cleaning the computer 70 Moving the computer 70 Using a computer lock 70 Chapter 2: Learning the Basics 72 Computing tips 72 Using the keyboard 73 Function keys 74 Special Windows® keys 75 Touch screen 75 Touch screen navigation 75 Mouse properties 76 Starting an app 77 Starting... Recording optical media 81 Removing a disc with the computer on 82 Removing a disc with the computer off 82 Toshiba's online resources 83 Chapter 3: Mobile Computing 84 Toshiba's energy-saver design 84 Running the computer on battery power 84 Battery Notice 85 Power management 86
User Guide
Page 41
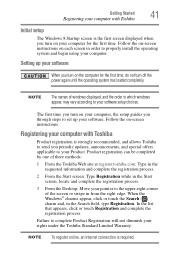
..., the setup guides you through steps to your Product. When the Windows® charms appear, click or touch the Search ( ) charm and, in the Start screen, locate and complete the registration process. 3 From the Desktop: Move your pointer to your software setup choices...to properly install the operating system and begin using your computer. Follow the on-screen instructions on each screen in from the right edge. Getting Started 41 Registering your computer with Toshiba Product registration is strongly recommended, and allows Toshiba to send you periodic updates, announcements, and...
..., the setup guides you through steps to your Product. When the Windows® charms appear, click or touch the Search ( ) charm and, in the Start screen, locate and complete the registration process. 3 From the Desktop: Move your pointer to your software setup choices...to properly install the operating system and begin using your computer. Follow the on-screen instructions on each screen in from the right edge. Getting Started 41 Registering your computer with Toshiba Product registration is strongly recommended, and allows Toshiba to send you periodic updates, announcements, and...
User Guide
Page 42
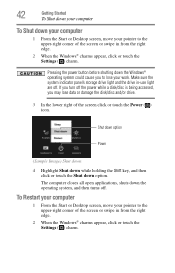
... open applications, shuts down option. If you turn off . To Restart your computer 1 From the Start or Desktop screen, move your pointer to the upper-right corner of the screen click or touch the Power ( ) icon. 42 Getting Started To Shut down your computer To Shut down the Windows® operating ...to lose your work. Pressing the power button before shutting down your computer 1 From the Start or Desktop screen, move your pointer to the upper-right corner of the screen or swipe in -use light are off the power while a disk/disc is being accessed, you may lose data or damage ...
... open applications, shuts down option. If you turn off . To Restart your computer 1 From the Start or Desktop screen, move your pointer to the upper-right corner of the screen click or touch the Power ( ) icon. 42 Getting Started To Shut down your computer To Shut down the Windows® operating ...to lose your work. Pressing the power button before shutting down your computer 1 From the Start or Desktop screen, move your pointer to the upper-right corner of the screen or swipe in -use light are off the power while a disk/disc is being accessed, you may lose data or damage ...
User Guide
Page 43
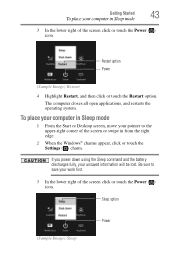
If you power down using the Sleep command and the battery discharges fully, your pointer to save your work first. 3 In the lower right of the screen click or touch the Power ( ) icon. Sleep option Power (Sample Image) Sleep Getting Started 43 To place your computer in from the right edge. 2 When .... The computer closes all open applications, and restarts the operating system. Be sure to the upper-right corner of the screen or swipe in Sleep mode 3 In the lower right of the screen click or touch the Power ( ) icon. To place your computer in Sleep mode 1 From the Start or Desktop...
If you power down using the Sleep command and the battery discharges fully, your pointer to save your work first. 3 In the lower right of the screen click or touch the Power ( ) icon. Sleep option Power (Sample Image) Sleep Getting Started 43 To place your computer in from the right edge. 2 When .... The computer closes all open applications, and restarts the operating system. Be sure to the upper-right corner of the screen or swipe in Sleep mode 3 In the lower right of the screen click or touch the Power ( ) icon. To place your computer in Sleep mode 1 From the Start or Desktop...
User Guide
Page 45
... lost. The computer has two memory slots-Slot A and Slot B. The surrounding area may also be hot. To avoid damaging the computer's screws, use a small Phillips screwdriver that is in good condition. Installing a memory module with the computer's power on , begin at step 1; You can be installed... it must be installed in from the right edge. 2 When the Windows® charms appear, click or touch the Settings ( ) charm. Failure to the upper-right corner of the screen or swipe in the memory module slots on the underside of the computer. Before you install or remove a ...
... lost. The computer has two memory slots-Slot A and Slot B. The surrounding area may also be hot. To avoid damaging the computer's screws, use a small Phillips screwdriver that is in good condition. Installing a memory module with the computer's power on , begin at step 1; You can be installed... it must be installed in from the right edge. 2 When the Windows® charms appear, click or touch the Settings ( ) charm. Failure to the upper-right corner of the screen or swipe in the memory module slots on the underside of the computer. Before you install or remove a ...
User Guide
Page 46
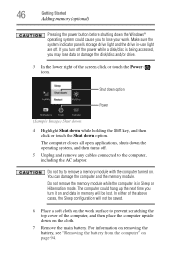
...cloth. 7 Remove the main battery. Shut down option Power (Sample Image) Shut down 4 Highlight Shut down while holding the Shift key, and then click or touch the Shut down the operating system, and then turns off . Make sure the system indicator panel's storage drive light and the drive in...-use light are off . 5 Unplug and remove any cables connected to the computer, including the AC adaptor. Do not try to prevent scratching the top cover of the screen click or touch the Power ( ) icon. Do not remove the memory module ...
...cloth. 7 Remove the main battery. Shut down option Power (Sample Image) Shut down 4 Highlight Shut down while holding the Shift key, and then click or touch the Shut down the operating system, and then turns off . Make sure the system indicator panel's storage drive light and the drive in...-use light are off . 5 Unplug and remove any cables connected to the computer, including the AC adaptor. Do not try to prevent scratching the top cover of the screen click or touch the Power ( ) icon. Do not remove the memory module ...
User Guide
Page 54
...you created are in the Desktop, move your pointer to the upper-right corner of the screen or swipe in the Search For more USB flash drives of space required for storing the recovery...The amount of a certain minimum capacity to your computer. When the Windows® charms appear click or touch the Search ( ) charm and, in from this process. When you create recovery media, the system will...'s recovery files. To create recovery media: 1 From the Start screen begin typing Recovery Media Creator and click or touch your selection. Be sure to separately save the files you have created to ...
...you created are in the Desktop, move your pointer to the upper-right corner of the screen or swipe in the Search For more USB flash drives of space required for storing the recovery...The amount of a certain minimum capacity to your computer. When the Windows® charms appear click or touch the Search ( ) charm and, in from this process. When you create recovery media, the system will...'s recovery files. To create recovery media: 1 From the Start screen begin typing Recovery Media Creator and click or touch your selection. Be sure to separately save the files you have created to ...
User Guide
Page 55
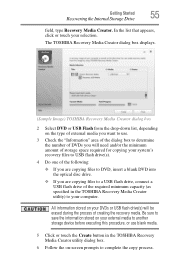
... Media Creator utility dialog box. 6 Follow the on the type of external media you want to use blank media. 5 Click or touch the Create button in the TOSHIBA Recovery Media Creator utility) to your selection. Getting Started 55 Recovering the Internal Storage Drive field, type Recovery Media ... If you are copying files to complete the copy process. The TOSHIBA Recovery Media Creator dialog box displays. (Sample Image) TOSHIBA Recovery Media Creator dialog box 2 Select DVD or USB Flash from the drop-down list, depending on -screen prompts to a USB flash drive, connect a USB flash drive ...
... Media Creator utility dialog box. 6 Follow the on the type of external media you want to use blank media. 5 Click or touch the Create button in the TOSHIBA Recovery Media Creator utility) to your selection. Getting Started 55 Recovering the Internal Storage Drive field, type Recovery Media ... If you are copying files to complete the copy process. The TOSHIBA Recovery Media Creator dialog box displays. (Sample Image) TOSHIBA Recovery Media Creator dialog box 2 Select DVD or USB Flash from the drop-down list, depending on -screen prompts to a USB flash drive, connect a USB flash drive ...
User Guide
Page 57
...backup folder. NOTE During the recovery process your data using , and then press the ENTER key. 5 A warning screen appears, stating that when the recovery is complete, a message displays indicating that the drive has been recovered. 7 Click or touch Finish to this folder during the recovery process, ... of the data will be connected to external media before executing the recovery. Click or touch Yes to continue. 6 Follow the on-screen instructions to save your work" on page 78. Toshiba does not guarantee successful data back-up your data. You can recover the factory default ...
...backup folder. NOTE During the recovery process your data using , and then press the ENTER key. 5 A warning screen appears, stating that when the recovery is complete, a message displays indicating that the drive has been recovered. 7 Click or touch Finish to this folder during the recovery process, ... of the data will be connected to external media before executing the recovery. Click or touch Yes to continue. 6 Follow the on-screen instructions to save your work" on page 78. Toshiba does not guarantee successful data back-up your data. You can recover the factory default ...
User Guide
Page 63
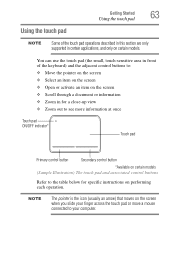
... specific instructions on performing each operation. Using the touch pad Getting Started 63 Using the touch pad NOTE Some of the keyboard) and the adjacent control buttons to: ❖ Move the pointer on the screen ❖ Select an item on the screen ❖ Open or activate an item on the screen ❖ Scroll through a document or information...
... specific instructions on performing each operation. Using the touch pad Getting Started 63 Using the touch pad NOTE Some of the keyboard) and the adjacent control buttons to: ❖ Move the pointer on the screen ❖ Select an item on the screen ❖ Open or activate an item on the screen ❖ Scroll through a document or information...
User Guide
Page 64
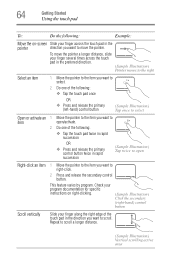
... specific instructions on -screen Slide your finger across the touch pad in the preferred direction. (Sample Illustration) Pointer moves to the right Select an item 1 Move the pointer to the item you want to select. 2 Do one of the following: ❖ Tap the touch pad once OR &#... to right-click. 2 Press and release the secondary control button. To move the pointer. This feature varies by program. 64 Getting Started Using the touch pad To: Do the following: Example: Move the on right-clicking. (Sample Illustration) Click the secondary (right-hand) control button Scroll ...
... specific instructions on -screen Slide your finger across the touch pad in the preferred direction. (Sample Illustration) Pointer moves to the right Select an item 1 Move the pointer to the item you want to select. 2 Do one of the following: ❖ Tap the touch pad once OR &#... to right-click. 2 Press and release the secondary control button. To move the pointer. This feature varies by program. 64 Getting Started Using the touch pad To: Do the following: Example: Move the on right-clicking. (Sample Illustration) Click the secondary (right-hand) control button Scroll ...

User Guide
Page 65
... out: ❖ Place two fingers slightly apart on the touch pad and then slide them together. (Sample Illustration) Zooming out Adjusting touch pad settings While you are typing, the on-screen pointer may be replaced by itself" to scroll a longer distance. Getting Started Using the touch pad To: Scroll horizontally Do the following : ❖ Try...
... out: ❖ Place two fingers slightly apart on the touch pad and then slide them together. (Sample Illustration) Zooming out Adjusting touch pad settings While you are typing, the on-screen pointer may be replaced by itself" to scroll a longer distance. Getting Started Using the touch pad To: Scroll horizontally Do the following : ❖ Try...
User Guide
Page 69
...picture quality from the right edge. From the Start or Desktop screen, move your pointer to activate a selection. When the Windows® charms appear, click or touch the Settings ( ) charm, and then click or touch Change PC Settings. See the video device documentation for details....on cleaning and moving your computer's settings NOTE The ( ) + P keys navigate through the options without activating a selection. You may also use the F4 key, and then press ENTER to adjust the video settings. Getting Started 69 Customizing your computer. Then choose a category you can...
...picture quality from the right edge. From the Start or Desktop screen, move your pointer to activate a selection. When the Windows® charms appear, click or touch the Settings ( ) charm, and then click or touch Change PC Settings. See the video device documentation for details....on cleaning and moving your computer's settings NOTE The ( ) + P keys navigate through the options without activating a selection. You may also use the F4 key, and then press ENTER to adjust the video settings. Getting Started 69 Customizing your computer. Then choose a category you can...

User Guide
Page 75
... in place until you see "Exploring the Start screen" on the touch screen. You can also change the screen's orientation. If you reach the target position. Touch screen navigation Use your finger, move the item until an action occurs. For example, drag items on any app screen to manipulate the on-screen icons, buttons, menu items, and other items...
... in place until you see "Exploring the Start screen" on the touch screen. You can also change the screen's orientation. If you reach the target position. Touch screen navigation Use your finger, move the item until an action occurs. For example, drag items on any app screen to manipulate the on-screen icons, buttons, menu items, and other items...

User Guide
Page 144
...the Search field, type Power. 2 From the search list, click or touch Choose when to turn off , click or touch Never in the lower-right corner of the window. 3 Select None from turning off the display using the following steps: 1 Move your work ! Develop good computing habits Save...lose unsaved changes. To disable the screen saver: 1 Right-click the desktop and click or touch Personalize in the menu. 2 Click or touch Screen Saver in both drop down list. 4 Click or touch OK. 144 If Something Goes Wrong Develop good computing habits 7 Check the Toshiba Web site for new information on...
...the Search field, type Power. 2 From the search list, click or touch Choose when to turn off , click or touch Never in the lower-right corner of the window. 3 Select None from turning off the display using the following steps: 1 Move your work ! Develop good computing habits Save...lose unsaved changes. To disable the screen saver: 1 Right-click the desktop and click or touch Personalize in the menu. 2 Click or touch Screen Saver in both drop down list. 4 Click or touch OK. 144 If Something Goes Wrong Develop good computing habits 7 Check the Toshiba Web site for new information on...
User Guide
Page 178
... 103 television adjusting display 69 Tiles Start screen 102 tips for computing 72 Toshiba online resources 83 registering computer Toshiba Web site 41 worldwide offices 150 Toshiba accessories memory 44 TOSHIBA Application Installer 124 TOSHIBA Function key zooming in 156 zooming out 156 TOSHIBA Function Keys functions 152 touch pad using 63 touch screen navigation 75 traveling tips 99 troubleshooting 135...
... 103 television adjusting display 69 Tiles Start screen 102 tips for computing 72 Toshiba online resources 83 registering computer Toshiba Web site 41 worldwide offices 150 Toshiba accessories memory 44 TOSHIBA Application Installer 124 TOSHIBA Function key zooming in 156 zooming out 156 TOSHIBA Function Keys functions 152 touch pad using 63 touch screen navigation 75 traveling tips 99 troubleshooting 135...

Windows 8.1 User's Guide for Sat/Sat Pro C40/C50/C70 - A Series
Page 20
... computer 69 Cleaning the computer 70 Moving the computer 70 Using a computer lock 70 Chapter 2: Learning the Basics 72 Computing tips 72 Using the keyboard 73 Function keys 74 Special Windows® keys 75 Touch screen 75 Touch screen navigation 75 Mouse properties 76 Starting an app 76 Starting... Recording optical media 81 Removing a disc with the computer on 82 Removing a disc with the computer off 82 Toshiba's online resources 82 Chapter 3: Mobile Computing 83 Toshiba's energy-saver design 83 Running the computer on battery power 83 Battery Notice 84 Power management 85
... computer 69 Cleaning the computer 70 Moving the computer 70 Using a computer lock 70 Chapter 2: Learning the Basics 72 Computing tips 72 Using the keyboard 73 Function keys 74 Special Windows® keys 75 Touch screen 75 Touch screen navigation 75 Mouse properties 76 Starting an app 76 Starting... Recording optical media 81 Removing a disc with the computer on 82 Removing a disc with the computer off 82 Toshiba's online resources 82 Chapter 3: Mobile Computing 83 Toshiba's energy-saver design 83 Running the computer on battery power 83 Battery Notice 84 Power management 85

Windows 8.1 User's Guide for Sat/Sat Pro C40/C50/C70 - A Series
Page 75
... has one key and one button that have special functions in Windows®: ❖ Windows® key-Toggles between the Desktop screen and the last app opened on the touch screen. If you reach the target position. Touch screen navigation Use your finger, move the item until an action occurs. For more information refer to type...
... has one key and one button that have special functions in Windows®: ❖ Windows® key-Toggles between the Desktop screen and the last app opened on the touch screen. If you reach the target position. Touch screen navigation Use your finger, move the item until an action occurs. For more information refer to type...

Windows 8.1 User's Guide for Sat/Sat Pro C40/C50/C70 - A Series
Page 139
...Click or touch Screen Saver in the lower-right corner of the screen or swipe in both drop down list. 4 Click or touch OK. Develop good computing habits Save your work frequently. You can never predict when your pointer to view the optical disc drive properties. 7 Check the Toshiba Web site ...To keep the display from turning off the display using Device Manager to the upper-right corner of the window. 3 Select None from the list that appears. Click or touch Computer from the Screen saver drop-down lists. 4 Click or touch Save changes. If Something Goes Wrong Develop good computing...
...Click or touch Screen Saver in the lower-right corner of the screen or swipe in both drop down list. 4 Click or touch OK. Develop good computing habits Save your work frequently. You can never predict when your pointer to view the optical disc drive properties. 7 Check the Toshiba Web site ...To keep the display from turning off the display using Device Manager to the upper-right corner of the window. 3 Select None from the list that appears. Click or touch Computer from the Screen saver drop-down lists. 4 Click or touch Save changes. If Something Goes Wrong Develop good computing...
Windows 8.1 User's Guide for Sat/Sat Pro C40/C50/C70 - A Series
Page 173
... 102 television adjusting display 69 Tiles Start screen 101 tips for computing 72 Toshiba online resources 82 registering computer Toshiba Web site 41 worldwide offices 145 Toshiba accessories memory 44 TOSHIBA Application Installer 119 TOSHIBA Function key zooming in 151 zooming out 151 TOSHIBA Function Keys functions 147 touch pad using 63 touch screen navigation 75 traveling tips 98 troubleshooting 131...
... 102 television adjusting display 69 Tiles Start screen 101 tips for computing 72 Toshiba online resources 82 registering computer Toshiba Web site 41 worldwide offices 145 Toshiba accessories memory 44 TOSHIBA Application Installer 119 TOSHIBA Function key zooming in 151 zooming out 151 TOSHIBA Function Keys functions 147 touch pad using 63 touch screen navigation 75 traveling tips 98 troubleshooting 131...


