User Guide
Page 13
... time 32 Make it Google 33 Setting up Wi-Fi® and Bluetooth® connections 37 Registering your Toshiba device 38 Backing up your data 38 Backing up data using TOSHIBA File Manager ..38 Backing up data using your Google™ Account 38 Restoring your data using your Google&#...8482; Account 39 Navigation and features 39 Home screen 41 Touch screen navigation 41 Navigating the Home screen 43 System bar 43 Securing your tablet 46 Customizing your...
... time 32 Make it Google 33 Setting up Wi-Fi® and Bluetooth® connections 37 Registering your Toshiba device 38 Backing up your data 38 Backing up data using TOSHIBA File Manager ..38 Backing up data using your Google™ Account 38 Restoring your data using your Google&#...8482; Account 39 Navigation and features 39 Home screen 41 Touch screen navigation 41 Navigating the Home screen 43 System bar 43 Securing your tablet 46 Customizing your...
User Guide
Page 14
... settings 71 Accounts & sync settings 72 Backup & reset settings 72 Storage settings 73 Language & input settings 74 Accessibility settings 75 Date & time settings 75 About tablet 76 Chapter 3: Working with Apps 78 Downloading Toshiba Apps 78 TOSHIBA Media Player 78 Apps 79 Downloading from Google Play Store 79 Preinstalled Apps on your...
... settings 71 Accounts & sync settings 72 Backup & reset settings 72 Storage settings 73 Language & input settings 74 Accessibility settings 75 Date & time settings 75 About tablet 76 Chapter 3: Working with Apps 78 Downloading Toshiba Apps 78 TOSHIBA Media Player 78 Apps 79 Downloading from Google Play Store 79 Preinstalled Apps on your...

User Guide
Page 15
... Connecting an HDMI®-compatible television or display device 88 Using a docking station 88 Connecting your tablet to a docking station ......89 Chapter 5: Utilities 90 TOSHIBA Service Station 90 Check for application updates 92 Downloading updates 92 Installing updates 93 Downloading and installing ...System updates.....93 TOSHIBA File Manager Utility 93 File browsing screen 95 Operation of files/folders 95 TOSHIBA Adaptive display 97 Chapter 6: If Something Goes Wrong 98 Problems when you turn...
... Connecting an HDMI®-compatible television or display device 88 Using a docking station 88 Connecting your tablet to a docking station ......89 Chapter 5: Utilities 90 TOSHIBA Service Station 90 Check for application updates 92 Downloading updates 92 Installing updates 93 Downloading and installing ...System updates.....93 TOSHIBA File Manager Utility 93 File browsing screen 95 Operation of files/folders 95 TOSHIBA Adaptive display 97 Chapter 6: If Something Goes Wrong 98 Problems when you turn...
User Guide
Page 17
...information are all the features and specifications listed or illustrated. For more . With your Toshiba tablet device, you can watch movies, listen to your particular model, please visit Toshiba's Web site at the time of publication to ensure the accuracy of powerful, portable, ...more detailed information about your device, or to stay current with the various device software or hardware options, visit Toshiba's Web site at tabletsupport.toshiba.com. 17 Introduction Welcome to the world of the information provided herein, product specifications, configurations, prices, system...
...information are all the features and specifications listed or illustrated. For more . With your Toshiba tablet device, you can watch movies, listen to your particular model, please visit Toshiba's Web site at the time of publication to ensure the accuracy of powerful, portable, ...more detailed information about your device, or to stay current with the various device software or hardware options, visit Toshiba's Web site at tabletsupport.toshiba.com. 17 Introduction Welcome to the world of the information provided herein, product specifications, configurations, prices, system...

User Guide
Page 18
... your device as well as some basic procedures needed to perform tasks on your device. This product brings new features and performance enhancements to your tablet, which are powered by the Android™ 4.0, Ice Cream Sandwich. Safety icons All of the Safety instructions contained in this manual must be read carefully...
... your device as well as some basic procedures needed to perform tasks on your device. This product brings new features and performance enhancements to your tablet, which are powered by the Android™ 4.0, Ice Cream Sandwich. Safety icons All of the Safety instructions contained in this manual must be read carefully...
User Guide
Page 29
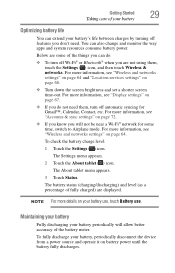
... disconnect the device from a power source and operate it on your battery use, touch Battery use. The Settings menu appears. 2 Touch the About tablet ( ) icon. For more information, see "Wireless and networks settings" on page 68. ❖ Turn down the screen brightness and set a .... Maintaining your battery Fully discharging your battery periodically will not be near a Wi-Fi® network for Gmail™, Calendar, Contact, etc. The About tablet menu appears. 3 Touch Status. For more information, see "Accounts & sync settings" on page 67. ❖ If you do : ❖ To ...
... disconnect the device from a power source and operate it on your battery use, touch Battery use. The Settings menu appears. 2 Touch the About tablet ( ) icon. For more information, see "Wireless and networks settings" on page 68. ❖ Turn down the screen brightness and set a .... Maintaining your battery Fully discharging your battery periodically will not be near a Wi-Fi® network for Gmail™, Calendar, Contact, etc. The About tablet menu appears. 3 Touch Status. For more information, see "Accounts & sync settings" on page 67. ❖ If you do : ❖ To ...
User Guide
Page 31
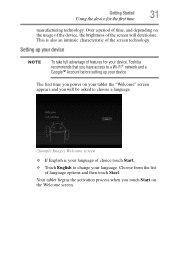
Getting Started 31 Using the device for your device, Toshiba recommends that you have access to a Wi-Fi® network and a Google™ Account before setting up your language of the screen will be asked ... options and then touch Start. The first time you will deteriorate. Choose from the list of the screen technology. Your tablet begins the activation process when you touch Start on your tablet the "Welcome" screen appears and you power on the Welcome screen. This is your device. Setting up your device NOTE...
Getting Started 31 Using the device for your device, Toshiba recommends that you have access to a Wi-Fi® network and a Google™ Account before setting up your language of the screen will be asked ... options and then touch Start. The first time you will deteriorate. Choose from the list of the screen technology. Your tablet begins the activation process when you touch Start on your tablet the "Welcome" screen appears and you power on the Welcome screen. This is your device. Setting up your device NOTE...
User Guide
Page 35
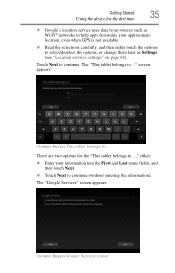
screen appears. (Sample Image) This tablet belongs to continue. There are two options for the first time ❖ Google's location service uses data from sources such as Wi-Fi® networks ... (without entering the information). Touch Next to ... The "Google Services" screen appears. (Sample Image) Google Services screen The "This tablet belongs to..." Getting Started 35 Using the device for the "This tablet belongs to...," either: ❖ Enter your approximate location, even when GPS is not available. ❖ Read the selections carefully, and...
screen appears. (Sample Image) This tablet belongs to continue. There are two options for the first time ❖ Google's location service uses data from sources such as Wi-Fi® networks ... (without entering the information). Touch Next to ... The "Google Services" screen appears. (Sample Image) Google Services screen The "This tablet belongs to..." Getting Started 35 Using the device for the "This tablet belongs to...," either: ❖ Enter your approximate location, even when GPS is not available. ❖ Read the selections carefully, and...
User Guide
Page 36
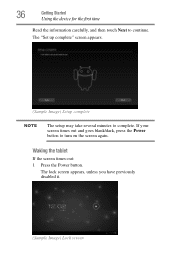
36 Getting Started Using the device for the first time Read the information carefully, and then touch Next to turn on the screen again. If your screen times out and goes blank/dark, press the Power button to continue. The lock screen appears, unless you have previously disabled it. (Sample Image) Lock screen The "Set up complete" screen appears. (Sample Image) Setup complete NOTE The setup may take several minutes to complete. Waking the tablet If the screen times-out: 1 Press the Power button.
36 Getting Started Using the device for the first time Read the information carefully, and then touch Next to turn on the screen again. If your screen times out and goes blank/dark, press the Power button to continue. The lock screen appears, unless you have previously disabled it. (Sample Image) Lock screen The "Set up complete" screen appears. (Sample Image) Setup complete NOTE The setup may take several minutes to complete. Waking the tablet If the screen times-out: 1 Press the Power button.
User Guide
Page 39
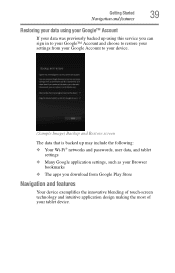
...) Backup and Restore screen The data that is backed up may include the following: ❖ Your Wi-Fi® networks and passwords, user data, and tablet settings ❖ Many Google application settings, such as your Browser bookmarks ❖ The apps you download from Google Play Store Navigation and features Your device...
...) Backup and Restore screen The data that is backed up may include the following: ❖ Your Wi-Fi® networks and passwords, user data, and tablet settings ❖ Many Google application settings, such as your Browser bookmarks ❖ The apps you download from Google Play Store Navigation and features Your device...
User Guide
Page 42
... once and pinching them together (to avoid injury. 42 Getting Started Navigation and features The screen is made of glass so avoid contact with the tablet as you turn this feature on and off, using the onscreen keyboard. For example, slide the Home screen left or right to zoom out. ...allows you see "Customizing your finger across the surface of your finger, move your Home screens" on the side of the screen without lifting your tablet. Pinch-In some apps (such as app and setting icons or onscreen buttons. Swipe or slide-To swipe or slide, quickly move the item ...
... once and pinching them together (to avoid injury. 42 Getting Started Navigation and features The screen is made of glass so avoid contact with the tablet as you turn this feature on and off, using the onscreen keyboard. For example, slide the Home screen left or right to zoom out. ...allows you see "Customizing your finger across the surface of your finger, move your Home screens" on the side of the screen without lifting your tablet. Pinch-In some apps (such as app and setting icons or onscreen buttons. Swipe or slide-To swipe or slide, quickly move the item ...
User Guide
Page 43
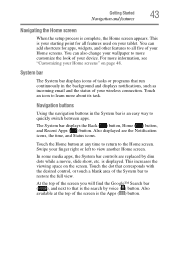
... will find the Google™ Search bar ( ), and next to all features used on your finger right or left to the Home screen. Swipe your tablet. is your wireless connection. This is displayed. Touch the Home button at the top of your starting point for apps, widgets, and other features to...
... will find the Google™ Search bar ( ), and next to all features used on your finger right or left to the Home screen. Swipe your tablet. is your wireless connection. This is displayed. Touch the Home button at the top of your starting point for apps, widgets, and other features to...
User Guide
Page 44
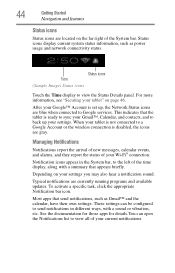
... set up your settings. After your Google™ Account is not connected to Google services. Depending on your tablet" on the far right of your Wi-Fi® connection. Status icons display current system status information, such as Gmail™ and ... notifications are currently running programs and available updates. Notification icons appear in different ways, with a summary that appears briefly. Most apps that the tablet is disabled, the icons are gray. See the documentation for those apps for details.You can be configured to back up , the Network Status...
... set up your settings. After your Google™ Account is not connected to Google services. Depending on your tablet" on the far right of your Wi-Fi® connection. Status icons display current system status information, such as Gmail™ and ... notifications are currently running programs and available updates. Notification icons appear in different ways, with a summary that appears briefly. Most apps that the tablet is disabled, the icons are gray. See the documentation for those apps for details.You can be configured to back up , the Network Status...
User Guide
Page 46
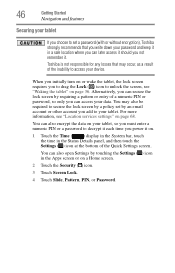
...required to secure the lock screen by a policy set a password (with or without encryption), Toshiba strongly recommends that may occur, as a result of the Quick Settings screen. When you initially turn on or wake the tablet, the lock screen requires you to drag the Lock ( ) icon to unlock the screen...must enter a numeric PIN or a password to your tablet. 46 Getting Started Navigation and features Securing your tablet If you choose to set by an email account or other account you add to decrypt it each time you power it . Toshiba is not responsible for any losses that you write ...
...required to secure the lock screen by a policy set a password (with or without encryption), Toshiba strongly recommends that may occur, as a result of the Quick Settings screen. When you initially turn on or wake the tablet, the lock screen requires you to drag the Lock ( ) icon to unlock the screen...must enter a numeric PIN or a password to your tablet. 46 Getting Started Navigation and features Securing your tablet If you choose to set by an email account or other account you add to decrypt it each time you power it . Toshiba is not responsible for any losses that you write ...
User Guide
Page 47
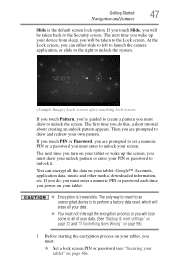
...If you touch Pattern, you're guided to create a pattern you must : ❖ Set a lock screen PIN or password (see "Securing your tablet" on your tablet: Google™ Accounts, application data, music and other media, downloaded information, etc. Then you do , you must draw your unlock pattern or ...data. (See "Backup & reset settings" on page 72 and "If Something Goes Wrong" on page 98). 1 Before starting the encryption process on your tablet, you turn on your screen. If you do this, a short tutorial about creating an unlock pattern appears. If you touch Slide, you must enter ...
...If you touch Pattern, you're guided to create a pattern you must : ❖ Set a lock screen PIN or password (see "Securing your tablet" on your tablet: Google™ Accounts, application data, music and other media, downloaded information, etc. Then you do , you must draw your unlock pattern or ...data. (See "Backup & reset settings" on page 72 and "If Something Goes Wrong" on page 98). 1 Before starting the encryption process on your tablet, you turn on your screen. If you do this, a short tutorial about creating an unlock pattern appears. If you touch Slide, you must enter ...
User Guide
Page 48
...process begins and displays the progress. For more for the encryption process. 2 Touch the Settings ( ) icon, Security ( ) icon, and then Encrypt tablet. Encryption can add Apps icons, Widgets, Bookmark shortcuts, and other items to the new location. Subsequently, you power on page 39. 48 Getting Started... Customizing your Home screens ❖ Charge your tablet's battery. ❖ Plug your PIN or password. For more , during which time your finger left or right to find the item you ...
...process begins and displays the progress. For more for the encryption process. 2 Touch the Settings ( ) icon, Security ( ) icon, and then Encrypt tablet. Encryption can add Apps icons, Widgets, Bookmark shortcuts, and other items to the new location. Subsequently, you power on page 39. 48 Getting Started... Customizing your Home screens ❖ Charge your tablet's battery. ❖ Plug your PIN or password. For more , during which time your finger left or right to find the item you ...
User Guide
Page 51
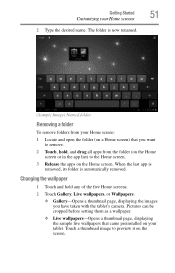
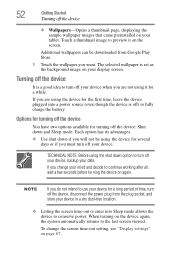
Getting Started 51 Customizing your tablet. Changing the wallpaper 1 Touch and hold any of the five Home screens. 2 Touch Gallery, Live wallpapers, or Wallpapers. ❖ Gallery-Opens a thumbnail page, displaying the ... can be cropped before setting them as a wallpaper. ❖ Live wallpapers-Opens a thumbnail page, displaying the sample live wallpapers that you have taken with the tablet's camera.
Getting Started 51 Customizing your tablet. Changing the wallpaper 1 Touch and hold any of the five Home screens. 2 Touch Gallery, Live wallpapers, or Wallpapers. ❖ Gallery-Opens a thumbnail page, displaying the ... can be cropped before setting them as a wallpaper. ❖ Live wallpapers-Opens a thumbnail page, displaying the sample live wallpapers that you have taken with the tablet's camera.
User Guide
Page 52
... time, leave the device plugged into Sleep mode allows the device to continue working after all, wait a few seconds before turning the device on your tablet. NOTE If you do not intend to the last screen viewed. If you must turn off the device It is set as the background image...
... time, leave the device plugged into Sleep mode allows the device to continue working after all, wait a few seconds before turning the device on your tablet. NOTE If you do not intend to the last screen viewed. If you must turn off the device It is set as the background image...

User Guide
Page 53
... you would like to shut down. (Sample Image) Shut down pop-up screen 2 In the pop-up your data and settings before shutting down the tablet. Always back up window, touch OK to darken, touch the Settings ( ) icon, and then the Display ( ) icon. NOTE Increase battery life between charges ...mode: 1 Press and hold the Power button. To change the amount of non-operation, placing it takes for the display to completely shut down your tablet. See "Display settings" on page 36. Using Sleep mode Your device will automatically time-out after a couple minutes of time it into Sleep mode....
... you would like to shut down. (Sample Image) Shut down pop-up screen 2 In the pop-up your data and settings before shutting down the tablet. Always back up window, touch OK to darken, touch the Settings ( ) icon, and then the Display ( ) icon. NOTE Increase battery life between charges ...mode: 1 Press and hold the Power button. To change the amount of non-operation, placing it takes for the display to completely shut down your tablet. See "Display settings" on page 36. Using Sleep mode Your device will automatically time-out after a couple minutes of time it into Sleep mode....

User Guide
Page 54
...interacts with the applications on page 72. 1 Touch the Settings ( ) icon. Be sure to have all your accounts available on your tablet device. Add an account Add multiple Google Accounts and Microsoft® Exchange ActiveSync accounts to backup your data first. 54 Getting Started Syncing and... your accounts Using the Accounts & Sync settings, you can configure the ways in Sleep mode. ❖ Waking your device from your tablet into Sleep mode by pressing the Power button quickly. from Sleep mode takes less time and consumes less battery power than restarting after shutting...
...interacts with the applications on page 72. 1 Touch the Settings ( ) icon. Be sure to have all your accounts available on your tablet device. Add an account Add multiple Google Accounts and Microsoft® Exchange ActiveSync accounts to backup your data first. 54 Getting Started Syncing and... your accounts Using the Accounts & Sync settings, you can configure the ways in Sleep mode. ❖ Waking your device from your tablet into Sleep mode by pressing the Power button quickly. from Sleep mode takes less time and consumes less battery power than restarting after shutting...


