Use and Care Manual
Page 4
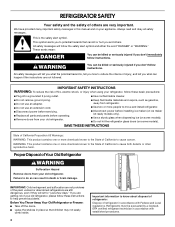
...of injury, and tell you don't immediately follow instructions. WARNING You can be killed or seriously injured if you are getting rid of your old refrigerator, please follow these basic precautions: ■ Plug into a grounded 3 prong outlet. ■ Use nonflammable cleaner. ■ Do not remove ... you what can kill or hurt you to potential hazards that children may not easily climb inside. 4 Important information to move and install refrigerator. ■ Disconnect power before installing ice maker (on ice maker kit ready models only). ■ Use a sturdy glass when dispensing ...
...of injury, and tell you don't immediately follow instructions. WARNING You can be killed or seriously injured if you are getting rid of your old refrigerator, please follow these basic precautions: ■ Plug into a grounded 3 prong outlet. ■ Use nonflammable cleaner. ■ Do not remove ... you what can kill or hurt you to potential hazards that children may not easily climb inside. 4 Important information to move and install refrigerator. ■ Disconnect power before installing ice maker (on ice maker kit ready models only). ■ Use a sturdy glass when dispensing ...

Use and Care Manual
Page 5
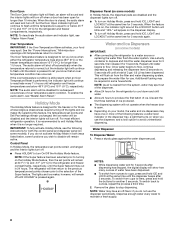
... OFF (right) setting as bumping. Do not use . Water System Preparation Please read before or after heavy usage. ■ If your refrigerator has a water filter, it for use sharp instruments, rubbing alcohol, flammable fluids, or abrasive cleaners to your model has a base grille filter...flow. These products can damage the surface of unknown quality without adequate disinfection before using it. Dispenser Models IMPORTANT: After connecting the refrigerator to a water source or replacing the water filter, follow the steps below to make sure the base grille filter is properly ...
... OFF (right) setting as bumping. Do not use . Water System Preparation Please read before or after heavy usage. ■ If your refrigerator has a water filter, it for use sharp instruments, rubbing alcohol, flammable fluids, or abrasive cleaners to your model has a base grille filter...flow. These products can damage the surface of unknown quality without adequate disinfection before using it. Dispenser Models IMPORTANT: After connecting the refrigerator to a water source or replacing the water filter, follow the steps below to make sure the base grille filter is properly ...
Use and Care Manual
Page 6
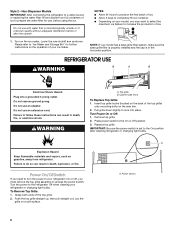
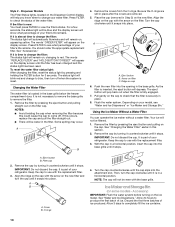
... Depending on your model, you must remove the top grille assembly to follow these instructions can result in death, explosion, or fire. REFRIGERATOR USE WARNING B A B Electrical Shock Hazard Plug into place. Failure to access the power switch. Cabinet side trims To Replace Top ...the top grille) onto mounting bolts on a soft surface. Replace top grille. Style 2 - Non-Dispenser Models IMPORTANT: After connecting the refrigerator to a water source or replacing the water filter, fill and discard two full containers of unknown quality without adequate disinfection before using the...
... Depending on your model, you must remove the top grille assembly to follow these instructions can result in death, explosion, or fire. REFRIGERATOR USE WARNING B A B Electrical Shock Hazard Plug into place. Failure to access the power switch. Cabinet side trims To Replace Top ...the top grille) onto mounting bolts on a soft surface. Replace top grille. Style 2 - Non-Dispenser Models IMPORTANT: After connecting the refrigerator to a water source or replacing the water filter, fill and discard two full containers of unknown quality without adequate disinfection before using the...
Use and Care Manual
Page 7
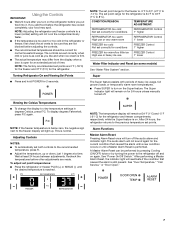
...or until the desired temperature is normal. The controls are 0°F (-18°C) for the freezer and 37°F (3°C) for the refrigerator. To display degrees Fahrenheit, press F/C again. After performing a Master Alarm Reset, the indicator light will not sound again for the current ...NOTES: ■ To automatically set point range for 2 seconds. Super The Super feature assists with periods of time. NOTE: Adjusting the refrigerator and freezer controls to a lower (colder) setting will turn on the Super feature. Viewing the Celsius Temperatures ■ To change the ...
...or until the desired temperature is normal. The controls are 0°F (-18°C) for the freezer and 37°F (3°C) for the refrigerator. To display degrees Fahrenheit, press F/C again. After performing a Master Alarm Reset, the indicator light will not sound again for the current ...NOTES: ■ To automatically set point range for 2 seconds. Super The Super feature assists with periods of time. NOTE: Adjusting the refrigerator and freezer controls to a lower (colder) setting will turn on the Super feature. Viewing the Celsius Temperatures ■ To change the ...
Use and Care Manual
Page 8
...those whose religious observances require turning off -flavor if you know that turns on some models) IMPORTANT: ■ After connecting the refrigerator to stop dispensing. To switch from the filter and water dispensing system, and prepare the water filter for another 3 seconds. ... previous temperature set points and Deli Pan settings remain unchanged; This will not operate when the freezer door is open for the refrigerator and freezer compartments, respectively. Once water begins to flow, continue depressing and releasing the dispenser lever (5 seconds on some models)...
...those whose religious observances require turning off -flavor if you know that turns on some models) IMPORTANT: ■ After connecting the refrigerator to stop dispensing. To switch from the filter and water dispensing system, and prepare the water filter for another 3 seconds. ... previous temperature set points and Deli Pan settings remain unchanged; This will not operate when the freezer door is open for the refrigerator and freezer compartments, respectively. Once water begins to flow, continue depressing and releasing the dispenser lever (5 seconds on some models)...
Use and Care Manual
Page 10
... the new filter. Accessory) IMPORTANT: Flush the water system before turning on cap 6. Press FILTER to use with the arrow on your refrigerator. If it stops. It is almost time to come off when the system is part of your model, see what percentage of your ...it is part of your filter's life remains. If this section. 2. B C A A. IMPORTANT: Do not discard the cap. It is time to change your refrigerator. Eject button B. Keep the cap to check the status of ice produced. A B A. O-rings 4. See "Water and Ice Dispensers." Discard the first three batches...
... the new filter. Accessory) IMPORTANT: Flush the water system before turning on cap 6. Press FILTER to use with the arrow on your refrigerator. If it stops. It is almost time to come off when the system is part of your model, see what percentage of your ...it is part of your filter's life remains. If this section. 2. B C A A. IMPORTANT: Do not discard the cap. It is time to change your refrigerator. Eject button B. Keep the cap to check the status of ice produced. A B A. O-rings 4. See "Water and Ice Dispensers." Discard the first three batches...

Use and Care Manual
Page 12
...plastic wrap, aluminum foil, or plastic containers with both hands. It will make sure that setting. 3. Remove the food from the refrigerator. When storing meat longer than the times given, freeze the meat. Shelves 1. Reach under the glass shelf with your individual storage ...the shelf supports. NOTE: The temperature in the deli pan can be stored in the desired location. Tempered glass is normal. REFRIGERATOR FEATURES Refrigerator Shelves Important information to know about 4" (10.2 cm). Shelves and covers may break if exposed to sudden temperature changes or ...
...plastic wrap, aluminum foil, or plastic containers with both hands. It will make sure that setting. 3. Remove the food from the refrigerator. When storing meat longer than the times given, freeze the meat. Shelves 1. Reach under the glass shelf with your individual storage ...the shelf supports. NOTE: The temperature in the deli pan can be stored in the desired location. Tempered glass is normal. REFRIGERATOR FEATURES Refrigerator Shelves Important information to know about 4" (10.2 cm). Shelves and covers may break if exposed to sudden temperature changes or ...

Use and Care Manual
Page 13
... moisture in position. A B A. Push the drawer back and then pull it forward to 3 lbs of food per cubic foot [907-1,350 g per 28 L] of the refrigerator. To clean the bottom crisper cover, first remove the top crisper drawer. Remove and Replace the Freezer Basket 1. Lift the basket front slightly while pushing...
... moisture in position. A B A. Push the drawer back and then pull it forward to 3 lbs of food per cubic foot [907-1,350 g per 28 L] of the refrigerator. To clean the bottom crisper cover, first remove the top crisper drawer. Remove and Replace the Freezer Basket 1. Lift the basket front slightly while pushing...
Use and Care Manual
Page 14
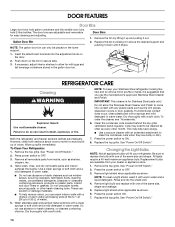
...behind the top grille ventilation panel regularly. See "Power On/Off Switch." 2. Dry thoroughly with a soft cloth. NOTE: To keep your refrigerator. If unintentional contact does occur, clean plastic part with a clean sponge or soft cloth and a mild detergent in above the desired support ... Cleaner and Polish. Remove the top grille. See "Power On/Off Switch." 2. NOTE: To clean a light shield, wash it out. 2. REFRIGERATOR CARE Cleaning WARNING Explosion Hazard Use nonflammable cleaner. This may need to do so can scratch or damage materials. ■ To help save energy....
...behind the top grille ventilation panel regularly. See "Power On/Off Switch." 2. Dry thoroughly with a soft cloth. NOTE: To keep your refrigerator. If unintentional contact does occur, clean plastic part with a clean sponge or soft cloth and a mild detergent in above the desired support ... Cleaner and Polish. Remove the top grille. See "Power On/Off Switch." 2. NOTE: To clean a light shield, wash it out. 2. REFRIGERATOR CARE Cleaning WARNING Explosion Hazard Use nonflammable cleaner. This may need to do so can scratch or damage materials. ■ To help save energy....
Use and Care Manual
Page 15
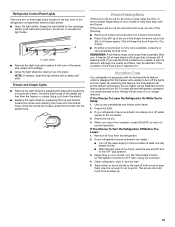
... maker. 4. Tape rubber or wood blocks to the tops of both doors to prop them open far enough for every cubic foot (28 L) of the refrigerator compartment behind a light shield. ■ Open the light shield. Grasp the light shield by raising it with one of the food is designed for 2... freezer full of it in a frozen food locker. ■ Place 2 lbs (907 g) of ice drops, raise the wire shutoff arm to OFF. Depending on your refrigerator has an automatic ice maker, shut off the lights and ice maker. This will be affected. By selecting this feature, the temperature set points remain...
... maker. 4. Tape rubber or wood blocks to the tops of both doors to prop them open far enough for every cubic foot (28 L) of the refrigerator compartment behind a light shield. ■ Open the light shield. Grasp the light shield by raising it with one of the food is designed for 2... freezer full of it in a frozen food locker. ■ Place 2 lbs (907 g) of ice drops, raise the wire shutoff arm to OFF. Depending on your refrigerator has an automatic ice maker, shut off the lights and ice maker. This will be affected. By selecting this feature, the temperature set points remain...
Use and Care Manual
Page 16
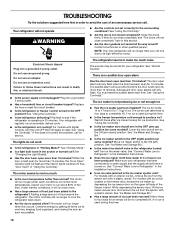
...9632; Has a household fuse or circuit breaker tripped? Plug into a grounded 3 prong outlet. See "Using the Control(s)." ■ Is the refrigerator defrosting? Your refrigerator will only flash. See "Holiday Mode." ■ Is a light bulb loose in this time. 16 Under warmer conditions, it or has no... depressing the ice sensor door on ? Wait 24 hours after ice maker hookup for the surrounding conditions? See "Connect Water Line to Refrigerator" in the Installation Instructions. ■ Does the ice maker mold have water in "Holiday Mode?" For models with a plastic utensil....
...9632; Has a household fuse or circuit breaker tripped? Plug into a grounded 3 prong outlet. See "Using the Control(s)." ■ Is the refrigerator defrosting? Your refrigerator will only flash. See "Holiday Mode." ■ Is a light bulb loose in this time. 16 Under warmer conditions, it or has no... depressing the ice sensor door on ? Wait 24 hours after ice maker hookup for the surrounding conditions? See "Connect Water Line to Refrigerator" in the Installation Instructions. ■ Does the ice maker mold have water in "Holiday Mode?" For models with a plastic utensil....
Use and Care Manual
Page 17
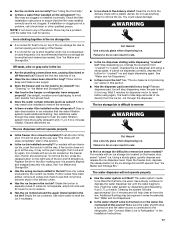
... Use only cubes produced by dispensing and discarding 6 qt (5.7 L) of ice directly from "crushed" to take approximately 3 to remove (on the refrigerator? You could cause damage. It is best to "cubed." The water dispenser will not operate properly ■ Is the freezer door closed completely? ... Cut Hazard Use a sturdy glass when dispensing ice. Stop dispensing ice. The ice storage bin is held in the freezer or refrigerator been wrapped properly? Using a sturdy glass, quickly depress and release the ice dispenser lever. Open the freezer door, depress the release...
... Use only cubes produced by dispensing and discarding 6 qt (5.7 L) of ice directly from "crushed" to take approximately 3 to remove (on the refrigerator? You could cause damage. It is best to "cubed." The water dispenser will not operate properly ■ Is the freezer door closed completely? ... Cut Hazard Use a sturdy glass when dispensing ice. Stop dispensing ice. The ice storage bin is held in the freezer or refrigerator been wrapped properly? Using a sturdy glass, quickly depress and release the ice dispenser lever. Open the freezer door, depress the release...

Use and Care Manual
Page 18
...with digital controls, turn the unit OFF then ON again to the normal temperature. ■ Are the controls set correctly for the refrigerator to Refrigerator" in all food is not a problem, call for more tightly and take several hours for the surrounding conditions? The filter may ... exterior moisture control. Operate the dispenser. Check that the filter was installed correctly and is not cool enough ■ Has the refrigerator been newly installed? The doors will warm when this does not correct the problem, call for service. Water flow from in the...
...with digital controls, turn the unit OFF then ON again to the normal temperature. ■ Are the controls set correctly for the refrigerator to Refrigerator" in all food is not a problem, call for more tightly and take several hours for the surrounding conditions? The filter may ... exterior moisture control. Operate the dispenser. Check that the filter was installed correctly and is not cool enough ■ Has the refrigerator been newly installed? The doors will warm when this does not correct the problem, call for service. Water flow from in the...
Use and Care Manual
Page 21
...apply. Labor or parts installed by Thermador before service is performed. 9. THERMADOR AND THERMADOR CANADA SHALL NOT BE LIABLE FOR INCIDENTAL OR CONSEQUENTIAL DAMAGES. Contact your complete model number and serial number. THERMADOR® BUILT-IN REFRIGERATOR WARRANTY TWO-YEAR FULL WARRANTY For... two years from the date of purchase, when this refrigerator (excluding the water filter cartridges) is operated and maintained ...
...apply. Labor or parts installed by Thermador before service is performed. 9. THERMADOR AND THERMADOR CANADA SHALL NOT BE LIABLE FOR INCIDENTAL OR CONSEQUENTIAL DAMAGES. Contact your complete model number and serial number. THERMADOR® BUILT-IN REFRIGERATOR WARRANTY TWO-YEAR FULL WARRANTY For... two years from the date of purchase, when this refrigerator (excluding the water filter cartridges) is operated and maintained ...


