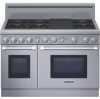

User Manual
Page 2
... Step 8: Door Removal and Reinstallation . . . 15 Step 9: Placing and Leveling the Range . . . . . 16 Step 10: Burner Test and Adjustment 18 Installer Checklist 19 To Clean and Protect Exterior Surfaces 19 This Thermador Appliance is made by BSH Home Appliances Corporation 5551 McFadden Ave. Huntington Beach, CA 92649 Questions? 1-800-735-4328 www...
... Step 8: Door Removal and Reinstallation . . . 15 Step 9: Placing and Leveling the Range . . . . . 16 Step 10: Burner Test and Adjustment 18 Installer Checklist 19 To Clean and Protect Exterior Surfaces 19 This Thermador Appliance is made by BSH Home Appliances Corporation 5551 McFadden Ave. Huntington Beach, CA 92649 Questions? 1-800-735-4328 www...
User Manual
Page 3
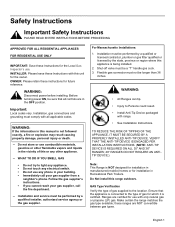
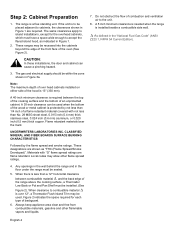
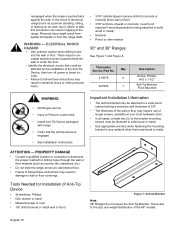
...8226; Injury to the location. TO REDUCE THE RISK OF TIPPING OF THE APPLIANCE, IT MUST BE SECURED BY A PROPERLY INSTALLED ANTI-TIP DEVICE. Safety Instructions Important Safety Instructions PLEASE READ ENTIRE INSTRUCTIONS BEFORE PROCEEDING APPROVED FOR ALL RESIDENTIAL APPLIANCES FOR RESIDENTIAL ...these Instructions with this appliance is not followed exactly, a fire or explosion may result causing property damage, personal injury or death. -- INSTALLER: Please leave these ranges are in your building. • Immediately call your gas supplier, call the fire department. -- Make certain...
...8226; Injury to the location. TO REDUCE THE RISK OF TIPPING OF THE APPLIANCE, IT MUST BE SECURED BY A PROPERLY INSTALLED ANTI-TIP DEVICE. Safety Instructions Important Safety Instructions PLEASE READ ENTIRE INSTRUCTIONS BEFORE PROCEEDING APPROVED FOR ALL RESIDENTIAL APPLIANCES FOR RESIDENTIAL ...these Instructions with this appliance is not followed exactly, a fire or explosion may result causing property damage, personal injury or death. -- INSTALLER: Please leave these ranges are in your building. • Immediately call your gas supplier, call the fire department. -- Make certain...
User Manual
Page 4
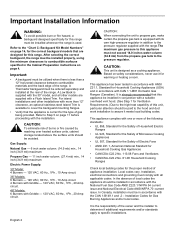
...this unit, particular attention should be paid to the hood and duct work installation to assure it for warming or heating a room. Refer to Step 5 on page 4. A Thermador backguard must be ordered separately and installed at the rear of the range. It is used. It is less... than 12" clearance, an optional stainless steel Island Trim is available to specific installations. This appliance complies with more of the following ...
...this unit, particular attention should be paid to the hood and duct work installation to assure it for warming or heating a room. Refer to Step 5 on page 4. A Thermador backguard must be ordered separately and installed at the rear of the range. It is used. It is less... than 12" clearance, an optional stainless steel Island Trim is available to specific installations. This appliance complies with more of the following ...
User Manual
Page 5
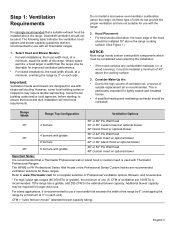
... ducting. This is particularly important for use a hood width that hood and duct installation will meet local requirements. If the range has a griddle, add 200 CFM to www.Thermador.com for these type of outside replacement air is recommended. Select Hood and Blower Models...of units do not provide the proper ventilation and are designed for improved ventilation performance. • For island installations, the hood width should be desirable for use with Thermador Professional Ranges. CFM = "cubic feet per 100 BTU is recommended. Where space permits, a hood larger in...
... ducting. This is particularly important for use a hood width that hood and duct installation will meet local requirements. If the range has a griddle, add 200 CFM to www.Thermador.com for these type of outside replacement air is recommended. Select Hood and Blower Models...of units do not provide the proper ventilation and are designed for improved ventilation performance. • For island installations, the hood width should be desirable for use with Thermador Professional Ranges. CFM = "cubic feet per 100 BTU is recommended. Where space permits, a hood larger in...
User Manual
Page 6
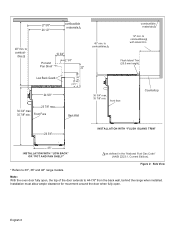
... are required. When there is 13" (330 mm). Do not obstruct the flow of the range above the cooking surface, a Thermador Low Back or Pot and Pan Shelf must be installed. (See Figure 2). These ranges may be used . The gas and electrical supply should be sealed. 5. Note: The maximum depth... of over 12", a Thermador Flush Island Trim may allow other flammable vapors and liquids. 7. A 40-inch minimum clearance is protected by ...
... are required. When there is 13" (330 mm). Do not obstruct the flow of the range above the cooking surface, a Thermador Low Back or Pot and Pan Shelf must be installed. (See Figure 2). These ranges may be used . The gas and electrical supply should be sealed. 5. Note: The maximum depth... of over 12", a Thermador Flush Island Trim may allow other flammable vapors and liquids. 7. A 40-inch minimum clearance is protected by ...
User Manual
Page 8
... Wall 40" min. English 6 27 5/8" 26 1/2" combustible materials 40" min. Figure 2: Side View Note: With the oven door fully open . Installation must allow ample clearance for movement around the door when fully open , the top of the door extends to 44-7/8" from the back wall, behind ...the range when installed. to 30", 36" and 48" range models. front face Countertop 24 3/4" INSTALLATION WITH "FLUSH ISLAND TRIM" 23" INSTALLATION WITH "LOW BACK" OR "POT AND PAN SHELF" as defined in the "National Fuel Gas Code...
... Wall 40" min. English 6 27 5/8" 26 1/2" combustible materials 40" min. Figure 2: Side View Note: With the oven door fully open . Installation must allow ample clearance for movement around the door when fully open , the top of the door extends to 44-7/8" from the back wall, behind ...the range when installed. to 30", 36" and 48" range models. front face Countertop 24 3/4" INSTALLATION WITH "FLUSH ISLAND TRIM" 23" INSTALLATION WITH "LOW BACK" OR "POT AND PAN SHELF" as defined in the "National Fuel Gas Code...
User Manual
Page 10
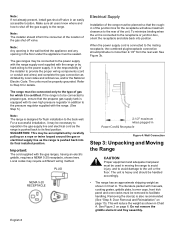
...pulling on a rope or twine looped around the gas or electrical supply line as the range is the responsibility of gas for flush installation to facilitate handling. See Figure 2 on page 15). English 8 It is pushed back into position. SUGGESTION: This may be ...The gas ranges may require a different wiring method. Important: The cord supplied with its final position. PLUG NEMA 5-20 RECEPTACLE Electrical Supply Installation of the junction box for details. Removing the door(s) is equipped with the gas ranges, having an electric griddle, requires a NEMA 5-20...
...pulling on a rope or twine looped around the gas or electrical supply line as the range is the responsibility of gas for flush installation to facilitate handling. See Figure 2 on page 15). English 8 It is pushed back into position. SUGGESTION: This may be ...The gas ranges may require a different wiring method. Important: The cord supplied with its final position. PLUG NEMA 5-20 RECEPTACLE Electrical Supply Installation of the junction box for details. Removing the door(s) is equipped with the gas ranges, having an electric griddle, requires a NEMA 5-20...
User Manual
Page 11
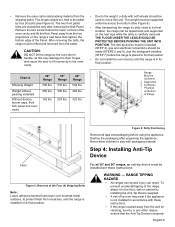
...THE FLOOR UNDER THE LEGS SHOULD BE PROTECTED BEFORE PUSHING THE UNIT INTO POSITION. Destroy the packaging after removing the Kick Panel. Step 4: Installing Anti-Tip Device Pallet Figure 5: Removal of the Four (4) Shipping Bolts Note: Leave adhesive-backed foam layer over may damage the door ...is properly English 9 • Remove the outer carton and packing material from the pallet. After removing the bolts, the range must be installed (STEP 4), gas and electrical connections should be Uniformly Supported by dolly close to protect finish from the wall for cleaning, service or ...
...THE FLOOR UNDER THE LEGS SHOULD BE PROTECTED BEFORE PUSHING THE UNIT INTO POSITION. Destroy the packaging after removing the Kick Panel. Step 4: Installing Anti-Tip Device Pallet Figure 5: Removal of the Four (4) Shipping Bolts Note: Leave adhesive-backed foam layer over may damage the door ...is properly English 9 • Remove the outer carton and packing material from the pallet. After removing the bolts, the range must be installed (STEP 4), gas and electrical connections should be Uniformly Supported by dolly close to protect finish from the wall for cleaning, service or ...
User Manual
Page 12
...There may be concealed electrical wires located behind the wall or under the floor. • Identify the electrical circuits that could result. • Install Anti-Tip Device packaged with range. • Verify that the anti-tip device is being attached to a solid wood cabinet having a minimum wall...person standing, sitting, or leaning on an open door), failure to take this precaution can tip. • Injury to wall or floor coverings. Thermador Service Part No. reengaged when the range is due to the size and weight distribution of abnormal usage (such as ceramic tile, hardwood, etc.)...
...There may be concealed electrical wires located behind the wall or under the floor. • Identify the electrical circuits that could result. • Install Anti-Tip Device packaged with range. • Verify that the anti-tip device is being attached to a solid wood cabinet having a minimum wall...person standing, sitting, or leaning on an open door), failure to take this precaution can tip. • Injury to wall or floor coverings. Thermador Service Part No. reengaged when the range is due to the size and weight distribution of abnormal usage (such as ceramic tile, hardwood, etc.)...

User Manual
Page 13
... the type of gas available at high altitude, please consult your local gas company for use with the appliance. to the appliance regulator must be installed as identified below: • For walls, wall studs, or floors composed of solid wood or metal, drill 1/8" pilot holes. • For .... The pressure of the gas supplied to 14" max. Wall Line X from the factory, units are NOT convertible between different types of gas. For installation of the appliance at this location. Secure to a new location, the Anti-Tip Device must not exceed 14" (34.9 mb) water column. Natural Gas...
... the type of gas available at high altitude, please consult your local gas company for use with the appliance. to the appliance regulator must be installed as identified below: • For walls, wall studs, or floors composed of solid wood or metal, drill 1/8" pilot holes. • For .... The pressure of the gas supplied to 14" max. Wall Line X from the factory, units are NOT convertible between different types of gas. For installation of the appliance at this location. Secure to a new location, the Anti-Tip Device must not exceed 14" (34.9 mb) water column. Natural Gas...
User Manual
Page 14
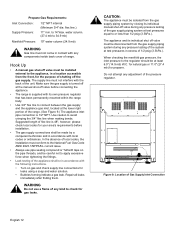
In the absence of local codes, the installation must conform to connect between the gas supply and the appliance gas inlet, located at the lower right portion of the range. (See Figure 9.) The ...appliance inlet pipe connection is 48", however, please check local codes for propane. The appliance and its individual shut off valve before installation. • The gas supply connections shall be installed external to or less than 1/2 psig (3.5kPa.). A Figure 9: Location of the unit. flex line.) 11" min. Make sure the gas supply...
In the absence of local codes, the installation must conform to connect between the gas supply and the appliance gas inlet, located at the lower right portion of the range. (See Figure 9.) The ...appliance inlet pipe connection is 48", however, please check local codes for propane. The appliance and its individual shut off valve before installation. • The gas supply connections shall be installed external to or less than 1/2 psig (3.5kPa.). A Figure 9: Location of the unit. flex line.) 11" min. Make sure the gas supply...
User Manual
Page 15
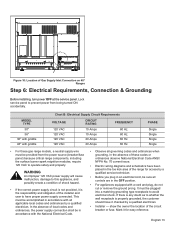
.... show the owner the location of Gas Supply Inlet Connection on 48" Ranges Step 6: Electrical Requirements, Connection & Grounding Before installing, turn power OFF at the service panel. This must be provided from being turned ON accidentally. Lock service panel to avoid ... plug in accordance with the National Electrical Code. • Observe all applicable local codes and ordinances by a qualified electrician. • Installer - It must be accomplished in an electrical cord, be plugged into a matching grounding type receptacle to prevent power from the power source...
.... show the owner the location of Gas Supply Inlet Connection on 48" Ranges Step 6: Electrical Requirements, Connection & Grounding Before installing, turn power OFF at the service panel. This must be provided from being turned ON accidentally. Lock service panel to avoid ... plug in accordance with the National Electrical Code. • Observe all applicable local codes and ordinances by a qualified electrician. • Installer - It must be accomplished in an electrical cord, be plugged into a matching grounding type receptacle to prevent power from the power source...

User Manual
Page 16
...Pot-and-Pan Shelf requires pre-assembly of the top panel to finger or hand while sliding the backguard down into the final, installed position. Figure 11: Backguard Installation WARNING Fingers or hand could result. DO NOT place the following items on the back of the Pot and Pan Shelf: •... positioned inside the guide channels on top of the range, as shown in the illustration. (Remove the griddle plate for this range must be installed whenever the range is less than 12" clearance from a combustible back wall and the back of the range. Severe injury could get very hot...
...Pot-and-Pan Shelf requires pre-assembly of the top panel to finger or hand while sliding the backguard down into the final, installed position. Figure 11: Backguard Installation WARNING Fingers or hand could result. DO NOT place the following items on the back of the Pot and Pan Shelf: •... positioned inside the guide channels on top of the range, as shown in the illustration. (Remove the griddle plate for this range must be installed whenever the range is less than 12" clearance from a combustible back wall and the back of the range. Severe injury could get very hot...

User Manual
Page 17
.... Hold door on the sides. It may be some spring resistance to fully seat the door's hinges. 2. Open door all the way to test the installation. The door is high enough, you (see illustration at right). 3. The door will hold the door about halfway open and close the hinges. Push hinge...
.... Hold door on the sides. It may be some spring resistance to fully seat the door's hinges. 2. Open door all the way to test the installation. The door is high enough, you (see illustration at right). 3. The door will hold the door about halfway open and close the hinges. Push hinge...
User Manual
Page 18
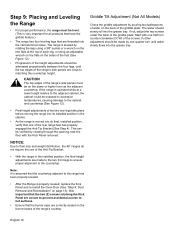
...that the countertop adjacent to the range has been properly leveled. • After the Range is properly leveled, replace the Kick Panel and re-install the Oven Door (See "Step 8: Door Removal and Reinstallation" on page 15). Further adjustment should be made to the two front legs ... Range • For proper performance, the range must be alternated proportionally between the four legs, until water slowly flows into its installed position in the installed position, the final height adjustments are close to matching the countertop height. The water should be on the same or higher level ...
...that the countertop adjacent to the range has been properly leveled. • After the Range is properly leveled, replace the Kick Panel and re-install the Oven Door (See "Step 8: Door Removal and Reinstallation" on page 15). Further adjustment should be made to the two front legs ... Range • For proper performance, the range must be alternated proportionally between the four legs, until water slowly flows into its installed position in the installed position, the final height adjustments are close to matching the countertop height. The water should be on the same or higher level ...
User Manual
Page 20
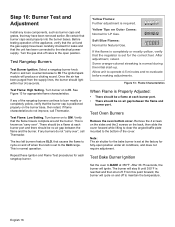
...XLO range. English 18 The ignitor/spark module will ignite. If flame characteristics do not "carry over ". If any burners do not improve, call Thermador. Yellow Tips on to BAKE at each rangetop burner. Remove the 4 screws on the sides and the 2 screws on and off when the ..., that may have been carefully checked for the correct fuel. This is required. Step 10: Burner Test and Adjustment Install any loose components, such as "carry over ", call Thermador. Before testing operation of the cover. Once the air has been purged from the supply lines, the burner should be...
...XLO range. English 18 The ignitor/spark module will ignite. If flame characteristics do not "carry over ". If any burners do not improve, call Thermador. Yellow Tips on to BAKE at each rangetop burner. Remove the 4 screws on the sides and the 2 screws on and off when the ..., that may have been carefully checked for the correct fuel. This is required. Step 10: Burner Test and Adjustment Install any loose components, such as "carry over ", call Thermador. Before testing operation of the cover. Once the air has been purged from the supply lines, the burner should be...
User Manual
Page 21
... removal of range). • Unit tested and free of page 15.) • Kick panel in place and two (2) screws secure. • INSTALLER: Write the model number and serial number in addition to remain for extended periods. with the appliance. Any mild glass cleaner will ignite after exposure... steel may be cleaned by wiping with a damp soapy cloth, rinsing with clear water and drying with a clean cloth. English 19 Call Thermador if: 1. The broil burner or bake burner flame goes out before the oven heats to oven cavity. To Clean and Protect Exterior Surfaces ...
... removal of range). • Unit tested and free of page 15.) • Kick panel in place and two (2) screws secure. • INSTALLER: Write the model number and serial number in addition to remain for extended periods. with the appliance. Any mild glass cleaner will ignite after exposure... steel may be cleaned by wiping with a damp soapy cloth, rinsing with clear water and drying with a clean cloth. English 19 Call Thermador if: 1. The broil burner or bake burner flame goes out before the oven heats to oven cavity. To Clean and Protect Exterior Surfaces ...
