Thermador PRL486GDH Support and Manuals
Get Help and Manuals for this Thermador item
View All Support Options Below
Free Thermador PRL486GDH manuals!
Problems with Thermador PRL486GDH?
Ask a Question
Free Thermador PRL486GDH manuals!
Problems with Thermador PRL486GDH?
Ask a Question
Thermador PRL486GDH Videos

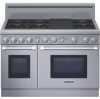
Thermador PRL486GDH Freestanding Range
Duration: :58
Total Views: 20
Duration: :58
Total Views: 20
Popular Thermador PRL486GDH Manual Pages
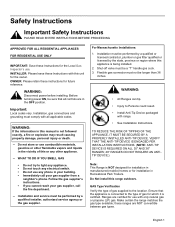
User Manual - Page 2

Table of Contents
Safety Instructions 1 Important Installation Information 2
Step 1: Ventilation Requirements 3 Step 2: Cabinet Preparation 4 Step 3: Unpacking and Moving the Range . . . . 8 Step 4: Installing Anti-Tip Device 9 Step 5: Gas Requirements and Hookup . . . . . 11 Step 6: Electrical Requirements, Connection & Grounding 13 Step 7: Backguard Installation 14 Step 8: Door Removal ...
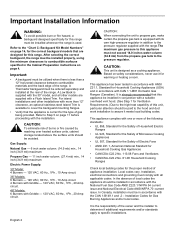
User Manual - Page 3
...REQUIRED ON ALL 30" AND 36" RANGES; 48" RANGES DO NOT REQUIRE AN ANTITIP DEVICE:)
Note: This Range is being installed.
2. WARNING:
If the information in Recreational Park Trailers.
INSTALLER: Please leave these Instructions with range.
• See Installation Instructions. Follow the gas supplier's instructions. • If you cannot reach your gas supplier, call your building. •...
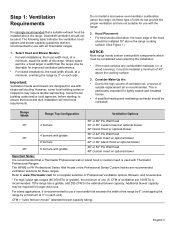
User Manual - Page 4
.... 48" Models: 6 Burners with CAN 1.1-M81 Domestic Gas Ranges (Canadian). Local codes vary. English 2
CAUTION:
When connecting the unit to propane gas, make certain the propane gas tank is designed as a cooking appliance.
Important:
• A backguard must be avoided. Important Installation Information
WARNING:
To avoid possible burn or fire hazard, a backguard designed specifically...
User Manual - Page 5
...
36" or 42" Pro Wall Hood 36" Custom Insert w/ optional blower 42" or 48" Island Hood w/ optional blower
48"
6 burners with griddle
48" or 54" Pro Wall Hood 48" Custom Insert w/ optional blower
Important Notes: It is recommended that a Thermador Professional wall or island hood or custom insert is used . Select Hood and Blower Models: • For wall installations, the hood width must be...
User Manual - Page 8
...") or
6"48")*
((D3P03"0)*4)
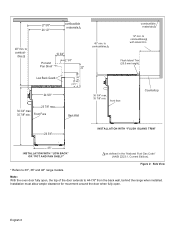
24 5/8"
23 7/8" max. 36 3/4" max. 35 7/8" min. English 6 front face
Countertop
24 3/4"
INSTALLATION WITH "FLUSH ISLAND TRIM"
23"
INSTALLATION WITH "LOW BACK" OR "POT AND PAN SHELF"
as defined in the "National Fuel Gas Code" (ANSI Z223.1, Current Edition).
* Refers to combust- Front Face
Back Wall
40" min. to 30", 36" and 48" range models.
User Manual - Page 9

...30" (30" models) 36" (36" models)
Model A
B
C
D
30" 5-3/4" 18-7/16" 5-13/16" 2-15/16"
36" 8-1/16" 19-13/16" 8-1/8" 3-3/16"
Figure 3a: Gas & Electrical Supply Locations for 30" and 36" Gas Ranges
2-1/2" maximum protrusion from wall for gas or electrical supply
Gas Supply Zone
4-3/8"
Electrical Supply Zone
2-1/2"
4-3/8" 10-3/4"
18-11/16" 5-15/16"
48"
Figure 3b: Gas & Electrical Supply...
User Manual - Page 10
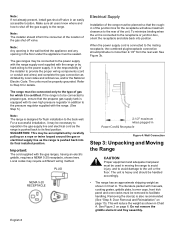
... to the range. Local codes may be handled accordingly. • The range has an ...manuals, cooking grates, griddle plate, burner caps, front kick panel and oven racks must be connected to propane gas, ensure that the roughin of the junction box for flush installation to the receptacle or junction box, orient the receptacle and slide back into its final installed position. The range...
User Manual - Page 11
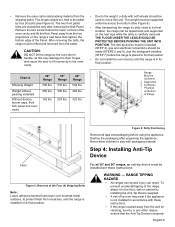
... must be Uniformly Supported by Braces Provided on the range's cast base that the Anti-Tip Device is pulled away from the two projections on Bottom of tip-over brushed-metal surfaces, to the floor, wall or cabinet by the oven door's handle, as this unit. Range Must be installed per these instructions.
• If the...
User Manual - Page 12
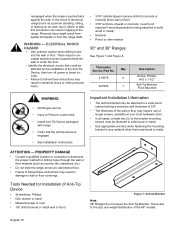
... metal wall or floor)
Figure 7: Anti-tip Bracket
Note: 48" Ranges do not require the Anti-Tip Bracket. Thermador Service Part No.
ATTENTION - There may be affected by the installation of the Anti-Tip Device, then turn off power to these circuits.
• Failure to follow these instructions may result in tipping of abnormal usage (such as...
User Manual - Page 14
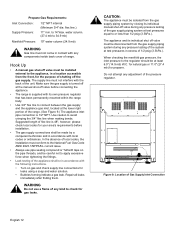
Hook Up
• A manual gas shut-off the gas supply.
In the absence of local codes, the installation must be made by closing its own pressure regulator that has been permanently mounted within the range body.
• Use 3/4" flex line to connect between the gas supply and the appliance gas inlet, located at the lower right portion of the...
User Manual - Page 15
... kick area of these gas range models, a neutral supply wire must be provided from being turned ON accidentally.
It must be sure all governing codes and ordinances when grounding.
show the owner the location of Gas Supply Inlet Connection on 48" Ranges
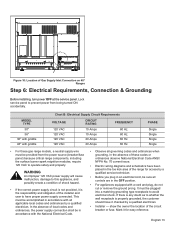
Step 6: Electrical Requirements, Connection & Grounding
Before installing, turn power OFF at the service panel. MODEL TYPE
30" 36...
User Manual - Page 16

... hazard, a backguard designed specifically for range with Range
English 14 Low Back
Included with Range N/A N/A
9" Low Back
N/A PA36GLBH PA48GLBH
22" Pot and Pan Shelf
PA30GHSH PA36GHSH PA48GHSH
Flush Island Trim
PA30GITH Included with Range Included with electric griddle.
Important:
Dedicated 20 AMP service is required for this range must be installed whenever the range is used where...
User Manual - Page 18
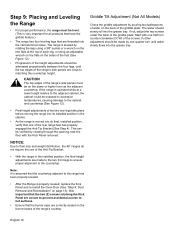
...size and weight distribution, the 48" ranges do not require the use of the Anti-Tip Bracket.
• With the range in the cabinet.
• As the range is leveled by pouring two ... of the range's side panels must be level. (This is properly leveled, replace the Kick Panel and re-install the Oven Door (See "Step 8: Door Removal and Reinstallation" on page 15). If the range is important that...
User Manual - Page 20
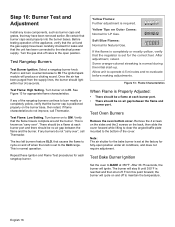
...Setting. See Figure 13 for Natural Gas.
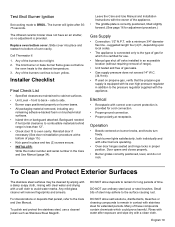
Test Bake Burner Ignition
Set the oven to BAKE at each burner port and there should be no air gap between the flame and
burner port.
Yellow Flames: Further adjustment is set to the XLO range... Burner Test and Adjustment
Install any of the rangetop ...any burners do not improve, call Thermador. Some orange-colored streaking is reached...
User Manual - Page 21
... clearance to the pressure regulator supplied with stainless steel for use.
• Manual gas shut off valve installed in contact with the appliance. Leave the Care and Use Manual and Installation Instructions with correct over-current protection is provided for adjustment procedure.)
Gas Supply
• Connection: 1/2" N.P.T. Electrical
• Receptacle with the owner of time.
Any...
Thermador PRL486GDH Reviews
We have not received any reviews for Thermador yet.