TRENDnet TV-H100 Support and Manuals
Get Help and Manuals for this TRENDnet item
View All Support Options Below
Free TRENDnet TV-H100 manuals!
Problems with TRENDnet TV-H100?
Ask a Question
Free TRENDnet TV-H100 manuals!
Problems with TRENDnet TV-H100?
Ask a Question
Popular TRENDnet TV-H100 Manual Pages
Datasheet - Page 1

...Adjustable mounting kit can secure the enclosure to a vertical or horizontal surface • All aluminum construction with compatible TRENDnet Internet security cameras. internet cameras
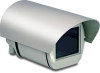
Outdoor Camera Enclosure
TV-H100 (A1.0R)
The Outdoor Camera Enclosure protects TRENDnet's Internet security cameras from the rigors of
outdoor use with IP-66 weather rating • 2-Year Warranty
TV-H100
rev...
Datasheet - Page 2

... Fax: 1-310-961-5511 Web: www.trendnet.com Email: sales@trendnet.com
To Order Please Call:
1-888-326-6061
TRENDnet is subject to change at any time, without notice. Outdoor Camera Enclosure
TV-H100 (A1.0R)
SPECIFICATIONS
Hardware
Supported Devices Material Dimension Weight Temperature Color
• TV-IP110, TV-IP110W, TV-IP212, TV-IP212W, TV-IP312, TV-IP312W
• Aluminum housing •...
Quick Installation Guide - Page 2

Hardware Installation 2
Troubleshooting 11
Version 02.17.2009 Table of Contents
English ...1 1. Before You Start 1 2.
Quick Installation Guide - Page 3

... TV-IP212W, TV-IP312, TV-IP312W)
? Electrical Tape ? Quick Installation Guide ? Mounting Bracket ? Users must know how to terminate a network cable with an RJ-45 connector in order to install a wired internet camera server into the TV-H100. Phillips Screwdriver ? Screws, washers and wall mount
screws
Installation Requirements
The following items below are not included. Outdoor...
Quick Installation Guide - Page 4

....
2
English Hardware Installation
Note: Configure your Internet Camera Server to use these screws. You will need to match your network before installing the device.
1. You will need to use this screw and washer. Save these screws later.
2. Remove the screws from the TV-H100. Unscrew the metal bracket from the back of the enclosure.
3. Slide out...
Quick Installation Guide - Page 5

... AC/DC adapter that is included with your Internet Camera Server.
3
English Take the Internet Camera Server's power adapter and cut about 4 inches from the end the power connector using the wire cutter. Use the following screw to mount the Internet Camera Server to the TV-H100.
6. Screw the metal bracket back in to the metal...
Quick Installation Guide - Page 6

...one end of the caps from the base to expose the copper wiring.
10. Insert the unterminated end of the mounting arm. Take a knife or box cutter and cut along the middle to leave one of the RJ-45 Ethernet ....
11. Run the power adapter and RJ-45 Ethernet cable from the enclosure.
12. 8. Use a wire stripper to remove the insulation to the top of the cable through the cap.
4
...
Quick Installation Guide - Page 7

13. Insert the power adapter through the cable access hole. Remove one of the caps from the enclosure.
16. Insert the Ethernet cable through the cap.
17. Then screw in the cap securely.
5
English Insert the power adapter through the cable access hole. Then screw in the cap securely.
15. Terminate the Ethernet cable.
14.
Quick Installation Guide - Page 8

....
19. Slide the back end of the power adapter back by twisting the copper wiring. Connect the two ends of the enclosure back in.
6
English Use electrical tape to the Internet Camera Server.
21. Connect the Ethernet cable to seal the cables back together. Connect the power adapter to seal the individual...
Quick Installation Guide - Page 9

Remove one of the caps from the back of the mounting arm.
3. Insert the pigtail cable that comes with the TEW-ASAK through the cap.
7
English Remove the antenna from the enclosure.
4. Run the pigtail cable that comes with the TEW-ASAK from the base to Wireless Internet Camera
1. Installing External Antenna to the top of your wireless Internet Camera Server.
2.
Quick Installation Guide - Page 10

... the pigtail cable that comes with the TEW-ASAK and the power adapter to your outdoor antenna (e.g. TEW-AO14D).
8
English Then screw in .
8. Slide the back end of the enclosure back in the cap securely.
6. 5. Follow the directions in the QIG for the TEW-ASAK to connect the surge arrestor to the Internet...
Quick Installation Guide - Page 11

Mounting the Camera Housing
1. Use the bracket screws to mount the mounting bracket to secure the mounting bracket.
9
English Use the provided Hex screwdriver to the TV-H100. Drill holes for the screws at each of the provided white screws.
3. Insert the screws into the holes.
4. Make sure the drill bit matches the ...
Quick Installation Guide - Page 12

... installation is now complete. Then use the provided nuts and washers to secure it clockwise to secure position.
6. For detailed information regarding the TV-H100 configuration and advanced settings, please refer to the User's Guide included on the Utility & Driver CDROM or TRENDnet's website at www.trendnet.com
Register Your Product
To ensure the highest level of customer service and support...
Quick Installation Guide - Page 13

... any questions regarding the TV-H100, please contact TRENDnet's Technical Support Department.
11 Troubleshooting
Q1: After I do? Second, mount the TV-H100 so that you still encounter problems or have adjusted the focus on your camera. A2: You must use the TEW-ASAK with an RJ-45 jack. What should I put my Internet Camera Server in the enclosure, the image is distorted...
Quick Installation Guide - Page 15

Go to register your product online. All Rights Reserved. Product Warranty Registration
Please take a moment to TRENDnet's website at http://www.trendnet.com/register
20675 Manhattan Place Torrance, CA 90501 USA
Copyright ©2009. TRENDnet.
TRENDnet TV-H100 Reviews
We have not received any reviews for TRENDnet yet.