User's Guide
Page 13
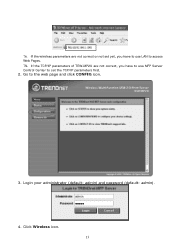
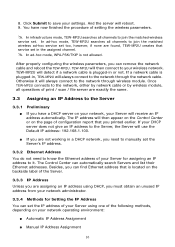
Login your administrator (default: admin) and password (default: admin). 4. Click Wireless icon. 13 # If the wireless parameters are not correct or not set yet, you have to use LAN to access Web Pages. # If the TCP/IP parameters of TEW-MP2U are not correct, you have to use MFP Server Control Center to the web page and click CONFIG icon. 3. Go to set the TCP/IP parameters first. 2.
Login your administrator (default: admin) and password (default: admin). 4. Click Wireless icon. 13 # If the wireless parameters are not correct or not set yet, you have to use LAN to access Web Pages. # If the TCP/IP parameters of TEW-MP2U are not correct, you have to use MFP Server Control Center to the web page and click CONFIG icon. 3. Go to set the TCP/IP parameters first. 2.
User's Guide
Page 16
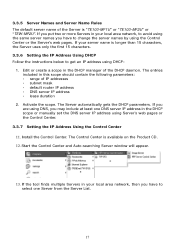
...backside label of your DHCP server does not give an IP address to the Server, the Server will use the Default IP address: 192.168.1.100. „ If you are exactly the same. 3.3 Assigning an IP Address to the Server 3.3.1 Preliminary „ If you can automatically search Servers and list their Ethernet addresses.... not need to join the matched wireless service set in a DHCP network, you can set the IP address of the following methods, depending on your Server using DHCP, you printed earlier. The Control Center can remove the network cable and reboot the TEW-MP2U. In ad-hoc...
...backside label of your DHCP server does not give an IP address to the Server, the Server will use the Default IP address: 192.168.1.100. „ If you are exactly the same. 3.3 Assigning an IP Address to the Server 3.3.1 Preliminary „ If you can automatically search Servers and list their Ethernet addresses.... not need to join the matched wireless service set in a DHCP network, you can set the IP address of the following methods, depending on your Server using DHCP, you printed earlier. The Control Center can remove the network cable and reboot the TEW-MP2U. In ad-hoc...
User's Guide
Page 17
...TE100-MP1U" or "TE100-MP2U" or "TEW-MP2U". Start the Control Center and Auto-searching Server window will appear. 13. Install the Control Center. The entries included in your local area network, then you may include at least one Server from the Server List. 17 3.3.5 Server Names and Server Name Rules The default server... name of the Server is available on the Product CD. 12. If your server name is longer than 15 characters, the Server uses only the first 15 characters. 3.3.6 Setting the IP ...
...TE100-MP1U" or "TE100-MP2U" or "TEW-MP2U". Start the Control Center and Auto-searching Server window will appear. 13. Install the Control Center. The entries included in your local area network, then you may include at least one Server from the Server List. 17 3.3.5 Server Names and Server Name Rules The default server... name of the Server is available on the Product CD. 12. If your server name is longer than 15 characters, the Server uses only the first 15 characters. 3.3.6 Setting the IP ...

User's Guide
Page 18
After you have logged in successfully, select TCP/IP from the Server's menu. 14. The Set IP Address dialog appears. 18 Double click the highlight list and enter the Server's administrator (default: admin) and password (default: admin). 15.
After you have logged in successfully, select TCP/IP from the Server's menu. 14. The Set IP Address dialog appears. 18 Double click the highlight list and enter the Server's administrator (default: admin) and password (default: admin). 15.

User's Guide
Page 19
...the Step1~Step4 of Set the IP Address Using the Control Center. 2. Open IE Browser and enter the Server's IP address or click the Home Icon of IP setting method (static or dynamic using DHCP). Click the button corresponding to define Subnet Mask and Default Gateway. Go to save your ...choice of the Control Center. 3. You can use desired DNS by clicking the Manual DNS button and manually assigning a DNS. 17. When assigning a static IP address you Server in the Server List. If you choose Automatically get IP by DHCP, you...
...the Step1~Step4 of Set the IP Address Using the Control Center. 2. Open IE Browser and enter the Server's IP address or click the Home Icon of IP setting method (static or dynamic using DHCP). Click the button corresponding to define Subnet Mask and Default Gateway. Go to save your ...choice of the Control Center. 3. You can use desired DNS by clicking the Manual DNS button and manually assigning a DNS. 17. When assigning a static IP address you Server in the Server List. If you choose Automatically get IP by DHCP, you...

User's Guide
Page 20
Click TCP/IP icon. 6. 4. Click the button corresponding to your choice of IP setting methods (static or 20 Enter administrator (default: admin) and password (default: admin). 5.
Click TCP/IP icon. 6. 4. Click the button corresponding to your choice of IP setting methods (static or 20 Enter administrator (default: admin) and password (default: admin). 5.

User's Guide
Page 21
When assigning a static IP address you use some parallel printers and use Parallel-to-USB cables to connect the printers), the default printer names are named as : USB1_Printer and USB2_Printer with respect to card reader plugging in multiple cards) and Pz represents the z-th partition.... the y-th Disk (in particular to USB1 port and USB2 port. 3.4.2 Storage Names The local drives of USB Device 3.4.1 Printer Names 1. And the Server will set as the default printer names. You have to save your settings. For example, the printer model name is "LaserJet 3030 PCL 6" and then the...
When assigning a static IP address you use some parallel printers and use Parallel-to-USB cables to connect the printers), the default printer names are named as : USB1_Printer and USB2_Printer with respect to card reader plugging in multiple cards) and Pz represents the z-th partition.... the y-th Disk (in particular to USB1 port and USB2 port. 3.4.2 Storage Names The local drives of USB Device 3.4.1 Printer Names 1. And the Server will set as the default printer names. You have to save your settings. For example, the printer model name is "LaserJet 3030 PCL 6" and then the...

User's Guide
Page 29
...your Windows PC such Internet PC, you must enter the Server's IP address in Printer Name or IP Address box. 6. In the Port Name box, enter USB1_RAW or USB2_RAW for Raw TCP Printing Windows Platform: Windows 2000, XP and 2003 1. The default Port 29 Select the desired printer driver and click Set... Port to USB1 port and USB2 port, respectively. # If your Server is running ...
...your Windows PC such Internet PC, you must enter the Server's IP address in Printer Name or IP Address box. 6. In the Port Name box, enter USB1_RAW or USB2_RAW for Raw TCP Printing Windows Platform: Windows 2000, XP and 2003 1. The default Port 29 Select the desired printer driver and click Set... Port to USB1 port and USB2 port, respectively. # If your Server is running ...

User's Guide
Page 49
...box of the Control Center or the Server's web pages. 6.5.1 Setting up File Server Using the Control Center 1. Double click the highlight list and enter the Server's administrator (default: admin) and password (default: admin). 4. If the tool finds multiple Servers in your USB Mass Storages with ...user level security in network: „ SMB/CIFS: NetBIOS over TCP/IP „ FTP The protocols are shown in ...
...box of the Control Center or the Server's web pages. 6.5.1 Setting up File Server Using the Control Center 1. Double click the highlight list and enter the Server's administrator (default: admin) and password (default: admin). 4. If the tool finds multiple Servers in your USB Mass Storages with ...user level security in network: „ SMB/CIFS: NetBIOS over TCP/IP „ FTP The protocols are shown in ...

User's Guide
Page 54
... login to the Server; Use Microsoft Dos's FTP client 1. If you clear Server authentication, you have to enter user name and password to login to the Server; B. In Web Address List, enter command: "ftp://Server's Server Name" or "ftp://Server's IP address". If you have changed the default FTP port : ...21 to the new value, you have to add the new port number in FTP server protocol settings you have to...
... login to the Server; Use Microsoft Dos's FTP client 1. If you clear Server authentication, you have to enter user name and password to login to the Server; B. In Web Address List, enter command: "ftp://Server's Server Name" or "ftp://Server's IP address". If you have changed the default FTP port : ...21 to the new value, you have to add the new port number in FTP server protocol settings you have to...
User's Guide
Page 66
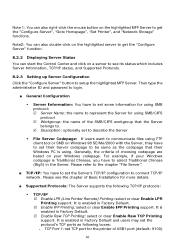
... Protocols: The Server supports the following boxes: - Please see its status which includes Server Information, TCP/IP status, and Supported Protocols. 8.2.3 Setting up Server Configuration Click the "Configure Server" button to setup the highlighted MFP Server. TCP Port ...Default. 5 Enable Raw TCP Printing: select or clear Enable Raw TCP Printing support. Note 1: You can also right-click the mouse button on the highlighted MFP Server to get the "Configure Server" function. 8.2.2 Displaying Server Status You can also double-click on the highlighted server to get the "Configure Server...
... Protocols: The Server supports the following boxes: - Please see its status which includes Server Information, TCP/IP status, and Supported Protocols. 8.2.3 Setting up Server Configuration Click the "Configure Server" button to setup the highlighted MFP Server. TCP Port ...Default. 5 Enable Raw TCP Printing: select or clear Enable Raw TCP Printing support. Note 1: You can also right-click the mouse button on the highlighted MFP Server to get the "Configure Server" function. 8.2.2 Displaying Server Status You can also double-click on the highlighted server to get the "Configure Server...

User's Guide
Page 70
...). Š Set Email Configuration 5 SMTP Protocol: select or clear Enable SMTP support 5 SMTP Server Name: enter your SMTP server's Server Name or IP address. 5 SMTP Port Number: set new SMTP server's TCP port number (default: 25). 5 Subject: enter the subject of SNMP v3. „ Email: If you want to receive some letters for variable of SysLocation...
...). Š Set Email Configuration 5 SMTP Protocol: select or clear Enable SMTP support 5 SMTP Server Name: enter your SMTP server's Server Name or IP address. 5 SMTP Port Number: set new SMTP server's TCP port number (default: 25). 5 Subject: enter the subject of SNMP v3. „ Email: If you want to receive some letters for variable of SysLocation...

User's Guide
Page 74
... chapter "File Server". „ TCP/IP: You have to connect TCP/IP network. It is enabled in Factory Default. - Enable Server Authentication: select or clear Enable Server Authentication support. Select the item, if you allow that the Server belongs to. 5 Description: optionally set TCP port for the printer of USB2 port (default: 9101) 5 Enable SMB/CIFS Print/File Server: select...
... chapter "File Server". „ TCP/IP: You have to connect TCP/IP network. It is enabled in Factory Default. - Enable Server Authentication: select or clear Enable Server Authentication support. Select the item, if you allow that the Server belongs to. 5 Description: optionally set TCP port for the printer of USB2 port (default: 9101) 5 Enable SMB/CIFS Print/File Server: select...

User's Guide
Page 84
... Address: 0.0.0.0 z SysContact: sales@trendnet.com z SysName: TRENDnet TE100-MP1U (or TE100-MP2U or TEW-MP2U) USB MFP Server z SysLocation: www.trendnet.com z EnableAuthenTrap: 2 (disable) z SNMPv3: Disabled - Auth Password: None - Subnet Mask: 255.255.255.0 - Manual DNS: None (Disabled). z Static IP: Disabled - TCP Port (USB1): 9100 - Default Gateway: none - DNS Server: none Supported Protocols z LPR Printing: Enabled z IPP Printing: Enabled z Raw TCP/JetDirect...
... Address: 0.0.0.0 z SysContact: sales@trendnet.com z SysName: TRENDnet TE100-MP1U (or TE100-MP2U or TEW-MP2U) USB MFP Server z SysLocation: www.trendnet.com z EnableAuthenTrap: 2 (disable) z SNMPv3: Disabled - Auth Password: None - Subnet Mask: 255.255.255.0 - Manual DNS: None (Disabled). z Static IP: Disabled - TCP Port (USB1): 9100 - Default Gateway: none - DNS Server: none Supported Protocols z LPR Printing: Enabled z IPP Printing: Enabled z Raw TCP/JetDirect...

User's Guide
Page 86
... firmware. Open Control Center. Double click the selected Server and enter Administrator (default: admin) and Password (default: admin). 3. Chapter14 Upgrade Firmware This chapter describes ...how to start upgrading the firmware. 5. Wait for 20 seconds for system reboot. Please follow one of the following Procedures: Procedure A: Using the Control Center 1. Procedure B: Using the Server's Web Pages 1. Check the Server's IP address. 86 Select the Server that the Server...
... firmware. Open Control Center. Double click the selected Server and enter Administrator (default: admin) and Password (default: admin). 3. Chapter14 Upgrade Firmware This chapter describes ...how to start upgrading the firmware. 5. Wait for 20 seconds for system reboot. Please follow one of the following Procedures: Procedure A: Using the Control Center 1. Procedure B: Using the Server's Web Pages 1. Check the Server's IP address. 86 Select the Server that the Server...

User's Guide
Page 87
... Control Center. Login the Server with Administrator (default: admin) and Password (default: admin). 7. Then Servers' IP addresses will automatically search for system reboot. Click Upload button to access the Server's home page. 5. Click Upgrade Firmware. 9. Procedure C: Using the Init Button and the TFTP Client 87 Go to "http://Server's IP address "or "http://Server's Server Name" to start firmware upgrade...
... Control Center. Login the Server with Administrator (default: admin) and Password (default: admin). 7. Then Servers' IP addresses will automatically search for system reboot. Click Upload button to access the Server's home page. 5. Click Upgrade Firmware. 9. Procedure C: Using the Init Button and the TFTP Client 87 Go to "http://Server's IP address "or "http://Server's Server Name" to start firmware upgrade...

User's Guide
Page 88
... and USB2 blink. (For TRENDnet 301, only USB1 LED will blink.) Please note that after that PC and the Server belong to Factory Default values. 2. Click Upload Image. 5. 1. Click Open Image to open your PC's TCP/IP such that , the Server will operate using the factory default values after restarting, i.e., your Server's configuration will recover to the...
... and USB2 blink. (For TRENDnet 301, only USB1 LED will blink.) Please note that after that PC and the Server belong to Factory Default values. 2. Click Upload Image. 5. 1. Click Open Image to open your PC's TCP/IP such that , the Server will operate using the factory default values after restarting, i.e., your Server's configuration will recover to the...
