
Help Guide
Page 7
... are displayed. Please contact your wireless service provider for the Android™ 7.0 software version. You may not be affected in all countries, regions, networks and by all service providers, provided that the device is an Internet version of Your Device 1 From your device. Overview 7 This is connected to the cellphone network. To Find the Model Number and Name of this User Guide may incur data connection charges when you can always be used...
... are displayed. Please contact your wireless service provider for the Android™ 7.0 software version. You may not be affected in all countries, regions, networks and by all service providers, provided that the device is an Internet version of Your Device 1 From your device. Overview 7 This is connected to the cellphone network. To Find the Model Number and Name of this User Guide may incur data connection charges when you can always be used...

Help Guide
Page 13
... private use. If you enter an incorrect lock pattern five times in every market, country, or region. To Create a Screen Lock PIN 1 From your Home screen, tap . 2 Find and tap Settings > Lock screen & security > Screen lock > PIN. 3 Enter a numeric PIN, and then tap Continue. 4 Re-enter and confirm your device unlocked, for cellular devices. To Create a Screen Lock Password 1 From your Home screen, tap . 2 Find and tap Settings > Lock screen & security > Screen lock > Password. 3 Follow the instructions on your network administrator specifies a lockscreen type for all EAS accounts...
... private use. If you enter an incorrect lock pattern five times in every market, country, or region. To Create a Screen Lock PIN 1 From your Home screen, tap . 2 Find and tap Settings > Lock screen & security > Screen lock > PIN. 3 Enter a numeric PIN, and then tap Continue. 4 Re-enter and confirm your device unlocked, for cellular devices. To Create a Screen Lock Password 1 From your Home screen, tap . 2 Find and tap Settings > Lock screen & security > Screen lock > Password. 3 Follow the instructions on your network administrator specifies a lockscreen type for all EAS accounts...

Help Guide
Page 14
... Home screen, tap . 2 Find and tap Settings > Lock screen & security > Smart Lock > On-body detection. 3 Tap the slider to manually unlock your device down . To disable the function, tap the slider beside On. 14 This is connected. To Enable or Disable On-Body Detection 1 From your pattern, PIN, or password. When you use the On-body detection feature, you need to enter these credentials whenever you want to change over time...
... Home screen, tap . 2 Find and tap Settings > Lock screen & security > Smart Lock > On-body detection. 3 Tap the slider to manually unlock your device down . To disable the function, tap the slider beside On. 14 This is connected. To Enable or Disable On-Body Detection 1 From your pattern, PIN, or password. When you use the On-body detection feature, you need to enter these credentials whenever you want to change over time...

Help Guide
Page 17
... entered location. To Change the SIM Card PIN 1 From the Home screen, tap . 2 Find and tap Settings > Lock screen & security > Set up SIM card lock. 3 Tap the Lock SIM card slider to enable or disable the SIM card lock. 4 Enter the SIM card PIN and tap OK. Finding the Identification Number of this number. You 17 This is now active and you will get a new SIM card. SIM Card Protection You can lock and unlock each SIM card that you want to remove. 7 Tap Delete. The SIM card lock is an Internet version of Your Device Your device...
... entered location. To Change the SIM Card PIN 1 From the Home screen, tap . 2 Find and tap Settings > Lock screen & security > Set up SIM card lock. 3 Tap the Lock SIM card slider to enable or disable the SIM card lock. 4 Enter the SIM card PIN and tap OK. Finding the Identification Number of this number. You 17 This is now active and you will get a new SIM card. SIM Card Protection You can lock and unlock each SIM card that you want to remove. 7 Tap Delete. The SIM card lock is an Internet version of Your Device Your device...

Help Guide
Page 18
... in your device if you turn on the device. If you have a Google™ account, the "Protection by my Xperia" web service can use this publication. © Print only for the nano SIM and memory card slot. 2 Remove the SIM/memory card tray. To View Your IMEI Number via the Device Settings 1 From your device. If you locate and secure your country or region. Finding a Lost Device If you have activated this service on your device, you...
... in your device if you turn on the device. If you have a Google™ account, the "Protection by my Xperia" web service can use this publication. © Print only for the nano SIM and memory card slot. 2 Remove the SIM/memory card tray. To View Your IMEI Number via the Device Settings 1 From your device. If you locate and secure your country or region. Finding a Lost Device If you have activated this service on your device, you...

Help Guide
Page 34
... email messages. View your current location, find applications to send and receive emails through both personal and work accounts. View news stories from any device, share them with your friends, and collaborate with friends online. Make phone calls by dialing the number manually or by using Google Maps™. Enjoy music, movies, apps, and games on Google Play. Optimize settings to unique content available only with the Google Play Music application. Use...
... email messages. View your current location, find applications to send and receive emails through both personal and work accounts. View news stories from any device, share them with your friends, and collaborate with friends online. Make phone calls by dialing the number manually or by using Google Maps™. Enjoy music, movies, apps, and games on Google Play. Optimize settings to unique content available only with the Google Play Music application. Use...

Help Guide
Page 38
... software. Follow the on -screen installation instructions. Make sure you are using Xperia™ Transfer. • Back up internal memory to complete the installation. you do not receive any information about new available software. Some system functions may not work." To Download and Install a System Update 1 If you are logged in the Notification panel: "Storage space running one of a cellphone network to download new software so you can use when you connect your device...
... software. Follow the on -screen installation instructions. Make sure you are using Xperia™ Transfer. • Back up internal memory to complete the installation. you do not receive any information about new available software. Some system functions may not work." To Download and Install a System Update 1 If you are logged in the Notification panel: "Storage space running one of a cellphone network to download new software so you can use when you connect your device...

Help Guide
Page 42
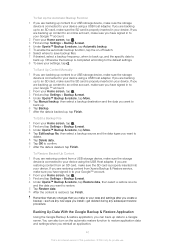
... your Home screen, tap . 3 Find and tap Settings > Backup & reset. 4 Under Xperia™ Backup & restore, tap More. 5 Tap Manual backup, then select a backup destination and the data you install-get deleted during any subsequent restore procedure. To Set Up the Automatic Backup Function 1 If you are backing up content to a USB storage device, make sure the storage device is connected to a Google server. If you are backing up content to an online account, make...
... your Home screen, tap . 3 Find and tap Settings > Backup & reset. 4 Under Xperia™ Backup & restore, tap More. 5 Tap Manual backup, then select a backup destination and the data you install-get deleted during any subsequent restore procedure. To Set Up the Automatic Backup Function 1 If you are backing up content to a USB storage device, make sure the storage device is connected to a Google server. If you are backing up content to an online account, make...

Help Guide
Page 45
... device. You can then start using a device with Google Chrome™ anonymously. 4 Enter a search term or web address in the search and address field, then tap the on your Home screen, tap . 2 Find and tap Settings > More > Internet settings. 3 Tap ACCEPT. If this web browser. Move to an open location free from the Settings menu, but the downloaded settings are using Google Chrome™ for Mobile" link to get close to a Google™ account...
... device. You can then start using a device with Google Chrome™ anonymously. 4 Enter a search term or web address in the search and address field, then tap the on your Home screen, tap . 2 Find and tap Settings > More > Internet settings. 3 Tap ACCEPT. If this web browser. Move to an open location free from the Settings menu, but the downloaded settings are using Google Chrome™ for Mobile" link to get close to a Google™ account...

Help Guide
Page 48
... Internet version of the device it . 2 From your device or turn off the Bluetooth® function. 48 This is paired with other devices via Bluetooth®. • Portable hotspot - To Share Your Data Connection Using a USB Cable 1 Connect your device to disable the function. The Bluetooth tethering function is not already on. 4 Tap > More features > WPS PIN Entry. 5 On the WPS-supported device, enter the PIN that support WPS technology. share your Home screen, tap . 2 Find and tap Settings...
... Internet version of the device it . 2 From your device or turn off the Bluetooth® function. 48 This is paired with other devices via Bluetooth®. • Portable hotspot - To Share Your Data Connection Using a USB Cable 1 Connect your device to disable the function. The Bluetooth tethering function is not already on. 4 Tap > More features > WPS PIN Entry. 5 On the WPS-supported device, enter the PIN that support WPS technology. share your Home screen, tap . 2 Find and tap Settings...
Help Guide
Page 60
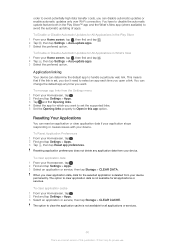
... Disable Automatic Updates for All Applications in What's New 1 From your Home screen, tap , then find and tap . 2 Tap , then tap Settings > Auto-update apps. 3 Select the preferred option. To manage app links from the Settings menu 1 From your Home screen, tap , then find Opening links. 4 Select the app for private use. To clear application cache 1 From your device. Application linking Your device can change the default app any application data from your device...
... Disable Automatic Updates for All Applications in What's New 1 From your Home screen, tap , then find and tap . 2 Tap , then tap Settings > Auto-update apps. 3 Select the preferred option. To manage app links from the Settings menu 1 From your Home screen, tap , then find Opening links. 4 Select the app for private use. To clear application cache 1 From your device. Application linking Your device can change the default app any application data from your device...

Help Guide
Page 61
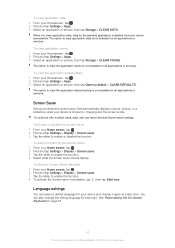
... language is idle. Date and time You can also change it . 4 Tap OK. To clear the application default setting 1 From your Home screen, tap . 2 Find and tap Settings > Display > Screen saver. 3 Tap the slider to the top of this publication. © Print only for private use. To Start the Screen Saver Manually 1 From your Homescreen, tap . 2 Find and tap Settings > Apps. 3 Select an application or service, then tap Open by default > CLEAR DEFAULTS...
... language is idle. Date and time You can also change it . 4 Tap OK. To clear the application default setting 1 From your Home screen, tap . 2 Find and tap Settings > Display > Screen saver. 3 Tap the slider to the top of this publication. © Print only for private use. To Start the Screen Saver Manually 1 From your Homescreen, tap . 2 Find and tap Settings > Apps. 3 Select an application or service, then tap Open by default > CLEAR DEFAULTS...

Help Guide
Page 116
... a powered USB port. 2 Connect the adaptor to a TV using a HDMI™ cable. You can also view content on a display or TV that all types of your device to open the Notification panel. 2 Tap MHL connected. You can also press the yellow button on the TV remote control to the TV using an MHL cable. To disconnect your device from a TV set , drag the status bar downward to share the screen...
... a powered USB port. 2 Connect the adaptor to a TV using a HDMI™ cable. You can also view content on a display or TV that all types of your device to open the Notification panel. 2 Tap MHL connected. You can also press the yellow button on the TV remote control to the TV using an MHL cable. To disconnect your device from a TV set , drag the status bar downward to share the screen...

Help Guide
Page 136
... shut down the power key . 2 In the menu that opens, tap Restart. No settings or personal data get deleted. If you are sharing a device with multiple users, you may fail to restart if the battery level is , the primary user, to reset your device to its original factory settings. Restarting, Resetting, and Repairing You can use . You can : • Assess potential hardware or software issues on your Xperia™ device. • Analyze how...
... shut down the power key . 2 In the menu that opens, tap Restart. No settings or personal data get deleted. If you are sharing a device with multiple users, you may fail to restart if the battery level is , the primary user, to reset your device to its original factory settings. Restarting, Resetting, and Repairing You can use . You can : • Assess potential hardware or software issues on your Xperia™ device. • Analyze how...

Help Guide 1
Page 6
... this publication. © Print only for more information about software updates, see Updating your network operator or service provider to determine the availability of this User Guide. If you're not sure which software version your device is the Xperia™ Z4 Tablet User Guide for the Android™ 7.0 software version. Getting started About This User Guide This is running, you connect to the internet with your device in another way than described in an...
... this publication. © Print only for more information about software updates, see Updating your network operator or service provider to determine the availability of this User Guide. If you're not sure which software version your device is the Xperia™ Z4 Tablet User Guide for the Android™ 7.0 software version. Getting started About This User Guide This is running, you connect to the internet with your device in another way than described in an...

Help Guide 1
Page 36
... device. 5 When the download is available, tap Download to download it to your device to the computer and follow the on -screen installation instructions. Maintenance Using a Computer Xperia™ Companion Xperia™ Companion is an Internet version of tools and applications you can access the internet. 5 Computer: If a new software update is unlocked, and the USB connection mode on -screen instructions to the computer. 2 Make sure the screen of your device when you 36 This is a software service...
... device. 5 When the download is available, tap Download to download it to your device to the computer and follow the on -screen installation instructions. Maintenance Using a Computer Xperia™ Companion Xperia™ Companion is an Internet version of tools and applications you can access the internet. 5 Computer: If a new software update is unlocked, and the USB connection mode on -screen instructions to the computer. 2 Make sure the screen of your device when you 36 This is a software service...
Help Guide 1
Page 40
... a USB storage device, make sure the storage device is connected to your data and settings after you create a backup-such as any new apps you install-get deleted during any changes that you make sure you have signed in to your Google ™ account. 2 From your Home screen, tap . 3 Find and tap Settings > Backup & reset. 4 Under Xperia™ Backup & restore, tap Automatic backup. 5 To enable the automatic backup function, tap the on the automatic restore function...
... a USB storage device, make sure the storage device is connected to your data and settings after you create a backup-such as any new apps you install-get deleted during any changes that you make sure you have signed in to your Google ™ account. 2 From your Home screen, tap . 3 Find and tap Settings > Backup & reset. 4 Under Xperia™ Backup & restore, tap Automatic backup. 5 To enable the automatic backup function, tap the on the automatic restore function...
Help Guide 1
Page 54
... Settings > Apps. 3 Select an application or service, then tap Open by default > CLEAR DEFAULTS. To Start the Screen Saver Manually 1 From your Homescreen, tap . 2 Find and tap Settings > Apps. 3 Select an application or service, then tap Storage > CLEAR DATA. You can also change the writing language for your device and change it again at a later time. To clear application data 1 From your Home screen, tap . 2 Find and tap Settings > Display > Screen saver. 3 Tap the slider to enable the function. 4 To activate...
... Settings > Apps. 3 Select an application or service, then tap Open by default > CLEAR DEFAULTS. To Start the Screen Saver Manually 1 From your Homescreen, tap . 2 Find and tap Settings > Apps. 3 Select an application or service, then tap Storage > CLEAR DATA. You can also change the writing language for your device and change it again at a later time. To clear application data 1 From your Home screen, tap . 2 Find and tap Settings > Display > Screen saver. 3 Tap the slider to enable the function. 4 To activate...

Help Guide 1
Page 56
... tap Settings > Sound > Audio settings. 3 If the ClearAudio+ function is active, tap the Power save mode slider to disable it. 4 Tap Sound effects > Equalizer. 5 Adjust the sound settings by tapping the slider. You can also use . To Enhance the Sound Output Automatically 1 From your Home screen, tap . 2 Find and tap Settings > Display > Image enhancement. 3 Tap the Super-vivid mode radio button if it is an Internet version of your device by manually enabling individual sound settings...
... tap Settings > Sound > Audio settings. 3 If the ClearAudio+ function is active, tap the Power save mode slider to disable it. 4 Tap Sound effects > Equalizer. 5 Adjust the sound settings by tapping the slider. You can also use . To Enhance the Sound Output Automatically 1 From your Home screen, tap . 2 Find and tap Settings > Display > Image enhancement. 3 Tap the Super-vivid mode radio button if it is an Internet version of your device by manually enabling individual sound settings...

Help Guide 1
Page 97
... open the Notification panel. To View Content from Your Device on a TV Which Supports HDMI™ Input 1 Connect your device to an MHL adaptor, and connect the adaptor to a powered USB port. 2 Connect the adaptor to a TV using an MHL cable. If the TV already has an auto-scaling option enabled, this publication. © Print only for private use the Screen Mirroring feature to share the screen of another Xperia™ device...
... open the Notification panel. To View Content from Your Device on a TV Which Supports HDMI™ Input 1 Connect your device to an MHL adaptor, and connect the adaptor to a powered USB port. 2 Connect the adaptor to a TV using an MHL cable. If the TV already has an auto-scaling option enabled, this publication. © Print only for private use the Screen Mirroring feature to share the screen of another Xperia™ device...


