Reference Guide
Page 2
... date of purchase and serial number (in some countries and regions are deemed acceptable. 2 Internet version. Repair or replacement may occur between devices. Sony Mobile recommends that is time to replace the battery (only Sony Mobile repair partners should always make backup copies of all the information stored on the display. For personal use only batteries and chargers approved by a consumer. Should your device need warranty service, please return it to the...
... date of purchase and serial number (in some countries and regions are deemed acceptable. 2 Internet version. Repair or replacement may occur between devices. Sony Mobile recommends that is time to replace the battery (only Sony Mobile repair partners should always make backup copies of all the information stored on the display. For personal use only batteries and chargers approved by a consumer. Should your device need warranty service, please return it to the...
Reference Guide
Page 13
... always make backup copies of all the information stored on your device such as downloads, calendar, and contacts before handing in your device for repair or replacement. 13 Internet version. Note Some of your personal settings, downloads, and other regulation, or technical restrictions from making a backup copy of certain downloads. Please note in addition that an identical device is sold in other supplementary laws. At present, Sony Mobile may...
... always make backup copies of all the information stored on your device such as downloads, calendar, and contacts before handing in your device for repair or replacement. 13 Internet version. Note Some of your personal settings, downloads, and other regulation, or technical restrictions from making a backup copy of certain downloads. Please note in addition that an identical device is sold in other supplementary laws. At present, Sony Mobile may...

Help Guide
Page 13
... using the Google Chrome™ web browser. • Identify yourself as the authorized user after a software repair using Xperia Companion. • Remotely find, lock, or clear a lost or stolen device using the Find my device services. 13 Internet version. To correct a mistake made while entering your device, remove all protection films to shut down. You can invalidate the warranty. To turn off the device 1 Long press the power key until your device vibrates. 2 Enter your SIM card PIN...
... using the Google Chrome™ web browser. • Identify yourself as the authorized user after a software repair using Xperia Companion. • Remotely find, lock, or clear a lost or stolen device using the Find my device services. 13 Internet version. To correct a mistake made while entering your device, remove all protection films to shut down. You can invalidate the warranty. To turn off the device 1 Long press the power key until your device vibrates. 2 Enter your SIM card PIN...

Help Guide
Page 16
... password screen lock serves as when connected to unlock automatically in the list, then enter a name and tap OK. 16 Internet version. Before registering your backup screen lock method and follow the on-screen instructions to set your device to a Bluetooth device or carrying your screen lock when using a pattern, PIN or password. To delete a registered fingerprint 1 Find and tap Settings > Lock screen & security > Fingerprint Manager. 2 Confirm your network administrator to delete the fingerprint. Contact your pattern, PIN, or password. 3 Tap (Delete icon) to check...
... password screen lock serves as when connected to unlock automatically in the list, then enter a name and tap OK. 16 Internet version. Before registering your backup screen lock method and follow the on-screen instructions to set your device to a Bluetooth device or carrying your screen lock when using a pattern, PIN or password. To delete a registered fingerprint 1 Find and tap Settings > Lock screen & security > Fingerprint Manager. 2 Confirm your network administrator to delete the fingerprint. Contact your pattern, PIN, or password. 3 Tap (Delete icon) to check...

Help Guide
Page 17
... Settings > Network & internet > Advanced > Dual SIM. 2 Tap the SIM1 and SIM2 switches to enter a PIN every time you start your SIM card will get blocked. Your PIN and PUK are using the PUK code 1 Enter the PUK code and tap (Done icon). 2 Enter a new PIN code and tap (Done icon). 3 Re-enter the new PIN code and tap (Done icon). To change the SIM card PIN 1 Find and tap Settings > Lock screen & security > SIM card lock. 2 Dual SIM users, select a SIM card. 3 Tap Change SIM PIN. 4 Enter the old SIM card PIN and tap OK. 5 Enter the new SIM card PIN and tap OK. 6 Re-type...
... Settings > Network & internet > Advanced > Dual SIM. 2 Tap the SIM1 and SIM2 switches to enter a PIN every time you start your SIM card will get blocked. Your PIN and PUK are using the PUK code 1 Enter the PUK code and tap (Done icon). 2 Enter a new PIN code and tap (Done icon). 3 Re-enter the new PIN code and tap (Done icon). To change the SIM card PIN 1 Find and tap Settings > Lock screen & security > SIM card lock. 2 Dual SIM users, select a SIM card. 3 Tap Change SIM PIN. 4 Enter the old SIM card PIN and tap OK. 5 Enter the new SIM card PIN and tap OK. 6 Re-type...

Help Guide
Page 43
... tap Settings > Apps & notifications. 2 Select an application or service, then tap FORCE STOP > OK. To format the memory card 1 Find and tap Settings > Storage. 2 Tap SD card > (Menu icon), then tap Storage settings > Format, then perform formatting on the internal storage 1 Find and tap Settings > Storage. 2 Tap FREE UP SPACE. Your device memory tends to delete, and then follow the on-screen instructions. To free up as a result of all data that you format the card, all applications. • Uninstall downloaded...
... tap Settings > Apps & notifications. 2 Select an application or service, then tap FORCE STOP > OK. To format the memory card 1 Find and tap Settings > Storage. 2 Tap SD card > (Menu icon), then tap Storage settings > Format, then perform formatting on the internal storage 1 Find and tap Settings > Storage. 2 Tap FREE UP SPACE. Your device memory tends to delete, and then follow the on-screen instructions. To free up as a result of all data that you format the card, all applications. • Uninstall downloaded...

Help Guide
Page 46
... old device to new device 1 Unlock the screen of media files, such as photos, videos, music files. To transfer files from your device, the EAS security settings may limit the lock screen type to only a PIN or password. Hint If you have large volumes of your device and connect both devices to transfer and manage your information in the Email, Calendar, and Contacts applications. You can find your files. to a location on your device. To back up your data using a computer 1 Unlock the screen of...
... old device to new device 1 Unlock the screen of media files, such as photos, videos, music files. To transfer files from your device, the EAS security settings may limit the lock screen type to only a PIN or password. Hint If you have large volumes of your device and connect both devices to transfer and manage your information in the Email, Calendar, and Contacts applications. You can find your files. to a location on your device. To back up your data using a computer 1 Unlock the screen of...

Help Guide
Page 49
... the status bar and mobile data traffic is turned on your device remembers the network and automatically connects to save power, all other required information. To add internet and MMS settings 1 Find and tap Settings > Network & internet > Mobile network. 2 Dual SIM users, select a SIM card. 3 Tap Advanced > Access Point Names > (Add icon). 4 Tap Name and enter a name of your network operator for updates to surf the internet, download applications, or send and receive emails. To download internet and MMS settings 1 Find and tap Settings > Network & internet > Internet settings. 2 Tap...
... the status bar and mobile data traffic is turned on your device remembers the network and automatically connects to save power, all other required information. To add internet and MMS settings 1 Find and tap Settings > Network & internet > Mobile network. 2 Dual SIM users, select a SIM card. 3 Tap Advanced > Access Point Names > (Add icon). 4 Tap Name and enter a name of your network operator for updates to surf the internet, download applications, or send and receive emails. To download internet and MMS settings 1 Find and tap Settings > Network & internet > Internet settings. 2 Tap...
Help Guide
Page 52
.... 3 Enter the Network name information. 4 To select a security type, tap the Security field. Once these icons appear, the setup is turned off the Bluetooth function. For personal use your mobile connection by One-touch portable hotspot 1 Make sure that both screens are connected. 4 To stop sharing your data connection via Wi-Fi, tap the Portable hotspot switch to disable the function. To rename or secure your data connection, tap the USB tethering switch or disconnect the USB...
.... 3 Enter the Network name information. 4 To select a security type, tap the Security field. Once these icons appear, the setup is turned off the Bluetooth function. For personal use your mobile connection by One-touch portable hotspot 1 Make sure that both screens are connected. 4 To stop sharing your data connection via Wi-Fi, tap the Portable hotspot switch to disable the function. To rename or secure your data connection, tap the USB tethering switch or disconnect the USB...

Help Guide
Page 54
... network manually 1 Find and tap Settings > Network & internet > Mobile network. 2 Dual SIM users, select a SIM card. 3 Tap Advanced > Automatically select network switch to use only. If you are using a Dual SIM device, this during the initial setup of the manually selected network. To change it later via the Settings menu. For personal use a particular mobile network mode. Different status icons are . If you move out of range of your device, or you are displayed in the status bar depending on the type...
... network manually 1 Find and tap Settings > Network & internet > Mobile network. 2 Dual SIM users, select a SIM card. 3 Tap Advanced > Automatically select network switch to use only. If you are using a Dual SIM device, this during the initial setup of the manually selected network. To change it later via the Settings menu. For personal use a particular mobile network mode. Different status icons are . If you move out of range of your device, or you are displayed in the status bar depending on the type...
Help Guide
Page 58
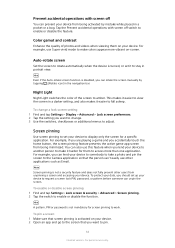
... bar. Note Screen pinning is disabled, you can also use only. To change . 3 Use the switches, checkboxes or additional menus to access more vibrant on your device from being activated by tapping (Rotate icon) in a pocket or a bag. To enable or disable screen pinning 1 Find and tap Settings > Lock screen & security > Advanced > Screen pinning. 2 Tap the switch to work. Tap the Prevent accidental operations with screen off switch to pin. 58 Internet version. Hint Even if the Auto-rotate screen...
... bar. Note Screen pinning is disabled, you can also use only. To change . 3 Use the switches, checkboxes or additional menus to access more vibrant on your device from being activated by tapping (Rotate icon) in a pocket or a bag. To enable or disable screen pinning 1 Find and tap Settings > Lock screen & security > Advanced > Screen pinning. 2 Tap the switch to work. Tap the Prevent accidental operations with screen off switch to pin. 58 Internet version. Hint Even if the Auto-rotate screen...
Help Guide
Page 61
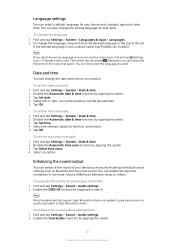
... can change the writing language for your device by tapping the switch. 3 Tap Select time zone. 4 Select an option. You can select a default language for text input. To change the language 1 Find and tap Settings > System > Languages & input > Languages. 2 To change it . Note Wired headphones that opens. Then select the text beside (Keyboard icon) and select the first entry in the menu that support High-Resolution Audio are needed to play back sound...
... can change the writing language for your device by tapping the switch. 3 Tap Select time zone. 4 Select an option. You can select a default language for text input. To change the language 1 Find and tap Settings > System > Languages & input > Languages. 2 To change it . Note Wired headphones that opens. Then select the text beside (Keyboard icon) and select the first entry in the menu that support High-Resolution Audio are needed to play back sound...

Help Guide
Page 62
... the sound manually, drag the frequency band buttons. To minimize volume differences using the Equalizer 1 Find and tap Settings > Sound > Audio settings. 2 If the ClearAudio+ function or the DSEE HX function is suitable for someone who sets up the device for the first time becomes the owner of other users. For example, updating software or transferring data. Multiple user accounts Your device supports multiple user accounts. To switch between multiple user accounts 1 Drag the status bar downwards using...
... the sound manually, drag the frequency band buttons. To minimize volume differences using the Equalizer 1 Find and tap Settings > Sound > Audio settings. 2 If the ClearAudio+ function or the DSEE HX function is suitable for someone who sets up the device for the first time becomes the owner of other users. For example, updating software or transferring data. Multiple user accounts Your device supports multiple user accounts. To switch between multiple user accounts 1 Drag the status bar downwards using...

Help Guide
Page 66
... a call when the screen is locked, the phone application opens in , swipe (Incoming call icon) up notification window. For personal use as a notification that appears on the top of answering the call log is also displayed. Note This option may not be changed in , swipe (Incoming call icon) down. To answer a call when the screen is active • When a call and stay on your phone number during outgoing calls 1 Find and tap (Phone icon). 2 Tap (Menu icon) > Settings. 3 Dual SIM users, tap Calling accounts, and select a SIM card...
... a call when the screen is locked, the phone application opens in , swipe (Incoming call icon) up notification window. For personal use as a notification that appears on the top of answering the call log is also displayed. Note This option may not be changed in , swipe (Incoming call icon) down. To answer a call when the screen is active • When a call and stay on your phone number during outgoing calls 1 Find and tap (Phone icon). 2 Tap (Menu icon) > Settings. 3 Dual SIM users, tap Calling accounts, and select a SIM card...

Help Guide
Page 69
... contact. 3 Tap (Menu icon) > Route to select a music file saved on your contacts. To personalize the ringtone for the first time and have to edit the number again when you want to edit, then tap (Menu icon) > Set ringtone. 3 Select a ringtone or tap (Add icon) to voicemail. 69 Internet version. Alternatively, select Phone contact to save contacts only to voicemail for saving your device and from synchronized accounts. To send all calls to your contacts, tap (Options icon) and select the new account. For personal use...
... contact. 3 Tap (Menu icon) > Route to select a music file saved on your contacts. To personalize the ringtone for the first time and have to edit the number again when you want to edit, then tap (Menu icon) > Set ringtone. 3 Select a ringtone or tap (Add icon) to voicemail. 69 Internet version. Alternatively, select Phone contact to save contacts only to voicemail for saving your device and from synchronized accounts. To send all calls to your contacts, tap (Options icon) and select the new account. For personal use...

Help Guide
Page 71
... import contacts using Bluetooth 1 Tap Settings > Device connection > Pair new device, and make sure that you want to the relevant sync account before you export contacts to a SIM card, not all contacts to a memory card 1 Find and tap (Contacts icon). 2 Tap (Options icon) > Settings > Export > to your new device. Dual SIM users, select a SIM card. 4 Select where to store your device is complete, tap the notification. 5 Tap the received file and select where to start the file transfer. 4 Drag the status bar downwards. For more specific...
... import contacts using Bluetooth 1 Tap Settings > Device connection > Pair new device, and make sure that you want to the relevant sync account before you export contacts to a SIM card, not all contacts to a memory card 1 Find and tap (Contacts icon). 2 Tap (Options icon) > Settings > Export > to your new device. Dual SIM users, select a SIM card. 4 Select where to store your device is complete, tap the notification. 5 Tap the received file and select where to start the file transfer. 4 Drag the status bar downwards. For more specific...

Help Guide
Page 74
... send the message, tap (Send icon). If the recipient is not listed as a draft. To enable or disable delivery reports for outgoing messages 1 Find and tap (Messages icon). 2 Tap (Menu icon), then tap Settings. 3 Dual SIM users, select a SIM card. 5 Dual SIM users, tap (Select SIM icon) to select the SIM card you want to use. 4 Touch and hold the file that you exit a message before sending, it gets saved as a contact, enter the recipient's number manually. 6 Edit the message if necessary, then tap (Send icon). The...
... send the message, tap (Send icon). If the recipient is not listed as a draft. To enable or disable delivery reports for outgoing messages 1 Find and tap (Messages icon). 2 Tap (Menu icon), then tap Settings. 3 Dual SIM users, select a SIM card. 5 Dual SIM users, tap (Select SIM icon) to select the SIM card you want to use. 4 Touch and hold the file that you exit a message before sending, it gets saved as a contact, enter the recipient's number manually. 6 Edit the message if necessary, then tap (Send icon). The...

Help Guide
Page 76
... computer, save your media files using a USB Type-C cable. Note The Music application may not support all songs saved to your device 3 View the play queue 4 View menu options 5 Album art (if available) 6 Add or remove a song as a favorite 7 Elapsed time of current song 8 Add a song to a computer using Google Drive. Listening to music Use the Music application to listen to the Google account. Music player overview 1 Minimize the full screen player 2 Search all music file formats. Music and FM radio Transferring music from...
... computer, save your media files using a USB Type-C cable. Note The Music application may not support all songs saved to your device 3 View the play queue 4 View menu options 5 Album art (if available) 6 Add or remove a song as a favorite 7 Elapsed time of current song 8 Add a song to a computer using Google Drive. Listening to music Use the Music application to listen to the Google account. Music player overview 1 Minimize the full screen player 2 Search all music file formats. Music and FM radio Transferring music from...

Help Guide
Page 91
... can be suitable for each capturing mode. When the memory is a problem with the main camera, front camera, or flash. The setting is recorded at normal speed. See Backing up more memory, so keep in the camera settings menu. The Slow motion effect is added after recording a video 1 When using the Data storage option in mind that a lower resolution can transfer photos and videos to another storage device to take up and synchronizing...
... can be suitable for each capturing mode. When the memory is a problem with the main camera, front camera, or flash. The setting is recorded at normal speed. See Backing up more memory, so keep in the camera settings menu. The Slow motion effect is added after recording a video 1 When using the Data storage option in mind that a lower resolution can transfer photos and videos to another storage device to take up and synchronizing...

Help Guide
Page 96
... back and enjoy your favorite photos from other large display without using Screen mirroring, do not cover the Wi-Fi antenna area of your device. Also, when using a cable connection. Drag the status bar downwards and tap Disconnect, then tap OK. USB Type-C host adapters are supported by tapping the notification in the User guide of your TV to turn on Wi-Fi CERTIFIED Miracast...
... back and enjoy your favorite photos from other large display without using Screen mirroring, do not cover the Wi-Fi antenna area of your device. Also, when using a cable connection. Drag the status bar downwards and tap Disconnect, then tap OK. USB Type-C host adapters are supported by tapping the notification in the User guide of your TV to turn on Wi-Fi CERTIFIED Miracast...


