
User Guide
Page 2
... and Ports...13 About the Indicator Lights ...20 Connecting a Power Source ...22 Using the Battery Pack ...23 Shutting Down Your Computer Safely ...27 Using Your VAIO Computer ...28 Using the Keyboard ...29 Using the Touch Pad ...31 Using Special-function Buttons ...32 Using the Optical Disc Drive ...34 Using PC Cards...
... and Ports...13 About the Indicator Lights ...20 Connecting a Power Source ...22 Using the Battery Pack ...23 Shutting Down Your Computer Safely ...27 Using Your VAIO Computer ...28 Using the Keyboard ...29 Using the Touch Pad ...31 Using Special-function Buttons ...32 Using the Optical Disc Drive ...34 Using PC Cards...

User Guide
Page 3
...USB) Device...83 Connecting a Printer ...86 Connecting an i.LINK Device ...87 Connecting to a Network (LAN) ...89 Customizing Your VAIO Computer ...90 Setting the Password ...91 Using Fingerprint Authentication ...102 Using Trusted Platform Module (TPM)...127 Setting Up Your Computer with... VAIO Central ...134 Using the Power Saving Modes ...135 Managing Power with VAIO Power Management ...140 Changing the Performance Setting ...143 Protecting the Hard Disk ...144 Upgrading Your VAIO Computer...145 Adding and Removing Memory...146
...USB) Device...83 Connecting a Printer ...86 Connecting an i.LINK Device ...87 Connecting to a Network (LAN) ...89 Customizing Your VAIO Computer ...90 Setting the Password ...91 Using Fingerprint Authentication ...102 Using Trusted Platform Module (TPM)...127 Setting Up Your Computer with... VAIO Central ...134 Using the Power Saving Modes ...135 Managing Power with VAIO Power Management ...140 Changing the Performance Setting ...143 Protecting the Hard Disk ...144 Upgrading Your VAIO Computer...145 Adding and Removing Memory...146

User Guide
Page 4
n4 N Precautions ...152 On Handling the LCD Screen ...153 On Using the Power Source ...154 On Handling Your Computer...155 On Handling Floppy Disks ...157 On Handling Discs ...158 On Using the Battery Pack...159 On Using Headphones...160 On Handling Memory Stick Media...161 On Handling the Hard Disk ...162 Troubleshooting ...163 Computer ...165 System Security ...172 Battery...173 Internet ...175 Networking ...177 Bluetooth Technology ...180 Optical Discs ...184 Display ...188 Printing ...191 Microphone ...192 Mouse ...193 Speakers ...194 Touch Pad...195
n4 N Precautions ...152 On Handling the LCD Screen ...153 On Using the Power Source ...154 On Handling Your Computer...155 On Handling Floppy Disks ...157 On Handling Discs ...158 On Using the Battery Pack...159 On Using Headphones...160 On Handling Memory Stick Media...161 On Handling the Hard Disk ...162 Troubleshooting ...163 Computer ...165 System Security ...172 Battery...173 Internet ...175 Networking ...177 Bluetooth Technology ...180 Optical Discs ...184 Display ...188 Printing ...191 Microphone ...192 Mouse ...193 Speakers ...194 Touch Pad...195

User Guide
Page 14
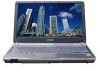
Front n 14 N Getting Started A Media Access indicator (page 20) B Memory Stick PRO/Duo media slot* (page 48) C SD memory card/MultiMediaCard (MMC) slot (page 52) D LCD screen (page 153) E Keyboard (page 29) F Touch pad (page 31) G Fingerprint sensor (page 102) H WIRELESS switch (page 56) I Muting button (page 32) J Volume buttons (page 32) K Headphones jack (page 75) L Microphone jack (page 82) * Your computer supports Memory Stick PRO media and Memory Stick Duo media with high speed and high capacity capabilities.
Front n 14 N Getting Started A Media Access indicator (page 20) B Memory Stick PRO/Duo media slot* (page 48) C SD memory card/MultiMediaCard (MMC) slot (page 52) D LCD screen (page 153) E Keyboard (page 29) F Touch pad (page 31) G Fingerprint sensor (page 102) H WIRELESS switch (page 56) I Muting button (page 32) J Volume buttons (page 32) K Headphones jack (page 75) L Microphone jack (page 82) * Your computer supports Memory Stick PRO media and Memory Stick Duo media with high speed and high capacity capabilities.

User Guide
Page 20
... using battery power, blinks when the battery pack is running out of the computer is on .) When the indicator is off, the memory card is read from or written to a memory card. (Do not enter Sleep mode or turn off the computer when this indicator is on , blinks when the computer is...
... using battery power, blinks when the battery pack is running out of the computer is on .) When the indicator is off, the memory card is read from or written to a memory card. (Do not enter Sleep mode or turn off the computer when this indicator is on , blinks when the computer is...

User Guide
Page 28
Using Your VAIO Computer This section describes how to get the most out of using your VAIO computer. ❑ Using the Keyboard (page 29) ❑ Using the Touch Pad (page 31) ❑ Using Special-function Buttons (page 32) ❑ Using the Optical Disc Drive (page 34) ❑ Using PC Cards (page 44) ❑ Using the Memory Stick Media (page 47) ❑ Using Other Memory Cards (page 52) ❑ Using the Internet (page 55) ❑ Using Wireless LAN (WLAN) (page 56) ❑ Using the Bluetooth Functionality (page 63) n 28 N Using Your VAIO Computer
Using Your VAIO Computer This section describes how to get the most out of using your VAIO computer. ❑ Using the Keyboard (page 29) ❑ Using the Touch Pad (page 31) ❑ Using Special-function Buttons (page 32) ❑ Using the Optical Disc Drive (page 34) ❑ Using PC Cards (page 44) ❑ Using the Memory Stick Media (page 47) ❑ Using Other Memory Cards (page 52) ❑ Using the Internet (page 55) ❑ Using Wireless LAN (WLAN) (page 56) ❑ Using the Bluetooth Functionality (page 63) n 28 N Using Your VAIO Computer

User Guide
Page 32
...Plays the next chapter/movie in the DVD during playback with the WinDVD software or the next song in the memory card, such as a Memory Stick media or SD memory card, without launching Windows. Special-function button AV MODE button Play/Pause button Stop button Previous track button Next ...song in Instant Mode as well as when Windows is launched and running : Launches the WinDVD software by default. n 32 N Using Your VAIO Computer Using Special-function Buttons Your computer is equipped with special buttons to help file on the AV Mode Button Settings utility for more information...
...Plays the next chapter/movie in the DVD during playback with the WinDVD software or the next song in the memory card, such as a Memory Stick media or SD memory card, without launching Windows. Special-function button AV MODE button Play/Pause button Stop button Previous track button Next ...song in Instant Mode as well as when Windows is launched and running : Launches the WinDVD software by default. n 32 N Using Your VAIO Computer Using Special-function Buttons Your computer is equipped with special buttons to help file on the AV Mode Button Settings utility for more information...

User Guide
Page 39
.... ❑ Deactivate the screen saver and exit anti-virus software before you eject it. n 39 N Using Your VAIO Computer Notes on writing data to a disc ❑ Use only Sony Value-added software when writing to burn discs, make sure you exit and close the session before writing data to... Roxio Easy Media Creator software to add some data to a used disc. To complete this may cause your software. ❑ Only use memory-resident utility software while writing data to discs. This will affect the use of different CD burning software for additional data burning may result. ...
.... ❑ Deactivate the screen saver and exit anti-virus software before you eject it. n 39 N Using Your VAIO Computer Notes on writing data to a disc ❑ Use only Sony Value-added software when writing to burn discs, make sure you exit and close the session before writing data to... Roxio Easy Media Creator software to add some data to a used disc. To complete this may cause your software. ❑ Only use memory-resident utility software while writing data to discs. This will affect the use of different CD burning software for additional data burning may result. ...

User Guide
Page 40
... is different from the label on the DVD disc or on the packaging, you cannot play the disc on your computer. ! n 40 N Using Your VAIO Computer Notes on playing discs To achieve optimum performance when playing DVDs, you should follow these recommendations. ❑ Close all ," this means that you can... DVDs to change it to play the disc. R DL, DVD+R, DVD+RW, DVD-R, DVD-RW, or DVD-RAM disc media. ❑ Do not use memory-resident utility software to malfunction. ❑ Deactivate the screen saver and exit anti-virus software before playing a DVD. ❑ Do not switch to power saving...
... is different from the label on the DVD disc or on the packaging, you cannot play the disc on your computer. ! n 40 N Using Your VAIO Computer Notes on playing discs To achieve optimum performance when playing DVDs, you should follow these recommendations. ❑ Close all ," this means that you can... DVDs to change it to play the disc. R DL, DVD+R, DVD+RW, DVD-R, DVD-RW, or DVD-RAM disc media. ❑ Do not use memory-resident utility software to malfunction. ❑ Deactivate the screen saver and exit anti-virus software before playing a DVD. ❑ Do not switch to power saving...
User Guide
Page 47
...cameras, mobile phones and other devices. n 47 N Using Your VAIO Computer Using the Memory Stick Media Your computer supports the Memory Stick media. Inserting a Memory Stick media with capacity of the copyright protection technology developed by Sony. Because it is the general name of up to use this feature.... For the latest information about the Memory Stick media, visit the Memory Stick Web site at http://www.memorystick.com/en/. ! Memory Stick media is not guaranteed of ...
...cameras, mobile phones and other devices. n 47 N Using Your VAIO Computer Using the Memory Stick Media Your computer supports the Memory Stick media. Inserting a Memory Stick media with capacity of the copyright protection technology developed by Sony. Because it is the general name of up to use this feature.... For the latest information about the Memory Stick media, visit the Memory Stick Web site at http://www.memorystick.com/en/. ! Memory Stick media is not guaranteed of ...

User Guide
Page 48
...VAIO Computer Inserting a Memory Stick Media To insert a Memory Stick media 1 Hold the Memory Stick media with the arrow facing upward and pointing toward the Memory Stick PRO/Duo media slot. 2 Carefully slide the Memory Stick media into the slot until it smoothly. Improper insertion of the computer). ! You can insert a Memory...with the arrow pointing in your Computer window as a local drive, under the appropriate letter (depending on the Memory Stick Duo media, visit the Memory Stick Web site at http://www.memorystick.com/en/. and duo-size media. Do not insert more information ...
...VAIO Computer Inserting a Memory Stick Media To insert a Memory Stick media 1 Hold the Memory Stick media with the arrow facing upward and pointing toward the Memory Stick PRO/Duo media slot. 2 Carefully slide the Memory Stick media into the slot until it smoothly. Improper insertion of the computer). ! You can insert a Memory...with the arrow pointing in your Computer window as a local drive, under the appropriate letter (depending on the Memory Stick Duo media, visit the Memory Stick Web site at http://www.memorystick.com/en/. and duo-size media. Do not insert more information ...

User Guide
Page 49
...Click Start and Computer to open the Computer window. 2 Double-click the Memory Stick media icon to view the list of data files saved in Format options. n 49 N Using Your VAIO Computer To view the contents of the Memory Stick media 1 Click Start and Computer to open the Computer window. 3... Right-click the Memory Stick media icon and select Format. 4 Click Restore device defaults. ! Avoid accidental...
...Click Start and Computer to open the Computer window. 2 Double-click the Memory Stick media icon to view the list of data files saved in Format options. n 49 N Using Your VAIO Computer To view the contents of the Memory Stick media 1 Click Start and Computer to open the Computer window. 3... Right-click the Memory Stick media icon and select Format. 4 Click Restore device defaults. ! Avoid accidental...

User Guide
Page 50
It may take time to format the Memory Stick media depending on the media. 7 Once completed, click OK. 8 Click Close. n 50 N Using Your VAIO Computer 5 Click Start. 6 At the confirmation prompt, click OK. The formatting process starts. !
It may take time to format the Memory Stick media depending on the media. 7 Once completed, click OK. 8 Click Close. n 50 N Using Your VAIO Computer 5 Click Start. 6 At the confirmation prompt, click OK. The formatting process starts. !

User Guide
Page 51
... Media Access indicator light is off . 2 Push the Memory Stick media in toward the computer. n 51 N Using Your VAIO Computer Removing a Memory Stick Media To remove a Memory Stick media 1 Check that the Media Access indicator light is off before removing the Memory Stick media. Always remove the Memory Stick media gently, or it may lose data...
... Media Access indicator light is off . 2 Push the Memory Stick media in toward the computer. n 51 N Using Your VAIO Computer Removing a Memory Stick Media To remove a Memory Stick media 1 Check that the Media Access indicator light is off before removing the Memory Stick media. Always remove the Memory Stick media gently, or it may lose data...
User Guide
Page 52
... damage to accommodate other audio/video devices. An incompatible memory card or memory card adapter may be difficult to remove from the slot. n 52 N Using Your VAIO Computer Using Other Memory Cards In addition to the Memory Stick PRO/Duo media slot, your computer is equipped ...with an SD memory card/MultiMediaCard (MMC) slot to your computer. Before You Use Memory Cards The SD memory card/MultiMediaCard (MMC) slot on compatible memory cards, visit the Sony online ...
... damage to accommodate other audio/video devices. An incompatible memory card or memory card adapter may be difficult to remove from the slot. n 52 N Using Your VAIO Computer Using Other Memory Cards In addition to the Memory Stick PRO/Duo media slot, your computer is equipped ...with an SD memory card/MultiMediaCard (MMC) slot to your computer. Before You Use Memory Cards The SD memory card/MultiMediaCard (MMC) slot on compatible memory cards, visit the Sony online ...

User Guide
Page 53
Inserting a Memory Card To insert a memory card 1 Locate the SD memory card/MultiMediaCard (MMC) slot on the front of the computer. n 53 N Using Your VAIO Computer 2 Hold the memory card with the arrow facing upward and pointing toward the memory card slot. 3 Carefully slide the memory card into place. Do not force the card into the slot. ✍ If the memory card does not go into the slot easily, remove it gently and verify you are inserting it clicks into the slot until it in the proper direction.
Inserting a Memory Card To insert a memory card 1 Locate the SD memory card/MultiMediaCard (MMC) slot on the front of the computer. n 53 N Using Your VAIO Computer 2 Hold the memory card with the arrow facing upward and pointing toward the memory card slot. 3 Carefully slide the memory card into place. Do not force the card into the slot. ✍ If the memory card does not go into the slot easily, remove it gently and verify you are inserting it clicks into the slot until it in the proper direction.

User Guide
Page 54
Do not remove a memory card while the Media Access indicator light is off. 2 Press the extended part of the memory card, causing it to extend out from the slot. 3 When the card extends, carefully pull it out of the slot. n 54 N Using Your VAIO Computer Removing a Memory Card ! To remove a memory card 1 Check that the Media Access indicator light is on. The card or its data may become damaged.
Do not remove a memory card while the Media Access indicator light is off. 2 Press the extended part of the memory card, causing it to extend out from the slot. 3 When the card extends, carefully pull it out of the slot. n 54 N Using Your VAIO Computer Removing a Memory Card ! To remove a memory card 1 Check that the Media Access indicator light is on. The card or its data may become damaged.

User Guide
Page 88
... video camcorder shown here is an example; You cannot access the pictures stored on the digital video camcorder. 2 Launch the DVgate Plus software. ✍ On Sony digital video cameras, ports labeled DV Out, DV In/Out, or i.LINK are i.LINK-compatible. n 88 N Using Peripheral Devices Connecting a Digital Video Camcorder To connect... end of an i.LINK cable (1) (not supplied) into the i.LINK port (2) on the computer and the other end into the DV In/Out ports (3) on a Memory Stick media when using an i.LINK connection.
... video camcorder shown here is an example; You cannot access the pictures stored on the digital video camcorder. 2 Launch the DVgate Plus software. ✍ On Sony digital video cameras, ports labeled DV Out, DV In/Out, or i.LINK are i.LINK-compatible. n 88 N Using Peripheral Devices Connecting a Digital Video Camcorder To connect... end of an i.LINK cable (1) (not supplied) into the i.LINK port (2) on the computer and the other end into the DV In/Out ports (3) on a Memory Stick media when using an i.LINK connection.

User Guide
Page 111
...finger of which fingerprint you want to substitute fingerprint authentication for the Power-on Security feature and Next. ✍ If the Power-on Security memory contains the enrolled fingerprints, no buttons are enrolled for the power-on password or hard disk password, you will be able to use for ...password entry when starting your fingerprints are displayed on the Power-on row. 9 Click Finish. n 111 N Customizing Your VAIO Computer To enable the Power-on Security feature If your computer. 1 Click Start, All Programs, Protector Suite QL, and Control Center.
...finger of which fingerprint you want to substitute fingerprint authentication for the Power-on Security feature and Next. ✍ If the Power-on Security memory contains the enrolled fingerprints, no buttons are enrolled for the power-on password or hard disk password, you will be able to use for ...password entry when starting your fingerprints are displayed on the Power-on row. 9 Click Finish. n 111 N Customizing Your VAIO Computer To enable the Power-on Security feature If your computer. 1 Click Start, All Programs, Protector Suite QL, and Control Center.

User Guide
Page 130
n 130 N Customizing Your VAIO Computer ❑ Do not encrypt the following files and folders including them . Sony assumes no way to restore them if you carelessly encrypt them . ❑ Automatic backup file Default file name: SPSystemBackup.xml Default ... the subfolder for the SPSystemBackup.xml file. ❑ Token file for decryption Default file name: SPEmRecToken.xml Default path: Removable media (FD, USB memory, etc.) ❑ Key and certificate backup file Default file name: SpBackupArchive.xml Default path: None (Clicking Browse displays the \Documents\Security Platform window...
n 130 N Customizing Your VAIO Computer ❑ Do not encrypt the following files and folders including them . Sony assumes no way to restore them if you carelessly encrypt them . ❑ Automatic backup file Default file name: SPSystemBackup.xml Default ... the subfolder for the SPSystemBackup.xml file. ❑ Token file for decryption Default file name: SPEmRecToken.xml Default path: Removable media (FD, USB memory, etc.) ❑ Key and certificate backup file Default file name: SpBackupArchive.xml Default path: None (Clicking Browse displays the \Documents\Security Platform window...


