User Guide
Page 2
...Started ...11 Locating Controls and Ports...12 About the Indicator Lights ...17 Setting Up Your Computer ...18 Shutting Down Your Computer Safely ...33 Using Your VAIO Computer ...34 Using the Keyboard ...35 Using the Touch Pad ...39 Using the Mouse ...40 Using the Built-in MOTION EYE Camera...43 Using ...the Optical Disc Drive ...47 Using the TV Function ...56 Using the HDMI Input Function ...75 Using the ExpressCard Module ...82 Using the Memory Stick ...86 Using the SD Memory Card ...92 Using the Internet......
...Started ...11 Locating Controls and Ports...12 About the Indicator Lights ...17 Setting Up Your Computer ...18 Shutting Down Your Computer Safely ...33 Using Your VAIO Computer ...34 Using the Keyboard ...35 Using the Touch Pad ...39 Using the Mouse ...40 Using the Built-in MOTION EYE Camera...43 Using ...the Optical Disc Drive ...47 Using the TV Function ...56 Using the HDMI Input Function ...75 Using the ExpressCard Module ...82 Using the Memory Stick ...86 Using the SD Memory Card ...92 Using the Internet......

User Guide
Page 4
n4 N Troubleshooting ...152 Computer ...154 System Security ...160 Built-in MOTION EYE Camera...161 Networking ...164 Bluetooth Technology ...167 Optical Discs ...171 Display ...176 Printing ...177 Microphone ...178 Mouse ...179 Speakers ...180 Touch Pad...182 Keyboard...183 Floppy Disks ...184 Audio/Video...185 HDMI ...188 Memory Stick ...190 Peripherals ...191 Support Options ...192 Sony Support Information ...193 Program Support Information...196 Trademarks ...206
n4 N Troubleshooting ...152 Computer ...154 System Security ...160 Built-in MOTION EYE Camera...161 Networking ...164 Bluetooth Technology ...167 Optical Discs ...171 Display ...176 Printing ...177 Microphone ...178 Mouse ...179 Speakers ...180 Touch Pad...182 Keyboard...183 Floppy Disks ...184 Audio/Video...185 HDMI ...188 Memory Stick ...190 Peripherals ...191 Support Options ...192 Sony Support Information ...193 Program Support Information...196 Trademarks ...206

User Guide
Page 12
... sensor Point the supplied remote commander to this manual due to identify the controls and ports shown on the following pages. ! G SONY logo lamp (page 120) H LCD screen (page 139) I HDMI SELECT indicator* (page 17) J WIRELESS indicator (page 17) K DISPLAY OFF indicator (page 17) L Hard disk drive/Optical disc drive indicator (page...
... sensor Point the supplied remote commander to this manual due to identify the controls and ports shown on the following pages. ! G SONY logo lamp (page 120) H LCD screen (page 139) I HDMI SELECT indicator* (page 17) J WIRELESS indicator (page 17) K DISPLAY OFF indicator (page 17) L Hard disk drive/Optical disc drive indicator (page...

User Guide
Page 13
... Started A Power button B DISPLAY OFF button Press this button also turns off the LCD backlight. J Base stand (page 143) * Support high-/full-/low- While the HDMI input is selected (page 76), pressing this button to turn off the volume. C Capture angle adjuster (page 43) D Back panel cover Remove the back panel...
... Started A Power button B DISPLAY OFF button Press this button also turns off the LCD backlight. J Base stand (page 143) * Support high-/full-/low- While the HDMI input is selected (page 76), pressing this button to turn off the volume. C Capture angle adjuster (page 43) D Back panel cover Remove the back panel...

User Guide
Page 14
...) C Memory module compartment cover (page 127) D AC In port (page 23) E CABLE/ANT DIGITAL input port* (page 63) F CABLE/ANT ANALOG input port* (page 56) G HDMI INPUT port* (page 75) H Cable clamps (page 25) I INFRARED TRANSMITTER OUT jack* (page 73) J S VIDEO input port* (page 64) K A/V INPUT jack* (page 64) L Network (Ethernet...
...) C Memory module compartment cover (page 127) D AC In port (page 23) E CABLE/ANT DIGITAL input port* (page 63) F CABLE/ANT ANALOG input port* (page 56) G HDMI INPUT port* (page 75) H Cable clamps (page 25) I INFRARED TRANSMITTER OUT jack* (page 73) J S VIDEO input port* (page 64) K A/V INPUT jack* (page 64) L Network (Ethernet...

User Guide
Page 15
Right n 15 N Getting Started A Optical disc drive (page 47) B Drive eject button (page 48) C Hi-Speed USB (USB 2.0) ports*1 (page 107) D WIRELESS switch (page 96) E HDMI SELECT button*2 (page 76) F MENU button*2 (page 76) G Up/Down buttons*2 (page 76) H OK button*2 (page 76) *1 Support high-/full-/low- speeds. *2 On selected models only.
Right n 15 N Getting Started A Optical disc drive (page 47) B Drive eject button (page 48) C Hi-Speed USB (USB 2.0) ports*1 (page 107) D WIRELESS switch (page 96) E HDMI SELECT button*2 (page 76) F MENU button*2 (page 76) G Up/Down buttons*2 (page 76) H OK button*2 (page 76) *1 Support high-/full-/low- speeds. *2 On selected models only.

User Guide
Page 17
... Illuminates while the built-in MOTION EYE camera is equipped with the following indicator lights: Indicator Power 1 Built-in MOTION EYE camera Media Access HDMI SELECT* DISPLAY OFF Hard disk drive/Optical disc drive WIRELESS * On selected models only. Illuminates when the drive is selected. Illuminates in green ... it off when this indicator is turned on , illuminates in orange while the computer is in use . Functions Illuminates in green while the HDMI input is reading or writing data. Illuminates when data is read from or written to a memory card. (Do not place the computer into...
... Illuminates while the built-in MOTION EYE camera is equipped with the following indicator lights: Indicator Power 1 Built-in MOTION EYE camera Media Access HDMI SELECT* DISPLAY OFF Hard disk drive/Optical disc drive WIRELESS * On selected models only. Illuminates when the drive is selected. Illuminates in green ... it off when this indicator is turned on , illuminates in orange while the computer is in use . Functions Illuminates in green while the HDMI input is reading or writing data. Illuminates when data is read from or written to a memory card. (Do not place the computer into...
User Guide
Page 25
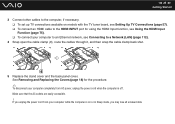
If you may lose all unsaved data. See Removing and Replacing the Covers (page 18) for using the HDMI Input function, see Using the HDMI Input Function (page 75). ❑ To connect your computer to an Ethernet network, see Connecting to a Network (LAN) (page 112). 4 Snap open ...Started 3 Connect other cables to the computer, if necessary. ❑ To set up TV connections available on models with the TV tuner board, see Setting Up TV Connections (page 57). ❑ To connect an HDMI cable to the HDMI INPUT port for the procedure. ✍ To disconnect your computer while the computer is...
If you may lose all unsaved data. See Removing and Replacing the Covers (page 18) for using the HDMI Input function, see Using the HDMI Input Function (page 75). ❑ To connect your computer to an Ethernet network, see Connecting to a Network (LAN) (page 112). 4 Snap open ...Started 3 Connect other cables to the computer, if necessary. ❑ To set up TV connections available on models with the TV tuner board, see Setting Up TV Connections (page 57). ❑ To connect an HDMI cable to the HDMI INPUT port for the procedure. ✍ To disconnect your computer while the computer is...

User Guide
Page 34
... This section describes how to get the most out of using your VAIO computer. ❑ Using the Keyboard (page 35) ❑ Using the Touch Pad (page 39) ❑ Using the Mouse (page 40) ❑ Using the Built-in ...MOTION EYE Camera (page 43) ❑ Using the Optical Disc Drive (page 47) ❑ Using the TV Function (page 56) ❑ Using the HDMI Input Function (page 75) ❑ Using the ExpressCard Module (page 82) ❑ Using the Memory Stick (page 86) ❑ Using the SD...
... This section describes how to get the most out of using your VAIO computer. ❑ Using the Keyboard (page 35) ❑ Using the Touch Pad (page 39) ❑ Using the Mouse (page 40) ❑ Using the Built-in ...MOTION EYE Camera (page 43) ❑ Using the Optical Disc Drive (page 47) ❑ Using the TV Function (page 56) ❑ Using the HDMI Input Function (page 75) ❑ Using the ExpressCard Module (page 82) ❑ Using the Memory Stick (page 86) ❑ Using the SD...

User Guide
Page 75
...VAIO Computer Using the HDMI Input Function Your computer may be equipped with an HDMI INPUT port that enables you can receive the highdefinition video and sound outputs from the connected device and you to connect a device with the HDMI Input function. You cannot record the HDMI input, such as a TV... program, displayed on your computer is equipped with the HDMI INPUT port. ! See the online specifications to find out if your computer and...
...VAIO Computer Using the HDMI Input Function Your computer may be equipped with an HDMI INPUT port that enables you can receive the highdefinition video and sound outputs from the connected device and you to connect a device with the HDMI Input function. You cannot record the HDMI input, such as a TV... program, displayed on your computer is equipped with the HDMI INPUT port. ! See the online specifications to find out if your computer and...

User Guide
Page 76
... selected, the HDMI SELECT button and the HDMI SELECT indicator light illuminate in green. HDMI input control buttons HDMI SELECT button MENU button Functions Toggles the display and sound input between the computer input and the HDMI input from the connected device. n 76 N Using Your VAIO Computer Using the HDMI Input Control Buttons The HDMI input control buttons...
... selected, the HDMI SELECT button and the HDMI SELECT indicator light illuminate in green. HDMI input control buttons HDMI SELECT button MENU button Functions Toggles the display and sound input between the computer input and the HDMI input from the connected device. n 76 N Using Your VAIO Computer Using the HDMI Input Control Buttons The HDMI input control buttons...

User Guide
Page 77
... computer, you have enabled the Auto Input Sensing feature with an HDMI cable to display the HDMI input from the base stand before setting up the HDMI connection. n 77 N Using Your VAIO Computer Connecting and Using the HDMI-Compatible Device You need to connect the HDMI-compatible device to your computer with the OSD menu, turning...
... computer, you have enabled the Auto Input Sensing feature with an HDMI cable to display the HDMI input from the base stand before setting up the HDMI connection. n 77 N Using Your VAIO Computer Connecting and Using the HDMI-Compatible Device You need to connect the HDMI-compatible device to your computer with the OSD menu, turning...

User Guide
Page 78
You cannot use the OSD menu to change the volume. While the HDMI input is selected: - n 78 N Using Your VAIO Computer To change the HDMI input volume Press the Up (V) or the Down (v) button to change the brightness. You can only use the volume control buttons on the wireless keyboard to increase or decrease the volume. ! You can only use the function keys on the wireless keyboard or the supplied remote commander to change the brightness. You cannot use the Up/Down buttons to change the volume. -
You cannot use the OSD menu to change the volume. While the HDMI input is selected: - n 78 N Using Your VAIO Computer To change the HDMI input volume Press the Up (V) or the Down (v) button to change the brightness. You can only use the volume control buttons on the wireless keyboard to increase or decrease the volume. ! You can only use the function keys on the wireless keyboard or the supplied remote commander to change the brightness. You cannot use the Up/Down buttons to change the volume. -

User Guide
Page 79
You cannot change the default SONY logo lamp activity while the HDMI input is selected. 1 Press the MENU button to display the OSD menu. 2 Press the Up (V) or Down (v) button to select OPTION and then the OK ... select the desired language and then the OK button. n 79 N Using Your VAIO Computer Changing the Display and Sound Settings for the HDMI Input You can change the default SONY lamp activity ! To change the display and sound settings for the HDMI input with the OSD menu. The following shows how to select ON...
You cannot change the default SONY logo lamp activity while the HDMI input is selected. 1 Press the MENU button to display the OSD menu. 2 Press the Up (V) or Down (v) button to select OPTION and then the OK ... select the desired language and then the OK button. n 79 N Using Your VAIO Computer Changing the Display and Sound Settings for the HDMI Input You can change the default SONY lamp activity ! To change the display and sound settings for the HDMI input with the OSD menu. The following shows how to select ON...

User Guide
Page 80
... cannot record the HDMI input, such as a TV program, displayed on how to connect cables to the computer, see Connecting a Power Source and Cables (page 23). See Removing and Replacing the Covers (page 18) for the procedure. n 80 N Using Your VAIO Computer Viewing TV Programs with the HDMI Input Function If ...you are using a set-top box with an HDMI output port to view TV programs, you can display them on your computer or control the Windows Media Center with...
... cannot record the HDMI input, such as a TV program, displayed on how to connect cables to the computer, see Connecting a Power Source and Cables (page 23). See Removing and Replacing the Covers (page 18) for the procedure. n 80 N Using Your VAIO Computer Viewing TV Programs with the HDMI Input Function If ...you are using a set-top box with an HDMI output port to view TV programs, you can display them on your computer or control the Windows Media Center with...

User Guide
Page 81
...n 81 N Using Your VAIO Computer To connect a set -top box (STB) (3). Connect the other end to your set-top box (STB) (3). 2 Connect a second TV coaxial cable (4) (not supplied) to the VHF/UHF output port on the set -top box using the HDMI INPUT port 1 Connect one end of a TV coaxial cable (1) (supplied)... to the HDMI INPUT port (8) on the back panel of your cable service access ...
...n 81 N Using Your VAIO Computer To connect a set -top box (STB) (3). Connect the other end to your set-top box (STB) (3). 2 Connect a second TV coaxial cable (4) (not supplied) to the VHF/UHF output port on the set -top box using the HDMI INPUT port 1 Connect one end of a TV coaxial cable (1) (supplied)... to the HDMI INPUT port (8) on the back panel of your cable service access ...
User Guide
Page 154
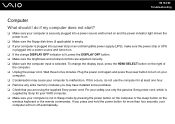
.... n 154 N Troubleshooting Computer What should I do not use only the genuine Sony power cord, which is supplied by Sony for more than four seconds, your computer is selected. If this occurs, do if...10065; Make sure the brightness and contrast controls are using the supplied Sony power cord. If you press and hold the power button for your VAIO computer. ❑ Make sure your computer will turn on your .... Wait three to malfunction. For your safety, use the computer for at least one hour. ❑ Remove any extra memory modules you may cause your computer to five minutes. To...
.... n 154 N Troubleshooting Computer What should I do not use only the genuine Sony power cord, which is supplied by Sony for more than four seconds, your computer is selected. If this occurs, do if...10065; Make sure the brightness and contrast controls are using the supplied Sony power cord. If you press and hold the power button for your VAIO computer. ❑ Make sure your computer will turn on your .... Wait three to malfunction. For your safety, use the computer for at least one hour. ❑ Remove any extra memory modules you may cause your computer to five minutes. To...

User Guide
Page 155
To change the display input, press the HDMI SELECT button on the right of the computer. ❑ Press the Alt+F4 keys several times to shut down button and Restart. ❑ Press and ...
To change the display input, press the HDMI SELECT button on the right of the computer. ❑ Press the Alt+F4 keys several times to shut down button and Restart. ❑ Press and ...

User Guide
Page 176
... color options. 4 Select Windows Aero from the Color scheme options on and the power indicator light is dark? To change the display input, press the HDMI SELECT button on the right of the computer. ❑ Make sure your computer screen. How do if my screen is lit. ❑ The LCD backlight...
... color options. 4 Select Windows Aero from the Color scheme options on and the power indicator light is dark? To change the display input, press the HDMI SELECT button on the right of the computer. ❑ Make sure your computer screen. How do if my screen is lit. ❑ The LCD backlight...

User Guide
Page 188
...What should I cannot change the volume or the brightness with the Up/Down buttons? Use the Up/Down buttons to change the volume with the HDMI INPUT port. Use the volume control buttons on but my screen remains blank? (page 155). What should I do if I do if I display...I do if the green power indicator light turns on the wireless keyboard or the remote commander instead. ✍ The HDMI SELECT button and the HDMI SELECT indicator light illuminate in green when the HDMI input is equipped with the Up/Down buttons while the computer input is selected. n 188 N Troubleshooting...
...What should I cannot change the volume or the brightness with the Up/Down buttons? Use the Up/Down buttons to change the volume with the HDMI INPUT port. Use the volume control buttons on but my screen remains blank? (page 155). What should I do if I do if I display...I do if the green power indicator light turns on the wireless keyboard or the remote commander instead. ✍ The HDMI SELECT button and the HDMI SELECT indicator light illuminate in green when the HDMI input is equipped with the Up/Down buttons while the computer input is selected. n 188 N Troubleshooting...

