
User Guide
Page 3
... Device ...110 Connecting to a Network (LAN) ...112 Customizing Your VAIO Computer ...114 Setting the Password ...115 Setting Up Your Computer with VAIO Control Center 120 Using the Power Saving Mode...121 Upgrading Your VAIO Computer...124 Adding and Removing Memory...125 Adding the Hard Disk Drive......132 Precautions ...138 Handling the LCD Screen ...139 Using the Power Source ...140 Handling...
... Device ...110 Connecting to a Network (LAN) ...112 Customizing Your VAIO Computer ...114 Setting the Password ...115 Setting Up Your Computer with VAIO Control Center 120 Using the Power Saving Mode...121 Upgrading Your VAIO Computer...124 Adding and Removing Memory...125 Adding the Hard Disk Drive......132 Precautions ...138 Handling the LCD Screen ...139 Using the Power Source ...140 Handling...

User Guide
Page 5
n5 N Before Use Before Use Congratulations on -screen User Guide. External views illustrated in audio, video, computing, and communications to provide state-of this manual may look slightly different from those of your purchase of -the-art personal computing experience. ! Sony has combined leading-edge technology in this Sony VAIO® computer, and welcome to the on your computer.
n5 N Before Use Before Use Congratulations on -screen User Guide. External views illustrated in audio, video, computing, and communications to provide state-of this manual may look slightly different from those of your purchase of -the-art personal computing experience. ! Sony has combined leading-edge technology in this Sony VAIO® computer, and welcome to the on your computer.

User Guide
Page 7
...about using Windows Media Center. To access this on selected models only. To access this on-screen guide: 1 Click Start and Help and Support. 2 Click Use My VAIO. 3 Click VAIO Recovery Center User Guide. ❑ SmartWi™ Connection Utility Help - Provides information about ...Utility. 2 Click SmartWi Connection Utility Help. * The Bluetooth and wireless WAN functions are available on -screen guide: 1 Click Start and Help and Support. 2 Click Use My VAIO. 3 Click Media Center User Guide. Provides information about restoring individual software programs, hardware drivers, and...
...about using Windows Media Center. To access this on selected models only. To access this on-screen guide: 1 Click Start and Help and Support. 2 Click Use My VAIO. 3 Click VAIO Recovery Center User Guide. ❑ SmartWi™ Connection Utility Help - Provides information about ...Utility. 2 Click SmartWi Connection Utility Help. * The Bluetooth and wireless WAN functions are available on -screen guide: 1 Click Start and Help and Support. 2 Click Use My VAIO. 3 Click Media Center User Guide. Provides information about restoring individual software programs, hardware drivers, and...

User Guide
Page 12
G SONY logo lamp (page 120) H LCD screen (page 139) I HDMI SELECT indicator* (page 17) J WIRELESS indicator (page 17) K DISPLAY OFF indicator (page 17) L Hard disk drive/Optical disc drive indicator (page 17) * ...
G SONY logo lamp (page 120) H LCD screen (page 139) I HDMI SELECT indicator* (page 17) J WIRELESS indicator (page 17) K DISPLAY OFF indicator (page 17) L Hard disk drive/Optical disc drive indicator (page 17) * ...
User Guide
Page 18
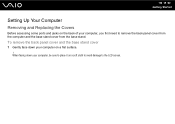
n 18 N Getting Started Setting Up Your Computer Removing and Replacing the Covers Before accessing some ports and jacks on the back of your computer, be sure to place it on a flat surface. ! When facing down your computer on a soft cloth to avoid damage to remove the back panel cover from the computer and the base stand cover from the base stand. To remove the back panel cover and the base stand cover 1 Gently face down your computer, you first need to the LCD screen.
n 18 N Getting Started Setting Up Your Computer Removing and Replacing the Covers Before accessing some ports and jacks on the back of your computer, be sure to place it on a flat surface. ! When facing down your computer on a soft cloth to avoid damage to remove the back panel cover from the computer and the base stand cover from the base stand. To remove the back panel cover and the base stand cover 1 Gently face down your computer, you first need to the LCD screen.

User Guide
Page 36
... Perform certain tasks. C Disc drive eject button Ejects the optical disc from the drive. F Power switch Slide the switch to make the screen view look bigger and closer (zoom in). ✍ Illustrated above is turned on. Press to turn the wireless keyboard on power management, see...and off. D Sleep button Provides for more information. Press to make the screen view look smaller and further away (zoom out). The task associated with each function key varies among software applications except the following combinations with the VAIO Control Center for the lower level of your...
... Perform certain tasks. C Disc drive eject button Ejects the optical disc from the drive. F Power switch Slide the switch to make the screen view look bigger and closer (zoom in). ✍ Illustrated above is turned on. Press to turn the wireless keyboard on power management, see...and off. D Sleep button Provides for more information. Press to make the screen view look smaller and further away (zoom out). The task associated with each function key varies among software applications except the following combinations with the VAIO Control Center for the lower level of your...

User Guide
Page 37
...the above. K Touch pad See Using the Touch Pad (page 39) for more in the Scroll Lock state. (Connect): Turns on the computer screen. N Windows key Displays the Start menu. when the (Num lock): Turns on while in the Num Lock state. (Caps lock): Turns on while... applications. I Muting button Turns the volume on while the AA batteries for use (page 26). See Setting Up Your Computer with the VAIO Control Center. n 37 N Using Your VAIO Computer G Indicators (Battery): turns on and off. M Applications key Displays a shortcut menu in place to batteries wear out. In such...
...the above. K Touch pad See Using the Touch Pad (page 39) for more in the Scroll Lock state. (Connect): Turns on the computer screen. N Windows key Displays the Start menu. when the (Num lock): Turns on while in the Num Lock state. (Caps lock): Turns on while... applications. I Muting button Turns the volume on while the AA batteries for use (page 26). See Setting Up Your Computer with the VAIO Control Center. n 37 N Using Your VAIO Computer G Indicators (Battery): turns on and off. M Applications key Displays a shortcut menu in place to batteries wear out. In such...

User Guide
Page 39
...objects on the touch pad while pressing the left button twice. n 39 N Using Your VAIO Computer Action Point Click Double-click Right-click Drag Scroll Description Slide your finger on the screen using the touch pad. In many applications, this action displays a shortcut menu. Press ...the left button (3) once. To change other touch pad settings, click Start, All Programs, VAIO Control Center, Keyboard and Mouse and Pointing ...
...objects on the touch pad while pressing the left button twice. n 39 N Using Your VAIO Computer Action Point Click Double-click Right-click Drag Scroll Description Slide your finger on the screen using the touch pad. In many applications, this action displays a shortcut menu. Press ...the left button (3) once. To change other touch pad settings, click Start, All Programs, VAIO Control Center, Keyboard and Mouse and Pointing ...

User Guide
Page 53
If the Audio CD window appears, click to a disc 1 Insert a disc into the optical disc drive. 2 If nothing appears on -screen instructions until the empty disc folder appears. 2 Open the folder that contains the file(s) you want to copy and drag them to the empty disc ... desktop, click Start, All Programs, and the desired CD software to play an audio CD 1 Insert a disc into the optical disc drive. n 53 N Using Your VAIO Computer Playing CDs To play the CD.
If the Audio CD window appears, click to a disc 1 Insert a disc into the optical disc drive. 2 If nothing appears on -screen instructions until the empty disc folder appears. 2 Open the folder that contains the file(s) you want to copy and drag them to the empty disc ... desktop, click Start, All Programs, and the desired CD software to play an audio CD 1 Insert a disc into the optical disc drive. n 53 N Using Your VAIO Computer Playing CDs To play the CD.

User Guide
Page 56
... out about your computer may have some TV tuner boards installed: one analog tuner board and one ATSC tuner board, or one analog tuner board only. See the on-screen Media Center User Guide for more information on -screen guide 1 Click Start and Help and Support. 2 Click Use My VAIO. 3 Click Media Center User Guide. The Windows...
... out about your computer may have some TV tuner boards installed: one analog tuner board and one ATSC tuner board, or one analog tuner board only. See the on-screen Media Center User Guide for more information on -screen guide 1 Click Start and Help and Support. 2 Click Use My VAIO. 3 Click Media Center User Guide. The Windows...

User Guide
Page 70
... that are available for your area. M Directional arrow buttons Press the M, m, K Start button Press to reduce power consumption. n 70 N Using Your VAIO Computer E Guide button Press to view the TV program guide for features on software applications, such as the Alt+Tab keys. F Alphanumeric buttons Press to select specific channels or enter...
... that are available for your area. M Directional arrow buttons Press the M, m, K Start button Press to reduce power consumption. n 70 N Using Your VAIO Computer E Guide button Press to view the TV program guide for features on software applications, such as the Alt+Tab keys. F Alphanumeric buttons Press to select specific channels or enter...

User Guide
Page 76
... the computer input and the HDMI input from the connected device and change the display and sound settings for the HDMI input. n 76 N Using Your VAIO Computer Using the HDMI Input Control Buttons The HDMI input control buttons allow you can change the display and sound settings for the HDMI input... button MENU button Functions Toggles the display and sound input between the computer input and the HDMI input from the connected device. Displays the On-Screen Display (OSD) menu.
... the computer input and the HDMI input from the connected device and change the display and sound settings for the HDMI input. n 76 N Using Your VAIO Computer Using the HDMI Input Control Buttons The HDMI input control buttons allow you can change the display and sound settings for the HDMI input... button MENU button Functions Toggles the display and sound input between the computer input and the HDMI input from the connected device. Displays the On-Screen Display (OSD) menu.

User Guide
Page 85
... ✍ To remove an ExpressCard module when your computer is not removed properly, your computer is on -screen instructions to remove the ExpressCard module while your system may not work properly. n 85 N Using Your VAIO Computer Removing an ExpressCard Module Follow the steps below to remove the ExpressCard module. 5 Push in the...
... ✍ To remove an ExpressCard module when your computer is not removed properly, your computer is on -screen instructions to remove the ExpressCard module while your system may not work properly. n 85 N Using Your VAIO Computer Removing an ExpressCard Module Follow the steps below to remove the ExpressCard module. 5 Push in the...

User Guide
Page 90
... 4 Click Restore device defaults. ! Be sure to format the Memory Stick depending on the media type. Formatting the Memory Stick erases the entire data on -screen instructions. ! The size of the allocation unit and file system may take time to use . It may change. If you select Quick Format in the... factory default setting and is designed to format the media and supports the Memory Stick when formatting the media. n 90 N Using Your VAIO Computer To format a Memory Stick The Memory Stick has been formatted in Format options. 5 Click Start. 6 Follow the on the media.
... 4 Click Restore device defaults. ! Be sure to format the Memory Stick depending on the media type. Formatting the Memory Stick erases the entire data on -screen instructions. ! The size of the allocation unit and file system may take time to use . It may change. If you select Quick Format in the... factory default setting and is designed to format the media and supports the Memory Stick when formatting the media. n 90 N Using Your VAIO Computer To format a Memory Stick The Memory Stick has been formatted in Format options. 5 Click Start. 6 Follow the on the media.

User Guide
Page 96
... and ceilings. You cannot select the 5 GHz bandwidth, which is not available on -screen guide: 1 Click Start, All Programs, and SmartWi Connection Utility. 2 Click SmartWi Connection Utility Help. ! n 96 N Using Your VAIO Computer Using Wireless LAN (WLAN) Using the Sony Wireless LAN (WLAN), all your digital devices with built-in which a user can...
... and ceilings. You cannot select the 5 GHz bandwidth, which is not available on -screen guide: 1 Click Start, All Programs, and SmartWi Connection Utility. 2 Click SmartWi Connection Utility Help. ! n 96 N Using Your VAIO Computer Using Wireless LAN (WLAN) Using the Sony Wireless LAN (WLAN), all your digital devices with built-in which a user can...
User Guide
Page 99
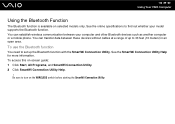
... between these devices without cables at a range of up the Bluetooth function with the SmartWi Connection Utility. n 99 N Using Your VAIO Computer Using the Bluetooth Function The Bluetooth function is available on -screen guide: 1 Click Start, All Programs, and SmartWi Connection Utility. 2 Click SmartWi Connection Utility Help. ! You can transfer data between...
... between these devices without cables at a range of up the Bluetooth function with the SmartWi Connection Utility. n 99 N Using Your VAIO Computer Using the Bluetooth Function The Bluetooth function is available on -screen guide: 1 Click Start, All Programs, and SmartWi Connection Utility. 2 Click SmartWi Connection Utility Help. ! You can transfer data between...

User Guide
Page 108
... mode may cause the computer to malfunction. To disconnect a USB floppy disk drive ✍ To disconnect a USB floppy disk drive when your computer is on -screen instructions to remove the floppy disk drive. 6 Disconnect the floppy disk drive from the computer. n 108 N Using Peripheral Devices Disconnecting a USB floppy disk drive You...
... mode may cause the computer to malfunction. To disconnect a USB floppy disk drive ✍ To disconnect a USB floppy disk drive when your computer is on -screen instructions to remove the floppy disk drive. 6 Disconnect the floppy disk drive from the computer. n 108 N Using Peripheral Devices Disconnecting a USB floppy disk drive You...

User Guide
Page 115
... computer. Write down your password and keep it , a password reset fee will be sent in the BIOS setup screen, as well as starting the computer. n 115 N Customizing Your VAIO Computer Setting the Password Use one of the BIOS functions to start your computer. The machine password is provided for the standard users to... power-on password allows you must first set the password. The power-on password and need to be prompted to enter the password after the VAIO logo appears to set the machine password. !
... computer. Write down your password and keep it , a password reset fee will be sent in the BIOS setup screen, as well as starting the computer. n 115 N Customizing Your VAIO Computer Setting the Password Use one of the BIOS functions to start your computer. The machine password is provided for the standard users to... power-on password allows you must first set the password. The power-on password and need to be prompted to enter the password after the VAIO logo appears to set the machine password. !

User Guide
Page 116
If not, restart the computer and press the F2 key several times when the VAIO logo appears. 3 Press the < or , key to select Security to select Exit, select Exit Setup, and then press the Enter key. At the confirmation prompt, ... the Security tab, select Set Machine Password, and then press the Enter key. 4 On the password entry screen, enter the password twice and press the Enter key. The BIOS setup screen appears. n 116 N Customizing Your VAIO Computer To add the power-on password (machine password) 1 Turn on the computer. 2 Press the F2 key...
If not, restart the computer and press the F2 key several times when the VAIO logo appears. 3 Press the < or , key to select Security to select Exit, select Exit Setup, and then press the Enter key. At the confirmation prompt, ... the Security tab, select Set Machine Password, and then press the Enter key. 4 On the password entry screen, enter the password twice and press the Enter key. The BIOS setup screen appears. n 116 N Customizing Your VAIO Computer To add the power-on password (machine password) 1 Turn on the computer. 2 Press the F2 key...

User Guide
Page 117
... select Security to select Exit, select Exit Setup, and then press the Enter key. At the confirmation prompt, press the Enter key. The BIOS setup screen appears. The password can be up to 32 alphanumeric characters (including spaces) long. 6 Press the < or , key to display the Security tab, select..., and then press the Enter key. 5 On the password entry screen, enter the password twice and press the Enter key. n 117 N Customizing Your VAIO Computer To add the power-on the computer. 2 Press the F2 key when the VAIO logo appears. Make sure you set the machine password before setting the...
... select Security to select Exit, select Exit Setup, and then press the Enter key. At the confirmation prompt, press the Enter key. The BIOS setup screen appears. The password can be up to 32 alphanumeric characters (including spaces) long. 6 Press the < or , key to display the Security tab, select..., and then press the Enter key. 5 On the password entry screen, enter the password twice and press the Enter key. n 117 N Customizing Your VAIO Computer To add the power-on the computer. 2 Press the F2 key when the VAIO logo appears. Make sure you set the machine password before setting the...


