User Guide
Page 2
... Before Use ...5 Documentation ...6 Ergonomic Considerations ...9 Getting Started ...11 Locating Controls and Ports...12 About the Indicator Lights ...17 Setting Up Your Computer ...18 Shutting Down Your Computer Safely ...33 Using Your VAIO Computer ...34 Using the Keyboard ...35 Using the Touch Pad ...39 Using the Mouse ...40 Using the Built-in MOTION EYE Camera...
... Before Use ...5 Documentation ...6 Ergonomic Considerations ...9 Getting Started ...11 Locating Controls and Ports...12 About the Indicator Lights ...17 Setting Up Your Computer ...18 Shutting Down Your Computer Safely ...33 Using Your VAIO Computer ...34 Using the Keyboard ...35 Using the Touch Pad ...39 Using the Mouse ...40 Using the Built-in MOTION EYE Camera...

User Guide
Page 3
... Connecting a Printer ...109 Connecting an i.LINK Device ...110 Connecting to a Network (LAN) ...112 Customizing Your VAIO Computer ...114 Setting the Password ...115 Setting Up Your Computer with VAIO Control Center 120 Using the Power Saving Mode...121 Upgrading Your VAIO Computer...124 Adding and Removing Memory...125 Adding the Hard Disk Drive...132 Precautions ...138 Handling...
... Connecting a Printer ...109 Connecting an i.LINK Device ...110 Connecting to a Network (LAN) ...112 Customizing Your VAIO Computer ...114 Setting the Password ...115 Setting Up Your Computer with VAIO Control Center 120 Using the Power Saving Mode...121 Upgrading Your VAIO Computer...124 Adding and Removing Memory...125 Adding the Hard Disk Drive...132 Precautions ...138 Handling...

User Guide
Page 4
n4 N Troubleshooting ...152 Computer ...154 System Security ...160 Built-in MOTION EYE Camera...161 Networking ...164 Bluetooth Technology ...167 Optical Discs ...171 Display ...176 Printing ...177 Microphone ...178 Mouse ...179 Speakers ...180 Touch Pad...182 Keyboard...183 Floppy Disks ...184 Audio/Video...185 HDMI ...188 Memory Stick ...190 Peripherals ...191 Support Options ...192 Sony Support Information ...193 Program Support Information...196 Trademarks ...206
n4 N Troubleshooting ...152 Computer ...154 System Security ...160 Built-in MOTION EYE Camera...161 Networking ...164 Bluetooth Technology ...167 Optical Discs ...171 Display ...176 Printing ...177 Microphone ...178 Mouse ...179 Speakers ...180 Touch Pad...182 Keyboard...183 Floppy Disks ...184 Audio/Video...185 HDMI ...188 Memory Stick ...190 Peripherals ...191 Support Options ...192 Sony Support Information ...193 Program Support Information...196 Trademarks ...206

User Guide
Page 5
External views illustrated in audio, video, computing, and communications to the on your computer. Sony has combined leading-edge technology in this manual may look slightly different from those of your purchase of this Sony VAIO® computer, and welcome to provide state-of-the-art personal computing experience. ! n5 N Before Use Before Use Congratulations on -screen User Guide.
External views illustrated in audio, video, computing, and communications to the on your computer. Sony has combined leading-edge technology in this manual may look slightly different from those of your purchase of this Sony VAIO® computer, and welcome to provide state-of-the-art personal computing experience. ! n5 N Before Use Before Use Congratulations on -screen User Guide.

User Guide
Page 6
... customers in Spanish-speaking Latin American countries or areas http://esupport.sony.com/ES/VAIO/BR/ for customers in this manual) - It also includes information about the software programs included with your computer, as well as information on your computer must be connected to the Internet. ❑ Specifications - n6 N Before Use Documentation Your documentation...
... customers in Spanish-speaking Latin American countries or areas http://esupport.sony.com/ES/VAIO/BR/ for customers in this manual) - It also includes information about the software programs included with your computer, as well as information on your computer must be connected to the Internet. ❑ Specifications - n6 N Before Use Documentation Your documentation...

User Guide
Page 7
...(s) or your model supports the functions. ❑ Media Center User Guide (Selected models only) - Provides information about using Windows Media Center. n7 N Before Use ❑ VAIO Recovery Center User Guide - To access this on -screen guide: 1 Click Start and Help and Support. 2 Click Use My...
...(s) or your model supports the functions. ❑ Media Center User Guide (Selected models only) - Provides information about using Windows Media Center. n7 N Before Use ❑ VAIO Recovery Center User Guide - To access this on -screen guide: 1 Click Start and Help and Support. 2 Click Use My...

User Guide
Page 8
... VAIO technology page, specifications, and system and software information. ❑ Troubleshoot my VAIO Maintain and troubleshoot your VAIO computer. n8 N Before Use Help and Support Help and Support is easy to access and provides a single location for general information and technical assistance for your VAIO computer with VAIO Care, system restore, backup and recovery, and contact Sony support...
... VAIO technology page, specifications, and system and software information. ❑ Troubleshoot my VAIO Maintain and troubleshoot your VAIO computer. n8 N Before Use Help and Support Help and Support is easy to access and provides a single location for general information and technical assistance for your VAIO computer with VAIO Care, system restore, backup and recovery, and contact Sony support...

User Guide
Page 9
...Whenever possible, you more comfortable. Let your upper arms hang naturally at your computer. Place the display directly in a chair with your feet are flat on the floor. Excessive use of the computer may make you should attempt to take account of the following ergonomic considerations: n9...Position of the chair so your wrists in a relaxed, upright posture and avoid slouching forward or leaning far backwards. Keep your computer - Adjust the level of your forearms horizontal (2), with good back support. Sit in a neutral, comfortable position (3) while using your sides.
...Whenever possible, you more comfortable. Let your upper arms hang naturally at your computer. Place the display directly in a chair with your feet are flat on the floor. Excessive use of the computer may make you should attempt to take account of the following ergonomic considerations: n9...Position of the chair so your wrists in a relaxed, upright posture and avoid slouching forward or leaning far backwards. Keep your computer - Adjust the level of your forearms horizontal (2), with good back support. Sit in a neutral, comfortable position (3) while using your sides.

User Guide
Page 10
...; Lighting - Proper lighting adds to the proper position. You can reduce eye strain and muscle fatigue by adjusting the tilt of the display to your computer, especially on the center of the display - Make sure you leave at least 4 inches (10 cm) of space behind and at least 8 inches (20 cm...
...; Lighting - Proper lighting adds to the proper position. You can reduce eye strain and muscle fatigue by adjusting the tilt of the display to your computer, especially on the center of the display - Make sure you leave at least 4 inches (10 cm) of space behind and at least 8 inches (20 cm...

User Guide
Page 11
... 18) ❑ Shutting Down Your Computer Safely (page 33) Upon completion, connect one device (for the first time, do not connect any other hardware that did not originally come with only the supplied accessories connected and set up your computer with your VAIO computer. ! n 11 N Getting Started Getting Started This section describes how to start...
... 18) ❑ Shutting Down Your Computer Safely (page 33) Upon completion, connect one device (for the first time, do not connect any other hardware that did not originally come with only the supplied accessories connected and set up your computer with your VAIO computer. ! n 11 N Getting Started Getting Started This section describes how to start...

User Guide
Page 12
...Controls and Ports Take a moment to this manual due to variations in specifications. It may be different from those illustrated in this sensor for operations. G SONY logo lamp (page 120) H LCD screen (page 139) I HDMI SELECT indicator* (page 17) J WIRELESS indicator (page 17) K DISPLAY OFF indicator... (page 17) L Hard disk drive/Optical disc drive indicator (page 17) * On selected models only. The appearance of your computer may also vary in MOTION EYE camera (page 43) E Power indicator (page 17) F Remote sensor Point the supplied remote commander to identify the...
...Controls and Ports Take a moment to this manual due to variations in specifications. It may be different from those illustrated in this sensor for operations. G SONY logo lamp (page 120) H LCD screen (page 139) I HDMI SELECT indicator* (page 17) J WIRELESS indicator (page 17) K DISPLAY OFF indicator... (page 17) L Hard disk drive/Optical disc drive indicator (page 17) * On selected models only. The appearance of your computer may also vary in MOTION EYE camera (page 43) E Power indicator (page 17) F Remote sensor Point the supplied remote commander to identify the...

User Guide
Page 13
E CONNECT button (page 26), (page 28) F i.LINK 4-pin (S400) port (page 110) G OPTICAL OUT port (page 105) (Output Sampling Rate: 44.1 KHz/48.0 KHz/96.0 KHz) H Hi-Speed USB (USB 2.0) ports* (page 107) I Base stand cover Remove the base stand cover to bundle cables to access the ports and jacks behind it (page 18). While the HDMI input is selected (page 76), pressing this button to turn off the volume. Back n 13 N Getting Started A Power button B DISPLAY OFF button Press this button also turns off the LCD backlight. J Base stand (page 143) * Support high-/full-/low- C Capture angle...
E CONNECT button (page 26), (page 28) F i.LINK 4-pin (S400) port (page 110) G OPTICAL OUT port (page 105) (Output Sampling Rate: 44.1 KHz/48.0 KHz/96.0 KHz) H Hi-Speed USB (USB 2.0) ports* (page 107) I Base stand cover Remove the base stand cover to bundle cables to access the ports and jacks behind it (page 18). While the HDMI input is selected (page 76), pressing this button to turn off the volume. Back n 13 N Getting Started A Power button B DISPLAY OFF button Press this button also turns off the LCD backlight. J Base stand (page 143) * Support high-/full-/low- C Capture angle...

User Guide
Page 14
... down before you touch it. The area around the air exhaust vent (1) becomes hot while your computer is on. n 14 N Getting Started A Air exhaust vent (page 142) B HARD DISK DRIVE ACCESS BAY cover (page 133) C Memory module compartment cover (page 127) D AC ...
... down before you touch it. The area around the air exhaust vent (1) becomes hot while your computer is on. n 14 N Getting Started A Air exhaust vent (page 142) B HARD DISK DRIVE ACCESS BAY cover (page 133) C Memory module compartment cover (page 127) D AC ...

User Guide
Page 15
Right n 15 N Getting Started A Optical disc drive (page 47) B Drive eject button (page 48) C Hi-Speed USB (USB 2.0) ports*1 (page 107) D WIRELESS switch (page 96) E HDMI SELECT button*2 (page 76) F MENU button*2 (page 76) G Up/Down buttons*2 (page 76) H OK button*2 (page 76) *1 Support high-/full-/low- speeds. *2 On selected models only.
Right n 15 N Getting Started A Optical disc drive (page 47) B Drive eject button (page 48) C Hi-Speed USB (USB 2.0) ports*1 (page 107) D WIRELESS switch (page 96) E HDMI SELECT button*2 (page 76) F MENU button*2 (page 76) G Up/Down buttons*2 (page 76) H OK button*2 (page 76) *1 Support high-/full-/low- speeds. *2 On selected models only.

User Guide
Page 16
Left n 16 N Getting Started A ExpressCard/34 slot (page 82) B Memory Stick slot*1 (page 86) C Media Access indicator (page 17) D SD memory card slot (page 92) E Headphones jack (page 105) F Microphone jack Connect an external microphone. G Line In jack Connect an external audio device for audio input. speeds. H Hi-Speed USB (USB 2.0) port*2 (page 107) *1 Your computer supports both standard- and Duo-size Memory Stick. *2 Supports high-/full-/low-
Left n 16 N Getting Started A ExpressCard/34 slot (page 82) B Memory Stick slot*1 (page 86) C Media Access indicator (page 17) D SD memory card slot (page 92) E Headphones jack (page 105) F Microphone jack Connect an external microphone. G Line In jack Connect an external audio device for audio input. speeds. H Hi-Speed USB (USB 2.0) port*2 (page 107) *1 Your computer supports both standard- and Duo-size Memory Stick. *2 Supports high-/full-/low-

User Guide
Page 17
... following indicator lights: Indicator Power 1 Built-in green while the HDMI input is turned off . n 17 N Getting Started About the Indicator Lights Your computer is reading or writing data. Illuminates in MOTION EYE camera Media Access HDMI SELECT* DISPLAY OFF Hard disk drive/Optical disc drive WIRELESS * On selected...not in orange when the LCD backlight is selected. Illuminates when data is read from or written to a memory card. (Do not place the computer into Sleep mode or turn it off when this indicator is lit.) When the indicator is unlit, the memory card is turned on. Do ...
... following indicator lights: Indicator Power 1 Built-in green while the HDMI input is turned off . n 17 N Getting Started About the Indicator Lights Your computer is reading or writing data. Illuminates in MOTION EYE camera Media Access HDMI SELECT* DISPLAY OFF Hard disk drive/Optical disc drive WIRELESS * On selected...not in orange when the LCD backlight is selected. Illuminates when data is read from or written to a memory card. (Do not place the computer into Sleep mode or turn it off when this indicator is lit.) When the indicator is unlit, the memory card is turned on. Do ...
User Guide
Page 18
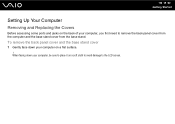
n 18 N Getting Started Setting Up Your Computer Removing and Replacing the Covers Before accessing some ports and jacks on the back of your computer, you first need to the LCD screen. When facing down your computer, be sure to place it on a flat surface. ! To remove the back panel cover and the base stand cover 1 Gently face down your computer on a soft cloth to avoid damage to remove the back panel cover from the computer and the base stand cover from the base stand.
n 18 N Getting Started Setting Up Your Computer Removing and Replacing the Covers Before accessing some ports and jacks on the back of your computer, you first need to the LCD screen. When facing down your computer, be sure to place it on a flat surface. ! To remove the back panel cover and the base stand cover 1 Gently face down your computer on a soft cloth to avoid damage to remove the back panel cover from the computer and the base stand cover from the base stand.

User Guide
Page 19
n 19 N Getting Started ! Put your fingertips underneath the back panel cover (2) when removing the cover from the computer. 2 Grasp the back panel cover (1) with both hands, gently lift it, and remove it from the computer.
n 19 N Getting Started ! Put your fingertips underneath the back panel cover (2) when removing the cover from the computer. 2 Grasp the back panel cover (1) with both hands, gently lift it, and remove it from the computer.

User Guide
Page 20
n 20 N Getting Started 3 Slide the base stand cover (3) in the direction of the arrow and remove it from the base stand.
n 20 N Getting Started 3 Slide the base stand cover (3) in the direction of the arrow and remove it from the base stand.

User Guide
Page 21
To replace the back panel cover and the base stand cover 1 Put the base stand cover (1) back on the base stand and slide it in the direction of the arrow. n 21 N Getting Started
To replace the back panel cover and the base stand cover 1 Put the base stand cover (1) back on the base stand and slide it in the direction of the arrow. n 21 N Getting Started