Operating Instructions (Large File - 14.22 MB)
Page 7
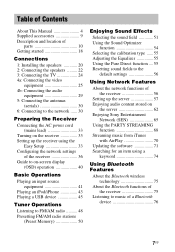
...speakers ......... 22 3: Connecting the TV 24 4a: Connecting the video equipment 25 4b: Connecting the audio equipment 29 5: Connecting the antennas (aerials 30 6: Connecting to the network ...... 30 Preparing the Receiver Connecting the AC power cord (mains lead 33 Turning on the receiver 33 Setting up the receiver using the Easy Setup...network functions of the receiver 56 Setting up the server 57 Enjoying audio content stored on the server 62 Enjoying Sony Entertainment Network (SEN 65 Using the PARTY STREAMING function 68 Streaming music from iTunes with AirPlay 70 Updating the ...
...speakers ......... 22 3: Connecting the TV 24 4a: Connecting the video equipment 25 4b: Connecting the audio equipment 29 5: Connecting the antennas (aerials 30 6: Connecting to the network ...... 30 Preparing the Receiver Connecting the AC power cord (mains lead 33 Turning on the receiver 33 Setting up the receiver using the Easy Setup...network functions of the receiver 56 Setting up the server 57 Enjoying audio content stored on the server 62 Enjoying Sony Entertainment Network (SEN 65 Using the PARTY STREAMING function 68 Streaming music from iTunes with AirPlay 70 Updating the ...
Operating Instructions (Large File - 14.22 MB)
Page 8
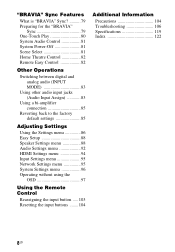
... Input Assign 83 Using a bi-amplifier connection 85 Reverting back to the factory default settings 85 Adjusting Settings Using the Settings menu 86 Easy Setup 88 Speaker Settings menu 88 Audio Settings menu 92 HDMI Settings menu 94 Input Settings menu 95 Network Settings menu 95 System Settings menu 96 Operating without...
... Input Assign 83 Using a bi-amplifier connection 85 Reverting back to the factory default settings 85 Adjusting Settings Using the Settings menu 86 Easy Setup 88 Speaker Settings menu 88 Audio Settings menu 92 HDMI Settings menu 94 Input Settings menu 95 Network Settings menu 95 System Settings menu 96 Operating without...
Operating Instructions (Large File - 14.22 MB)
Page 18
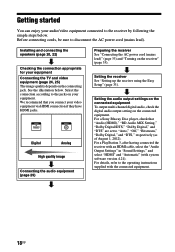
Installing and connecting the speakers (page 20, 22) Checking the connection appropriate for your equipment Connecting the TV and video equipment (page 24, 25) The image quality depends on your equipment. Setting the receiver See "Setting up the receiver using the Easy Setup" (page 33). For ... cords, be sure to "Auto," "Off," "Bitstream," "Dolby Digital," and "DTS," respectively (as of August 1, 2012). For a Sony Blu-ray Disc player, check that you connect your audio/video equipment connected to the operating instructions supplied with system software version 4.21). For ...
Installing and connecting the speakers (page 20, 22) Checking the connection appropriate for your equipment Connecting the TV and video equipment (page 24, 25) The image quality depends on your equipment. Setting the receiver See "Setting up the receiver using the Easy Setup" (page 33). For ... cords, be sure to "Auto," "Off," "Bitstream," "Dolby Digital," and "DTS," respectively (as of August 1, 2012). For a Sony Blu-ray Disc player, check that you connect your audio/video equipment connected to the operating instructions supplied with system software version 4.21). For ...
Operating Instructions (Large File - 14.22 MB)
Page 33
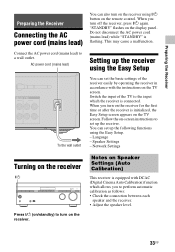
...power cord (mains lead) while "STANDBY" is flashing. Notes on the receiver. This may cause a malfunction. When you turn on Speaker Settings (Auto Calibration) This receiver is equipped with the instructions on the remote control. Preparing the Receiver Preparing the Receiver Connecting the AC ...power cord (mains lead) You can set up the receiver using the Easy Setup. - Switch the input of the receiver easily by operating the receiver in accordance with DCAC (Digital Cinema Auto Calibration) function which...
...power cord (mains lead) while "STANDBY" is flashing. Notes on the receiver. This may cause a malfunction. When you turn on Speaker Settings (Auto Calibration) This receiver is equipped with the instructions on the remote control. Preparing the Receiver Preparing the Receiver Connecting the AC ...power cord (mains lead) You can set up the receiver using the Easy Setup. - Switch the input of the receiver easily by operating the receiver in accordance with DCAC (Digital Cinema Auto Calibration) function which...
Operating Instructions (Large File - 14.22 MB)
Page 34
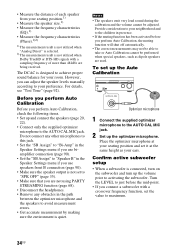
...signals with a crossover frequency function, set the value to your preference. Before you perform Auto Calibration Before you can adjust the speaker levels manually according to maximum. 34US Provide consideration to your neighborhood and to the children in the path between the optimizer microphone and ... microphone to the AUTO CAL MIC jack. 2 Set up the volume prior to achieve proper sound balance for your room. Confirm active subwoofer setup • When a subwoofer is connected, turn on the subwoofer and turn up the optimizer microphone. • Measure the distance of more ...
...signals with a crossover frequency function, set the value to your preference. Before you perform Auto Calibration Before you can adjust the speaker levels manually according to maximum. 34US Provide consideration to your neighborhood and to the children in the path between the optimizer microphone and ... microphone to the AUTO CAL MIC jack. 2 Set up the volume prior to achieve proper sound balance for your room. Confirm active subwoofer setup • When a subwoofer is connected, turn on the subwoofer and turn up the optimizer microphone. • Measure the distance of more ...
Operating Instructions (Large File - 14.22 MB)
Page 35
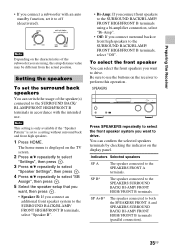
... TV screen. 2 Press V/v repeatedly to select "Settings", then press . 3 Press V/v repeatedly to select "Speaker Settings", then press . 4 Press V/v repeatedly to select "SB Assign", then press . 5 Select the speaker setup that you want, then press . • Speaker B: If you connect an additional front speaker system to the SURROUND BACK/BI-AMP/ FRONT HIGH/FRONT B terminals, select...
... TV screen. 2 Press V/v repeatedly to select "Settings", then press . 3 Press V/v repeatedly to select "Speaker Settings", then press . 4 Press V/v repeatedly to select "SB Assign", then press . 5 Select the speaker setup that you want, then press . • Speaker B: If you connect an additional front speaker system to the SURROUND BACK/BI-AMP/ FRONT HIGH/FRONT B terminals, select...
Operating Instructions (Large File - 14.22 MB)
Page 36
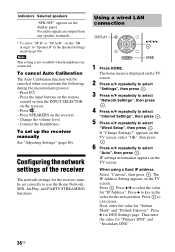
...". 36US Press b to select "Wired Setup", then press . Note This setting is displayed on the TV screen. 2 Press V/v repeatedly to select "Settings", then press . 3 Press V/v repeatedly to select "Network Settings", then press . 4 Press V/v repeatedly to select "Internet Settings", then press . 5 Press V/v repeatedly to key in the Speaker Settings menu (page 90). The...
...". 36US Press b to select "Wired Setup", then press . Note This setting is displayed on the TV screen. 2 Press V/v repeatedly to select "Settings", then press . 3 Press V/v repeatedly to select "Network Settings", then press . 4 Press V/v repeatedly to select "Internet Settings", then press . 5 Press V/v repeatedly to key in the Speaker Settings menu (page 90). The...

Operating Instructions (Large File - 14.22 MB)
Page 88
... that you perform Auto Calibration again to enjoy the surround sound. Tips • You can select the calibration type after you can also adjust the speaker levels after Auto Calibration measurement" (page 89). 2 Select the item you perform the automatic calibration function. 1 Follow the instructions on -screen instructions (... Dolby TrueHD or DTS-HD signals with a sampling frequency of more than 48 kHz are only for the current seating position. Easy Setup Re-runs the Easy Setup to "Off" when using the "Calibration Type" (page 90). - Follow the on the TV screen, then press .
... that you perform Auto Calibration again to enjoy the surround sound. Tips • You can select the calibration type after you can also adjust the speaker levels after Auto Calibration measurement" (page 89). 2 Select the item you perform the automatic calibration function. 1 Follow the instructions on -screen instructions (... Dolby TrueHD or DTS-HD signals with a sampling frequency of more than 48 kHz are only for the current seating position. Easy Setup Re-runs the Easy Setup to "Off" when using the "Calibration Type" (page 90). - Follow the on the TV screen, then press .
Operating Instructions (Large File - 14.22 MB)
Page 90
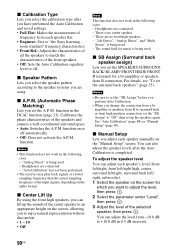
... frequency than the actual sampling frequency of the center speaker to an appropriate height on the "Manual Setup" screen. Headphones are connected. - x Manual Setup Lets you select the speaker pattern according to off automatically. • Off:... Does not activate the A.P.M. Notes • This function does not work in the DCAC function (page 33). You can adjust the level from each speaker flat. • Engineer: Sets to "the Sony...
... frequency than the actual sampling frequency of the center speaker to an appropriate height on the "Manual Setup" screen. Headphones are connected. - x Manual Setup Lets you select the speaker pattern according to off automatically. • Off:... Does not activate the A.P.M. Notes • This function does not work in the DCAC function (page 33). You can adjust the level from each speaker flat. • Engineer: Sets to "the Sony...
Operating Instructions (Large File - 14.22 MB)
Page 108
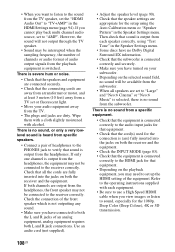
... receiver and the equipment. • Check the INPUT MODE (page 83). • Check that the equipment is connected correctly to the HDMI jack for the setup using "Test Tone" in the HDMI Settings menu (page 94). • When you want to listen to the sound from the TV...; Depending on both L and R jack connections. There is output from the headphones. If only one channel is severe hum or noise. • Check that the speakers and equipment are connected securely. • Check that the connecting cords are away from a transformer or motor, and at least 3 meters (10 feet) away from...
... receiver and the equipment. • Check the INPUT MODE (page 83). • Check that the equipment is connected correctly to the HDMI jack for the setup using "Test Tone" in the HDMI Settings menu (page 94). • When you want to listen to the sound from the TV...; Depending on both L and R jack connections. There is output from the headphones. If only one channel is severe hum or noise. • Check that the speakers and equipment are connected securely. • Check that the connecting cords are away from a transformer or motor, and at least 3 meters (10 feet) away from...
Operating Instructions (Large File - 14.22 MB)
Page 109
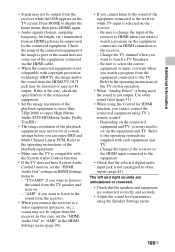
... technology (HDCP), the image and/or the sound from the HDMI TV OUT jack may be distorted or may not be output. Check the setup of the connected equipment if the image is poor or the sound does not come out of the TV on the connected equipment and TV...HDMI Settings menu to display the home menu, then press HOME again. • Audio signals (format, sampling frequency, bit length, etc.) transmitted from the TV speaker and receiver. - Additional Information • Sound may not be output from the receiver while the OSD appears on the equipment connected via the HDMI cable...
... technology (HDCP), the image and/or the sound from the HDMI TV OUT jack may be distorted or may not be output. Check the setup of the connected equipment if the image is poor or the sound does not come out of the TV on the connected equipment and TV...HDMI Settings menu to display the home menu, then press HOME again. • Audio signals (format, sampling frequency, bit length, etc.) transmitted from the TV speaker and receiver. - Additional Information • Sound may not be output from the receiver while the OSD appears on the equipment connected via the HDMI cable...


