
Operating Instructions (Large File - 11.22 MB)
Page 2
... amplifiers) that produce heat. 9) Do not defeat the safety purpose of the polarized or grounding-type plug. This equipment has been tested and found to disconnect the unit from earphones and headphones can cause hearing loss. This symbol is used to comply with batteryinstalled to rain...sources such as sunshine, fire or the like. If the provided plug does not fit into your outlet, consult an electrician for your Sony dealer regarding this apparatus to the presence of important operating and maintenance (servicing) instructions in the United States Owner's Record The model ...
... amplifiers) that produce heat. 9) Do not defeat the safety purpose of the polarized or grounding-type plug. This equipment has been tested and found to disconnect the unit from earphones and headphones can cause hearing loss. This symbol is used to comply with batteryinstalled to rain...sources such as sunshine, fire or the like. If the provided plug does not fit into your outlet, consult an electrician for your Sony dealer regarding this apparatus to the presence of important operating and maintenance (servicing) instructions in the United States Owner's Record The model ...

Operating Instructions (Large File - 11.22 MB)
Page 3
... where you purchased the product. By ensuring this product shall not be caused by hand. continued 3GB NOTE: This equipment has been tested and found to comply with the apparatus. CAUTION You are designed to provide reasonable protection against harmful interference in the U.S.A. For customers... and other European countries with separate collection systems) This symbol on the product or on its packaging indicates that to which the receiver is required when the apparatus has been damaged in any changes or modifications not expressly approved in accordance with the instructions, may ...
... where you purchased the product. By ensuring this product shall not be caused by hand. continued 3GB NOTE: This equipment has been tested and found to comply with the apparatus. CAUTION You are designed to provide reasonable protection against harmful interference in the U.S.A. For customers... and other European countries with separate collection systems) This symbol on the product or on its packaging indicates that to which the receiver is required when the apparatus has been damaged in any changes or modifications not expressly approved in accordance with the instructions, may ...
Operating Instructions (Large File - 11.22 MB)
Page 18
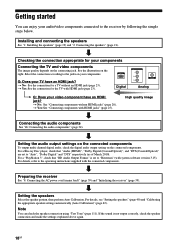
... channel digital audio, check the digital audio output setting on the right. Preparing the receiver See "8: Connecting the AC power cord (mains lead)" (page 39) and "Initializing the receiver" (page 39). Checking the connection appropriate for the TV with system software version 3.15). Digital COMPONENT VIDEO Y PB/CB PR/CR VIDEO Analog Q: ..." (page 21). Select the connection according to the jacks on the connecting jack. Getting started You can check the speaker connection using "Test Tone" (page 111). t No: See the connection for a TV without HDMI jacks" (page 28).
... channel digital audio, check the digital audio output setting on the right. Preparing the receiver See "8: Connecting the AC power cord (mains lead)" (page 39) and "Initializing the receiver" (page 39). Checking the connection appropriate for the TV with system software version 3.15). Digital COMPONENT VIDEO Y PB/CB PR/CR VIDEO Analog Q: ..." (page 21). Select the connection according to the jacks on the connecting jack. Getting started You can check the speaker connection using "Test Tone" (page 111). t No: See the connection for a TV without HDMI jacks" (page 28).

Operating Instructions (Large File - 11.22 MB)
Page 41
... " Settings", then press or b. Setting the surround back speakers You can switch the usage of the speaker(s) connected to select "Speaker", then press . Preparing the Receiver 3 Press V/v repeatedly to the SPEAKERS SURROUND BACK/FRONT HIGH/BI-AMP/FRONT B terminals in accordance with the intended use. Speaker Settings Speaker Pattern Sur Back...
... " Settings", then press or b. Setting the surround back speakers You can switch the usage of the speaker(s) connected to select "Speaker", then press . Preparing the Receiver 3 Press V/v repeatedly to the SPEAKERS SURROUND BACK/FRONT HIGH/BI-AMP/FRONT B terminals in accordance with the intended use. Speaker Settings Speaker Pattern Sur Back...

Operating Instructions (Large File - 11.22 MB)
Page 42
... to use the buttons on the display. The DCAC is not utilized when signals with a sampling frequency of each speaker and the receiver. • Adjust the speaker level. • Measure the distance of more than 96 kHz are connected. 42GB Calibrating the appropriate... speaker settings automatically (Auto Calibration) This receiver is not utilized when "A. For details, see "Test Tone" (page 111). You can adjust the speaker levels manually according to perform automatic calibration as follows: &#...
... to use the buttons on the display. The DCAC is not utilized when signals with a sampling frequency of each speaker and the receiver. • Adjust the speaker level. • Measure the distance of more than 96 kHz are connected. 42GB Calibrating the appropriate... speaker settings automatically (Auto Calibration) This receiver is not utilized when "A. For details, see "Test Tone" (page 111). You can adjust the speaker levels manually according to perform automatic calibration as follows: &#...

Operating Instructions (Large File - 11.22 MB)
Page 45
The measurement process will take approximately 30 seconds with a test tone. When the measurement ends, a beep sounds and the screen switches. Exit Exits the setting process without saving the measurement results. ... measurement results and exits the setting process (page 46). Distance Displays the measurement result for speaker level. Wait until the measurement process completes. Preparing the Receiver 3 Press V/v repeatedly to select "Auto Calibration", then press . 4 Press V/v repeatedly to measure, then press b. See "Message list after Auto Calibration measurement" (page...
The measurement process will take approximately 30 seconds with a test tone. When the measurement ends, a beep sounds and the screen switches. Exit Exits the setting process without saving the measurement results. ... measurement results and exits the setting process (page 46). Distance Displays the measurement result for speaker level. Wait until the measurement process completes. Preparing the Receiver 3 Press V/v repeatedly to select "Auto Calibration", then press . 4 Press V/v repeatedly to measure, then press b. See "Message list after Auto Calibration measurement" (page...

Operating Instructions (Large File - 11.22 MB)
Page 88
Features of the Setup Manager application software You can check the settings of your computer, as well as using the receiver, after installing the Setup Manager application software provided on the screen. 88GB CD-ROM (Setup Manager application software) ...software. • Auto Calibration • Speaker - If the installation launcher does not start automatically, double-click "SetupLauncher.exe" on the screen. Test Tone • S-AIR System Requirements Operating System Windows 7 Starter/Home Premium/ Professional/Ultimate (32bit/64bit) Windows Vista Home Basic/Home Premium/ ...
Features of the Setup Manager application software You can check the settings of your computer, as well as using the receiver, after installing the Setup Manager application software provided on the screen. 88GB CD-ROM (Setup Manager application software) ...software. • Auto Calibration • Speaker - If the installation launcher does not start automatically, double-click "SetupLauncher.exe" on the screen. Test Tone • S-AIR System Requirements Operating System Windows 7 Starter/Home Premium/ Professional/Ultimate (32bit/64bit) Windows Vista Home Basic/Home Premium/ ...

Operating Instructions (Large File - 11.22 MB)
Page 111
... Speaker Settings menu. If there is shown on the TV screen during adjustment. You can output test tone from that of all speakers to "Small". • If you do not use MASTER VOLUME on the receiver. • The adjusted value is not enough bass, you want to adjust, then press . 2 ... can use the equalizer to boost the bass levels. • The surround back speakers will cut it to select the speaker on the "Test Tone" screen. Test Tone You can set to "Small", the center, surround, and front high speakers are using multi channel surround sound, select "Small" to...
... Speaker Settings menu. If there is shown on the TV screen during adjustment. You can output test tone from that of all speakers to "Small". • If you do not use MASTER VOLUME on the receiver. • The adjusted value is not enough bass, you want to adjust, then press . 2 ... can use the equalizer to boost the bass levels. • The surround back speakers will cut it to select the speaker on the "Test Tone" screen. Test Tone You can set to "Small", the center, surround, and front high speakers are using multi channel surround sound, select "Small" to...

Operating Instructions (Large File - 11.22 MB)
Page 112
... from adjacent speakers You can output test tone from adjacent speakers so that you can adjust the balance between the speakers. 1 Press B/b repeatedly to select "Phase Audio", then press . 2 Press V/v repeatedly to adjust the parameter, then press . • OFF • L/C, C/R, R/SL, R/SR, SR/SL, SR/SBR..., SR/SB*, SBR/SBL, SB/SL*, SBL/SL, SL/L, L/SR, L/RH, LH/RH, LH/R Lets you output the test tone sequentially from adjacent ...
... from adjacent speakers You can output test tone from adjacent speakers so that you can adjust the balance between the speakers. 1 Press B/b repeatedly to select "Phase Audio", then press . 2 Press V/v repeatedly to adjust the parameter, then press . • OFF • L/C, C/R, R/SL, R/SR, SR/SL, SR/SBR..., SR/SB*, SBR/SBL, SB/SL*, SBL/SL, SL/L, L/SR, L/RH, LH/RH, LH/R Lets you output the test tone sequentially from adjacent ...

Operating Instructions (Large File - 11.22 MB)
Page 119
...7 again to enter the Subnet Mask, Gateway address, DNS1 address, and DNS2 address. 9 Press V/v repeatedly to select "Test Connection", then press . "Success! The receiver is now connected to select the IP address, then press . appears on the TV screen. 5 Press V/v/B/b and to ...used for Controllers appears on the TV screen. 2 Press V/v repeatedly to select the controller you set availability of operations allowed for the receiver for "Auto Permission", all the controllers detected are checked automatically. 3 Press V/v/B/b repeatedly to select "Controllers", then press . When you...
...7 again to enter the Subnet Mask, Gateway address, DNS1 address, and DNS2 address. 9 Press V/v repeatedly to select "Test Connection", then press . "Success! The receiver is now connected to select the IP address, then press . appears on the TV screen. 5 Press V/v/B/b and to ...used for Controllers appears on the TV screen. 2 Press V/v repeatedly to select the controller you set availability of operations allowed for the receiver for "Auto Permission", all the controllers detected are checked automatically. 3 Press V/v/B/b repeatedly to select "Controllers", then press . When you...

Operating Instructions (Large File - 11.22 MB)
Page 123
... [Display] Parameters [Display] Auto Calibration settings [] Auto Calibration start [A.CAL START] Calibration type [CAL TYPE] Position [POSITION] Level settings [] Naming position [NAME IN] Test tonea) [TEST TONE] Phase noisea) [P. AUDIO] Front left speaker levela) [FL LEVEL] Front right speaker levela) [FR LEVEL] Center speaker levela) [CNT LEVEL] Surround left speaker levela) [SL LEVEL...
... [Display] Parameters [Display] Auto Calibration settings [] Auto Calibration start [A.CAL START] Calibration type [CAL TYPE] Position [POSITION] Level settings [] Naming position [NAME IN] Test tonea) [TEST TONE] Phase noisea) [P. AUDIO] Front left speaker levela) [FL LEVEL] Front right speaker levela) [FR LEVEL] Center speaker levela) [CNT LEVEL] Surround left speaker levela) [SL LEVEL...
Operating Instructions (Large File - 11.22 MB)
Page 138
... a TV set or fluorescent light. • Move your subwoofer. • Depending on the "PlayStation 3". • Set "Audio Out" to the digital input jacks of this receiver, make sure the setting for signals with alcohol. There is no sound from the subwoofer. • Check the "Speaker Pattern"...slightly moistened with a sampling frequency of the connected component is (are connected correctly and securely. • Adjust the level parameters using "Test Tone" in Dolby Digital or DTS format. • When connecting the DVD player, etc., to "AMP" in the Input Option menu (page ...
... a TV set or fluorescent light. • Move your subwoofer. • Depending on the "PlayStation 3". • Set "Audio Out" to the digital input jacks of this receiver, make sure the setting for signals with alcohol. There is no sound from the subwoofer. • Check the "Speaker Pattern"...slightly moistened with a sampling frequency of the connected component is (are connected correctly and securely. • Adjust the level parameters using "Test Tone" in Dolby Digital or DTS format. • When connecting the DVD player, etc., to "AMP" in the Input Option menu (page ...
Operating Instructions (Large File - 11.22 MB)
Page 149
...Speaker Settings 109, 124 SPEAKERS 42 Subwoofer Level 118, 126 Subwoofer LPF 118 Super Audio CD player 34 Sur Back Assign 109 Surround Settings 113, 125 System Audio Control 92 System Power-Off 93 System Settings 121, 127 T Test Tone 111, 123 Theater/Theatre Mode Sync 93 Treble 114, 125 Tuner 61 ...Tuner Settings 125 TV 23, 26 U Up converting 33 V VCR 32 Video Settings 116, 126 Viewing information in the ...
...Speaker Settings 109, 124 SPEAKERS 42 Subwoofer Level 118, 126 Subwoofer LPF 118 Super Audio CD player 34 Sur Back Assign 109 Surround Settings 113, 125 System Audio Control 92 System Power-Off 93 System Settings 121, 127 T Test Tone 111, 123 Theater/Theatre Mode Sync 93 Treble 114, 125 Tuner 61 ...Tuner Settings 125 TV 23, 26 U Up converting 33 V VCR 32 Video Settings 116, 126 Viewing information in the ...
