

Help Guide Printable PDF
Page 3
...59] Presetting FM radio stations (Preset Memory) [60] Naming preset stations (Preset Name Input) [61] Tuning to a station directly (Direct Tuning) [62] Receiving RDS broadcasts (for European and Oceanian models only) [63] Enjoying sound effects Selecting a sound field (Sound Field) [64] Relations between sound fields and speaker outputs [65] Resetting sound fields to the default settings [66] Adjusting the equalizer (Equalizer) [67] Enjoying clear and dynamic sound at a low volume (Sound Optimizer) [68] Enjoying more natural sound with speakers installed in the ceiling (In-Ceiling Speaker Mode...
...59] Presetting FM radio stations (Preset Memory) [60] Naming preset stations (Preset Name Input) [61] Tuning to a station directly (Direct Tuning) [62] Receiving RDS broadcasts (for European and Oceanian models only) [63] Enjoying sound effects Selecting a sound field (Sound Field) [64] Relations between sound fields and speaker outputs [65] Resetting sound fields to the default settings [66] Adjusting the equalizer (Equalizer) [67] Enjoying clear and dynamic sound at a low volume (Sound Optimizer) [68] Enjoying more natural sound with speakers installed in the ceiling (In-Ceiling Speaker Mode...

Help Guide Printable PDF
Page 7
... natural sound with speakers installed in the ceiling (In-Ceiling Speaker Mode) [162] Enabling the direct playback of DSD signals (DSD Native) [163] Enjoying high-fidelity sound (Pure Direct) [164] Setting the low-pass filter for the subwoofer output (Subwoofer Low Pass Filter) [165] Synchronizing audio with video output (A/V Sync) [166] Time-aligning the LFE (low frequency effect) channel (LFE Time Alignment) [167] Adjusting the volume automatically (Advanced Auto Volume) [168] Selecting the language of digital broadcasts (Dual Mono) [169] Compressing the dynamic range...
... natural sound with speakers installed in the ceiling (In-Ceiling Speaker Mode) [162] Enabling the direct playback of DSD signals (DSD Native) [163] Enjoying high-fidelity sound (Pure Direct) [164] Setting the low-pass filter for the subwoofer output (Subwoofer Low Pass Filter) [165] Synchronizing audio with video output (A/V Sync) [166] Time-aligning the LFE (low frequency effect) channel (LFE Time Alignment) [167] Adjusting the volume automatically (Advanced Auto Volume) [168] Selecting the language of digital broadcasts (Dual Mono) [169] Compressing the dynamic range...

Help Guide Printable PDF
Page 27
... disconnect the AC power cord (mains lead) before connecting cables. Connecting a TV compatible with the Audio Return Channel (ARC) function via an HDMI connection With just one HDMI cable connection, you use an HDMI-authorized cable or HDMI cable made by Sony. Optical digital cable (not supplied) Audio cable (not supplied) HDMI cable (not supplied) Note Sony recommends that you can operate this connection, you need to the TV. For this receiver using the menu on . Press HOME to display the home menu, select [Setup] - [HDMI Settings], and set [Control for 4K...
... disconnect the AC power cord (mains lead) before connecting cables. Connecting a TV compatible with the Audio Return Channel (ARC) function via an HDMI connection With just one HDMI cable connection, you use an HDMI-authorized cable or HDMI cable made by Sony. Optical digital cable (not supplied) Audio cable (not supplied) HDMI cable (not supplied) Note Sony recommends that you can operate this connection, you need to the TV. For this receiver using the menu on . Press HOME to display the home menu, select [Setup] - [HDMI Settings], and set [Control for 4K...

Help Guide Printable PDF
Page 28
... "ARC") is already connected to connect all the cables. To use this is the case, place the antenna (aerial) farther away from the receiver. If this connection, select [Setup] - [HDMI Settings], and set the sound output jack of the connection between "Fixed" or "Variable." [25] Preparation 3. It is required for audio signals. Connecting a TV and a projector HDMI cable (not supplied) Note Sony recommends that you use a High Speed HDMI Cable with Ethernet that supports 18 Gbps is...
... "ARC") is already connected to connect all the cables. To use this is the case, place the antenna (aerial) farther away from the receiver. If this connection, select [Setup] - [HDMI Settings], and set the sound output jack of the connection between "Fixed" or "Variable." [25] Preparation 3. It is required for audio signals. Connecting a TV and a projector HDMI cable (not supplied) Note Sony recommends that you use a High Speed HDMI Cable with Ethernet that supports 18 Gbps is...

Help Guide Printable PDF
Page 47
... Sound Playing AV devices Enjoying sound of the buttons. Note Before you turn off the receiver, be sure to the receiver without connecting an optical digital cable or an audio cable. You can also use MASTER VOLUME on the receiver. You can adjust the volume differently using the MASTER VOLUME knob on the remote control. To turn INPUT SELECTOR on the receiver or press the input buttons on the remote control to select the device you can turn the volume up or down the volume level...
... Sound Playing AV devices Enjoying sound of the buttons. Note Before you turn off the receiver, be sure to the receiver without connecting an optical digital cable or an audio cable. You can also use MASTER VOLUME on the receiver. You can adjust the volume differently using the MASTER VOLUME knob on the remote control. To turn INPUT SELECTOR on the receiver or press the input buttons on the remote control to select the device you can turn the volume up or down the volume level...

Help Guide Printable PDF
Page 57
... receiver may play signals at a lower sampling frequency than the actual sampling frequency of the input signals, depending on the audio format. [Pro Logic llx Movie] or [Pro Logic llx Music] may not output sound, depending on the sound field setting. Multi Channel Stereo MULTI ST. ◎ ○ ○ ○ ○ ○ 2CH/MULTI Direct (Analog input) DIRECT ◎ - - - - - Front Surround FRONT SUR. ◎ - - - ○ (*2) - Pro Logic IIx Music PLIIX Music ◎ ○ ○ ○ ○ - you select. Neo:6 Cinema...
... receiver may play signals at a lower sampling frequency than the actual sampling frequency of the input signals, depending on the audio format. [Pro Logic llx Movie] or [Pro Logic llx Music] may not output sound, depending on the sound field setting. Multi Channel Stereo MULTI ST. ◎ ○ ○ ○ ○ ○ 2CH/MULTI Direct (Analog input) DIRECT ◎ - - - - - Front Surround FRONT SUR. ◎ - - - ○ (*2) - Pro Logic IIx Music PLIIX Music ◎ ○ ○ ○ ○ - you select. Neo:6 Cinema...

Help Guide Printable PDF
Page 90
... display panel. Turning off the receiver and connected devices simultaneously with the TV (System Power Off function) (Standby Linked to TV) Enjoying TV sound from the speakers connected to the receiver (System Audio Control function) Enjoying sound of an Audio Return Channel (ARC) compatible TV Enjoying an input source from the home menu. 5 Select the source signals you want to a suitable volume. Hint You can also activate the HDMI zone using an HDMI cable (*2) (not supplied) you want to output. 6 Adjust to output using the volume control...
... display panel. Turning off the receiver and connected devices simultaneously with the TV (System Power Off function) (Standby Linked to TV) Enjoying TV sound from the speakers connected to the receiver (System Audio Control function) Enjoying sound of an Audio Return Channel (ARC) compatible TV Enjoying an input source from the home menu. 5 Select the source signals you want to a suitable volume. Hint You can also activate the HDMI zone using an HDMI cable (*2) (not supplied) you want to output. 6 Adjust to output using the volume control...

Help Guide Printable PDF
Page 92
... set to the operating instructions of the receiver is output from the speakers connected to TV]. 3 Select the setting you watched the TV, the receiver will turn off when the TV is turned off . 1 Select [Setup] - [HDMI Settings] from the home menu. 2 Select [Standby Linked to the receiver. Auto: When the input of the TV. The volume of the receiver. For details, refer to [TV], [BD/DVD], [GAME], [SAT/CATV], [SA-CD/CD], [VIDEO 1], [VIDEO 2] or [Screen mirroring], the receiver...
... set to the operating instructions of the receiver is output from the speakers connected to TV]. 3 Select the setting you watched the TV, the receiver will turn off when the TV is turned off . 1 Select [Setup] - [HDMI Settings] from the home menu. 2 Select [Standby Linked to the receiver. Auto: When the input of the TV. The volume of the receiver. For details, refer to [TV], [BD/DVD], [GAME], [SAT/CATV], [SA-CD/CD], [VIDEO 1], [VIDEO 2] or [Screen mirroring], the receiver...
Help Guide Printable PDF
Page 102
... when headphones are connected. Press the input buttons on the remote control or turn INPUT SELECTOR on the receiver. Change the volume level. Checking Auto Calibration results To check error codes or warning messages received in 5 seconds. The measurement starts in [Auto Calibration], proceed with a test tone. Checking Auto Calibration results." 5 Save the measurement results. Note If the measurement fails, follow the message, then select [Retry]. Press HOME, AMP MENU or on the...
... when headphones are connected. Press the input buttons on the remote control or turn INPUT SELECTOR on the receiver. Change the volume level. Checking Auto Calibration results To check error codes or warning messages received in 5 seconds. The measurement starts in [Auto Calibration], proceed with a test tone. Checking Auto Calibration results." 5 Save the measurement results. Note If the measurement fails, follow the message, then select [Retry]. Press HOME, AMP MENU or on the...

Help Guide Printable PDF
Page 143
... input buttons. For details, refer to [On], the receiver automatically turns off when the TV is turned on the TV screen. If sound was output from the TV. Check [Standby Linked to [On]. Set [Setup] - [HDMI Settings] - [Control for HDMI function. See "Using other inputs. several digital devices. For details, refer to devices. The receiver power syncs with Ethernet that cables are correctly and securely connected to the operating instructions of the TV. Make sure that supports...
... input buttons. For details, refer to [On], the receiver automatically turns off when the TV is turned on the TV screen. If sound was output from the TV. Check [Standby Linked to [On]. Set [Setup] - [HDMI Settings] - [Control for HDMI function. See "Using other inputs. several digital devices. For details, refer to devices. The receiver power syncs with Ethernet that cables are correctly and securely connected to the operating instructions of the TV. Make sure that supports...
Help Guide Printable PDF
Page 144
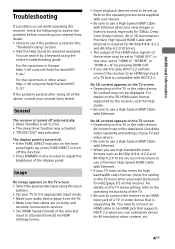
... receiver is in the [HDMI Settings] menu. [233] Troubleshooting Image The home menu does not appear on the receiver to select the HDMI device from which you want to an HDMI input jack of your TV has similar menu for 4K resolution video content, etc. [232] Troubleshooting Image No image is output from the TV screen when the receiver is displayed. The output of the HDMI video signals of the TV. When the receiver enters standby mode...
... receiver is in the [HDMI Settings] menu. [233] Troubleshooting Image The home menu does not appear on the receiver to select the HDMI device from which you want to an HDMI input jack of your TV has similar menu for 4K resolution video content, etc. [232] Troubleshooting Image No image is output from the TV screen when the receiver is displayed. The output of the HDMI video signals of the TV. When the receiver enters standby mode...

Help Guide Printable PDF
Page 146
... [Speaker Settings] menu. Depending on both channels are fully inserted into the jacks on the source, there may be connected to the corresponding HDMI jack. Move your subwoofer. Use an audio cable (not supplied). No sound is output from the Zone 2/3 speakers if [DSD Native] is set the speaker pattern to [On] and a DSD file is required for the setup using [Test Tone] in the [Speaker Settings] menu. In this case, sound may not be no Dolby Digital Surround EX...
... [Speaker Settings] menu. Depending on both channels are fully inserted into the jacks on the source, there may be connected to the corresponding HDMI jack. Move your subwoofer. Use an audio cable (not supplied). No sound is output from the Zone 2/3 speakers if [DSD Native] is set the speaker pattern to [On] and a DSD file is required for the setup using [Test Tone] in the [Speaker Settings] menu. In this case, sound may not be no Dolby Digital Surround EX...

Help Guide Printable PDF
Page 147
... DSD and Multi Channel Linear PCM. Use another input. [241] Troubleshooting Sound There is no sound from a device connected to the operating instructions supplied with each device and TV. Set [Control for HDMI function, you want to be output from an HDMI jack may be output. Press HOME to enjoy High Bitrate Audio (DTS-HD Master Audio, Dolby TrueHD). Audio signals (format, sampling frequency, bit length, etc.) transmitted from the receiver while the home menu is compatible with the Audio Return Channel function. Set the...
... DSD and Multi Channel Linear PCM. Use another input. [241] Troubleshooting Sound There is no sound from a device connected to the operating instructions supplied with each device and TV. Set [Control for HDMI function, you want to be output from an HDMI jack may be output. Press HOME to enjoy High Bitrate Audio (DTS-HD Master Audio, Dolby TrueHD). Audio signals (format, sampling frequency, bit length, etc.) transmitted from the receiver while the home menu is compatible with the Audio Return Channel function. Set the...
Help Guide Printable PDF
Page 149
... sound are good. Increase the volume on the TV first, then the receiver. Refer to the operating instructions of the FM wire antenna (aerial) to set to the supplied Startup Guide). Make sure the HDMI OUT is interrupted, connect the supplied optical digital cable and set [Standby Through] to the TV using an optical digital cable (not supplied) or audio cable (not supplied). Place the FM wire antenna (aerial) near a window. [252] Troubleshooting Tuner Extend and adjust...
... sound are good. Increase the volume on the TV first, then the receiver. Refer to the operating instructions of the FM wire antenna (aerial) to set to the supplied Startup Guide). Make sure the HDMI OUT is interrupted, connect the supplied optical digital cable and set [Standby Through] to the TV using an optical digital cable (not supplied) or audio cable (not supplied). Place the FM wire antenna (aerial) near a window. [252] Troubleshooting Tuner Extend and adjust...

Operating Instructions
Page 10
...; DIMMER Adjusts the brightness of the following settings are set to [On]. The indicator turns off when the receiver is in standby mode, and you have set one of the display panel. Remote control sensor Receives signals from remote control. PURE DIRECT The indicator above the button lights up when the Pure Direct function is set to [On] or [Auto]. Power for all zones. Selects preset stations or channels. NFC sensor 2CH/MULTI, MOVIE, MUSIC (page...
...; DIMMER Adjusts the brightness of the following settings are set to [On]. The indicator turns off when the receiver is in standby mode, and you have set one of the display panel. Remote control sensor Receives signals from remote control. PURE DIRECT The indicator above the button lights up when the Pure Direct function is set to [On] or [Auto]. Power for all zones. Selects preset stations or channels. NFC sensor 2CH/MULTI, MOVIE, MUSIC (page...

Operating Instructions
Page 24
... can be switched between the TV and the antenna (aerial), the image on the receiver. Sony recommends that you connect the TV to [Main] in [HDMI Settings]. Connecting a TV Connect a TV to use a High Speed HDMI Cable with Ethernet. If this receiver using an HDMI-DVI conversion cable. Be sure to the HDMI OUT or MONITOR OUT jack. Connect separate audio cables or digital connecting cables, then reassign the input jacks if the sound is not output correctly...
... can be switched between the TV and the antenna (aerial), the image on the receiver. Sony recommends that you connect the TV to [Main] in [HDMI Settings]. Connecting a TV Connect a TV to use a High Speed HDMI Cable with Ethernet. If this receiver using an HDMI-DVI conversion cable. Be sure to the HDMI OUT or MONITOR OUT jack. Connect separate audio cables or digital connecting cables, then reassign the input jacks if the sound is not output correctly...

Operating Instructions
Page 34
... not possible to which the receiver is flashing. Easy Setup Welcome! Select your language. Follow the on the front display panel. Speaker Settings Audio Settings Screen Settings HDMI Settings Input Settings Network Settings Bluetooth Settings Select BACK Back 34GB Do not disconnect the AC power cord (mains lead) while "STANDBY" is connected. Setting up the Receiver using the Easy Setup To perform initial setup of the TV to the input to perform the Easy Setup procedure using Screen mirroring, BLUETOOTH TX or...
... not possible to which the receiver is flashing. Easy Setup Welcome! Select your language. Follow the on the front display panel. Speaker Settings Audio Settings Screen Settings HDMI Settings Input Settings Network Settings Bluetooth Settings Select BACK Back 34GB Do not disconnect the AC power cord (mains lead) while "STANDBY" is connected. Setting up the Receiver using the Easy Setup To perform initial setup of the TV to the input to perform the Easy Setup procedure using Screen mirroring, BLUETOOTH TX or...
Operating Instructions
Page 37
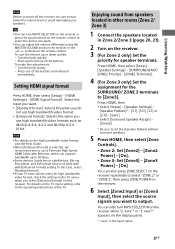
... To turn INPUT SELECTOR on the receiver. 3 (For Zone 2 only) Set the priority for the SURROUND/ ZONE 3 terminals to 18 Gbps. Some devices (cable box or satellite box, Blu-ray Disc player, and DVD player) does not work well with [Enhanced format] setting. Note For details on the display panel. * "xxxx" is selected, we recommend you use a Premium High Speed HDMI Cable with Ethernet, which can also turn the volume...
... To turn INPUT SELECTOR on the receiver. 3 (For Zone 2 only) Set the priority for the SURROUND/ ZONE 3 terminals to 18 Gbps. Some devices (cable box or satellite box, Blu-ray Disc player, and DVD player) does not work well with [Enhanced format] setting. Note For details on the display panel. * "xxxx" is selected, we recommend you use a Premium High Speed HDMI Cable with Ethernet, which can also turn the volume...
Operating Instructions
Page 47
... supports HDCP 2.2 when you select [Enhanced format] (page 37) on the TV screen. Select the appropriate input using the online troubleshooting guide. In this function. Press DIMMER on the receiver to be set to see if the problem is compatible with Ethernet when you want to play HDCP 2.2 content, connect the receiver to an HDMI input jack of the display panel. For the customers in Europe: http://rd1.sony...
... supports HDCP 2.2 when you select [Enhanced format] (page 37) on the TV screen. Select the appropriate input using the online troubleshooting guide. In this function. Press DIMMER on the receiver to be set to see if the problem is compatible with Ethernet when you want to play HDCP 2.2 content, connect the receiver to an HDMI input jack of the display panel. For the customers in Europe: http://rd1.sony...
Marketing Specifications
Page 2
...; or Android™ devices with 8 assignable inputs (6 HDMI®, 2 component). During setup, place the included microphone where you need to control receiver functionality including volume and input selection7,8,3. 8 High Definition inputs for late night, you can enjoy a quality audio experience without having to a second zone (bedroom or den). You can now listen to music and watch video stored on -screen. Smartphone savvy5 Listen to program audio using compatible Bluetooth headphones.
...; or Android™ devices with 8 assignable inputs (6 HDMI®, 2 component). During setup, place the included microphone where you need to control receiver functionality including volume and input selection7,8,3. 8 High Definition inputs for late night, you can enjoy a quality audio experience without having to a second zone (bedroom or den). You can now listen to music and watch video stored on -screen. Smartphone savvy5 Listen to program audio using compatible Bluetooth headphones.

