MHCGX355 Instructions (model of entire system)
Page 2
...IN CANADA CAUTION The use of uninsulated "dangerous voltage" within the product's enclosure that the cable ground shall be connected to the grounding system of the building, as close to the point of the FCC Rules. To prevent fire, do not expose the unit to Part 15...the apparatus. Increase the separation between the equipment and receiver. - registered mark. As an ENERGY STAR® partner, Sony Corporation has determined that interference will not occur in this manual could void your authority to operate this product meets the ENERGY STAR® guidelines for a Class B digital device, ...
...IN CANADA CAUTION The use of uninsulated "dangerous voltage" within the product's enclosure that the cable ground shall be connected to the grounding system of the building, as close to the point of the FCC Rules. To prevent fire, do not expose the unit to Part 15...the apparatus. Increase the separation between the equipment and receiver. - registered mark. As an ENERGY STAR® partner, Sony Corporation has determined that interference will not occur in this manual could void your authority to operate this product meets the ENERGY STAR® guidelines for a Class B digital device, ...
MHCGX355 Instructions (model of entire system)
Page 3
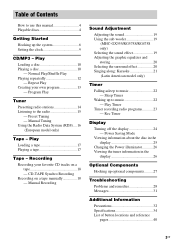
Recording Recording your own program 13 - Manual Recording Sound Adjustment Adjusting the sound 19 Using the sub woofer 19 (MHC-GX555/RG575S/RG475S only) Selecting the sound effect 19 Adjusting the graphic equalizer and storing 20 Selecting the surround effect 20 Singing ... disc in the display 25 Changing the Power illuminator........... 26 Viewing the tuner information in the display 26 Optional Components Hooking up to use this manual 4 Playable discs 4 Getting Started Hooking up the system 6 Setting the clock 9 CD/MP3 - Play Loading a tape 17 Playing a tape 17 Tape - CD-...
Recording Recording your own program 13 - Manual Recording Sound Adjustment Adjusting the sound 19 Using the sub woofer 19 (MHC-GX555/RG575S/RG475S only) Selecting the sound effect 19 Adjusting the graphic equalizer and storing 20 Selecting the surround effect 20 Singing ... disc in the display 25 Changing the Power illuminator........... 26 Viewing the tuner information in the display 26 Optional Components Hooking up to use this manual 4 Playable discs 4 Getting Started Hooking up the system 6 Setting the clock 9 CD/MP3 - Play Loading a tape 17 Playing a tape 17 Tape - CD-...
MHCGX355 Instructions (model of entire system)
Page 4
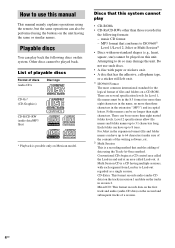
...CD-RW (audio data/MP3 files) * Playback is a CD having the same or similar names. A Multi Session CD is possible only on this manual This manual mainly explains operations using the remote, but the same operations can play • CD-ROMs • CD-Rs/CD-RWs other than eight characters....Mexican model. In Level 1, file names must be no more than three characters in the extension ".MP3") and in session 1 and data on this system cannot play back the following formats: - CD-Extra: This format records audio (audio CD data) on the tracks in capital letters. There can ...
...CD-RW (audio data/MP3 files) * Playback is a CD having the same or similar names. A Multi Session CD is possible only on this manual This manual mainly explains operations using the remote, but the same operations can play • CD-ROMs • CD-Rs/CD-RWs other than eight characters....Mexican model. In Level 1, file names must be no more than three characters in the extension ".MP3") and in session 1 and data on this system cannot play back the following formats: - CD-Extra: This format records audio (audio CD data) on the tracks in capital letters. There can ...
MHCGX355 Instructions (model of entire system)
Page 14
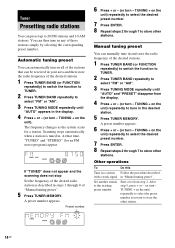
... (for a station. TUNING + on the unit) repeatedly to tune in and store the radio frequency of the desired radio station as the system scans for an FM stereo program) appear. If "TUNED" does not appear and the scanning does not stop Set the frequency of the desired...preset number. 7 Press ENTER. 8 Repeat steps 2 through 7 to select "FM" or "AM". 3 Press TUNING MODE repeatedly until "AUTO" appears in any of "Manual tuning preset" . 5 Press TUNER MEMORY. Set another station to store the other stations. Preset number 6 Press + or - (or turn - TUNING + on the ...
... (for a station. TUNING + on the unit) repeatedly to tune in and store the radio frequency of the desired radio station as the system scans for an FM stereo program) appear. If "TUNED" does not appear and the scanning does not stop Set the frequency of the desired...preset number. 7 Press ENTER. 8 Repeat steps 2 through 7 to select "FM" or "AM". 3 Press TUNING MODE repeatedly until "AUTO" appears in any of "Manual tuning preset" . 5 Press TUNER MEMORY. Set another station to store the other stations. Preset number 6 Press + or - (or turn - TUNING + on the ...

MHCGX355 Instructions (model of entire system)
Page 15
To reset the interval, repeat the same procedure. CD power is poor, set CD player power off by manually tuning in the station. Preset Tuning Preset radio stations in the tuner's memory first (see "Presetting radio stations" on the unit for some areas). When .... 2 Press TUNER BAND repeatedly to select "FM" or "AM". 3 Press TUNING MODE repeatedly until "PRESET" appears in the display. 4 Press + or - (or turn off the system. While holding x. To improve tuner reception When tuner reception is factory set CD power on the unit. Listening to the radio You can listen to...
To reset the interval, repeat the same procedure. CD power is poor, set CD player power off by manually tuning in the station. Preset Tuning Preset radio stations in the tuner's memory first (see "Presetting radio stations" on the unit for some areas). When .... 2 Press TUNER BAND repeatedly to select "FM" or "AM". 3 Press TUNING MODE repeatedly until "PRESET" appears in the display. 4 Press + or - (or turn off the system. While holding x. To improve tuner reception When tuner reception is factory set CD power on the unit. Listening to the radio You can listen to...
MHCGX355 Instructions (model of entire system)
Page 16
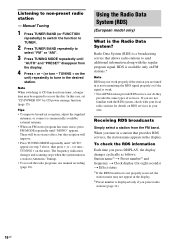
.... There will improve. • Press TUNING MODE repeatedly until "AUTO" appears in the display. 2) Preset number is the Radio Data System? TUNING + on the unit) repeatedly to access the disc. Note When switching to send additional information along with your local radio stations... FM MODE repeatedly until "MONO" appears. Receiving RDS broadcasts Simply select a station from the display. 4 Press + or - (or turn - Manual Tuning 1 Press TUNER BAND (or FUNCTION repeatedly) to switch the function to TUNER. 2 Press TUNER BAND repeatedly to non-preset radio station - Using...
.... There will improve. • Press TUNING MODE repeatedly until "AUTO" appears in the display. 2) Preset number is the Radio Data System? TUNING + on the unit) repeatedly to access the disc. Note When switching to send additional information along with your local radio stations... FM MODE repeatedly until "MONO" appears. Receiving RDS broadcasts Simply select a station from the display. 4 Press + or - (or turn - Manual Tuning 1 Press TUNER BAND (or FUNCTION repeatedly) to switch the function to TUNER. 2 Press TUNER BAND repeatedly to non-preset radio station - Using...
MHCGX355 Instructions (model of entire system)
Page 18
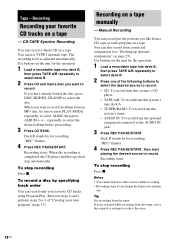
...You can use TYPE I (normal) tape. Recording Recording your favorite CD tracks on a tape manually - CD-TAPE Synchro Recording You can record just the portions you like from connected components (see "Hooking up optional components" on page 27). Between steps 2 and 3, perform steps 2 to 6 of the following... and load a disc you want to record. • CD: To record from this system's CD player. • TAPE A/B: To record from this system's tape deck A. • TUNER/BAND: To record from this system's tuner. • AUDIO IN: To record from the tuner: If noise is adjusted ...
...You can use TYPE I (normal) tape. Recording Recording your favorite CD tracks on a tape manually - CD-TAPE Synchro Recording You can record just the portions you like from connected components (see "Hooking up optional components" on page 27). Between steps 2 and 3, perform steps 2 to 6 of the following... and load a disc you want to record. • CD: To record from this system's CD player. • TAPE A/B: To record from this system's tape deck A. • TUNER/BAND: To record from this system's tuner. • AUDIO IN: To record from the tuner: If noise is adjusted ...
MHCGX355 Instructions (model of entire system)
Page 23
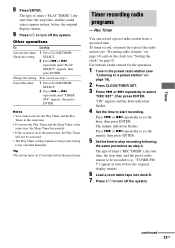
... indication flashes. 4 Set the time to a preset station" on at the same time, the Sleep Timer has priority. • If the system is not canceled manually. or > repeatedly until "TIMER OFF" appears, then press ENTER. continued 23GB Press . or > repeatedly to select "REC SET", then press..."TUNER FM 5") appear in turn, before the original display returns. 6 Load a recordable tape into deck B. 7 Press ?/1 to turn off the system. Tip The system turns on page 9). or > repeatedly to set the hour, then press ENTER. The type of timer ("REC TIMER"), the start time, the stop...
... indication flashes. 4 Set the time to a preset station" on at the same time, the Sleep Timer has priority. • If the system is not canceled manually. or > repeatedly until "TIMER OFF" appears, then press ENTER. continued 23GB Press . or > repeatedly to select "REC SET", then press..."TUNER FM 5") appear in turn, before the original display returns. 6 Load a recordable tape into deck B. 7 Press ?/1 to turn off the system. Tip The system turns on page 9). or > repeatedly to set the hour, then press ENTER. The type of timer ("REC TIMER"), the start time, the stop...
MHCGX355 Instructions (model of entire system)
Page 27
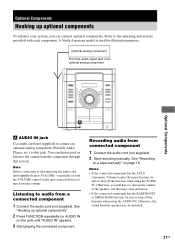
...speaker, and that may be distorted. 27GB Notes • If the connected component has the AVLS (Automatic Volume Limiter System) function, be sure to turn up the volume of an optional analog component Optional Components A AUDIO IN jack Use audio cord (not supplied) to connect an ...FUNCTION repeatedly (or AUDIO IN on page 18. See "Recording on a tape manually" on the unit) until "AUDIO IN" appears. 3 Start playing the connected component. Optional Components Hooking up optional components To enhance your system, you will have to turn off the function when using the AUDIO IN....
...speaker, and that may be distorted. 27GB Notes • If the connected component has the AVLS (Automatic Volume Limiter System) function, be sure to turn up the volume of an optional analog component Optional Components A AUDIO IN jack Use audio cord (not supplied) to connect an ...FUNCTION repeatedly (or AUDIO IN on page 18. See "Recording on a tape manually" on the unit) until "AUDIO IN" appears. 3 Start playing the connected component. Optional Components Hooking up optional components To enhance your system, you will have to turn off the function when using the AUDIO IN....
Marketing Specifications
Page 2
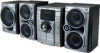
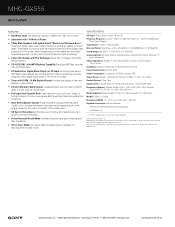
... lbs. (10.3kg) Dimensions (WHD): 11" x 12.9" x 16.7" (280 x 327 x 425 mm) Supplied Accessories: Instruction Manual Remote Commander® Remote Control RM-SC3 AA Batteries x 2 1. MHC-GX555 Mini System features s 460 Watts Total: 145 Watts per channel x 2 (RMS 10% THD, 120-10 kHz) s Subwoofer with 170 Watts of... notice. FM: Antenna Terminals: 75 ohms unbalanced Output Impedance: Amplifier: Accepts Headphones of 8 ohms or more then 2 speakers. Sony, Remote Commander and Walkman are trademarks of use than older style mechanical transports. s CD-R/CD-RW1 with Play Exchange Allows user ...
... lbs. (10.3kg) Dimensions (WHD): 11" x 12.9" x 16.7" (280 x 327 x 425 mm) Supplied Accessories: Instruction Manual Remote Commander® Remote Control RM-SC3 AA Batteries x 2 1. MHC-GX555 Mini System features s 460 Watts Total: 145 Watts per channel x 2 (RMS 10% THD, 120-10 kHz) s Subwoofer with 170 Watts of... notice. FM: Antenna Terminals: 75 ohms unbalanced Output Impedance: Amplifier: Accepts Headphones of 8 ohms or more then 2 speakers. Sony, Remote Commander and Walkman are trademarks of use than older style mechanical transports. s CD-R/CD-RW1 with Play Exchange Allows user ...


