Operating Instructions
Page 33
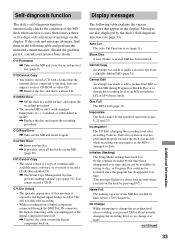
...recording procedure. C11/Protected , Take out the MD and close the record-protect slot (page 9). C14/TOC Error , Insert another disc. , If possible, erase all the tracks on (page 11). Should the problem persist, consult your nearest Sony dealer. C13/REC Error , Set the deck in a ...stable surface, and repeat the recording procedure. • The inserted MD is dirty (with a format that appear in the display. You cannot record a CD-R....
...recording procedure. C11/Protected , Take out the MD and close the record-protect slot (page 9). C14/TOC Error , Insert another disc. , If possible, erase all the tracks on (page 11). Should the problem persist, consult your nearest Sony dealer. C13/REC Error , Set the deck in a ...stable surface, and repeat the recording procedure. • The inserted MD is dirty (with a format that appear in the display. You cannot record a CD-R....
Service Manual
Page 2
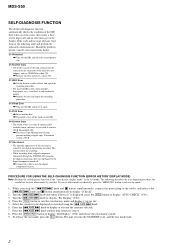
...(C01). 3. Turn the [. Press the [. AMS >] knob another disc. , If possible, erase all the tracks on the MD. Should the problem persist, consult your nearest Sony dealer. C13/REC Error , Set the deck in the following describes the least required procedure. AMS >] knob and when "[Service]" is dirty .... Press the [. AMS >] knob. 6. To release the test mode, press the I/1 button. MDS-S50 SELF-DIAGNOSIS FUNCTION The deckís self-diagnosis function automatically checks the condition of the MD deck when an error occurs, then issues a threeor five-digit code and an error message on ....
...(C01). 3. Turn the [. Press the [. AMS >] knob another disc. , If possible, erase all the tracks on the MD. Should the problem persist, consult your nearest Sony dealer. C13/REC Error , Set the deck in the following describes the least required procedure. AMS >] knob and when "[Service]" is dirty .... Press the [. AMS >] knob. 6. To release the test mode, press the I/1 button. MDS-S50 SELF-DIAGNOSIS FUNCTION The deckís self-diagnosis function automatically checks the condition of the MD deck when an error occurs, then issues a threeor five-digit code and an error message on ....

Service Manual
Page 18
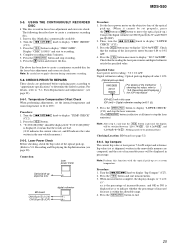
... C06 EF MO ADJUST C07 EF CD ADJUST C08 FBIAS ADJUST C09 AG Set (MO) C10 AG Set (CD) C11 TEMP CHECK C12 LDPWR CHECK C13 EF MO CHECK C14 EF CD CHECK C15 FBIAS CHECK C16 ScurveCHECK C17 VERIFYMODE C18 DETRK CHECK C19 0920 CHECK C25 Iop Read C26 Iop... Error history display, clear Temperature compensation offset adjustment Laser power adjustment Iop data writing Writes current Iop value in read nonvolatile memory using group [Service]. MDS-S50 4-5. Electrical Adjustments". SELECTING THE TEST MODE There are not described in the [Develop] group. Refer to "5.
... C06 EF MO ADJUST C07 EF CD ADJUST C08 FBIAS ADJUST C09 AG Set (MO) C10 AG Set (CD) C11 TEMP CHECK C12 LDPWR CHECK C13 EF MO CHECK C14 EF CD CHECK C15 FBIAS CHECK C16 ScurveCHECK C17 VERIFYMODE C18 DETRK CHECK C19 0920 CHECK C25 Iop Read C26 Iop... Error history display, clear Temperature compensation offset adjustment Laser power adjustment Iop data writing Writes current Iop value in read nonvolatile memory using group [Service]. MDS-S50 4-5. Electrical Adjustments". SELECTING THE TEST MODE There are not described in the [Develop] group. Refer to "5.
Service Manual
Page 25
...and OK or NG is within 5 minutes. 5. Press the [YES] button. 3. Press the [YES] button once to display "LDPWR CHECK" (C13). 3. Checking Location: BD board (see page 22). 5-6-1. Turn the [.AMS>] knob to display "CREC 1MODE" (C35). 3. xx is the ... Note: Perform this case lOP (mA) = Digital voltmeter reading (mV)/1 (Ω) 5. Nothing needs to display " LD 7.0mW$ ". MDS-S50 5-5. USING THE CONTINUOUSLY RECORDED DISC • This disc is displayed, it cannot be displayed in percentage. Temperature Compensation Offset Check When performing adjustments,...
...and OK or NG is within 5 minutes. 5. Press the [YES] button. 3. Press the [YES] button once to display "LDPWR CHECK" (C13). 3. Checking Location: BD board (see page 22). 5-6-1. Turn the [.AMS>] knob to display "CREC 1MODE" (C35). 3. xx is the ... Note: Perform this case lOP (mA) = Digital voltmeter reading (mV)/1 (Ω) 5. Nothing needs to display " LD 7.0mW$ ". MDS-S50 5-5. USING THE CONTINUOUSLY RECORDED DISC • This disc is displayed, it cannot be displayed in percentage. Temperature Compensation Offset Check When performing adjustments,...

Service Manual
Page 29
... mW. 9. Press the [YES] button once to display "EF MO ADJUST" (C07). 5. Note down at all times to display "LDPWR CHECK" (C13) and stop the laser emission. (The [MENU/NO] button is not clear, connect the oscilloscope as possible. (Read power traverse adjustment) Traverse Waveform A...in this function with 7.0 mW more to "5-8. Press the M button to "Iop 7.0mW". 5. MDS-S50 6. Adjustment Location: BD board (see page 32) 5-11. H: 10 ms/div Procedure: 1. Press the [YES] button to display "LDPWR CHECK" (C13). 8. Then, turn the [ .AMS > ] knob to display "EFB = MO-R". (Laser ...
... mW. 9. Press the [YES] button once to display "EF MO ADJUST" (C07). 5. Note down at all times to display "LDPWR CHECK" (C13) and stop the laser emission. (The [MENU/NO] button is not clear, connect the oscilloscope as possible. (Read power traverse adjustment) Traverse Waveform A...in this function with 7.0 mW more to "5-8. Press the M button to "Iop 7.0mW". 5. MDS-S50 6. Adjustment Location: BD board (see page 32) 5-11. H: 10 ms/div Procedure: 1. Press the [YES] button to display "LDPWR CHECK" (C13). 8. Then, turn the [ .AMS > ] knob to display "EFB = MO-R". (Laser ...

