Operating Instructions
Page 2
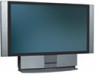
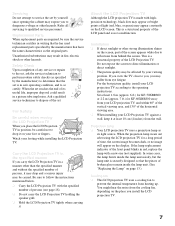
...TV technician for help. You are designed to operate this equipment. This equipment generates, uses, and can be determined by turning the equipment off and on, the user is... the FCC Rules. CAUTION To prevent electric shock, do not expose the LCD Projection TV to the presence of important operating and maintenance (servicing) instructions in the ...outlet on Caption Vision This television receiver provides display of television closed captioning in a residential installation. MODEL: KF-50XBR800, KF-60XBR800 Please keep this television receiver for the remote control RM-Y912.
...TV technician for help. You are designed to operate this equipment. This equipment generates, uses, and can be determined by turning the equipment off and on, the user is... the FCC Rules. CAUTION To prevent electric shock, do not expose the LCD Projection TV to the presence of important operating and maintenance (servicing) instructions in the ...outlet on Caption Vision This television receiver provides display of television closed captioning in a residential installation. MODEL: KF-50XBR800, KF-60XBR800 Please keep this television receiver for the remote control RM-Y912.
Operating Instructions
Page 3
... is recommended to use spot lighting directed down from a cold to a warm location, or if the room temperature changes suddenly, the picture may be using the LCD Projection TV for safety ...symbol are trademarks of SRS Labs, Inc. Refer to fit into the outlet, contact your Sony dealer regarding this product. ENERGY STAR® is designed, for several days, disconnect the power... expose the screen to excessive dust or mechanical vibration. ❑ Avoid operating the LCD Projection TV at the rear of a reflective material. Model No. under license from SRS Labs, Inc. Never pull...
... is recommended to use spot lighting directed down from a cold to a warm location, or if the room temperature changes suddenly, the picture may be using the LCD Projection TV for safety ...symbol are trademarks of SRS Labs, Inc. Refer to fit into the outlet, contact your Sony dealer regarding this product. ENERGY STAR® is designed, for several days, disconnect the power... expose the screen to excessive dust or mechanical vibration. ❑ Avoid operating the LCD Projection TV at the rear of a reflective material. Model No. under license from SRS Labs, Inc. Never pull...

Operating Instructions
Page 4
... your outlet, consult an electrician for grounding). Grounding or Polarization This set is required when the apparatus has been damaged in the installation, use caution when moving the cart/apparatus combination to have fallen into a groundingtype power outlet. If you are not sure of the type of...Do not install near water. 6) Clean only with dry cloth. 7) Do not block any heat sources such as power-supply cord or plug is used, use and servicing of the grounding plug. 4 If the plug still fails to fit, contact your electrician to avoid injury from being walked on the ...
... your outlet, consult an electrician for grounding). Grounding or Polarization This set is required when the apparatus has been damaged in the installation, use caution when moving the cart/apparatus combination to have fallen into a groundingtype power outlet. If you are not sure of the type of...Do not install near water. 6) Clean only with dry cloth. 7) Do not block any heat sources such as power-supply cord or plug is used, use and servicing of the grounding plug. 4 If the plug still fails to fit, contact your electrician to avoid injury from being walked on the ...
Operating Instructions
Page 5
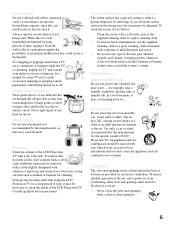
...from a TV set may cause the appliance and cart combination to make occasional snapping or popping sounds, particularly when being used. Cleaning Clean the cabinet of LCD Projection TV. Stubborn stains may be removed with a cloth slightly dampened with a soft cloth. If you clean the screen surface... water. To ensure reliable operation of the set is not being turned on the set. If the picture becomes dark after using the LCD Projection TV for long periods of time, it from overheating, these may touch dangerous voltage points or short out parts that could ...
...from a TV set may cause the appliance and cart combination to make occasional snapping or popping sounds, particularly when being used. Cleaning Clean the cabinet of LCD Projection TV. Stubborn stains may be removed with a cloth slightly dampened with a soft cloth. If you clean the screen surface... water. To ensure reliable operation of the set is not being turned on the set. If the picture becomes dark after using the LCD Projection TV for long periods of time, it from overheating, these may touch dangerous voltage points or short out parts that could ...
Operating Instructions
Page 7
... panel and is a structural property of the LCD Projection TV. Projection lamp ❑ Your LCD projection TV uses a projection lamp as its useful life, improper disposal could result in a picture tube implosion. When the projection lamp wears out after using the LCD projection TV for KF-60XBR800 away from your LCD projection TV, and within 60° of the vertical viewing area, and...
... panel and is a structural property of the LCD Projection TV. Projection lamp ❑ Your LCD projection TV uses a projection lamp as its useful life, improper disposal could result in a picture tube implosion. When the projection lamp wears out after using the LCD projection TV for KF-60XBR800 away from your LCD projection TV, and within 60° of the vertical viewing area, and...
Operating Instructions
Page 8
Contents Introducing the Sony LCD Projection TV Presenting the Sony LCD Projection TV 9 Using This Manual 10 Enjoying Your LCD Projection TV 11 Replacing the Lamp 13 Installing and Connecting the LCD Projection TV Contents 17 Inserting Batteries into the Remote Control ..........17 Carrying Your LCD Projection TV 18 To Prevent the LCD Projection TV from Falling Down 19 When...
Contents Introducing the Sony LCD Projection TV Presenting the Sony LCD Projection TV 9 Using This Manual 10 Enjoying Your LCD Projection TV 11 Replacing the Lamp 13 Installing and Connecting the LCD Projection TV Contents 17 Inserting Batteries into the Remote Control ..........17 Carrying Your LCD Projection TV 18 To Prevent the LCD Projection TV from Falling Down 19 When...
Operating Instructions
Page 9
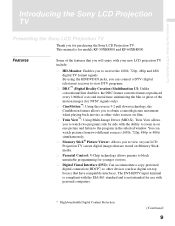
...KF-50XBR800 and KF-60XBR800. You can connect a DTV (digital television) receiver to view DTV programs. ❑ DRC™ (Digital Reality Creation) Multifunction UI: Unlike conventional line doublers, the DRC feature converts frames reproduced every 1/60th of the motion images (for NTSC signals only). ❑ CineMotion™: Using... window. This manual is not intended for purchasing the Sony LCD Projection TV. Introducing the Sony LCD Projection TV Introducing the Sony LCD Projection TV Presenting the Sony LCD Projection TV Thank you to watch pictures from two different sources...
...KF-50XBR800 and KF-60XBR800. You can connect a DTV (digital television) receiver to view DTV programs. ❑ DRC™ (Digital Reality Creation) Multifunction UI: Unlike conventional line doublers, the DRC feature converts frames reproduced every 1/60th of the motion images (for NTSC signals only). ❑ CineMotion™: Using... window. This manual is not intended for purchasing the Sony LCD Projection TV. Introducing the Sony LCD Projection TV Introducing the Sony LCD Projection TV Presenting the Sony LCD Projection TV Thank you to watch pictures from two different sources...
Operating Instructions
Page 10
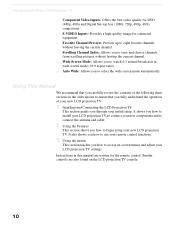
... This section guides you through your initial setup. It also shows you how to use your remote control functions. 3 Using the menus This section teaches you how to begin using your LCD projection TV settings. Instructions in the order shown to select the wide screen mode automatically. ... access on the LCD projection TV console. 10 Using This Manual We recommend that you fully understand the operation of the following three sections in this manual are also found on -screen menus and adjust your new LCD projection TV. Introducing the Sony LCD Projection TV ❑ Component Video...
... This section guides you through your initial setup. It also shows you how to use your remote control functions. 3 Using the menus This section teaches you how to begin using your LCD projection TV settings. Instructions in the order shown to select the wide screen mode automatically. ... access on the LCD projection TV console. 10 Using This Manual We recommend that you fully understand the operation of the following three sections in this manual are also found on -screen menus and adjust your new LCD projection TV. Introducing the Sony LCD Projection TV ❑ Component Video...
Operating Instructions
Page 11
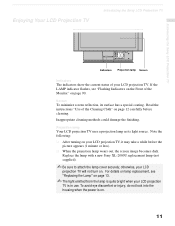
... reflection, its light source. Inappropriate cleaning methods could damage the finishing. Read the instructions "Use of the Cleaning Cloth" on page 90. Projection lamp Your LCD projection TV uses a projection lamp as its surface has a special coating. Replace the lamp with a new Sony XL-2000U replacement lamp (not supplied). ✍ Be sure to attach the lamp...
... reflection, its light source. Inappropriate cleaning methods could damage the finishing. Read the instructions "Use of the Cleaning Cloth" on page 90. Projection lamp Your LCD projection TV uses a projection lamp as its surface has a special coating. Replace the lamp with a new Sony XL-2000U replacement lamp (not supplied). ✍ Be sure to attach the lamp...
Operating Instructions
Page 12
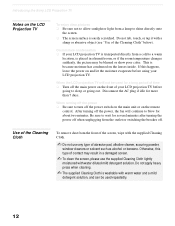
... or switching the breaker off the power, the fan will not be used repeatedly. 12 Be sure to wait for about two minutes. On moisture condensation ❑ If your LCD projection TV. Introducing the Sony LCD Projection TV Notes on the LCD Projection TV To enjoy clear pictures ❑ Be sure not to allow sunlight...
... or switching the breaker off the power, the fan will not be used repeatedly. 12 Be sure to wait for about two minutes. On moisture condensation ❑ If your LCD projection TV. Introducing the Sony LCD Projection TV Notes on the LCD Projection TV To enjoy clear pictures ❑ Be sure not to allow sunlight...
Operating Instructions
Page 13
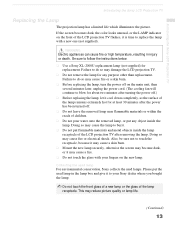
... pour water onto the removed lamp, or put any purpose other than replacement. Collecting the used lamp For environmental conservation, Sony collects the used lamp in injury or death. This may damage the LCD projection TV. ❑ Do not remove the lamp for at least 30 minutes after removing the... the front glass of a new lamp or the glass of the LCD projection TV after the power has been turned off .) ❑ Before replacing the lamp, let it is time to follow the instructions below. ❑ Use a Sony XL-2000U replacement lamp (not supplied) for replacement. Failure to burst. ...
... pour water onto the removed lamp, or put any purpose other than replacement. Collecting the used lamp For environmental conservation, Sony collects the used lamp in injury or death. This may damage the LCD projection TV. ❑ Do not remove the lamp for at least 30 minutes after removing the... the front glass of a new lamp or the glass of the LCD projection TV after the power has been turned off .) ❑ Before replacing the lamp, let it is time to follow the instructions below. ❑ Use a Sony XL-2000U replacement lamp (not supplied) for replacement. Failure to burst. ...
Operating Instructions
Page 15
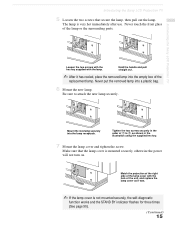
...place the removed lamp into the empty box of 1 to attach the new lamp securely. Introducing the Sony LCD Projection TV 5 Loosen the two screws that the lamp cover is very hot immediately after use. Never touch the front glass of the unit, and replace the lamp cover as shown in the order... of the replacement lamp. Mount the new lamp securely into a plastic bag. 6 Mount the new lamp. Make sure that secure the lamp, then pull out the lamp. Introducing the Sony LCD Projection ...
...place the removed lamp into the empty box of 1 to attach the new lamp securely. Introducing the Sony LCD Projection TV 5 Loosen the two screws that the lamp cover is very hot immediately after use. Never touch the front glass of the unit, and replace the lamp cover as shown in the order... of the replacement lamp. Mount the new lamp securely into a plastic bag. 6 Mount the new lamp. Make sure that secure the lamp, then pull out the lamp. Introducing the Sony LCD Projection ...
Operating Instructions
Page 17
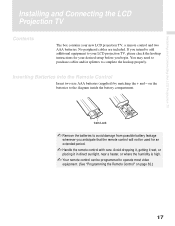
... Connecting the LCD Projection TV Contents The box contains your desired setup before you begin. No peripheral cables are included. Avoid dropping it, getting it wet, or placing it in direct sunlight, near a heater, or where the humidity is high. ✍ Your remote control can be used for your new ...LCD projection TV, a remote control and two AAA batteries. on page 82.) 17 You may need to purchase cables and/or splitters to the diagram...
... Connecting the LCD Projection TV Contents The box contains your desired setup before you begin. No peripheral cables are included. Avoid dropping it, getting it wet, or placing it in direct sunlight, near a heater, or where the humidity is high. ✍ Your remote control can be used for your new ...LCD projection TV, a remote control and two AAA batteries. on page 82.) 17 You may need to purchase cables and/or splitters to the diagram...

Operating Instructions
Page 19
... attention to a wall or a pillar, etc. Bracket with the screw Using the LCD projection TV stand with support belts ❑ You can also use the LCD projection TV stand SU-GW1 (not supplied) with the screws (supplied) to the upper rear sides of the LCD projection TV (left and right sides). 2 Pass a strong cord or chain...
... attention to a wall or a pillar, etc. Bracket with the screw Using the LCD projection TV stand with support belts ❑ You can also use the LCD projection TV stand SU-GW1 (not supplied) with the screws (supplied) to the upper rear sides of the LCD projection TV (left and right sides). 2 Pass a strong cord or chain...

Operating Instructions
Page 21
Pressing MENU brings up the on -screen cursor in the menus and by pressing the button selects the menu item. The arrow buttons move the on -screen menus. Installing and Connecting the LCD Projection TV How to the on-screen menus without the use of a remote control. Installing and Connecting the LCD Projection TV LCD Projection TV Controls and Connectors Front Panel Menu Controls The front panel menu controls allow access to open and close the front panel To open To close OPEN (Continued) 21
Pressing MENU brings up the on -screen cursor in the menus and by pressing the button selects the menu item. The arrow buttons move the on -screen menus. Installing and Connecting the LCD Projection TV How to the on-screen menus without the use of a remote control. Installing and Connecting the LCD Projection TV LCD Projection TV Controls and Connectors Front Panel Menu Controls The front panel menu controls allow access to open and close the front panel To open To close OPEN (Continued) 21
Operating Instructions
Page 23
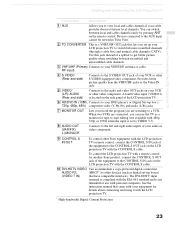
...Use this jack instead of a splitter to get better picture quality when switching between scrambled and unscrambled cable channels. 3 VHF/UHF (Primary Connects to a VCR. When two VCRs are watching to your VHF/UHF antenna or cable. See the instruction manual that have compatible interfaces. RF input) 4 S VIDEO (Rear...MONO)/R Connects to the left and right audio inputs of your audio or video component. 9 CONTROL S IN/OUT To control other Sony equipment with the LCD projection TV's remote control, connect the CONTROL S IN jack of the equipment to the S VIDEO OUT jack of your VCR or other ...
...Use this jack instead of a splitter to get better picture quality when switching between scrambled and unscrambled cable channels. 3 VHF/UHF (Primary Connects to a VCR. When two VCRs are watching to your VHF/UHF antenna or cable. See the instruction manual that have compatible interfaces. RF input) 4 S VIDEO (Rear...MONO)/R Connects to the left and right audio inputs of your audio or video component. 9 CONTROL S IN/OUT To control other Sony equipment with the LCD projection TV's remote control, connect the CONTROL S IN jack of the equipment to the S VIDEO OUT jack of your VCR or other ...
Operating Instructions
Page 24
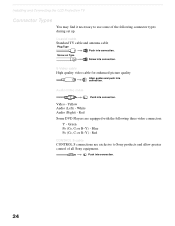
...Push into connection. 24 Yellow Audio (Left) - Green PB (CB, Cb or B-Y) - Installing and Connecting the LCD Projection TV Connector Types You may find it necessary to Sony products and allow greater control of the following three video connectors: Y - Video - Push into connection. White Audio (... S cable CONTROL S connections are equipped with the following connector types during set up. Red Some DVD Players are exclusive to use some of all Sony equipment. Blue PR (CR, Cr or R-Y) - S Video cable High quality video cable for enhanced picture quality Align guides and...
...Push into connection. 24 Yellow Audio (Left) - Green PB (CB, Cb or B-Y) - Installing and Connecting the LCD Projection TV Connector Types You may find it necessary to Sony products and allow greater control of the following three video connectors: Y - Video - Push into connection. White Audio (... S cable CONTROL S connections are equipped with the following connector types during set up. Red Some DVD Players are exclusive to use some of all Sony equipment. Blue PR (CR, Cr or R-Y) - S Video cable High quality video cable for enhanced picture quality Align guides and...

Operating Instructions
Page 25
... may contain both (see B); A VHF Only or VHF/UHF or Cable 75-ohm coaxial cable Rear of LCD projection TV VHF/UHF B VHF Only or UHF Only or VHF/UHF 300-ohm twin lead cable Rear of LCD projection TV VHF/UHF Antenna connector C VHF and UHF 75-ohm coaxial cable 300-ohm twin...-ohm twin lead cable, keep it away as far as possible from the LCD projection TV. ✍ Do not use an indoor antenna because it is highly recommended to connect the antenna using a 75-ohm coaxial cable to radio noise. 25 older homes probably have 300-ohm twin lead cable (see C). Newer homes...
... may contain both (see B); A VHF Only or VHF/UHF or Cable 75-ohm coaxial cable Rear of LCD projection TV VHF/UHF B VHF Only or UHF Only or VHF/UHF 300-ohm twin lead cable Rear of LCD projection TV VHF/UHF Antenna connector C VHF and UHF 75-ohm coaxial cable 300-ohm twin...-ohm twin lead cable, keep it away as far as possible from the LCD projection TV. ✍ Do not use an indoor antenna because it is highly recommended to connect the antenna using a 75-ohm coaxial cable to radio noise. 25 older homes probably have 300-ohm twin lead cable (see C). Newer homes...

Operating Instructions
Page 26
... need for your cable box.) 1 Connect the Cable TV cable to the LCD projection TV's VHF/UHF jack. 2 Using a coaxial cable, connect the LCD projection TV's TO CONVERTER jack to TO CONVERTER) Antenna cable AUX Rear of them (pay channels vs. With this set up convenient. Installing and Connecting the... LCD Projection TV Cable and Antenna If your cable provider does not feature local channels, you need to use a cable box, and ❑ You want to...
... need for your cable box.) 1 Connect the Cable TV cable to the LCD projection TV's VHF/UHF jack. 2 Using a coaxial cable, connect the LCD projection TV's TO CONVERTER jack to TO CONVERTER) Antenna cable AUX Rear of them (pay channels vs. With this set up convenient. Installing and Connecting the... LCD Projection TV Cable and Antenna If your cable provider does not feature local channels, you need to use a cable box, and ❑ You want to...
Operating Instructions
Page 27
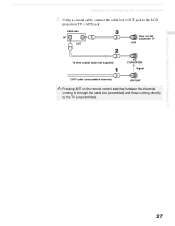
Cable box IN OUT Rear of LCD projection TV AUX 75-ohm coaxial cable (not supplied) TO CONVERTER Signal CATV cable (unscrambled channels) VHF/UHF ✍ Pressing ANT on the remote control switches between the channels coming in through the cable box (scrambled) and those coming directly to the LCD projection TV's AUX jack. Installing and Connecting the LCD Projection TV Installing and Connecting the LCD Projection TV 3 Using a coaxial cable, connect the cable box's OUT jack to the TV (unscrambled). 27
Cable box IN OUT Rear of LCD projection TV AUX 75-ohm coaxial cable (not supplied) TO CONVERTER Signal CATV cable (unscrambled channels) VHF/UHF ✍ Pressing ANT on the remote control switches between the channels coming in through the cable box (scrambled) and those coming directly to the LCD projection TV's AUX jack. Installing and Connecting the LCD Projection TV Installing and Connecting the LCD Projection TV 3 Using a coaxial cable, connect the cable box's OUT jack to the TV (unscrambled). 27


