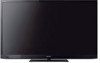
Sony KDL-55EX723 Research
Related Manual Pages

Related Videos

Sony KDL55EX723(KDL-55EX723)Video Review-Cheap Bravia 3D LED TV
Duration: 11:59
Total Views: 13,848
Duration: 11:59
Total Views: 13,848
Similar Questions

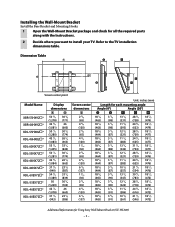
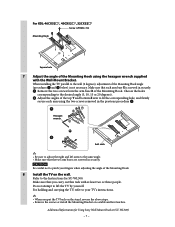
Www.sony-asia.com/support-model Bravia-kdl-55/46/40/32ex720
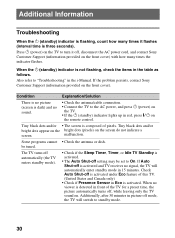
when i switch on the above model standby indicator is flashing 4 time (4 second duration).please giv...
when i switch on the above model standby indicator is flashing 4 time (4 second duration).please giv...
(Posted by shan31548 8 years ago)

Why Does My Tv Periodically Loses Power And The Screen Turns Black? I
My TV is losing power,the power saver light comes on the screen and I have it on the off modeThe scr...
My TV is losing power,the power saver light comes on the screen and I have it on the off modeThe scr...
(Posted by mmarkus 8 years ago)

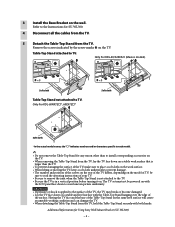
What Is The Screw Size For The Table Top Stand To Attach To The Tv? Thanks
(Posted by Go4green68 10 years ago)
I Need Service Manual For Power Supply Of Sony Lcd Model Klv26s400a
(Posted by varsha 11 years ago)

Volume Control Problem
I had a Sony Bravia and could always control the Surround speaker volume with the remote. I just got...
I had a Sony Bravia and could always control the Surround speaker volume with the remote. I just got...
(Posted by clongardner 12 years ago)