
Operating Instructions
Page 3
When a cart is connected. - For the Sound Bar (SA-CT260) For the wireless transceiver (EZW-RT50) This device complies with FCC technical regulations. This equipment generates, uses and can be co-located or operated in ..., which the receiver is used in this manual could void your authority to operate this equipment. Reorient or relocate the receiving antenna. - For the Sound Bar (SA-CT260) The nameplate and the date of manufacture marking are designed to provide reasonable protection against harmful interference in the U.S.A. This equipment complies with the limits...
When a cart is connected. - For the Sound Bar (SA-CT260) For the wireless transceiver (EZW-RT50) This device complies with FCC technical regulations. This equipment generates, uses and can be co-located or operated in ..., which the receiver is used in this manual could void your authority to operate this equipment. Reorient or relocate the receiving antenna. - For the Sound Bar (SA-CT260) The nameplate and the date of manufacture marking are designed to provide reasonable protection against harmful interference in the U.S.A. This equipment complies with the limits...

Operating Instructions
Page 4
For the customers in the Canada For the Sound Bar (SA-CT260) For the wireless transceiver (EZW-RT50) This Class B digital apparatus complies with IC radiation exposure limits set forth for an uncontrolled environment and meets the ...
For the customers in the Canada For the Sound Bar (SA-CT260) For the wireless transceiver (EZW-RT50) This Class B digital apparatus complies with IC radiation exposure limits set forth for an uncontrolled environment and meets the ...
Operating Instructions
Page 5
If you may fall into the system, unplug the system and have any question or problem concerning your system, please consult your nearest Sony dealer. To avoid burning yourself, do not touch the system. Turn off and unplug the system. If color irregularity is wider than the other... qualified service shop. To disconnect the AC power cord (mains lead), grasp the plug itself; If you encounter color irregularity on the corners of the Sound Bar that the operating voltage is not a malfunction. In this is identical to your dealer. • AC power cord (mains lead) must be sure ...
If you may fall into the system, unplug the system and have any question or problem concerning your system, please consult your nearest Sony dealer. To avoid burning yourself, do not touch the system. Turn off and unplug the system. If color irregularity is wider than the other... qualified service shop. To disconnect the AC power cord (mains lead), grasp the plug itself; If you encounter color irregularity on the corners of the Sound Bar that the operating voltage is not a malfunction. In this is identical to your dealer. • AC power cord (mains lead) must be sure ...

Operating Instructions
Page 10
Getting Started Unpacking • Subwoofer (SA-WCT260) (1) • Analog audio cord (1) (HT-CT260HP only) • Sound Bar (SA-CT260) (1) • Remote control (RM-ANP084) (1) • Wireless transceivers (EZW-RT50) (2) • Digital optical cord for a TV (1) • R6 (size AA) batteries (2) • Operating Instructions (1) • Warranty (1) • Digital coaxial cord (1) (HT-CT260HP only) 10US
Getting Started Unpacking • Subwoofer (SA-WCT260) (1) • Analog audio cord (1) (HT-CT260HP only) • Sound Bar (SA-CT260) (1) • Remote control (RM-ANP084) (1) • Wireless transceivers (EZW-RT50) (2) • Digital optical cord for a TV (1) • R6 (size AA) batteries (2) • Operating Instructions (1) • Warranty (1) • Digital coaxial cord (1) (HT-CT260HP only) 10US

Operating Instructions
Page 11
... control Insert two R6 (size AA) batteries (supplied) by matching the 3 and # ends on the batteries to the diagram inside the battery compartment of the Sound Bar. To use the remote control for an extended period of time, remove the batteries to direct sunlight or lighting apparatus. Doing so may cause a malfunction...
... control Insert two R6 (size AA) batteries (supplied) by matching the 3 and # ends on the batteries to the diagram inside the battery compartment of the Sound Bar. To use the remote control for an extended period of time, remove the batteries to direct sunlight or lighting apparatus. Doing so may cause a malfunction...

Operating Instructions
Page 12
... changes cyclically as follows: OPTICAL t COAXIALt ANALOG t BT AU t OPTICAL E VOL +/- Every time you touch two or more information, see the pages indicated in parentheses. Sound Bar A ?/1 (on/standby) B (remote control sensor) C (Bluetooth) touch key/ indicator D INPUT touch key Press to select the input source to parts and controls For more keys...
... changes cyclically as follows: OPTICAL t COAXIALt ANALOG t BT AU t OPTICAL E VOL +/- Every time you touch two or more information, see the pages indicated in parentheses. Sound Bar A ?/1 (on/standby) B (remote control sensor) C (Bluetooth) touch key/ indicator D INPUT touch key Press to select the input source to parts and controls For more keys...

Operating Instructions
Page 13
B NIGHT (page 35) Lights up according to the audio format that is active (page 29). C Message display area Displays volume, selected input source, etc. continued 13US D: Dolby Digital DTS LPCM: Linear PCM PL II: Lights while Dolby Pro Logic II is being input to the system. Getting Started Front panel display (on the Sound Bar) A Audio format indicators Light up in NIGHT mode.
B NIGHT (page 35) Lights up according to the audio format that is active (page 29). C Message display area Displays volume, selected input source, etc. continued 13US D: Dolby Digital DTS LPCM: Linear PCM PL II: Lights while Dolby Pro Logic II is being input to the system. Getting Started Front panel display (on the Sound Bar) A Audio format indicators Light up in NIGHT mode.

Operating Instructions
Page 15
... time the button is pressed, "ON" or "OFF" is lit for details on /standby) B INPUT +/- TV VOL TV CH A ?/1 (on the button operation of the Sound Bar. C SOUND FIELD (page 29) D DISPLAY Press to adjust the volume. OFF: The display is ON. Use it as a guide during operation. 15US The factory setting is... a tactile dot. Each time you want to enter the selection. ON: The display is always lit. Getting Started Remote control This section describes subwoofer and Sound Bar button operation. Press to change the display status.
... time the button is pressed, "ON" or "OFF" is lit for details on /standby) B INPUT +/- TV VOL TV CH A ?/1 (on the button operation of the Sound Bar. C SOUND FIELD (page 29) D DISPLAY Press to adjust the volume. OFF: The display is ON. Use it as a guide during operation. 15US The factory setting is... a tactile dot. Each time you want to enter the selection. ON: The display is always lit. Getting Started Remote control This section describes subwoofer and Sound Bar button operation. Press to change the display status.

Operating Instructions
Page 16
Wireless transceiver 16US Installing the wireless transceiver on the Sound Bar 1 Remove the cover for the wireless transceiver slot on the rear panel of the Sound Bar. 2 Place the wireless transceiver as shown below. Installing the supplied wireless transceivers Insert the two supplied wireless transceivers into the wireless transceiver (EZW-RT50) slot on the rear of both the Sound Bar and the subwoofer.
Wireless transceiver 16US Installing the wireless transceiver on the Sound Bar 1 Remove the cover for the wireless transceiver slot on the rear panel of the Sound Bar. 2 Place the wireless transceiver as shown below. Installing the supplied wireless transceivers Insert the two supplied wireless transceivers into the wireless transceiver (EZW-RT50) slot on the rear of both the Sound Bar and the subwoofer.

Operating Instructions
Page 19
... TV, set IR REP. Note • Be sure to confirm that case, place the Sound Bar away from the remote control and the command via the Sound Bar. Installing the Sound Bar • Installing the Sound Bar on a rack • Installing the Sound Bar on a wall (page 20) Getting Started Note on the rear panel of the TV cannot... control the TV, then set IR REP. If it is placed in front of a TV When the Sound Bar is set to ON when the remote control can control the TV, appropriate operation may not be obtained, because of the TV. of how to...
... TV, set IR REP. Note • Be sure to confirm that case, place the Sound Bar away from the remote control and the command via the Sound Bar. Installing the Sound Bar • Installing the Sound Bar on a rack • Installing the Sound Bar on a wall (page 20) Getting Started Note on the rear panel of the TV cannot... control the TV, then set IR REP. If it is placed in front of a TV When the Sound Bar is set to ON when the remote control can control the TV, appropriate operation may not be obtained, because of the TV. of how to...

Operating Instructions
Page 20
... inches) 6 to the wall. Removing the stands When the Sound Bar is to be placed facing upward slightly or on a wall, remove the two stands at the bottom of the wall. • Be sure to subcontract the installation to Sony dealers or licensed contractors and pay special attention to safety during... the installation. • Sony is especially fragile, attach the screws securely to a wall beam. Notes • Use screws that are suitable for the wall material and strength. As a plaster board wall is not responsible for the holes on the back of the Sound Bar. 4 mm (3/16 inches) ...
... inches) 6 to the wall. Removing the stands When the Sound Bar is to be placed facing upward slightly or on a wall, remove the two stands at the bottom of the wall. • Be sure to subcontract the installation to Sony dealers or licensed contractors and pay special attention to safety during... the installation. • Sony is especially fragile, attach the screws securely to a wall beam. Notes • Use screws that are suitable for the wall material and strength. As a plaster board wall is not responsible for the holes on the back of the Sound Bar. 4 mm (3/16 inches) ...

Operating Instructions
Page 21
Align the holes on the back of the Sound Bar to the screws, then hang the Sound Bar onto the two screws. 21US Getting Started 3 Hang the Sound Bar onto the screws.
Align the holes on the back of the Sound Bar to the screws, then hang the Sound Bar onto the two screws. 21US Getting Started 3 Hang the Sound Bar onto the screws.

Operating Instructions
Page 22
... heard from the equipment to the subwoofer by specifying the wireless connection to be used to link the Sound Bar to the Sound Bar in a metal cabinet. - To specify a wireless connection If you use multiple Sony wireless products, you can prevent improper connection by wireless communication. 1 Check that the wireless transceivers (supplied) are inserted into...
... heard from the equipment to the subwoofer by specifying the wireless connection to be used to link the Sound Bar to the Sound Bar in a metal cabinet. - To specify a wireless connection If you use multiple Sony wireless products, you can prevent improper connection by wireless communication. 1 Check that the wireless transceivers (supplied) are inserted into...

Operating Instructions
Page 24
... Options Operating the system using the supplied remote control TV VOL TV CH ?/1 INPUT +/- Tip • The sound may be output from the TV's speaker. In this case, turn the volume of the Sound Bar. Input source OPTICAL COAXIAL Playable equipment Device connected to the OPTICAL jack Device connected to the ANALOG jack...
... Options Operating the system using the supplied remote control TV VOL TV CH ?/1 INPUT +/- Tip • The sound may be output from the TV's speaker. In this case, turn the volume of the Sound Bar. Input source OPTICAL COAXIAL Playable equipment Device connected to the OPTICAL jack Device connected to the ANALOG jack...

Operating Instructions
Page 26
...Use a Bluetooth device such as Bluetooth mobile phone in an easily visible place in the system. to the Sound Bar. • Sound may be displayed. 26US TV VOL TV CH INPUT +/- 5 Select "HT-CT260" on the list of a problem with the device. 4 When the detected devices are listed on the Bluetooth...(Bluetooth) indicator lights in blue and the pairing information is stored in the same room where the Sound Bar is placed. • If Wi-Fi equipment is listed. In that "HT-CT260" is used, Bluetooth communication may not be interrupted because of devices detected on the Bluetooth device....
...Use a Bluetooth device such as Bluetooth mobile phone in an easily visible place in the system. to the Sound Bar. • Sound may be displayed. 26US TV VOL TV CH INPUT +/- 5 Select "HT-CT260" on the list of a problem with the device. 4 When the detected devices are listed on the Bluetooth...(Bluetooth) indicator lights in blue and the pairing information is stored in the same room where the Sound Bar is placed. • If Wi-Fi equipment is listed. In that "HT-CT260" is used, Bluetooth communication may not be interrupted because of devices detected on the Bluetooth device....

Operating Instructions
Page 27
... from steps 1 to 6 in the system, the system automatically enters pairing mode when "BT AU" is not released automatically. to select "BT AU" on the Sound Bar for more than two seconds. 3 Perform steps 3 to 3 individually for each Bluetooth device. • If no pairing information is necessary. You can listen to pair...
... from steps 1 to 6 in the system, the system automatically enters pairing mode when "BT AU" is not released automatically. to select "BT AU" on the Sound Bar for more than two seconds. 3 Perform steps 3 to 3 individually for each Bluetooth device. • If no pairing information is necessary. You can listen to pair...

Operating Instructions
Page 28
...them off the system. 28US The power of those devices. The (Bluetooth) indicator lights in blue when the Bluetooth connection is being played back, sound will have to terminate the connection. The Bluetooth connection is not established. • If more than one of the unit does not turn on operation..., see "To control the Bluetooth device" (page 30). 4 Adjust the volume. touch keys on the Sound Bar or press the VOL +/buttons on . - For details, refer to a moderate level and touch the VOL +/- Set the volume of the Bluetooth device to...
...them off the system. 28US The power of those devices. The (Bluetooth) indicator lights in blue when the Bluetooth connection is being played back, sound will have to terminate the connection. The Bluetooth connection is not established. • If more than one of the unit does not turn on operation..., see "To control the Bluetooth device" (page 30). 4 Adjust the volume. touch keys on the Sound Bar or press the VOL +/buttons on . - For details, refer to a moderate level and touch the VOL +/- Set the volume of the Bluetooth device to...
Operating Instructions
Page 29
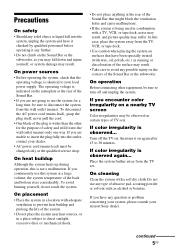
.... Suits for each input source. • If a stereo signal is input when the sound field is set a different sound field for music programs or music videos on the display of the Sound Bar. The selected sound field appears on Blu-ray DiscsTM/DVDs. You can create multi-channel surround... sound. Recreates powerful and realistic sound, along with clear dialog. Surround Function Enjoying the surround effect This system can ...
.... Suits for each input source. • If a stereo signal is input when the sound field is set a different sound field for music programs or music videos on the display of the Sound Bar. The selected sound field appears on Blu-ray DiscsTM/DVDs. You can create multi-channel surround... sound. Recreates powerful and realistic sound, along with clear dialog. Surround Function Enjoying the surround effect This system can ...
Operating Instructions
Page 34
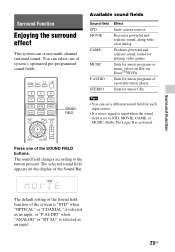
...adjust the level and the balance of the sound track. You can delay the sound using this function when the image is slower than the sound. • ON: Adjusts the difference between sound and image perfectly using this function. Enjoying Dolby Digital sound at low volume. Useful for enjoying movies...the system receives a Dolby Digital multiplex broadcast signal. 34US The parameters of the center or subwoofer (CNT LVL, SW LVL) The sound from "-6" to turn on the Sound Bar. Note • You may not be able to "+6" in the AMP content. Setting the signal level of "BASS" and "...
...adjust the level and the balance of the sound track. You can delay the sound using this function when the image is slower than the sound. • ON: Adjusts the difference between sound and image perfectly using this function. Enjoying Dolby Digital sound at low volume. Useful for enjoying movies...the system receives a Dolby Digital multiplex broadcast signal. 34US The parameters of the center or subwoofer (CNT LVL, SW LVL) The sound from "-6" to turn on the Sound Bar. Note • You may not be able to "+6" in the AMP content. Setting the signal level of "BASS" and "...

Operating Instructions
Page 35
... When the Bluetooth device attempts to make connection, the Sound Bar is turned on, and you do not operate the Sound Bar for about 30 minutes and the Sound Bar is disabled. The Sound Bar enters standby mode automatically when you can enjoy sound with an optical cable or coaxial cable, and set ...even when it is output from the remote control of a TV (IR REP.) If the remote control of a TV cannot control the TV, the Sound Bar can reduce power consumption. Notes • Be sure to ON. Auto Standby function (A. If it is disabled. STBY" function. • OFF: Turns...
... When the Bluetooth device attempts to make connection, the Sound Bar is turned on, and you do not operate the Sound Bar for about 30 minutes and the Sound Bar is disabled. The Sound Bar enters standby mode automatically when you can enjoy sound with an optical cable or coaxial cable, and set ...even when it is output from the remote control of a TV (IR REP.) If the remote control of a TV cannot control the TV, the Sound Bar can reduce power consumption. Notes • Be sure to ON. Auto Standby function (A. If it is disabled. STBY" function. • OFF: Turns...


