
Operating Guide
Page 8
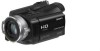
...cable (1) (p. 16) USB cable (1) (p. 30) CD-ROM "Handycam Application Software" (1) (p. 26) - Handycam Handbook (PDF) "Operating Guide" (This manual) (1) 8 Picture Motion Browser (Software) - Remove the insulation sheet before using the Remote Commander. Picture Motion Browser ...Guide - Getting Started Step 1: Checking supplied items Make sure that item supplied. The number in the parentheses indicates the number of that you have the following items supplied with your camcorder...
...cable (1) (p. 16) USB cable (1) (p. 30) CD-ROM "Handycam Application Software" (1) (p. 26) - Handycam Handbook (PDF) "Operating Guide" (This manual) (1) 8 Picture Motion Browser (Software) - Remove the insulation sheet before using the Remote Commander. Picture Motion Browser ...Guide - Getting Started Step 1: Checking supplied items Make sure that item supplied. The number in the parentheses indicates the number of that you have the following items supplied with your camcorder...
Operating Guide
Page 14
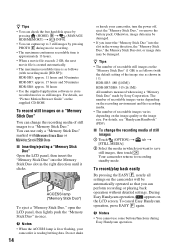
...). To record still images on the supplied CD-ROM. Do not shake 14 or knock your camcorder is as follows (with recording mode [HD SP]); To cancel Easy Handycam operation, press EASY ...Tips • You can check the free hard disk space by pressing (HOME) B t (MANAGE HDD/MEMORY) t [ INFO]. • You can capture up to 3 still images by Sony Corporation. You can perform recording or playing..." in ( )); HDR-SR5: approx. 11 hours and 50 minutes HDR-SR7: approx. 17 hours and 50 minutes HDR-SR8: approx. 30 hours • Use the supplied application software to recording standby mode...
...). To record still images on the supplied CD-ROM. Do not shake 14 or knock your camcorder is as follows (with recording mode [HD SP]); To cancel Easy Handycam operation, press EASY ...Tips • You can check the free hard disk space by pressing (HOME) B t (MANAGE HDD/MEMORY) t [ INFO]. • You can capture up to 3 still images by Sony Corporation. You can perform recording or playing..." in ( )); HDR-SR5: approx. 11 hours and 50 minutes HDR-SR7: approx. 17 hours and 50 minutes HDR-SR8: approx. 30 hours • Use the supplied application software to recording standby mode...
Operating Guide
Page 27
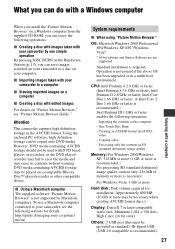
...camcorder captures high definition footage in SD (standard definition) image quality Memory: For Windows 2000/Windows XP: 512 MB or more (1 GB or more is recommended.) For processing SD (standard definition) image quality content only, 256 MB of memory or more is required. Using the enclosed PC software, high definition... One Touch Disc Burn - Copying a disc - http://guide.d-imaging.sony.co.jp/mac/ ms/us/ System requirements x When using "Picture...Windows Vista: 1 GB or more Hard disk: Disk volume required for details. However, DVD media containing AVCHD footage should not be played on ...
...camcorder captures high definition footage in SD (standard definition) image quality Memory: For Windows 2000/Windows XP: 512 MB or more (1 GB or more is recommended.) For processing SD (standard definition) image quality content only, 256 MB of memory or more is required. Using the enclosed PC software, high definition... One Touch Disc Burn - Copying a disc - http://guide.d-imaging.sony.co.jp/mac/ ms/us/ System requirements x When using "Picture...Windows Vista: 1 GB or more Hard disk: Disk volume required for details. However, DVD media containing AVCHD footage should not be played on ...
Operating Guide
Page 28
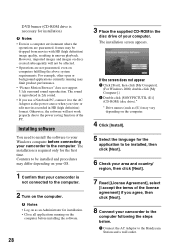
... (high definition) image quality, resulting in uneven playback. If the screen does not appear 1 Click [Start], then click [My Computer]. (For Windows 2000, double-click [My Computer].) 2 Double-click [SONYPICTUTIL (E:)] (CD-ROM) (disc drive).* * Drive names...software will not be installed, then click [Next]. 6 Check your area and country/ region, then click [Next]. 7 Read [License Agreement], select [I accept the terms of the license agreement] if you view or edit movies recorded in HD (high definition) format. However, imported images and images on your OS. 1 Confirm that your camcorder...
... (high definition) image quality, resulting in uneven playback. If the screen does not appear 1 Click [Start], then click [My Computer]. (For Windows 2000, double-click [My Computer].) 2 Double-click [SONYPICTUTIL (E:)] (CD-ROM) (disc drive).* * Drive names...software will not be installed, then click [Next]. 6 Check your area and country/ region, then click [Next]. 7 Read [License Agreement], select [I accept the terms of the license agreement] if you view or edit movies recorded in HD (high definition) format. However, imported images and images on your OS. 1 Confirm that your camcorder...

Operating Guide
Page 29
...LCD screen of your computer. 29 Click [NO], and continue installing the software. • The authentication may take time. The installation is complete. 12Remove the CD-ROM from the disc drive of your camcorder. 9 Click [Next] on the connection confirmation screen of the computer. 10Follow... the on-screen instructions to restart it at this time. Check the screen and follow the instructions displayed to recognize an AVCHD format disc - Sonic UDF Reader* Software ...
...LCD screen of your computer. 29 Click [NO], and continue installing the software. • The authentication may take time. The installation is complete. 12Remove the CD-ROM from the disc drive of your camcorder. 9 Click [Next] on the connection confirmation screen of the computer. 10Follow... the on-screen instructions to restart it at this time. Check the screen and follow the instructions displayed to recognize an AVCHD format disc - Sonic UDF Reader* Software ...
Operating Guide
Page 30
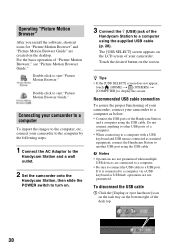
...the Handycam Station to another USB port using the USB cable. The [USB SELECT] screen appears on the bottom right of your camcorder, connect your camcorder to a computer as standard equipment, connect the Handycam Station to a computer using the USB cable. If it is connected to ... Station and a wall outlet. 2 Set the camcorder onto the Handycam Station, then slide the POWER switch to start "Picture Motion Browser Guide." Double-click to turn on the screen. Operating "Picture Motion Browser" After you install the software, shortcut icons for "Picture Motion Browser" and ...
...the Handycam Station to another USB port using the USB cable. The [USB SELECT] screen appears on the bottom right of your camcorder, connect your camcorder to a computer as standard equipment, connect the Handycam Station to a computer using the USB cable. If it is connected to ... Station and a wall outlet. 2 Set the camcorder onto the Handycam Station, then slide the POWER switch to start "Picture Motion Browser Guide." Double-click to turn on the screen. Operating "Picture Motion Browser" After you install the software, shortcut icons for "Picture Motion Browser" and ...


