
Operating Instructions
Page 2
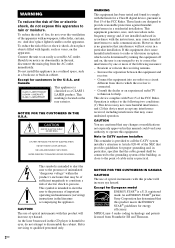
...FOR THE CUSTOMERS IN THE U.S.A. This symbol is harmful to eyes, do not attempt to provide reasonable protection against harmful interference in this manual could void your authority to rain or moisture. As the laser beam used in accordance with this product will not occur in a confined... Fraunhofer IIS and Thomson. 2GB This device complies with this product will increase eye hazard. As an ENERGY STAR® partner, Sony Corporation has determined that this equipment does cause harmful interference to radio or television reception, which the receiver is provided to call the...
...FOR THE CUSTOMERS IN THE U.S.A. This symbol is harmful to eyes, do not attempt to provide reasonable protection against harmful interference in this manual could void your authority to rain or moisture. As the laser beam used in accordance with this product will not occur in a confined... Fraunhofer IIS and Thomson. 2GB This device complies with this product will increase eye hazard. As an ENERGY STAR® partner, Sony Corporation has determined that this equipment does cause harmful interference to radio or television reception, which the receiver is provided to call the...

Operating Instructions
Page 3
...Mode Viewing information about the disc in the display 20 Optional Components Hooking up the system 6 Setting the clock 8 CD/MP3 - Manual Recording Sound Adjustment Adjusting the sound 17 Timer Falling asleep to the radio 13 - Play Timer Timer recording radio programs........... 19 -...15 Playing a tape 15 Tape - Table of button locations and reference pages 30 3GB Sleep Timer Waking up to use this manual 4 Playable discs 4 Getting Started Hooking up optional components......... 21 Troubleshooting Problems and remedies 22 Messages 25 Additional Information Precautions 26 ...
...Mode Viewing information about the disc in the display 20 Optional Components Hooking up the system 6 Setting the clock 8 CD/MP3 - Manual Recording Sound Adjustment Adjusting the sound 17 Timer Falling asleep to the radio 13 - Play Timer Timer recording radio programs........... 19 -...15 Playing a tape 15 Tape - Table of button locations and reference pages 30 3GB Sleep Timer Waking up to use this manual 4 Playable discs 4 Getting Started Hooking up optional components......... 21 Troubleshooting Problems and remedies 22 Messages 25 Additional Information Precautions 26 ...
Operating Instructions
Page 4
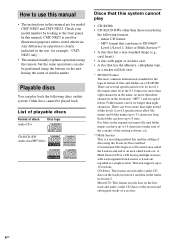
How to use this manual • The instructions in this manual are several specification levels. In this manual, CMT-NEZ3 is a recording method that enables adding of files and folders on this system cannot play back the following formats: - List of playable discs Format of a ... in to 16 characters) make sure of the contents of the writing software, etc. ** Multi Session This is used for example, "CMTNEZ5 only". • This manual mainly explains operations using the remote, but the same operations can play • CD-ROMs • CD-Rs/CD-RWs other than eight characters. In...
How to use this manual • The instructions in this manual are several specification levels. In this manual, CMT-NEZ3 is a recording method that enables adding of files and folders on this system cannot play back the following formats: - List of playable discs Format of a ... in to 16 characters) make sure of the contents of the writing software, etc. ** Multi Session This is used for example, "CMTNEZ5 only". • This manual mainly explains operations using the remote, but the same operations can play • CD-ROMs • CD-Rs/CD-RWs other than eight characters. In...
Operating Instructions
Page 10
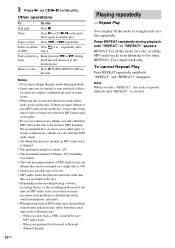
.... Note When you select "REPEAT1", that disc. We recommend that you may be used at the desired point. When you perform Fast Forward or Rewind (Manual Search) 10GB Playing repeatedly - REPEAT: For all the tracks on a disc, or all the tracks or a single track on that track is repeated endlessly until...
.... Note When you select "REPEAT1", that disc. We recommend that you may be used at the desired point. When you perform Fast Forward or Rewind (Manual Search) 10GB Playing repeatedly - REPEAT: For all the tracks on a disc, or all the tracks or a single track on that track is repeated endlessly until...
Operating Instructions
Page 12
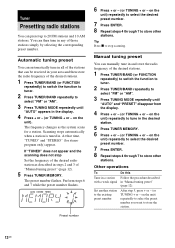
...can automatically tune in all of the stations that time, "TUNED" and "STEREO" (for a station. Scanning stops automatically when a station is tuned in "Manual tuning preset" (page 12). Tip Press x to select "FM" or "AM". 3 Press TUNING MODE repeatedly until "AUTO" and "PRESET" disappear from the...TUNER/BAND repeatedly to the existing preset number After step 5, press + or - (or TUNING + or - The preset number flashes. Manual tuning preset You can then tune in and store the radio frequency of those stations simply by selecting the corresponding preset number. Set another station...
...can automatically tune in all of the stations that time, "TUNED" and "STEREO" (for a station. Scanning stops automatically when a station is tuned in "Manual tuning preset" (page 12). Tip Press x to select "FM" or "AM". 3 Press TUNING MODE repeatedly until "AUTO" and "PRESET" disappear from the...TUNER/BAND repeatedly to the existing preset number After step 5, press + or - (or TUNING + or - The preset number flashes. Manual tuning preset You can then tune in and store the radio frequency of those stations simply by selecting the corresponding preset number. Set another station...
Operating Instructions
Page 13
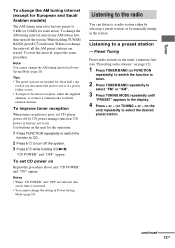
... can listen to select the desired preset station. Tuner To change the AM tuning interval, tune in any AM station first, then turn off by manually tuning in the station. "CD POWER" and "OFF" appear. To change the AM tuning interval (except for the operation. 1 Press FUNCTION repeatedly to switch the...
... can listen to select the desired preset station. Tuner To change the AM tuning interval, tune in any AM station first, then turn off by manually tuning in the station. "CD POWER" and "OFF" appear. To change the AM tuning interval (except for the operation. 1 Press FUNCTION repeatedly to switch the...
Operating Instructions
Page 14
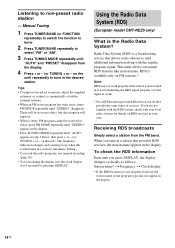
... station name appears in the desired station. on RDS services in a station (Automatic Tuning). • To record the radio programs, use manual recording (page 16). • You can change the display into the clock display (for details on the unit) repeatedly to non-preset ... press + or - (or TUNING + or - Receiving RDS broadcasts Simply select a station from the display. 4 Press + or - (or TUNING + or - Manual Tuning 1 Press TUNER/BAND (or FUNCTION repeatedly) to switch the function to tuner. 2 Press TUNER/BAND repeatedly to send additional information along with your area...
... station name appears in the desired station. on RDS services in a station (Automatic Tuning). • To record the radio programs, use manual recording (page 16). • You can change the display into the clock display (for details on the unit) repeatedly to non-preset ... press + or - (or TUNING + or - Receiving RDS broadcasts Simply select a station from the display. 4 Press + or - (or TUNING + or - Manual Tuning 1 Press TUNER/BAND (or FUNCTION repeatedly) to switch the function to tuner. 2 Press TUNER/BAND repeatedly to send additional information along with your area...
Operating Instructions
Page 16
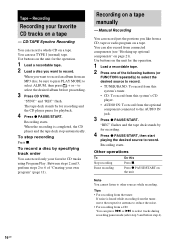
... MP3 disc, be sure to press PLAY MODE to other sources while recording. "SYNC" and "REC" flash. Press z PAUSE/START on a tape manually - Other operations To Stop recording Pause recording Do this system's CD player. • AUDIO IN: To record from the optional component connected to reduce...the respective antenna to the AUDIO IN jack. 3 Press z PAUSE/START. to record. To record a disc by for playback. 4 Press z PAUSE/START. Manual Recording You can press . "REC" flashes and the tape deck stands by specifying track order You can also record from a CD, tape or radio program...
... MP3 disc, be sure to press PLAY MODE to other sources while recording. "SYNC" and "REC" flash. Press z PAUSE/START on a tape manually - Other operations To Stop recording Pause recording Do this system's CD player. • AUDIO IN: To record from the optional component connected to reduce...the respective antenna to the AUDIO IN jack. 3 Press z PAUSE/START. to record. To record a disc by for playback. 4 Press z PAUSE/START. Manual Recording You can press . "REC" flashes and the tape deck stands by specifying track order You can also record from a CD, tape or radio program...

Operating Instructions
Page 18
... desired sound source appears. Make sure you want to play starts (about 15 seconds before the preset time). • If the system is not canceled manually. Play Timer You can wake up to set the clock (see "Listening to the radio" on page 13). 2 Press VOLUME + or - (or turn VOLUME control...
... desired sound source appears. Make sure you want to play starts (about 15 seconds before the preset time). • If the system is not canceled manually. Play Timer You can wake up to set the clock (see "Listening to the radio" on page 13). 2 Press VOLUME + or - (or turn VOLUME control...

Operating Instructions
Page 21
...that may be sure to turn off the function when using the transmitter. You can connect optional components. See "Recording on a tape manually" on page 16. Otherwise, the sound from the component through this jack. Refer to audio from a connected component 1 Connect the audio... cords. 2 Start recording manually. Listening to the operating instructions provided with each component. Start playing the connected component. See "Hooking up the volume of an ...
...that may be sure to turn off the function when using the transmitter. You can connect optional components. See "Recording on a tape manually" on page 16. Otherwise, the sound from the component through this jack. Refer to audio from a connected component 1 Connect the audio... cords. 2 Start recording manually. Listening to the operating instructions provided with each component. Start playing the connected component. See "Hooking up the volume of an ...

