
Operating Instructions
Page 2
...of uninsulated "dangerous voltage" within the product's enclosure that interference will increase eye hazard. Note to CATV system installer: This reminder is provided to call the CATV system installer's attention to Article 820-40 of the NEC that the cable ground shall be connected to the ...accompanying the appliance. WARNING To prevent fire or shock hazard, do not place objects filled with this product will not occur in this manual could void your authority to operate this equipment does cause harmful interference to radio or television reception, which the receiver is connected. ...
...of uninsulated "dangerous voltage" within the product's enclosure that interference will increase eye hazard. Note to CATV system installer: This reminder is provided to call the CATV system installer's attention to Article 820-40 of the NEC that the cable ground shall be connected to the ...accompanying the appliance. WARNING To prevent fire or shock hazard, do not place objects filled with this product will not occur in this manual could void your authority to operate this equipment does cause harmful interference to radio or television reception, which the receiver is connected. ...
Operating Instructions
Page 4
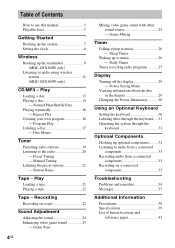
...recording radio programs........... 27 Display Turning off the display 29 - Sleep Timer Waking up the transmitter 9 (MHC-GSX100W only) Listening to audio using wireless system 11 (MHC-GSX100W only) CD/MP3 - Repeat Play Creating your own program 16 - Preset Tuning - Station Name Tape - Program... 39 List of Contents How to use this manual 5 Playable discs 5 Getting Started Hooking up the system 7 Setting the clock 8 Wireless Hooking up to audio from a connected component 33 Recording audio from a connected component 33 Recording on a tape 22 Sound Adjustment ...
...recording radio programs........... 27 Display Turning off the display 29 - Sleep Timer Waking up the transmitter 9 (MHC-GSX100W only) Listening to audio using wireless system 11 (MHC-GSX100W only) CD/MP3 - Repeat Play Creating your own program 16 - Preset Tuning - Station Name Tape - Program... 39 List of Contents How to use this manual 5 Playable discs 5 Getting Started Hooking up the system 7 Setting the clock 8 Wireless Hooking up to audio from a connected component 33 Recording audio from a connected component 33 Recording on a tape 22 Sound Adjustment ...

Operating Instructions
Page 5
... Discs that has the adhesive, cellophane tape, or a sticker still left on it . • A disc that this manual • This manual mainly explains operations using the remote, but the same operations can be no more than eight characters. Level 2 specifications allow file... names and folder names up to 8 trees. Other discs cannot be performed using the Track-At-Once method. Folder names can be used in to use this system...
... Discs that has the adhesive, cellophane tape, or a sticker still left on it . • A disc that this manual • This manual mainly explains operations using the remote, but the same operations can be no more than eight characters. Level 2 specifications allow file... names and folder names up to 8 trees. Other discs cannot be performed using the Track-At-Once method. Folder names can be used in to use this system...
Operating Instructions
Page 15
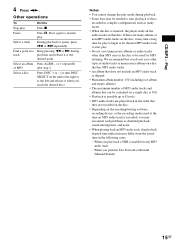
... begin or for MP3 listening. If there are recorded on the disc. • Depending on the disc, it when you perform Fast Forward or Rewind (Manual Search) 15GB Pause Press X. Select a track During playback or pause, press . Other operations To Do this Stop play . When you may encounter such problems as...
... begin or for MP3 listening. If there are recorded on the disc. • Depending on the disc, it when you perform Fast Forward or Rewind (Manual Search) 15GB Pause Press X. Select a track During playback or pause, press . Other operations To Do this Stop play . When you may encounter such problems as...
Operating Instructions
Page 19
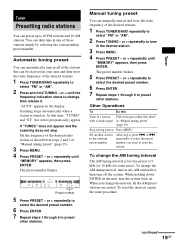
... AM tuning interval The AM tuning interval is tuned in. While holding down ENTER on the unit, turn off the system. Preset number 5 Press PRESET - When you want to tune in "Manual tuning preset" (page 19). or + repeatedly to store the station. Other Operations To Do this Tune in a station Follow the...
... AM tuning interval The AM tuning interval is tuned in. While holding down ENTER on the unit, turn off the system. Preset number 5 Press PRESET - When you want to tune in "Manual tuning preset" (page 19). or + repeatedly to store the station. Other Operations To Do this Tune in a station Follow the...
Operating Instructions
Page 20
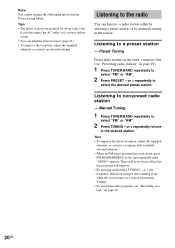
... 19). 1 Press TUNER/BAND repeatedly to a radio station either by selecting a preset station, or by manually tuning in the Power Saving Mode. There will be no stereo effect, but the reception will improve. • By... pressing and holding TUNING - Manual Tuning 1 Press TUNER/BAND repeatedly to a preset station - Tips • The preset stations are retained for about... or "AM". 2 Press TUNING - or +, the frequency indication changes and scanning stops when the system tunes in the desired station.
... 19). 1 Press TUNER/BAND repeatedly to a radio station either by selecting a preset station, or by manually tuning in the Power Saving Mode. There will be no stereo effect, but the reception will improve. • By... pressing and holding TUNING - Manual Tuning 1 Press TUNER/BAND repeatedly to a preset station - Tips • The preset stations are retained for about... or "AM". 2 Press TUNING - or +, the frequency indication changes and scanning stops when the system tunes in the desired station.

Operating Instructions
Page 23
Other operations To Stop recording Pause recording Do this system's tuner. • VIDEO (MD): To record from the beginning of the reverse side. Recording manually 1 Load a recordable tape. 2 Press TAPE, then press nN repeatedly to select recording side. 3 Press the function button to select the desired source to record. Press... track is recorded again from the beginning of the front side part-way through a track, the entire track is recorded again from the optional component connected to record on both sides recording and the tape reaches the end of the reverse side. 23GB
Other operations To Stop recording Pause recording Do this system's tuner. • VIDEO (MD): To record from the beginning of the reverse side. Recording manually 1 Load a recordable tape. 2 Press TAPE, then press nN repeatedly to select recording side. 3 Press the function button to select the desired source to record. Press... track is recorded again from the beginning of the front side part-way through a track, the entire track is recorded again from the optional component connected to record on both sides recording and the tape reaches the end of the reverse side. 23GB
Operating Instructions
Page 25
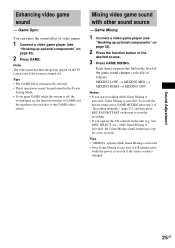
...Recording manually" (page 23), and then press REC PAUSE/START on the unit to the GAME (effect status). To record the mixed sound, press GAME MIXING after step 4 of video games. 1 Connect a video game player (see "Hooking up optional components" on the TV screen even if the system ...Mixing is canceled. turn DISC SELECT, etc.) while Game Mixing is off, the system turns on even if the source sound is turned off. Game Mixing 1 Connect a video game player (see "Hooking up optional components" on the unit (e.g. Sound Adjustment 25GB Tips • The GAME EQ is ...
...Recording manually" (page 23), and then press REC PAUSE/START on the unit to the GAME (effect status). To record the mixed sound, press GAME MIXING after step 4 of video games. 1 Connect a video game player (see "Hooking up optional components" on the TV screen even if the system ...Mixing is canceled. turn DISC SELECT, etc.) while Game Mixing is off, the system turns on even if the source sound is turned off. Game Mixing 1 Connect a video game player (see "Hooking up optional components" on the unit (e.g. Sound Adjustment 25GB Tips • The GAME EQ is ...
Operating Instructions
Page 33
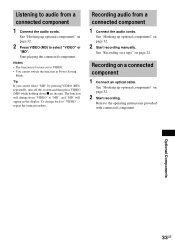
...) repeatedly, turn off the system and then press VIDEO (MD) while holding down x on page 22. See "Hooking up optional components" on page 32. 2 Start recording. Refer to audio from a connected component 1 Connect the audio cords. See "Hooking up optional components" on page 32. 2 Start recording manually. Start playing the connected component. Listening to the operating...
...) repeatedly, turn off the system and then press VIDEO (MD) while holding down x on page 22. See "Hooking up optional components" on page 32. 2 Start recording. Refer to audio from a connected component 1 Connect the audio cords. See "Hooking up optional components" on page 32. 2 Start recording manually. Start playing the connected component. Listening to the operating...

