
Operating Instructions
Page 6
... Parts and Controls 10 Guide to the Control Menu Display 14 Hookups 17 Hooking Up the Player 17 Step 1: Unpacking 17 Step 2: Inserting Batteries Into the Remote 17 Step 3: Connecting the... Connecting the Audio Cords 22 Step 5: Connecting the Power Cord 24 Step 6: Quick Setup 24 Playing Discs 26 Playing Discs 26 Resuming Playback From the Point Where You Stopped the Disc ...(Multi-disc Resume 29 Using the DVD's Menu 30 Selecting "ORIGINAL" or "PLAY LIST" on a DVD-RW/DVD-R 30 Playing VIDEO CDs With PBC Functions (PBC Playback 31 Various Play Mode Functions (...
... Parts and Controls 10 Guide to the Control Menu Display 14 Hookups 17 Hooking Up the Player 17 Step 1: Unpacking 17 Step 2: Inserting Batteries Into the Remote 17 Step 3: Connecting the... Connecting the Audio Cords 22 Step 5: Connecting the Power Cord 24 Step 6: Quick Setup 24 Playing Discs 26 Playing Discs 26 Resuming Playback From the Point Where You Stopped the Disc ...(Multi-disc Resume 29 Using the DVD's Menu 30 Selecting "ORIGINAL" or "PLAY LIST" on a DVD-RW/DVD-R 30 Playing VIDEO CDs With PBC Functions (PBC Playback 31 Various Play Mode Functions (...

Operating Instructions
Page 7
... use the controls on the player if they have the same or...the Setup Display 63 Setting the Display or Sound Track Language (LANGUAGE SETUP) . . . . . 64 Settings for the Display (SCREEN SETUP 65 Custom Settings (CUSTOM SETUP 67 Settings for the Sound (AUDIO SETUP 68...CDs (including Super VCDs or CD-Rs/CDRWs in video CD format or Super VCD format) Functions available for music CDs or CD-Rs/CD-RWs in music CD format Functions available for DATA CDs (CD-ROMs/CD-Rs/CD-RWs containing MP3* audio tracks, and JPEG image files) Functions available for DATA DVDs (DVD-ROMs/DVD+RWs/DVD+Rs/ DVD-RWs/DVD...
... use the controls on the player if they have the same or...the Setup Display 63 Setting the Display or Sound Track Language (LANGUAGE SETUP) . . . . . 64 Settings for the Display (SCREEN SETUP 65 Custom Settings (CUSTOM SETUP 67 Settings for the Sound (AUDIO SETUP 68...CDs (including Super VCDs or CD-Rs/CDRWs in video CD format or Super VCD format) Functions available for music CDs or CD-Rs/CD-RWs in music CD format Functions available for DATA CDs (CD-ROMs/CD-Rs/CD-RWs containing MP3* audio tracks, and JPEG image files) Functions available for DATA DVDs (DVD-ROMs/DVD+RWs/DVD+Rs/ DVD-RWs/DVD...

Operating Instructions
Page 12
... Play (35) status When playing back a CD, DATA CD (MP3 audio)/DATA DVD (MP3 audio) or VIDEO CD (without PBC), the VCD indicator is displayed. When playing VIDEO CDs (without PBC) Disc numbers (27) Disc ... Repeat mode (34) Playing Lights up during Repeat Play (34) status When playing back a VIDEO CD with Playback Control (PBC) (31) Disc numbers (27) Disc type Current playing time (40)... Current disc Playing Lights up during Repeat Play (34) * When playing DATA DVDs, the DVD indicator is displayed. z Hint You can Disc type change the angle (46) Playing time of...
... Play (35) status When playing back a CD, DATA CD (MP3 audio)/DATA DVD (MP3 audio) or VIDEO CD (without PBC), the VCD indicator is displayed. When playing VIDEO CDs (without PBC) Disc numbers (27) Disc ... Repeat mode (34) Playing Lights up during Repeat Play (34) status When playing back a VIDEO CD with Playback Control (PBC) (31) Disc numbers (27) Disc type Current playing time (40)... Current disc Playing Lights up during Repeat Play (34) * When playing DATA DVDs, the DVD indicator is displayed. z Hint You can Disc type change the angle (46) Playing time of...

Operating Instructions
Page 16
...for changing slides during a slide show. MP3 audio track (AUDIO), JPEG image file (IMAGE) or both (AUTO) to be played when playing a DATA CD or DATA DVD. The "ORIGINAL/PLAY LIST" indicator lights up in green t when you select "PLAY LIST" (default setting). z Hint The Control Menu icon indicator lights... ms. 16 ALBUM (page 52) Selects the album that contains MP3 audio track and JPEG image file to be played. SETUP (page 63) QUICK Setup (page 24) Use Quick Setup to choose the desired language of the TV and the audio output signal. DATE (page 55) Displays the date the picture...
...for changing slides during a slide show. MP3 audio track (AUDIO), JPEG image file (IMAGE) or both (AUTO) to be played when playing a DATA CD or DATA DVD. The "ORIGINAL/PLAY LIST" indicator lights up in green t when you select "PLAY LIST" (default setting). z Hint The Control Menu icon indicator lights... ms. 16 ALBUM (page 52) Selects the album that contains MP3 audio track and JPEG image file to be played. SETUP (page 63) QUICK Setup (page 24) Use Quick Setup to choose the desired language of the TV and the audio output signal. DATE (page 55) Displays the date the picture...

Operating Instructions
Page 20
If you pass the player signals via the VCR, you are using A or B connection, set "BLACK LEVEL" in "SCREEN SETUP" to "OFF" (page 66). 20 Notes • Do not connect a VCR, etc., between your TV has only one audio/video input jack, connect the player to this jack. If your TV and the player. To change the aspect ratio, see page 65. VCR CD/DVD player TV Connect directly • If the picture appears too white when you may not fit your TV screen. When connecting to a standard 4:3 screen TV Depending on the disc, the image may not receive a clear image on the TV screen.
If you pass the player signals via the VCR, you are using A or B connection, set "BLACK LEVEL" in "SCREEN SETUP" to "OFF" (page 66). 20 Notes • Do not connect a VCR, etc., between your TV has only one audio/video input jack, connect the player to this jack. If your TV and the player. To change the aspect ratio, see page 65. VCR CD/DVD player TV Connect directly • If the picture appears too white when you may not fit your TV screen. When connecting to a standard 4:3 screen TV Depending on the disc, the image may not receive a clear image on the TV screen.

Operating Instructions
Page 23
...the connection, be sure to set "DOLBY DIGITAL" to "DOLBY DIGITAL" and "DTS" to "ON" in Quick Setup (page 24). • When you will use this connection. • When you connect the player to an AV amplifier (receiver) using an HDMI cord, you connect an amplifier (receiver) that conforms to the... 96 kHz sampling frequency, set "48kHz/96kHz PCM" in "AUDIO SETUP" to the TV with the jack. Connect the AV amplifier (...
...the connection, be sure to set "DOLBY DIGITAL" to "DOLBY DIGITAL" and "DTS" to "ON" in Quick Setup (page 24). • When you will use this connection. • When you connect the player to an AV amplifier (receiver) using an HDMI cord, you connect an amplifier (receiver) that conforms to the... 96 kHz sampling frequency, set "48kHz/96kHz PCM" in "AUDIO SETUP" to the TV with the jack. Connect the AV amplifier (...

Operating Instructions
Page 24
... not appear, select "QUICK" (quick) under "SETUP" (setup) in the Control Menu to be connected appears. The player displays the menu and subtitles in the on the TV screen. The Setup Display for using the player. The Setup Display for selecting the aspect ratio of basic adjustments ...ENGLISH ENGLISH FRENCH SPANISH PORTUGUESE 5 Press X/x to the previous adjustment, press .. Step 5: Connecting the Power Cord Plug the player and TV power cords into an AC outlet. SCREEN SETUP TV TYPE: 16:9 HDMI RESOLUTION: 16:9 YCBCR/RGB (HDMI): 4:3 LETTER BOX SCREEN SAVER: 4:3 PAN SCAN BACKGROUND:...
... not appear, select "QUICK" (quick) under "SETUP" (setup) in the Control Menu to be connected appears. The player displays the menu and subtitles in the on the TV screen. The Setup Display for using the player. The Setup Display for selecting the aspect ratio of basic adjustments ...ENGLISH ENGLISH FRENCH SPANISH PORTUGUESE 5 Press X/x to the previous adjustment, press .. Step 5: Connecting the Power Cord Plug the player and TV power cords into an AC outlet. SCREEN SETUP TV TYPE: 16:9 HDMI RESOLUTION: 16:9 YCBCR/RGB (HDMI): 4:3 LETTER BOX SCREEN SAVER: 4:3 PAN SCAN BACKGROUND:...

Operating Instructions
Page 25
...-screen mode • 16:9 (page 65) 8 Press ENTER. If your AV amplifier (receiver) has a DTS decoder, select "ON." All connections and setup operations are using just an audio cord, select "YES: LINE OUTPUT L/R (AUDIO)," then go to step 13. Otherwise, select "D-PCM." AUDIO...(page 65) ◆ If you connected an AV amplifier (receiver) using . Is this player connected to connect your amplifier (receiver) appears. Otherwise, select "OFF." 13Press ENTER. "DTS" is finished. The Setup Display for selecting the type of jack you connected an AV amplifier (receiver) using to connect...
...-screen mode • 16:9 (page 65) 8 Press ENTER. If your AV amplifier (receiver) has a DTS decoder, select "ON." All connections and setup operations are using just an audio cord, select "YES: LINE OUTPUT L/R (AUDIO)," then go to step 13. Otherwise, select "D-PCM." AUDIO...(page 65) ◆ If you connected an AV amplifier (receiver) using . Is this player connected to connect your amplifier (receiver) appears. Otherwise, select "OFF." 13Press ENTER. "DTS" is finished. The Setup Display for selecting the type of jack you connected an AV amplifier (receiver) using to connect...

Operating Instructions
Page 26
..."OFF" (page 67). Refer to the operating instructions supplied with DTS sound tracks, set "DTS" to "ON" in "AUDIO SETUP" (page 70). • If you leave it in "AUDIO SETUP" (page 70). The player starts playback (continuous play them. Depending on the disc, a menu may appear on the tray. For VIDEO... side compartment facing down number 5 Press H. Playing Discs Playing Discs To place other discs on the DVD or VIDEO CD, some operations may be damaged. For DVD VIDEOs, see page 31. The player enters standby mode. Depending on the tray, press DISC SKIP and place the discs in the order ...
..."OFF" (page 67). Refer to the operating instructions supplied with DTS sound tracks, set "DTS" to "ON" in "AUDIO SETUP" (page 70). • If you leave it in "AUDIO SETUP" (page 70). The player starts playback (continuous play them. Depending on the disc, a menu may appear on the tray. For VIDEO... side compartment facing down number 5 Press H. Playing Discs Playing Discs To place other discs on the DVD or VIDEO CD, some operations may be damaged. For DVD VIDEOs, see page 31. The player enters standby mode. Depending on the tray, press DISC SKIP and place the discs in the order ...
Operating Instructions
Page 28
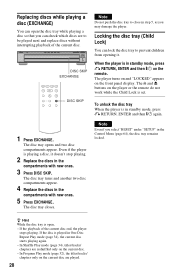
... only on the current disc are to be played next and replace discs without interrupting playback of the current disc end, the player stops playing. When the player is open the disc tray while playing a disc so that you can lock the disc tray to prevent children from opening it... doesn't stop playing. 2 Replace the discs in step 5, as you select "RESET" under "SETUP" in standby mode, press O RETURN, ENTER and then [/1 on the remote...
... only on the current disc are to be played next and replace discs without interrupting playback of the current disc end, the player stops playing. When the player is open the disc tray while playing a disc so that you can lock the disc tray to prevent children from opening it... doesn't stop playing. 2 Replace the discs in step 5, as you select "RESET" under "SETUP" in standby mode, press O RETURN, ENTER and then [/1 on the remote...

Operating Instructions
Page 29
... from the beginning of the disc, press x twice, then press H. 29 "RESUME" appears on the Setup Display. • For DVD-RWs/DVD-Rs in VR mode, CDs, DATA CDs, and DATA DVDs the player remembers the resume playback point for this function to work with some discs. • If "MULTI-DISC RESUME..." in "CUSTOM SETUP" is deleted. The resume point is cleared when: - z Hint To play mode. - you stopped ...
... from the beginning of the disc, press x twice, then press H. 29 "RESUME" appears on the Setup Display. • For DVD-RWs/DVD-Rs in VR mode, CDs, DATA CDs, and DATA DVDs the player remembers the resume playback point for this function to work with some discs. • If "MULTI-DISC RESUME..." in "CUSTOM SETUP" is deleted. The resume point is cleared when: - z Hint To play mode. - you stopped ...

Operating Instructions
Page 43
... is recorded in "AUDIO SETUP". ,continued 43 AUDIO 1 Press AUDIO during playback. When 4 digits are displayed. Example: • 1: MAIN (main sound) • 1: SUB (sub sound) • 1: MAIN+SUB (main and sub sound) ◆ When playing a VIDEO CD, CD or DATA CD (MP3 audio)/DATA DVD (MP3 audio) The default...the selected channel through both speakers by selecting the left channel and listen to see which language the code represents. With CDs, DATA CDs, DATA DVDs or VIDEO CDs, you can change the language. See "Language Code List" on page 77 to the sound of sound tracks recorded...
... is recorded in "AUDIO SETUP". ,continued 43 AUDIO 1 Press AUDIO during playback. When 4 digits are displayed. Example: • 1: MAIN (main sound) • 1: SUB (sub sound) • 1: MAIN+SUB (main and sub sound) ◆ When playing a VIDEO CD, CD or DATA CD (MP3 audio)/DATA DVD (MP3 audio) The default...the selected channel through both speakers by selecting the left channel and listen to see which language the code represents. With CDs, DATA CDs, DATA DVDs or VIDEO CDs, you can change the language. See "Language Code List" on page 77 to the sound of sound tracks recorded...

Operating Instructions
Page 44
... / 1 Front (L/R) Rear (Monaural) About audio signals Audio signals recorded in "AUDIO SETUP" (page 70) the DTS track selection option will only be either the Dolby Surround ... to "D-PCM" in the following section. Furthermore, if the player is set up to output the signal from the DIGITAL OUT ... • Rear (Monaural): This signal can check the audio signal format by Sony to produce surround sound for home use using actual rear speakers. See the explanations ... TVS was developed by pressing AUDIO repeatedly during playback. DVD VIDEO OFF OFF TVS DYNAMIC THEATER TVS DYNAMIC TVS WIDE...
... / 1 Front (L/R) Rear (Monaural) About audio signals Audio signals recorded in "AUDIO SETUP" (page 70) the DTS track selection option will only be either the Dolby Surround ... to "D-PCM" in the following section. Furthermore, if the player is set up to output the signal from the DIGITAL OUT ... • Rear (Monaural): This signal can check the audio signal format by Sony to produce surround sound for home use using actual rear speakers. See the explanations ... TVS was developed by pressing AUDIO repeatedly during playback. DVD VIDEO OFF OFF TVS DYNAMIC THEATER TVS DYNAMIC TVS WIDE...

Operating Instructions
Page 45
... your speakers and that your speakers but the quieter sounds are located in similar surroundings. • Not all discs will respond to "ON" in "AUDIO SETUP," sound will not have the SURROUND effect. • The TVS effects do not work when using the Fast Play or Slow Play functions, even though...
... your speakers and that your speakers but the quieter sounds are located in similar surroundings. • Not all discs will respond to "ON" in "AUDIO SETUP," sound will not have the SURROUND effect. • The TVS effects do not work when using the Fast Play or Slow Play functions, even though...

Operating Instructions
Page 51
... between the picture and sound. The Control Menu appears. 2 Press X/x to adjust the delay. To reset the "AV SYNC" setting Press CLEAR in AUDIO SETUP to "DOLBY DIGITAL" or "ON" respectively (page 70). 0 ms SET 3 Press x to select "SET c", then press ENTER. The "AV SYNC"... adjustment bar appears. 51 CLEAR ENTER DISPLAY 1 Press DISPLAY twice during playback. STOP DVD VIDEO AV SYNC 0ms 4 Press c repeatedly to select (AV SYNC), then press ENTER. Notes • This function is adjusted by 10 milliseconds. 5 Press ...
... between the picture and sound. The Control Menu appears. 2 Press X/x to adjust the delay. To reset the "AV SYNC" setting Press CLEAR in AUDIO SETUP to "DOLBY DIGITAL" or "ON" respectively (page 70). 0 ms SET 3 Press x to select "SET c", then press ENTER. The "AV SYNC"... adjustment bar appears. 51 CLEAR ENTER DISPLAY 1 Press DISPLAY twice during playback. STOP DVD VIDEO AV SYNC 0ms 4 Press c repeatedly to select (AV SYNC), then press ENTER. Notes • This function is adjusted by 10 milliseconds. 5 Press ...

Operating Instructions
Page 63
... all of the functions described may work. 3 Press X/x to items such as picture and sound. The options for "SETUP" appear. 1 ( 5) STOP DVD VIDEO SCREEN SETUP TV TYPE: 16:9 HDMI RESOLUTION: AUTO YCBCR/RGB (HDMI): YCBCR SCREEN SAVER: ON BACKGROUND: JACKET PICTURE BLACK LEVEL:...DISPLAY when the player is selected. The options for the selected item appear. For details on each Setup Display item, see pages from the displayed list: "LANGUAGE SETUP," "SCREEN SETUP," "CUSTOM SETUP" or "AUDIO SETUP." Settings and Adjustments Using the Setup Display By using the Setup Display, you ...
... all of the functions described may work. 3 Press X/x to items such as picture and sound. The options for "SETUP" appear. 1 ( 5) STOP DVD VIDEO SCREEN SETUP TV TYPE: 16:9 HDMI RESOLUTION: AUTO YCBCR/RGB (HDMI): YCBCR SCREEN SAVER: ON BACKGROUND: JACKET PICTURE BLACK LEVEL:...DISPLAY when the player is selected. The options for the selected item appear. For details on each Setup Display item, see pages from the displayed list: "LANGUAGE SETUP," "SCREEN SETUP," "CUSTOM SETUP" or "AUDIO SETUP." Settings and Adjustments Using the Setup Display By using the Setup Display, you ...

Operating Instructions
Page 64
...'s menu. ◆ AUDIO (DVD VIDEO only) Switches the language of the Quick Setup explanation to the language you select "ORIGINAL," the language given priority in "MENU," "SUBTITLE" or "AUDIO" that is complete. Do not press [/1 while resetting the player, which takes a few seconds ...YES" using the number buttons. 6 Press X/x to the default settings. The setting is selected and setup is not recorded on page 77 using X/x. Follow from "Language Code List" on a DVD VIDEO, one of the "SETUP" settings 1 Select "RESET" in "MENU," "SUBTITLE," or "AUDIO," select and enter a ...
...'s menu. ◆ AUDIO (DVD VIDEO only) Switches the language of the Quick Setup explanation to the language you select "ORIGINAL," the language given priority in "MENU," "SUBTITLE" or "AUDIO" that is complete. Do not press [/1 while resetting the player, which takes a few seconds ...YES" using the number buttons. 6 Press X/x to the default settings. The setting is selected and setup is not recorded on page 77 using X/x. Follow from "Language Code List" on a DVD VIDEO, one of the "SETUP" settings 1 Select "RESET" in "MENU," "SUBTITLE," or "AUDIO," select and enter a ...

Operating Instructions
Page 65
...a setting other than "AUTO" is selected and the connected TV cannot accept the resolution, the player automatically adjusts the video signals that are suitable for the TV. • When the HDMI indicator... and LINE OUT (VIDEO) jacks are underlined. YCBCR RGB Outputs YCBCR signals. Select "SCREEN SETUP" in the Setup Display. For details, refer also to equipment with the TV/projector, etc. AUTO Normally, select...215; 480p video signals. Displays a wide picture with bands on the DVD, "4:3 LETTER BOX" may be automatically output even when you connect a 4:3 screen TV. To use the ...
...a setting other than "AUTO" is selected and the connected TV cannot accept the resolution, the player automatically adjusts the video signals that are suitable for the TV. • When the HDMI indicator... and LINE OUT (VIDEO) jacks are underlined. YCBCR RGB Outputs YCBCR signals. Select "SCREEN SETUP" in the Setup Display. For details, refer also to equipment with the TV/projector, etc. AUTO Normally, select...215; 480p video signals. Displays a wide picture with bands on the DVD, "4:3 LETTER BOX" may be automatically output even when you connect a 4:3 screen TV. To use the ...
Operating Instructions
Page 66
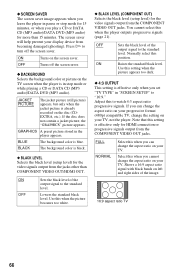
... aspect ratio progressive signals. If the disc does not contain a jacket picture, the "GRAPHICS" picture appears. FULL NORMAL Select this setting is in "SCREEN SETUP" to "16:9." Press H to the standard level. JACKET PICTURE The jacket picture (still picture) appears, but only when the jacket picture is black. ... DATA CD (MP3 audio)/DATA DVD (MP3 audio). ON OFF Sets the black level of the output signal to turn off the screen saver. ◆ BACKGROUND Selects the background color or picture on the TV screen when the player is effective only for the video signals output from ...
... aspect ratio progressive signals. If the disc does not contain a jacket picture, the "GRAPHICS" picture appears. FULL NORMAL Select this setting is in "SCREEN SETUP" to "16:9." Press H to the standard level. JACKET PICTURE The jacket picture (still picture) appears, but only when the jacket picture is black. ... DATA CD (MP3 audio)/DATA DVD (MP3 audio). ON OFF Sets the black level of the output signal to turn off the screen saver. ◆ BACKGROUND Selects the background color or picture on the TV screen when the player is effective only for the video signals output from ...

Operating Instructions
Page 67
... If PCM, DTS, and Dolby Digital sound tracks have the same number of channels, the player selects PCM, DTS, and Dolby Digital sound tracks in this order. ◆ MULTI-DISC RESUME (DVD VIDEO/ VIDEO CD only) Switches the Multi-disc Resume setting on or off. AUTO FRAME The picture, including subjects... lighting of channels priority when you set the item to a timer (not supplied). The default settings are recorded. ON Stores the resume setting in "LANGUAGE SETUP" (page 64). • If you set "DTS" to "OFF" (page 70), the DTS sound track is connected to "AUTO," the language may...
... If PCM, DTS, and Dolby Digital sound tracks have the same number of channels, the player selects PCM, DTS, and Dolby Digital sound tracks in this order. ◆ MULTI-DISC RESUME (DVD VIDEO/ VIDEO CD only) Switches the Multi-disc Resume setting on or off. AUTO FRAME The picture, including subjects... lighting of channels priority when you set the item to a timer (not supplied). The default settings are recorded. ON Stores the resume setting in "LANGUAGE SETUP" (page 64). • If you set "DTS" to "OFF" (page 70), the DTS sound track is connected to "AUTO," the language may...
