Operating Instructions
Page 3
...time, be sure to your television screen indefinitely. To disconnect the AC power cord, grasp the plug itself has been turned off the player. On adjusting volume Do not turn off . • If you do not place objects filled with strong magnets, such as it checked by qualified personnel before... the player for an extended period of time, you move the player, take out any questions or problems concerning your player, please consult your nearest Sony dealer. 3 On placement • Place the player in a location with very low level inputs or no audio signals. It is played. In this...
...time, be sure to your television screen indefinitely. To disconnect the AC power cord, grasp the plug itself has been turned off the player. On adjusting volume Do not turn off . • If you do not place objects filled with strong magnets, such as it checked by qualified personnel before... the player for an extended period of time, you move the player, take out any questions or problems concerning your player, please consult your nearest Sony dealer. 3 On placement • Place the player in a location with very low level inputs or no audio signals. It is played. In this...
Operating Instructions
Page 5
... the Sound 59 Enjoying Movies Changing the Angles 61 Displaying the Subtitles 61 Adjusting the Playback Picture (CUSTOM PICTURE MODE 62 Sharpening the Picture (SHARPNESS 63 Enjoying MP3 Audio and JPEG Images About MP3 Audio Tracks and JPEG ... Various Additional Functions Locking Discs (CUSTOM PARENTAL CONTROL, PARENTAL CONTROL 70 Controlling Your TV or AV Amplifier (Receiver) With the Supplied Remote 73 Settings and Adjustments Using the Setup Display 76 Setting the Display or Sound Track Language (LANGUAGE SETUP) . . . . . 77 Settings for the Display (SCREEN SETUP 78 Custom Settings (...
... the Sound 59 Enjoying Movies Changing the Angles 61 Displaying the Subtitles 61 Adjusting the Playback Picture (CUSTOM PICTURE MODE 62 Sharpening the Picture (SHARPNESS 63 Enjoying MP3 Audio and JPEG Images About MP3 Audio Tracks and JPEG ... Various Additional Functions Locking Discs (CUSTOM PARENTAL CONTROL, PARENTAL CONTROL 70 Controlling Your TV or AV Amplifier (Receiver) With the Supplied Remote 73 Settings and Adjustments Using the Setup Display 76 Setting the Display or Sound Track Language (LANGUAGE SETUP) . . . . . 77 Settings for the Display (SCREEN SETUP 78 Custom Settings (...

Operating Instructions
Page 10
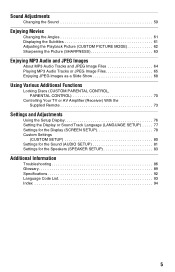
z Hint You can adjust the lighting of the front panel display by setting "DIMMER" in "CUSTOM SETUP" (page 80). Rear panel A DIGITAL OUT (COAXIAL) jack (22) (23) (24) B DIGITAL ...
z Hint You can adjust the lighting of the front panel display by setting "DIMMER" in "CUSTOM SETUP" (page 80). Rear panel A DIGITAL OUT (COAXIAL) jack (22) (23) (24) B DIGITAL ...

Operating Instructions
Page 14
... when "PLAYLIST" is selected. 14 PROGRAM (page 39) Selects the disc, album, or track to play repeatedly. ** CUSTOM PICTURE MODE (page 62) Adjusts the video signal from the player. The other Control Menu icon indicator lights up in green when: - "ANGLE": when the angles can select the picture...to be played when playing a DATA CD. * JPEG only ** MP3 only z Hints The Control Menu icon indicator lights up in green when you can adjust various other than "STANDARD" is selected. - SETUP (page 76) QUICK Setup Use Quick Setup to choose the desired language of the on the screen....
... when "PLAYLIST" is selected. 14 PROGRAM (page 39) Selects the disc, album, or track to play repeatedly. ** CUSTOM PICTURE MODE (page 62) Adjusts the video signal from the player. The other Control Menu icon indicator lights up in green when: - "ANGLE": when the angles can select the picture...to be played when playing a DATA CD. * JPEG only ** MP3 only z Hints The Control Menu icon indicator lights up in green when you can adjust various other than "STANDARD" is selected. - SETUP (page 76) QUICK Setup Use Quick Setup to choose the desired language of the on the screen....
Operating Instructions
Page 15
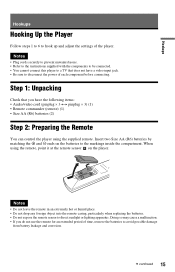
Doing so may cause a malfunction. • If you have a video input jack. • Be sure to hook up and adjust the settings of the player. Notes • Do not leave the remote in an extremely hot or humid place. • Do not drop any foreign ...
Doing so may cause a malfunction. • If you have a video input jack. • Be sure to hook up and adjust the settings of the player. Notes • Do not leave the remote in an extremely hot or humid place. • Do not drop any foreign ...

Operating Instructions
Page 26
... for using the player. To return to display the menu and subtitles as well. 26 The player uses the language selected here to the previous adjustment, press .. [/1 X/x . Step 6: Quick Setup Follow the steps below to run Quick Setup (page 77). 4 Press ENTER before inserting a disc.... the on the TV screen. Step 5: Connecting the Power Cord Plug the power cords of basic adjustments for selecting the language used in the Control Menu to select a language. To skip an adjustment, press >. LANGUAGE SETUP OSD: MENU: AUDIO: SUBTITLE: ENGLISH ENGLISH FRENCH SPANISH 5 Press X/x to...
... for using the player. To return to display the menu and subtitles as well. 26 The player uses the language selected here to the previous adjustment, press .. [/1 X/x . Step 6: Quick Setup Follow the steps below to run Quick Setup (page 77). 4 Press ENTER before inserting a disc.... the on the TV screen. Step 5: Connecting the Power Cord Plug the power cords of basic adjustments for selecting the language used in the Control Menu to select a language. To skip an adjustment, press >. LANGUAGE SETUP OSD: MENU: AUDIO: SUBTITLE: ENGLISH ENGLISH FRENCH SPANISH 5 Press X/x to...

Operating Instructions
Page 29
... operations are needed. z Hints • For connections B-1 C-1 D-1 If the sound distorts even when the volume is the default setting and does not need to be adjusted when you connect an amplifier (receiver) that conforms to the 96 kHz sampling frequency (page 82). 29 Quick Setup is selected. Each of this player...
... operations are needed. z Hints • For connections B-1 C-1 D-1 If the sound distorts even when the volume is the default setting and does not need to be adjusted when you connect an amplifier (receiver) that conforms to the 96 kHz sampling frequency (page 82). 29 Quick Setup is selected. Each of this player...
Operating Instructions
Page 32
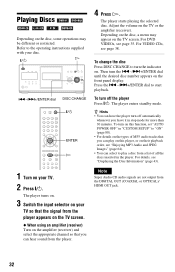
Adjust the volume on the front panel display. To change the disc Press DISC CHANGE to the operating instructions supplied with your disc. The player enters ... or restricted. Refer to turn off automatically whenever you leave it in stop mode for more than 30 minutes. For details, see page 35. For DVD VIDEOs, see "Displaying the Disc Information" (page 43). Then turn off the player Press [/1. H [/1 .-/>+/ENTER dial DISC CHANGE [/1 ENTER H 1 Turn on their playback order, see...
Adjust the volume on the front panel display. To change the disc Press DISC CHANGE to the operating instructions supplied with your disc. The player enters ... or restricted. Refer to turn off automatically whenever you leave it in stop mode for more than 30 minutes. For details, see page 35. For DVD VIDEOs, see "Displaying the Disc Information" (page 43). Then turn off the player Press [/1. H [/1 .-/>+/ENTER dial DISC CHANGE [/1 ENTER H 1 Turn on their playback order, see...

Operating Instructions
Page 59
... format, multiple signals ranging from the right or left channel, you can hear the instruments from the Control Menu (page 13). Sound Adjustments Sound Adjustments Changing the Sound When playing a DVD recorded in multiple audio formats (PCM, Dolby Digital, or DTS), you can change the language. The channels being played are displayed on...
... format, multiple signals ranging from the right or left channel, you can hear the instruments from the Control Menu (page 13). Sound Adjustments Sound Adjustments Changing the Sound When playing a DVD recorded in multiple audio formats (PCM, Dolby Digital, or DTS), you can change the language. The channels being played are displayed on...
Operating Instructions
Page 62
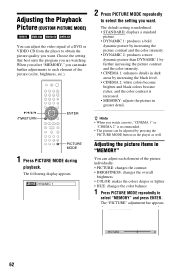
...best suits the program you want . The following display appears. C 01:32:55 PICTURE 0 Select : ENTER Cancel : RETURN 62 The "PICTURE" adjustment bar appears. C/X/x/c ORETURN ENTER PICTURE MODE 1 Press PICTURE MODE during playback. z Hints • When you want . DYNAMIC 1 2 Press PICTURE MODE...CINEMA 2: white colors become brighter and black colors become richer, and the color contrast is recommended. • The picture can adjust the video signal of a DVD or VIDEO CD from the player to obtain the picture quality you watch a movie, "CINEMA 1" or "CINEMA 2" is ...
...best suits the program you want . The following display appears. C 01:32:55 PICTURE 0 Select : ENTER Cancel : RETURN 62 The "PICTURE" adjustment bar appears. C/X/x/c ORETURN ENTER PICTURE MODE 1 Press PICTURE MODE during playback. z Hints • When you want . DYNAMIC 1 2 Press PICTURE MODE...CINEMA 2: white colors become brighter and black colors become richer, and the color contrast is recommended. • The picture can adjust the video signal of a DVD or VIDEO CD from the player to obtain the picture quality you watch a movie, "CINEMA 1" or "CINEMA 2" is ...

Operating Instructions
Page 63
...enhances the outline. • 2: enhances the outline more than 1. 4 Press ENTER. The options for "SHARPNESS" appear. 1 ( 2 4 ) 1 0 ( 2 8 ) DVD VIDEO Enjoying Movies OFF OFF 1 2 3 Press X/x to select "RESET" and press ENTER. To cancel the "SHARPNESS" setting Select "OFF" in step 3 and press ENTER. The... "RETURN" in step 3. To turn off the Control Menu Press DISPLAY repeatedly until the Control Menu is saved, and "BRIGHTNESS" adjustment bar appears. 3 Repeat step 2 to produce a sharper picture. 2 Press C/c to select (SHARPNESS), then press ENTER. The Custom...
...enhances the outline. • 2: enhances the outline more than 1. 4 Press ENTER. The options for "SHARPNESS" appear. 1 ( 2 4 ) 1 0 ( 2 8 ) DVD VIDEO Enjoying Movies OFF OFF 1 2 3 Press X/x to select "RESET" and press ENTER. To cancel the "SHARPNESS" setting Select "OFF" in step 3 and press ENTER. The... "RETURN" in step 3. To turn off the Control Menu Press DISPLAY repeatedly until the Control Menu is saved, and "BRIGHTNESS" adjustment bar appears. 3 Repeat step 2 to produce a sharper picture. 2 Press C/c to select (SHARPNESS), then press ENTER. The Custom...
Operating Instructions
Page 73
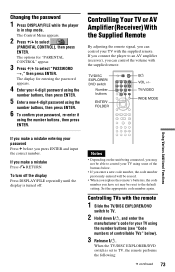
... number buttons (see "Code numbers of the buttons below ). 3 Release [/1. Controlling Your TV or AV Amplifier (Receiver) With the Supplied Remote By adjusting the remote signal, you make a mistake entering your password Press C before you have set to TV, the remote performs the following: c continued 73... If you can control the volume with the supplied remote. When the TV/DISC EXPLORER/DVD switch is in stop mode. Controlling TVs with the supplied remote. Changing the password 1 Press DISPLAY/FILE while the player is set may...
... number buttons (see "Code numbers of the buttons below ). 3 Release [/1. Controlling Your TV or AV Amplifier (Receiver) With the Supplied Remote By adjusting the remote signal, you make a mistake entering your password Press C before you have set to TV, the remote performs the following: c continued 73... If you can control the volume with the supplied remote. When the TV/DISC EXPLORER/DVD switch is in stop mode. Controlling TVs with the supplied remote. Changing the password 1 Press DISPLAY/FILE while the player is set may...

Operating Instructions
Page 74
...or off VOL +/- Adjusts the volume of the TV Number buttons Selects the channel of the TV and ENTER/ FOLDER WIDE MODE Switches to or from the wide mode of a Sony wide TV TV/VIDEO... other input sources Code numbers of controllable AV amplifiers (receiver)" below). 3 Release [/1. Manufacturer Sony Akai AOC Centurion Coronado Curtis-Mathes Daewoo Daytron Fisher General Electric Gold Star/LG Hitachi J.C.Penney ...is listed, try entering them one that works with the remote 1 Slide the TV/DISC EXPLORER/DVD switch to TV. buttons control the AV amplifier's volume. ◆ If you find the ...
...or off VOL +/- Adjusts the volume of the TV Number buttons Selects the channel of the TV and ENTER/ FOLDER WIDE MODE Switches to or from the wide mode of a Sony wide TV TV/VIDEO... other input sources Code numbers of controllable AV amplifiers (receiver)" below). 3 Release [/1. Manufacturer Sony Akai AOC Centurion Coronado Curtis-Mathes Daewoo Daytron Fisher General Electric Gold Star/LG Hitachi J.C.Penney ...is listed, try entering them one that works with the remote 1 Slide the TV/DISC EXPLORER/DVD switch to TV. buttons control the AV amplifier's volume. ◆ If you find the ...

Operating Instructions
Page 76
...the selected item appear. The options for "SETUP" appear. 4 ALL ( 2 4 ) DVD VIDEO : : QUICK CUSTOM RESET QUICK 3 Press X/x to 85. Note Playback settings stored in stop mode. Settings and Adjustments Using the Setup Display By using the Setup Display, you can also set a language for ... SETUP OSD: MENU: AUDIO: SUBTITLE: ENGLISH ENGLISH ENGLISH ENGLISH 4 Press X/x to select an item, then press ENTER. You can make various adjustments to select (SETUP), then press ENTER. X/x ENTER DISPLAY/ FILE 1 Press DISPLAY/FILE when the player is selected. Example: "SCREEN SETUP" ...
...the selected item appear. The options for "SETUP" appear. 4 ALL ( 2 4 ) DVD VIDEO : : QUICK CUSTOM RESET QUICK 3 Press X/x to 85. Note Playback settings stored in stop mode. Settings and Adjustments Using the Setup Display By using the Setup Display, you can also set a language for ... SETUP OSD: MENU: AUDIO: SUBTITLE: ENGLISH ENGLISH ENGLISH ENGLISH 4 Press X/x to select an item, then press ENTER. You can make various adjustments to select (SETUP), then press ENTER. X/x ENTER DISPLAY/ FILE 1 Press DISPLAY/FILE when the player is selected. Example: "SCREEN SETUP" ...
Operating Instructions
Page 77
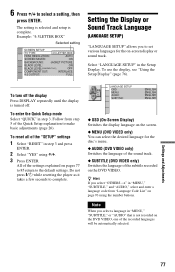
...select "OTHERS t" in "MENU," "SUBTITLE," and "AUDIO," select and enter a language code from step 5 of the Quick Setup explanation to make basic adjustments (page 26). Follow from "Language Code List" on page 93 using X/x. 3 Press ENTER. All of the subtitle recorded on pages 77 to 85 return...: ENGLISH ENGLISH ENGLISH ENGLISH ◆ OSD (On-Screen Display) Switches the display language on the screen. ◆ MENU (DVD VIDEO only) You can select the desired language for the on the DVD VIDEO, one of the "SETUP" settings 1 Select "RESET" in "MENU," "SUBTITLE," or "AUDIO" that is complete...
...select "OTHERS t" in "MENU," "SUBTITLE," and "AUDIO," select and enter a language code from step 5 of the Quick Setup explanation to make basic adjustments (page 26). Follow from "Language Code List" on page 93 using X/x. 3 Press ENTER. All of the subtitle recorded on pages 77 to 85 return...: ENGLISH ENGLISH ENGLISH ENGLISH ◆ OSD (On-Screen Display) Switches the display language on the screen. ◆ MENU (DVD VIDEO only) You can select the desired language for the on the DVD VIDEO, one of the "SETUP" settings 1 Select "RESET" in "MENU," "SUBTITLE," or "AUDIO" that is complete...
Operating Instructions
Page 78
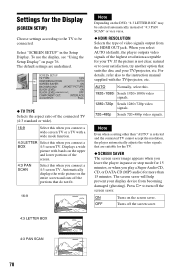
... when you leave the player in the Setup Display. If the picture is selected and the connected TV cannot accept the resolution, the player automatically adjusts the video signals that suits the disc and your display device from the HDMI OUT jack. Note Even when a setting other than 15 minutes. ..., etc. The default settings are suitable for more than "AUTO" is not clear, natural or to the instruction manual supplied with bands on the DVD, "4:3 LETTER BOX" may be connected. For details, refer also to your satisfaction, try another option that are underlined.
... when you leave the player in the Setup Display. If the picture is selected and the connected TV cannot accept the resolution, the player automatically adjusts the video signals that suits the disc and your display device from the HDMI OUT jack. Note Even when a setting other than 15 minutes. ..., etc. The default settings are suitable for more than "AUTO" is not clear, natural or to the instruction manual supplied with bands on the DVD, "4:3 LETTER BOX" may be connected. For details, refer also to your satisfaction, try another option that are underlined.
Operating Instructions
Page 79
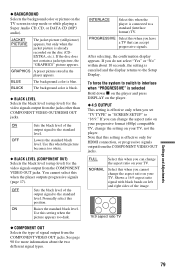
... accept progressive signals. Use this when the player is blue. Shows a 16:9 aspect ratio signal with black bands on the disc (CDEXTRA, etc.). Settings and Adjustments 79 BLUE BLACK The background color is connected to "16:9." INTERLACE Select this setting when the picture appears too dark. If you set "TV TYPE...
... accept progressive signals. Use this when the player is blue. Shows a 16:9 aspect ratio signal with black bands on the disc (CDEXTRA, etc.). Settings and Adjustments 79 BLUE BLACK The background color is connected to "16:9." INTERLACE Select this setting when the picture appears too dark. If you set "TV TYPE...
Operating Instructions
Page 80
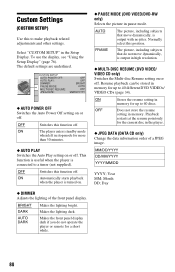
... Auto Power Off setting on or off . OFF Switches this position. ON Automatically starts playback when the player is connected to make playback related adjustments and other settings. Playback restarts at the resume point only for the current disc in the player. ◆ JPEG DATA (DATA CD only)...◆ AUTO PLAY Switches the Auto Play setting on or off . Resume playback can be stored in stop mode for up to 40 different DVD VIDEOs/ VIDEO CDs (page 34). BRIGHT Makes the lighting bright. This function is useful when the player is turned on or off. Normally select...
... Auto Power Off setting on or off . OFF Switches this position. ON Automatically starts playback when the player is connected to make playback related adjustments and other settings. Playback restarts at the resume point only for the current disc in the player. ◆ JPEG DATA (DATA CD only)...◆ AUTO PLAY Switches the Auto Play setting on or off . Resume playback can be stored in stop mode for up to 40 different DVD VIDEOs/ VIDEO CDs (page 34). BRIGHT Makes the lighting bright. This function is useful when the player is turned on or off. Normally select...
Operating Instructions
Page 81
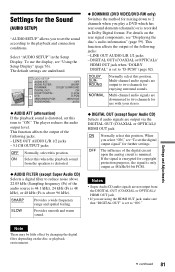
... and connection conditions. If the signal is encrypted for copyright protection purposes, the signal is recorded in the Setup Display. Settings and Adjustments c continued 81 The player reduces the audio output level. SHARP SLOW Provides a wide frequency range and spatial feeling. Provides smooth and... warm sound. ◆ DOWNMIX (DVD VIDEO/DVD-RW only) Switches the method for mixing down to two channels for use the display, see "Displaying the disc's audio information" (...
... and connection conditions. If the signal is encrypted for copyright protection purposes, the signal is recorded in the Setup Display. Settings and Adjustments c continued 81 The player reduces the audio output level. SHARP SLOW Provides a wide frequency range and spatial feeling. Provides smooth and... warm sound. ◆ DOWNMIX (DVD VIDEO/DVD-RW only) Switches the method for mixing down to two channels for use the display, see "Displaying the disc's audio information" (...
Operating Instructions
Page 82
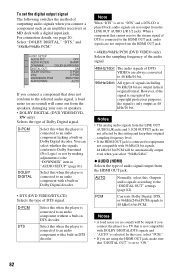
...-CD) Selects the type of signals including 96 kHz/24 bit are not output from the speakers, damaging your ears or speakers. • DOLBY DIGITAL (DVD VIDEO/DVD- Note When "DTS" is only output as an amplifier (receiver) or MD deck with a built-in DTS decoder. Notes • A loud noise (or... PCM will come out from the HDMI OUT jack. • 48kHz/96kHz PCM (DVD VIDEO only) Selects the sampling frequency of the audio signal. 48kHz/16bit The audio signals of DVD VIDEOs are not affected by making adjustments to 48 kHz/16 bit. 96kHz/24bit All types of DTS signal. Outputs audio...
...-CD) Selects the type of signals including 96 kHz/24 bit are not output from the speakers, damaging your ears or speakers. • DOLBY DIGITAL (DVD VIDEO/DVD- Note When "DTS" is only output as an amplifier (receiver) or MD deck with a built-in DTS decoder. Notes • A loud noise (or... PCM will come out from the HDMI OUT jack. • 48kHz/96kHz PCM (DVD VIDEO only) Selects the sampling frequency of the audio signal. 48kHz/16bit The audio signals of DVD VIDEOs are not affected by making adjustments to 48 kHz/16 bit. 96kHz/24bit All types of DTS signal. Outputs audio...


