Instruction Manual
Page 1
Digital Single Lens Reflex Camera Instruction Manual DSLR-A330/A380 Preparing the camera Before your operation Shooting images Using the shooting function Using the viewing function Changing your setup Viewing images on 70% or more recycled paper using VOC (Volatile Organic Compound)-free vegetable oil based ink. Printed on a computer Printing images Additional information on this product and answers to frequently asked questions can be found at our Customer Support Website.
Digital Single Lens Reflex Camera Instruction Manual DSLR-A330/A380 Preparing the camera Before your operation Shooting images Using the shooting function Using the viewing function Changing your setup Viewing images on 70% or more recycled paper using VOC (Volatile Organic Compound)-free vegetable oil based ink. Printed on a computer Printing images Additional information on this product and answers to frequently asked questions can be found at our Customer Support Website.
Instruction Manual
Page 9
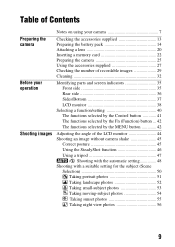
... camera Before your operation Shooting images Notes on using your camera 7 Checking the accessories supplied 13 Preparing the battery pack 14 Attaching a lens 20 Inserting a memory card 22 Preparing the camera 25 Using the accessories supplied 27 Checking the number of recordable images 29 Cleaning 32 Identifying parts and screen indicators 35 Front side 35 Rear side 36 Sides/Bottom 37 LCD monitor 38 Selecting a function/setting 40 The functions selected by the Control button...
... camera Before your operation Shooting images Notes on using your camera 7 Checking the accessories supplied 13 Preparing the battery pack 14 Attaching a lens 20 Inserting a memory card 22 Preparing the camera 25 Using the accessories supplied 27 Checking the number of recordable images 29 Cleaning 32 Identifying parts and screen indicators 35 Front side 35 Rear side 36 Sides/Bottom 37 LCD monitor 38 Selecting a function/setting 40 The functions selected by the Control button...
Instruction Manual
Page 11
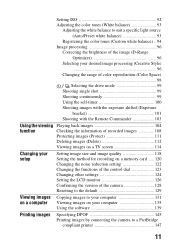
... (Exposure bracket 101 Shooting with the Remote Commander 103 Using the viewing Playing back images 104 function Checking the information of recorded images 108 Protecting images (Protect 111 Deleting images (Delete 112 Viewing images on a TV screen 114 Changing your setup Setting image size and image quality 118 Setting the method for recording on a memory card ..... 120 Changing the noise reduction setting 122 Changing the functions of the control dial 123 Changing other settings 124 Setting the LCD monitor 126 Confirming the version of the camera 128 Resetting to...
... (Exposure bracket 101 Shooting with the Remote Commander 103 Using the viewing Playing back images 104 function Checking the information of recorded images 108 Protecting images (Protect 111 Deleting images (Delete 112 Viewing images on a TV screen 114 Changing your setup Setting image size and image quality 118 Setting the method for recording on a memory card ..... 120 Changing the noise reduction setting 122 Changing the functions of the control dial 123 Changing other settings 124 Setting the LCD monitor 126 Confirming the version of the camera 128 Resetting to...
Instruction Manual
Page 42
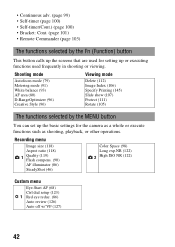
...) Custom menu Eye-Start AF (68) Ctrl dial setup (123) 1 Red eye reduc. (86) Auto review (126) Auto off w/ VF (127) 42 • Continuous adv. (page 99) • Self-timer (page 100) • Self-timer(Cont.) (page 100) • Bracket: Cont. (page 101) • Remote Commander (page 103) The functions selected by the MENU button You can set up the basic settings for setting up the screens that are used frequently in shooting or viewing. Shooting mode Autofocus mode (79) Metering mode (91) White balance...
...) Custom menu Eye-Start AF (68) Ctrl dial setup (123) 1 Red eye reduc. (86) Auto review (126) Auto off w/ VF (127) 42 • Continuous adv. (page 99) • Self-timer (page 100) • Self-timer(Cont.) (page 100) • Bracket: Cont. (page 101) • Remote Commander (page 103) The functions selected by the MENU button You can set up the basic settings for setting up the screens that are used frequently in shooting or viewing. Shooting mode Autofocus mode (79) Metering mode (91) White balance...
Instruction Manual
Page 59
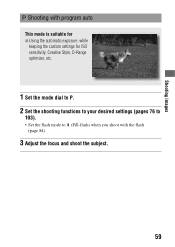
Shooting images Shooting with program auto This mode is suitable for z Using the automatic exposure, while keeping the custom settings for ISO sensitivity, Creative Style, D-Range optimizer, etc. 1 Set the mode dial to P. 2 Set the shooting functions to your desired settings (pages 76 to 103). • Set the flash mode to (Fill-flash) when you shoot with the flash (page 84). 3 Adjust the focus and shoot the subject. 59
Shooting images Shooting with program auto This mode is suitable for z Using the automatic exposure, while keeping the custom settings for ISO sensitivity, Creative Style, D-Range optimizer, etc. 1 Set the mode dial to P. 2 Set the shooting functions to your desired settings (pages 76 to 103). • Set the flash mode to (Fill-flash) when you shoot with the flash (page 84). 3 Adjust the focus and shoot the subject. 59
Instruction Manual
Page 65
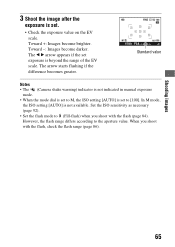
.... Standard value Notes • The (Camera shake warning) indicator is not indicated in manual exposure mode. • When the mode dial is set to the aperture value. The arrow starts flashing if the difference becomes greater. However, the flash range differs according to [100]. Toward -: Images become brighter. When you shoot with the flash, check the flash range (page 86). In M mode, the ISO setting [AUTO] is set to M, the ISO setting [AUTO] is not available.
.... Standard value Notes • The (Camera shake warning) indicator is not indicated in manual exposure mode. • When the mode dial is set to the aperture value. The arrow starts flashing if the difference becomes greater. However, the flash range differs according to [100]. Toward -: Images become brighter. When you shoot with the flash, check the flash range (page 86). In M mode, the ISO setting [AUTO] is set to M, the ISO setting [AUTO] is not available.

Instruction Manual
Page 77
... or a white wall. • Two subjects at an area where the focus has been confirmed. Focus area sensor Focus area Focus indicator Shooting technique • To select the area used for focusing, set up [AF area] (page 80). Using the shooting function 3 Press the shutter button halfway down to check the focus and shoot the image. • When the focus is confirmed, the focus indicator changes to shoot. You cannot release the shutter. The shutter is...
... or a white wall. • Two subjects at an area where the focus has been confirmed. Focus area sensor Focus area Focus indicator Shooting technique • To select the area used for focusing, set up [AF area] (page 80). Using the shooting function 3 Press the shutter button halfway down to check the focus and shoot the image. • When the focus is confirmed, the focus indicator changes to shoot. You cannot release the shutter. The shutter is...
Instruction Manual
Page 87
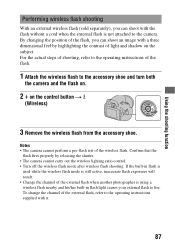
... control button t (Wireless) 3 Remove the wireless flash from the accessory shoe. By changing the position of the flash, you can shoot an image with a three dimensional feel by releasing the shutter. • The camera cannot carry out the wireless lighting ratio control. • Turn off the wireless flash mode after wireless flash shooting. Using the shooting function Performing wireless flash shooting With an external wireless flash (sold separately), you can shoot with the flash without a cord when the external flash is not attached to the camera. To change...
... control button t (Wireless) 3 Remove the wireless flash from the accessory shoe. By changing the position of the flash, you can shoot an image with a three dimensional feel by releasing the shutter. • The camera cannot carry out the wireless lighting ratio control. • Turn off the wireless flash mode after wireless flash shooting. Using the shooting function Performing wireless flash shooting With an external wireless flash (sold separately), you can shoot with the flash without a cord when the external flash is not attached to the camera. To change...
Instruction Manual
Page 90
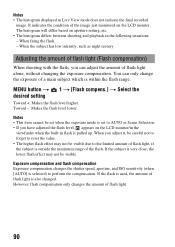
... low intensity, such as night scenery. Adjusting the amount of flash light (Flash compensation) When shooting with the flash, you can only change the exposure of the image just monitored on the LCD monitor. When firing the flash. - Exposure compensation and flash compensation Exposure compensation changes the shutter speed, aperture, and ISO sensitivity (when [AUTO] is within the flash range. When you have adjusted the flash level, appears on aperture setting, etc. • The histogram differs between shooting and playback in Live View mode...
... low intensity, such as night scenery. Adjusting the amount of flash light (Flash compensation) When shooting with the flash, you can only change the exposure of the image just monitored on the LCD monitor. When firing the flash. - Exposure compensation and flash compensation Exposure compensation changes the shutter speed, aperture, and ISO sensitivity (when [AUTO] is within the flash range. When you have adjusted the flash level, appears on aperture setting, etc. • The histogram differs between shooting and playback in Live View mode...
Instruction Manual
Page 100
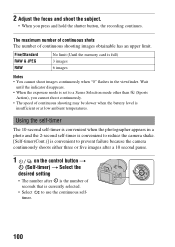
... memory card is set to use the continuous selftimer. 100 Using the self-timer The 10-second self-timer is convenient when the photographer appears in the viewfinder. 2 Adjust the focus and shoot the subject. • When you cannot shoot continuously. • The speed of continuous shooting may be slower when the battery level is insufficient or at low ambient temperatures. Wait until the indicator disappears. • When the exposure mode is full) 3 images 6 images...
... memory card is set to use the continuous selftimer. 100 Using the self-timer The 10-second self-timer is convenient when the photographer appears in the viewfinder. 2 Adjust the focus and shoot the subject. • When you cannot shoot continuously. • The speed of continuous shooting may be slower when the battery level is insufficient or at low ambient temperatures. Wait until the indicator disappears. • When the exposure mode is full) 3 images 6 images...
Instruction Manual
Page 101
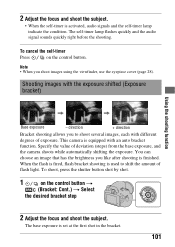
... the shutter button shot by shot. 1 on the control button. This camera is activated, audio signals and the self-timer lamp indicate the condition. 2 Adjust the focus and shoot the subject. • When the self-timer is equipped with an auto bracket function. To cancel the self-timer Press on the control button t (Bracket: Cont.) t Select the desired bracket step 2 Adjust the focus and shoot the subject. The base exposure is used to shoot several images, each with the exposure shifted (Exposure bracket) Using the shooting function Base exposure -
... the shutter button shot by shot. 1 on the control button. This camera is activated, audio signals and the self-timer lamp indicate the condition. 2 Adjust the focus and shoot the subject. • When the self-timer is equipped with an auto bracket function. To cancel the self-timer Press on the control button t (Bracket: Cont.) t Select the desired bracket step 2 Adjust the focus and shoot the subject. The base exposure is used to shoot several images, each with the exposure shifted (Exposure bracket) Using the shooting function Base exposure -
Instruction Manual
Page 123
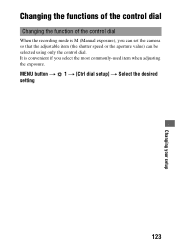
Changing the functions of the control dial Changing the function of the control dial When the recording mode is convenient if you can set the camera so that the adjustable item (the shutter speed or the aperture value) can be selected using only the control dial. It is M (Manual exposure), you select the most commonly-used item when adjusting the exposure. MENU button t 1 t [Ctrl dial setup] t Select the desired setting 123 Changing your setup
Changing the functions of the control dial Changing the function of the control dial When the recording mode is convenient if you can set the camera so that the adjustable item (the shutter speed or the aperture value) can be selected using only the control dial. It is M (Manual exposure), you select the most commonly-used item when adjusting the exposure. MENU button t 1 t [Ctrl dial setup] t Select the desired setting 123 Changing your setup
Instruction Manual
Page 124
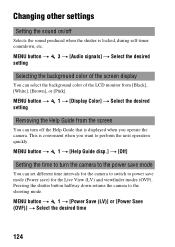
MENU button t 1 t [Display Color] t Select the desired setting Removing the Help Guide from [Black], [White], [Brown], or [Pink]. MENU button t 1 t [Help Guide disp.] t [Off] Setting the time to turn off Selects the sound produced when the shutter is locked, during self-timer countdown, etc. MENU button t 1 t [Power Save (LV)] or [Power Save (OVF)] t Select the desired time 124 Pressing the shutter button halfway down returns the camera to the shooting mode. MENU button t 3 t [Audio signals] t Select the desired setting Selecting the background color of the screen display You can select...
MENU button t 1 t [Display Color] t Select the desired setting Removing the Help Guide from [Black], [White], [Brown], or [Pink]. MENU button t 1 t [Help Guide disp.] t [Off] Setting the time to turn off Selects the sound produced when the shutter is locked, during self-timer countdown, etc. MENU button t 1 t [Power Save (LV)] or [Power Save (OVF)] t Select the desired time 124 Pressing the shutter button halfway down returns the camera to the shooting mode. MENU button t 3 t [Audio signals] t Select the desired setting Selecting the background color of the screen display You can select...
Instruction Manual
Page 126
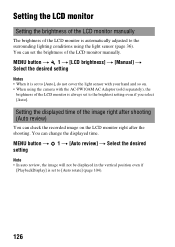
... lighting conditions using the light sensor (page 36). MENU button t 1 t [LCD brightness] t [Manual] t Select the desired setting Notes • When it is set to [Auto], do not cover the light sensor with your hand and so on the LCD monitor right after shooting (Auto review) You can change the displayed time. Setting the displayed time of the image right after the shooting. You can set the brightness of the LCD monitor manually. Setting the LCD monitor Setting the brightness of the LCD monitor manually...
... lighting conditions using the light sensor (page 36). MENU button t 1 t [LCD brightness] t [Manual] t Select the desired setting Notes • When it is set to [Auto], do not cover the light sensor with your hand and so on the LCD monitor right after shooting (Auto review) You can change the displayed time. Setting the displayed time of the image right after the shooting. You can set the brightness of the LCD monitor manually. Setting the LCD monitor Setting the brightness of the LCD monitor manually...

Instruction Manual
Page 129
...177;0.0 Graphic Display Single-image screen (with recording information) Single-shot adv. Items Exposure compensation (88) Recording information display (70) Playback display (104) Drive mode (99) ISO (92) Flash mode (84) Metering mode (91) Autofocus mode (79) White balance (93) Custom white balance (94) D-RangeOptimizer (96) Creative Style (96) Recording menu Reset to L:14M (DSLR-A380)/ L:10M (DSLR-A330) 3:2 Fine ±0.0 Auto On On Changing your setup 129 MENU button t 3 t [Reset default] t [OK] The items to the default You can reset the main functions of the camera. Resetting to be...
...177;0.0 Graphic Display Single-image screen (with recording information) Single-shot adv. Items Exposure compensation (88) Recording information display (70) Playback display (104) Drive mode (99) ISO (92) Flash mode (84) Metering mode (91) Autofocus mode (79) White balance (93) Custom white balance (94) D-RangeOptimizer (96) Creative Style (96) Recording menu Reset to L:14M (DSLR-A380)/ L:10M (DSLR-A330) 3:2 Fine ±0.0 Auto On On Changing your setup 129 MENU button t 3 t [Reset default] t [OK] The items to the default You can reset the main functions of the camera. Resetting to be...
Instruction Manual
Page 131
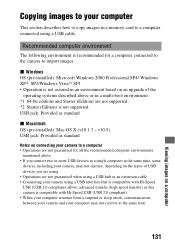
...; Operations are not supported. *2 Starter (Edition) is not supported. USB jack: Provided as this camera is compatible with Hi-Speed USB (USB 2.0 compliant). • When your computer resumes from a suspend or sleep mode, communication between your camera and your computer This section describes how to copy images in a memory card to a computer connected using a USB cable. Viewing images on a computer Copying images to your computer may not operate, depending on the types...
...; Operations are not supported. *2 Starter (Edition) is not supported. USB jack: Provided as this camera is compatible with Hi-Speed USB (USB 2.0 compliant). • When your computer resumes from a suspend or sleep mode, communication between your camera and your computer This section describes how to copy images in a memory card to a computer connected using a USB cable. Viewing images on a computer Copying images to your computer may not operate, depending on the types...
Instruction Manual
Page 141
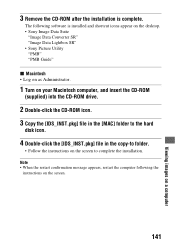
... restart confirmation message appears, restart the computer following software is complete. The following the instructions on the screen. 141 Viewing images on the screen to folder. • Follow the instructions on a computer 3 Remove the CD-ROM after the installation is installed and shortcut icons appear on the desktop. • Sony Image Data Suite "Image Data Converter SR" "Image Data Lightbox SR" • Sony Picture Utility "PMB" "PMB Guide" x Macintosh • Log on as Administrator. 1 Turn on...
... restart confirmation message appears, restart the computer following software is complete. The following the instructions on the screen. 141 Viewing images on the screen to folder. • Follow the instructions on a computer 3 Remove the CD-ROM after the installation is installed and shortcut icons appear on the desktop. • Sony Image Data Suite "Image Data Converter SR" "Image Data Lightbox SR" • Sony Picture Utility "PMB" "PMB Guide" x Macintosh • Log on as Administrator. 1 Turn on...

Instruction Manual
Page 157
... red eye reduction function (page 86). • Get close to appear too dark (insufficient light). Blurring of the hood, the filter or the hood may partially appear in the image. The corners of the image to the subject, and shoot the subject within the flash range using the flash (page 86). 157 Others The aperture value and/or shutter speed flashes when you press the shutter button...
... red eye reduction function (page 86). • Get close to appear too dark (insufficient light). Blurring of the hood, the filter or the hood may partially appear in the image. The corners of the image to the subject, and shoot the subject within the flash range using the flash (page 86). 157 Others The aperture value and/or shutter speed flashes when you press the shutter button...

Instruction Manual
Page 158
... image file was recorded using the "Pixel mapping" function. 1 Set the LIVE VIEW/OVF switch to "LIVE VIEW." 2 Attach the lens cap. 3 MENU button t 3 t [Pixel mapping] t [OK] The image is in USB mode. Delete the USB connection (page 135). The use of the camera. Viewing images Your camera cannot play back images. • The folder/file name has been changed on the TV screen. • Check whether the connection is recommended (pages 47, 84). The camera may not be able to the Live View mode...
... image file was recorded using the "Pixel mapping" function. 1 Set the LIVE VIEW/OVF switch to "LIVE VIEW." 2 Attach the lens cap. 3 MENU button t 3 t [Pixel mapping] t [OK] The image is in USB mode. Delete the USB connection (page 135). The use of the camera. Viewing images Your camera cannot play back images. • The folder/file name has been changed on the TV screen. • Check whether the connection is recommended (pages 47, 84). The camera may not be able to the Live View mode...
Instruction Manual
Page 164
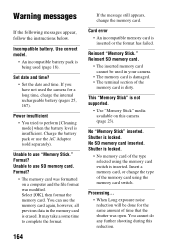
... file format was open. Format? Reinsert SD memory card. • The inserted memory card cannot be done for a long time, charge the internal rechargeable battery (pages 25, 167). Insert a memory card, or change the memory card. Processing... • When Long exposure noise reduction will be used the camera for the same amount of the memory card is locked. Select [OK], then format the memory card. Shutter is erased. Format? • The memory card was formatted on this reduction. Warning messages If the following messages appear, follow the instructions...
... file format was open. Format? Reinsert SD memory card. • The inserted memory card cannot be done for a long time, charge the internal rechargeable battery (pages 25, 167). Insert a memory card, or change the memory card. Processing... • When Long exposure noise reduction will be used the camera for the same amount of the memory card is locked. Select [OK], then format the memory card. Shutter is erased. Format? • The memory card was formatted on this reduction. Warning messages If the following messages appear, follow the instructions...


