Operating Instructions
Page 6
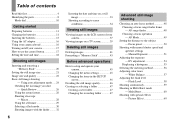
...parts 8 Mode dial 10 Getting started Preparing batteries 11 Charging the batteries 11 Inserting the batteries 13 Using the AC adaptor 16 Using your camera abroad 16 Turning on a TV screen 39 Deleting still images Deleting images 41 Formatting a "Memory Stick 43 Before advanced operations How to...to the subject - Using auto adjustment mode ..... 24 Checking the last image you shot - Picture Effect 60 Table of your camera 37 Viewing images on /off your camera 45 Changing the menu settings 45 Changing the items in Multi Burst mode - AF range finder 48 Choosing a focus operation ...
...parts 8 Mode dial 10 Getting started Preparing batteries 11 Charging the batteries 11 Inserting the batteries 13 Using the AC adaptor 16 Using your camera abroad 16 Turning on a TV screen 39 Deleting still images Deleting images 41 Formatting a "Memory Stick 43 Before advanced operations How to...to the subject - Using auto adjustment mode ..... 24 Checking the last image you shot - Picture Effect 60 Table of your camera 37 Viewing images on /off your camera 45 Changing the menu settings 45 Changing the items in Multi Burst mode - AF range finder 48 Choosing a focus operation ...

Operating Instructions
Page 17
... back a slide show • When connecting the (USB) jack or A/V OUT (MONO) jack How to use the control button Camera AF Mode: Digital Zoom: Date/Time: 1 Red Eye Reduction: 2 AF Illuminator: Auto Review: Single Smart Off Off Auto Off SELECT Setup 2 File Number: USB Connect: Video Out: 1 Clock Set: OK Cancel To change...
... back a slide show • When connecting the (USB) jack or A/V OUT (MONO) jack How to use the control button Camera AF Mode: Digital Zoom: Date/Time: 1 Red Eye Reduction: 2 AF Illuminator: Auto Review: Single Smart Off Off Auto Off SELECT Setup 2 File Number: USB Connect: Video Out: 1 Clock Set: OK Cancel To change...

Operating Instructions
Page 26
...lens portion while it is deleted. • The image may appear rough right after playback starts due to the image processing. When you shot - Quick Review Review VGA 101 8/8 101-0029 2005 1 1 10:30PM RETURN , Press b (7) on the LCD screen as follows. 26 The image is operating. •... zoom is equipped with v on the shutter button or press b (7) again. To return to digital zoom when the zoom scale exceeds 3×. Zoom Your camera is 3×. When digital zoom is set [Digital Zoom] to match the shooting purpose. Checking the last image you press the zoom button, the ...
...lens portion while it is deleted. • The image may appear rough right after playback starts due to the image processing. When you shot - Quick Review Review VGA 101 8/8 101-0029 2005 1 1 10:30PM RETURN , Press b (7) on the LCD screen as follows. 26 The image is operating. •... zoom is equipped with v on the shutter button or press b (7) again. To return to digital zoom when the zoom scale exceeds 3×. Zoom Your camera is 3×. When digital zoom is set [Digital Zoom] to match the shooting purpose. Checking the last image you press the zoom button, the ...

Operating Instructions
Page 33
... and time on a still image Shooting still images Camera AF Mode: Digital Zoom: Date/Time: 1 Red Eye Reduction: 2 AF Illuminator: Auto Review: Single Smart Off Off Auto Off SELECT Camera AF Mode: Digital Zoom: Date/Time: 1 Red Eye Reduction: 2 AF Illuminator: Auto Review: Day&Time Date Off Camera AF Mode: Digital Zoom: Date/Time: 1 Red Eye Reduction: 2 AF...
... and time on a still image Shooting still images Camera AF Mode: Digital Zoom: Date/Time: 1 Red Eye Reduction: 2 AF Illuminator: Auto Review: Single Smart Off Off Auto Off SELECT Camera AF Mode: Digital Zoom: Date/Time: 1 Red Eye Reduction: 2 AF Illuminator: Auto Review: Day&Time Date Off Camera AF Mode: Digital Zoom: Date/Time: 1 Red Eye Reduction: 2 AF...

Operating Instructions
Page 46
...) with b/B, then select the desired image quality with v/V. Mode dial MENU Control button a Set the mode dial to SET UP. Camera AF Mode: Digital Zoom: Date/Time: 1 Red Eye Reduction: 2 AF Illuminator: Auto Review: Single Smart Off Off Auto Off SELECT b Press v/V/b/B on the control button to anything other than SET UP. •...
...) with b/B, then select the desired image quality with v/V. Mode dial MENU Control button a Set the mode dial to SET UP. Camera AF Mode: Digital Zoom: Date/Time: 1 Red Eye Reduction: 2 AF Illuminator: Auto Review: Single Smart Off Off Auto Off SELECT b Press v/V/b/B on the control button to anything other than SET UP. •...

Operating Instructions
Page 49
...AF (S AF ) This mode is Single AF. Monitoring AF (M AF ) This mode shortens the time needed for shooting stationary subjects. The camera automatically adjusts the focus before the shutter button is pressed and held halfway down . a Set the mode dial to the mode dial setting (... SET UP. • When you compose images with the LCD screen off, the camera operates in Single AF mode. Camera AF Mode: xSingle Digital Zoom: Monitor Date/Time: 1 Red Eye Reduction: 2 AF Illuminator: Auto Review: • When shooting using the finder with the focus already adjusted. In this...
...AF (S AF ) This mode is Single AF. Monitoring AF (M AF ) This mode shortens the time needed for shooting stationary subjects. The camera automatically adjusts the focus before the shutter button is pressed and held halfway down . a Set the mode dial to the mode dial setting (... SET UP. • When you compose images with the LCD screen off, the camera operates in Single AF mode. Camera AF Mode: xSingle Digital Zoom: Monitor Date/Time: 1 Red Eye Reduction: 2 AF Illuminator: Auto Review: • When shooting using the finder with the focus already adjusted. In this...
Operating Instructions
Page 52
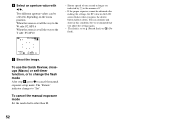
... one second or longer are indicated by ["] in this condition, but we recommend that you press the shutter button halfway down. To use the Quick Review, closeups (Macro) or self-timer function, or to change the flash mode After step 4, press z to cancel the manual exposure setup mode. d Select an aperture...
... one second or longer are indicated by ["] in this condition, but we recommend that you press the shutter button halfway down. To use the Quick Review, closeups (Macro) or self-timer function, or to change the flash mode After step 4, press z to cancel the manual exposure setup mode. d Select an aperture...

Operating Instructions
Page 55
...axis shows the brightness, and the vertical axis shows the number of an image. When the image size is displayed - A difference occurs in the digital zoom area - In this case, check the histogram while playing back a single-image or during recording and playback. 80 8M FINE 101 4 Number... skewed to display the histogram. A histogram can be used to check the exposure when the screen is set to see during Quick Review. When using other cameras. When playing back Multi Burst images - Advanced still image shooting • The histogram also appears when the mode dial is difficult ...
...axis shows the brightness, and the vertical axis shows the number of an image. When the image size is displayed - A difference occurs in the digital zoom area - In this case, check the histogram while playing back a single-image or during recording and playback. 80 8M FINE 101 4 Number... skewed to display the histogram. A histogram can be used to check the exposure when the screen is set to see during Quick Review. When using other cameras. When playing back Multi Burst images - Advanced still image shooting • The histogram also appears when the mode dial is difficult ...

Operating Instructions
Page 63
Advanced still image viewing Enlarging a portion of a still image You can enlarge a part of the image e Adjust the image size with the Quick Review function (page 26) by performing steps c to e. 63 You can enlarge the images displayed with the / (playback zoom) button. b Display the image to be enlarged ...
Advanced still image viewing Enlarging a portion of a still image You can enlarge a part of the image e Adjust the image size with the Quick Review function (page 26) by performing steps c to e. 63 You can enlarge the images displayed with the / (playback zoom) button. b Display the image to be enlarged ...

Operating Instructions
Page 64
... for presentations, etc. To cancel the slide show begins. This function is retained. • The quality of 3:2. • You cannot trim images displayed with Quick Review. 64 Playing back successive images - Set the following items with b/B, then press z. Off: After all images in a continuous loop. The image is recorded, and the...
... for presentations, etc. To cancel the slide show begins. This function is retained. • The quality of 3:2. • You cannot trim images displayed with Quick Review. 64 Playing back successive images - Set the following items with b/B, then press z. Off: After all images in a continuous loop. The image is recorded, and the...

Operating Instructions
Page 114
The date and time are indicated with x. (Camera) Item AF Mode Digital Zoom Date/time Setting xSingle / Monitor xSmart / Precision / Off Day&Time / Date / xOff Red Eye Reduction AF Illuminator Auto Review On / xOff xAuto / Off On / xOff Description Selects the focus operation mode (page 49). Also, the ... lighting (page 31). SET UP items Set the mode dial to superimpose the date or time onto the image (page 33). Selects the digital zoom mode (page 26). Selects whether to SET UP. You cannot shoot the next image during recording. Creates a folder for recording images ...
The date and time are indicated with x. (Camera) Item AF Mode Digital Zoom Date/time Setting xSingle / Monitor xSmart / Precision / Off Day&Time / Date / xOff Red Eye Reduction AF Illuminator Auto Review On / xOff xAuto / Off On / xOff Description Selects the focus operation mode (page 49). Also, the ... lighting (page 31). SET UP items Set the mode dial to superimpose the date or time onto the image (page 33). Selects the digital zoom mode (page 26). Selects whether to SET UP. You cannot shoot the next image during recording. Creates a folder for recording images ...

Operating Instructions
Page 126
... AF Mode 49 AF range finder frame 48 Aperture value 51 Auto adjustment mode 24 Auto Focus 25, 48 Auto power-off function 17 Auto Review 114 A/V connecting cable 39 B Battery life 15, 119 Battery remaining indicator 14 Beach mode 34 Beep/shutter sound 115 Burst 59 B&W 60 C Candle mode...to your computer 85, 86, 91, 93 Cutting movies 80 D Daylight 57 Daylight synchro 30 DC plug 16 Deleting movies 79 Deleting still images 41 Digital zoom 26 Divide 80 DPOF 69 E Enlarging an image 63 EV adjustment 54 F File names 87 File storage destinations 87 Finder 32 Flash Level 58...
... AF Mode 49 AF range finder frame 48 Aperture value 51 Auto adjustment mode 24 Auto Focus 25, 48 Auto power-off function 17 Auto Review 114 A/V connecting cable 39 B Battery life 15, 119 Battery remaining indicator 14 Beach mode 34 Beep/shutter sound 115 Burst 59 B&W 60 C Candle mode...to your computer 85, 86, 91, 93 Cutting movies 80 D Daylight 57 Daylight synchro 30 DC plug 16 Deleting movies 79 Deleting still images 41 Digital zoom 26 Divide 80 DPOF 69 E Enlarging an image 63 EV adjustment 54 F File names 87 File storage destinations 87 Finder 32 Flash Level 58...
Operating Instructions
Page 127
... 71 Picture effect 60 Picture Package 89 Playback zoom 63 Power on/off 17 Precautions 116 Precision digital zoom 27 Print (DPOF) mark 69 Program auto shooting 10 Protect 67 PTP 82, 93, 115 Q Quick Review 26 R Red Eye Reduction 31 Remaining shooting/viewing time 15, 109 RESET button 96 Resize 68...
... 71 Picture effect 60 Picture Package 89 Playback zoom 63 Power on/off 17 Precautions 116 Precision digital zoom 27 Print (DPOF) mark 69 Program auto shooting 10 Protect 67 PTP 82, 93, 115 Q Quick Review 26 R Red Eye Reduction 31 Remaining shooting/viewing time 15, 109 RESET button 96 Resize 68...
