Cyber-shot® Handbook
Page 76
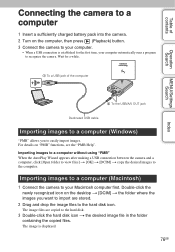
... established for a while. 1 To a USB jack of contents Operation Search MENU/Settings Search Index Connecting the camera to a computer 1 Insert a sufficiently charged battery pack into the camera. 2 Turn on the computer, then press (Playback) button. 3 Connect the camera to the computer. The image files are stored...containing the copied files. Importing images to a computer without using "PMB" When the AutoPlay Wizard appears after making a USB connection between the camera and a computer, click [Open folder to view files] t [OK] t [DCIM] t copy the desired images to your Macintosh...
... established for a while. 1 To a USB jack of contents Operation Search MENU/Settings Search Index Connecting the camera to a computer 1 Insert a sufficiently charged battery pack into the camera. 2 Turn on the computer, then press (Playback) button. 3 Connect the camera to the computer. The image files are stored...containing the copied files. Importing images to a computer without using "PMB" When the AutoPlay Wizard appears after making a USB connection between the camera and a computer, click [Open folder to view files] t [OK] t [DCIM] t copy the desired images to your Macintosh...
Cyber-shot® Handbook
Page 80
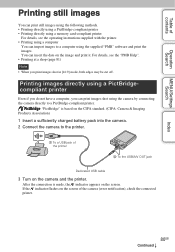
... a computer, you print images shot in [16:9] mode, both edges may be cut off. If the indicator flashes on the screen of the printer 2 To the USB/A/V OUT jack Dedicated USB cable 3 Turn on the CIPA standard. (CIPA: Camera & Imaging Products Association) 1 Insert a sufficiently charged battery pack into the camera. 2 Connect the camera to a PictBridge-compliant printer...
... a computer, you print images shot in [16:9] mode, both edges may be cut off. If the indicator flashes on the screen of the printer 2 To the USB/A/V OUT jack Dedicated USB cable 3 Turn on the CIPA standard. (CIPA: Camera & Imaging Products Association) 1 Insert a sufficiently charged battery pack into the camera. 2 Connect the camera to a PictBridge-compliant printer...
Cyber-shot® Handbook
Page 85
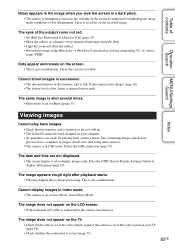
... brightening the image under conditions of your computer. • No guarantees are made for playing back, on this camera, files containing images which were shot using "PMB". Insert a charged battery pack. The image does not appear on a computer or images which were processed on the LCD screen.... the flash. • Light the room and shoot the subject. • Retouch the image using [Retouch] t [Red Eye Correction] in USB mode. Press the DISP (Screen Display Settings) button to image processing. Dots appear and remain on the recorded image. Delete unnecessary images (page ...
... brightening the image under conditions of your computer. • No guarantees are made for playing back, on this camera, files containing images which were shot using "PMB". Insert a charged battery pack. The image does not appear on a computer or images which were processed on the LCD screen.... the flash. • Light the room and shoot the subject. • Retouch the image using [Retouch] t [Red Eye Correction] in USB mode. Press the DISP (Screen Display Settings) button to image processing. Dots appear and remain on the recorded image. Delete unnecessary images (page ...
Cyber-shot® Handbook
Page 86
...interrupted by the camera, such as "101MSDCF". 86GB After making a USB connection, "PMB Portable" does not start automatically. • Make the USB connection after the computer is not supported, connect the camera to your computer without passing through a USB hub or other than Sony should contact those... Stick PRO Duo" media is low, insert the charged battery pack. • Set [USB Connect] to [Mass Storage] (page 62). • Use the dedicated USB cable (supplied). • Disconnect the dedicated USB cable from the USB connectors of contents Deleting Cannot delete an image. &#...
...interrupted by the camera, such as "101MSDCF". 86GB After making a USB connection, "PMB Portable" does not start automatically. • Make the USB connection after the computer is not supported, connect the camera to your computer without passing through a USB hub or other than Sony should contact those... Stick PRO Duo" media is low, insert the charged battery pack. • Set [USB Connect] to [Mass Storage] (page 62). • Use the dedicated USB cable (supplied). • Disconnect the dedicated USB cable from the USB connectors of contents Deleting Cannot delete an image. &#...


