
Operating Guide
Page 70
... movies are 2 ways to connect your camcorder to a computer. - Automatic Music Video Producer You can save pictures copied onto a computer to a CD-R as a backup. Save the images on CD-R You can easily create a short original video with a menu of "First Step Guide" on CD-ROM. USB Driver - ImageMixer VCD2 - For details on connection...
... movies are 2 ways to connect your camcorder to a computer. - Automatic Music Video Producer You can save pictures copied onto a computer to a CD-R as a backup. Save the images on CD-R You can easily create a short original video with a menu of "First Step Guide" on CD-ROM. USB Driver - ImageMixer VCD2 - For details on connection...
Operating Guide
Page 71
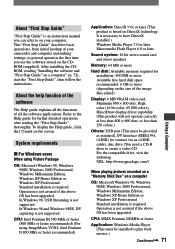
... Step Guide" describes basic operations, from initial hookup of your camcorder and computer and making settings, to general operation the first... (16 bit color, 65 000 colors), DirectDraw display driver capability (This product will not operate correctly at less than 800 × 600 dots, or less than 256 colors.) Others: USB port (This must be provided as standard), DV Interface...Application: DirectX 9.0c or later (This product is necessary to create a video CD. In Windows 98, USB Streaming is not assured if the above OS has been upgraded. CPU: Intel Pentium III 500 MHz or faster...
... Step Guide" describes basic operations, from initial hookup of your camcorder and computer and making settings, to general operation the first... (16 bit color, 65 000 colors), DirectDraw display driver capability (This product will not operate correctly at less than 800 × 600 dots, or less than 256 colors.) Others: USB port (This must be provided as standard), DV Interface...Application: DirectX 9.0c or later (This product is necessary to create a video CD. In Windows 98, USB Streaming is not assured if the above OS has been upgraded. CPU: Intel Pentium III 500 MHz or faster...
Operating Guide
Page 95
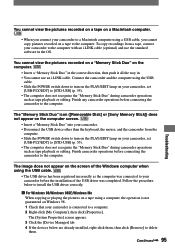
... icon ([Removable Disk] or [Sony Memory Stick]) does not appear on the computer screen. • Insert a "Memory Stick Duo" into your camcorder. • Disconnect the USB device other than the keyboard, the mouse, and the camcorder from a tape, connect your camcorder is not guaranteed on Windows 98.... You cannot use an i.LINK cable. Continued 95 The image does not appear on the screen of the USB driver was connected to your camcorder to a Macintosh computer using a USB cable, you cannot copy pictures recorded on a tape to a computer. 2 Right-click [My Computer], then click...
... icon ([Removable Disk] or [Sony Memory Stick]) does not appear on the computer screen. • Insert a "Memory Stick Duo" into your camcorder. • Disconnect the USB device other than the keyboard, the mouse, and the camcorder from a tape, connect your camcorder is not guaranteed on Windows 98.... You cannot use an i.LINK cable. Continued 95 The image does not appear on the screen of the USB driver was connected to your camcorder to a Macintosh computer using a USB cable, you cannot copy pictures recorded on a tape to a computer. 2 Right-click [My Computer], then click...
Operating Guide
Page 96
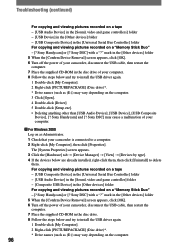
...] screen appears, click [OK]. 6 Turn off the power of your camcorder is connected to install the USB driver again. 1 Double-click [My Computer]. 2 Right-click [PICTUREPACKAGE] (Disc drive)*. * Drive names (such as (E:)) may vary depending on the computer. 96 Sony DSC] with a "?" Sony DSC] with a "?" Sony Handycam] or [? Troubleshooting (continued) For copying and viewing pictures recorded on...
...] screen appears, click [OK]. 6 Turn off the power of your camcorder is connected to install the USB driver again. 1 Double-click [My Computer]. 2 Right-click [PICTUREPACKAGE] (Disc drive)*. * Drive names (such as (E:)) may vary depending on the computer. 96 Sony DSC] with a "?" Sony DSC] with a "?" Sony Handycam] or [? Troubleshooting (continued) For copying and viewing pictures recorded on...
Operating Guide
Page 97
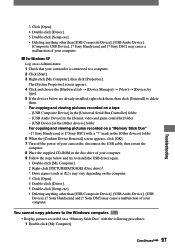
..." with a "?" Sony Handycam] and [? Continued 97 The [System Properties] screen appears. 4 Click and choose the [Hardware] tab [Device Manager] [View] [Devices by type]. 5 If the devices below and try to install the USB driver again. 1 Double-...Open]. 4 Double-click [Driver]. 5 Double-click [Setup.exe]. • Deleting anything other than [USB Composite Device], [USB Audio Device], [USB Device], [? Sony DSC] may cause a malfunction of your computer. For Windows XP Log on as (E:)) may cause a malfunction of your camcorder is connected to a ...
..." with a "?" Sony Handycam] and [? Continued 97 The [System Properties] screen appears. 4 Click and choose the [Hardware] tab [Device Manager] [View] [Devices by type]. 5 If the devices below and try to install the USB driver again. 1 Double-...Open]. 4 Double-click [Driver]. 5 Double-click [Setup.exe]. • Deleting anything other than [USB Composite Device], [USB Audio Device], [USB Device], [? Sony DSC] may cause a malfunction of your computer. For Windows XP Log on as (E:)) may cause a malfunction of your camcorder is connected to a ...

Operating Guide
Page 98
... screen of your camcorder first. Troubleshooting (continued) 2 Double-click the icon for Windows XP) [Picture Package] [Handycam Tools] [USB Streaming Tool]. 2 Select another lamp. If the computer does not recognize it, the USB driver may take some ... the newly recognized drive [Removable Disk (F:)] (For Windows XP, [Sony Memory Stick]). Disconnect the USB cable from your camcorder. • You cannot start Easy Handycam with USB connected] or [Cannot cancel Easy Handycam with USB connected] appears on -screen instructions, click [Next], then click [Done...
... screen of your camcorder first. Troubleshooting (continued) 2 Double-click the icon for Windows XP) [Picture Package] [Handycam Tools] [USB Streaming Tool]. 2 Select another lamp. If the computer does not recognize it, the USB driver may take some ... the newly recognized drive [Removable Disk (F:)] (For Windows XP, [Sony Memory Stick]). Disconnect the USB cable from your camcorder. • You cannot start Easy Handycam with USB connected] or [Cannot cancel Easy Handycam with USB connected] appears on -screen instructions, click [Next], then click [Done...


