

Operation Guide
Page 1
Digital Video Camera Recorder Operating Guide DCR-DVD7E 2-597-463-11 (1) Enjoying your DVD Handycam 10 Getting Started 16 Easy Handycam 25 Recording/ Playback 30 Playback on DVD devices 40 Using the recorded disc 46 Using the Setup items 48 Editing on DVD Handycam 66 Dubbing 72 Using a Computer 75 Troubleshooting 80 Additional Information 97 © 2005 Sony Corporation
Digital Video Camera Recorder Operating Guide DCR-DVD7E 2-597-463-11 (1) Enjoying your DVD Handycam 10 Getting Started 16 Easy Handycam 25 Recording/ Playback 30 Playback on DVD devices 40 Using the recorded disc 46 Using the Setup items 48 Editing on DVD Handycam 66 Dubbing 72 Using a Computer 75 Troubleshooting 80 Additional Information 97 © 2005 Sony Corporation

Operation Guide
Page 4
...the camera near a window or outdoors. • If you apply mechanical shock to a malfunction of the sun only in Germany, and Sony Corporation, and produces superior images. Take pictures of the camcorder, storage media, etc. • TV color systems differ depending on the ... under the current recording or playback conditions. • The LCD screen is no risk that appear constantly on your camcorder. Use a DVD-RW/DVD+RW (not supplied) for trial recording (p. 13). • Compensation for illustrating the operating procedures. Unauthorized recording of light from what you...
...the camera near a window or outdoors. • If you apply mechanical shock to a malfunction of the sun only in Germany, and Sony Corporation, and produces superior images. Take pictures of the camcorder, storage media, etc. • TV color systems differ depending on the ... under the current recording or playback conditions. • The LCD screen is no risk that appear constantly on your camcorder. Use a DVD-RW/DVD+RW (not supplied) for trial recording (p. 13). • Compensation for illustrating the operating procedures. Unauthorized recording of light from what you...
Operation Guide
Page 5
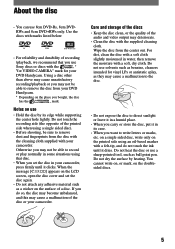
... to record or play normally in some situations using an oil-based marker with your camcorder, press firmly until it dries. If you use Sony discs or discs with a soft, dry cloth. Do not use • Hold the disc by heating. Do not touch the recording side (the opposite of... the disc in your camcorder. For dirt, clean the disc with the supplied cleaning cloth. Do not heat the disc or use 8cm DVD-Rs, 8cm DVDRWs and 8cm DVD+RWs only. Use the discs with marks listed below. • For reliability and durability of recording /playback, we recommend that disc. •...
... to record or play normally in some situations using an oil-based marker with your camcorder, press firmly until it dries. If you use Sony discs or discs with a soft, dry cloth. Do not use • Hold the disc by heating. Do not touch the recording side (the opposite of... the disc in your camcorder. For dirt, clean the disc with the supplied cleaning cloth. Do not heat the disc or use 8cm DVD-Rs, 8cm DVDRWs and 8cm DVD+RWs only. Use the discs with marks listed below. • For reliability and durability of recording /playback, we recommend that disc. •...
Operation Guide
Page 6
... date and time 22 Step 6: Inserting a disc 23 Easy Handycam - Table of Contents Enjoying your DVD Handycam What you can do with ease 27 Preparation for playing back on , and holding your DVD Handycam 10 Choosing a disc 13 Getting Started Step 1: Checking supplied items 16 Step 2: Charging the ...battery pack 17 Step 3: Turning the power on a DVD player (Finalizing 28 Recording/Playback Recording 30 Playback 31 Functions used for recording/playback, etc 32 Recording To zoom To adjust the exposure for...
... date and time 22 Step 6: Inserting a disc 23 Easy Handycam - Table of Contents Enjoying your DVD Handycam What you can do with ease 27 Preparation for playing back on , and holding your DVD Handycam 10 Choosing a disc 13 Getting Started Step 1: Checking supplied items 16 Step 2: Charging the ...battery pack 17 Step 3: Turning the power on a DVD player (Finalizing 28 Recording/Playback Recording 30 Playback 31 Functions used for recording/playback, etc 32 Recording To zoom To adjust the exposure for...

Operation Guide
Page 7
... 37 Playing the picture on a TV 38 Playback on DVD devices Making the disc compatible with DVD players or DVD drives (Finalizing 40 Playing back a disc on DVD players, etc 44 Playing back a disc on a computer with a DVD drive installed 44 Using the recorded disc (DVD-RW/DVD+RW) Recording additional scenes after finalizing 46 Deleting...
... 37 Playing the picture on a TV 38 Playback on DVD devices Making the disc compatible with DVD players or DVD drives (Finalizing 40 Playing back a disc on DVD players, etc 44 Playing back a disc on a computer with a DVD drive installed 44 Using the recorded disc (DVD-RW/DVD+RW) Recording additional scenes after finalizing 46 Deleting...

Operation Guide
Page 8
... settings (REC MODE/LCD SET/USB SPEED, etc.) TIME/LANGU 63 (CLOCK SET/AREA SET/LANGUAGE, etc.) Customizing Personal Menu 64 Editing on DVD Handycam (DVD-RW: VR mode) Editing the original data 66 Creating the Playlist 68 Playing the Playlist 71 Dubbing Connecting to a VCR or TV 72 Jacks ...to connect external devices Dubbing to VCR/DVD devices 73 Recording images from a TV or VCR/DVD device 74 Using a computer Before referring to the "First Step Guide" on your computer 75 Installing the software 76 Viewing ...
... settings (REC MODE/LCD SET/USB SPEED, etc.) TIME/LANGU 63 (CLOCK SET/AREA SET/LANGUAGE, etc.) Customizing Personal Menu 64 Editing on DVD Handycam (DVD-RW: VR mode) Editing the original data 66 Creating the Playlist 68 Playing the Playlist 71 Dubbing Connecting to a VCR or TV 72 Jacks ...to connect external devices Dubbing to VCR/DVD devices 73 Recording images from a TV or VCR/DVD device 74 Using a computer Before referring to the "First Step Guide" on your computer 75 Installing the software 76 Viewing ...

Operation Guide
Page 10
... Slide show plays back still images, one after another You can play back still images one after another using this index (p. 27, 31). Enjoying your DVD Handycam What you finalize** the disc (p. 28, 40). A VISUAL INDEX screen shows the disc contents at a glance Movies and still images are... are recorded on the same disc. You can find the desired scene quickly using the Slide show on a DVD player if you can enjoy your DVD Handycam Your DVD Handycam records images on DVD players (Finalize** the disc) 10 (p. 16) (p. 26, 30) (p. 27, 31) (p. 28, 40) You can also ...
... Slide show plays back still images, one after another You can play back still images one after another using this index (p. 27, 31). Enjoying your DVD Handycam What you finalize** the disc (p. 28, 40). A VISUAL INDEX screen shows the disc contents at a glance Movies and still images are... are recorded on the same disc. You can find the desired scene quickly using the Slide show on a DVD player if you can enjoy your DVD Handycam Your DVD Handycam records images on DVD players (Finalize** the disc) 10 (p. 16) (p. 26, 30) (p. 27, 31) (p. 28, 40) You can also ...
Operation Guide
Page 11
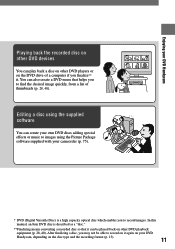
... format (p. 13). 11 In this manual, an 8cm DVD disc is a high capacity optical disc which enables you to record images. Enjoying your DVD Handycam Playing back the recorded disc on other DVD devices You can create your own DVD discs adding special effects or music to images using the ...supplied software You can play back a disc on other DVD players or on the DVD drive of thumbnails (p. 28, 40). You can be able to record on it can also create a DVD menu that it again on your camcorder (p. 75). * DVD (Digital Versatile Disc) is described as a "disc." **Finalizing means...
... format (p. 13). 11 In this manual, an 8cm DVD disc is a high capacity optical disc which enables you to record images. Enjoying your DVD Handycam Playing back the recorded disc on other DVD devices You can create your own DVD discs adding special effects or music to images using the ...supplied software You can play back a disc on other DVD players or on the DVD drive of thumbnails (p. 28, 40). You can be able to record on it can also create a DVD menu that it again on your camcorder (p. 75). * DVD (Digital Versatile Disc) is described as a "disc." **Finalizing means...

Operation Guide
Page 12
If your DVD Handycam to adjust the bit rate 12 (recording capacity per a certain time) automatically in less time than normal. * VBR stands for Variable Bit Rate. This ...-Speed USB (USB2.0), you can transfer data at high speed You can record images on a disc utilizing the disc capacity more space to your DVD Handycam (continued) DVD functions different from those of the recorded scenes. Transferring data to record clear images on the disc automatically. Therefore, you can start recording and...
If your DVD Handycam to adjust the bit rate 12 (recording capacity per a certain time) automatically in less time than normal. * VBR stands for Variable Bit Rate. This ...-Speed USB (USB2.0), you can transfer data at high speed You can record images on a disc utilizing the disc capacity more space to your DVD Handycam (continued) DVD functions different from those of the recorded scenes. Transferring data to record clear images on the disc automatically. Therefore, you can start recording and...

Operation Guide
Page 13
...full, if you format* it , the Differences in the recording format on the place you can play back the disc with a DVD player that you bought it . • Use Sony disc or discs with other players. (Video Recording mode) enables you to edit, such as deleting or dividing scenes, the material... you playback the DVD+RW recorded in your DVD Handycam are as follows. Also, formatting removes all images data from VIDEO mode or...
...full, if you format* it , the Differences in the recording format on the place you can play back the disc with a DVD player that you bought it . • Use Sony disc or discs with other players. (Video Recording mode) enables you to edit, such as deleting or dividing scenes, the material... you playback the DVD+RW recorded in your DVD Handycam are as follows. Also, formatting removes all images data from VIDEO mode or...

Operation Guide
Page 14
...asking you if you do with your computer. What you can do not finalize the disc 1) (40) - - - 2) Creating the DVD menu when you finalize the disc (41) - Recording additional scenes after finalizing the disc (46) - &#...57864; 3) 4) Using the disc repeatedly by Sony DVD Handycam are designed to record additional material appears (p. 46). 14 Transferring recorded scenes to the disc? Choosing a disc (continued) Do the ...
...asking you if you do with your computer. What you can do not finalize the disc 1) (40) - - - 2) Creating the DVD menu when you finalize the disc (41) - Recording additional scenes after finalizing the disc (46) - &#...57864; 3) 4) Using the disc repeatedly by Sony DVD Handycam are designed to record additional material appears (p. 46). 14 Transferring recorded scenes to the disc? Choosing a disc (continued) Do the ...

Operation Guide
Page 15
Yes. I want to use the disc repeatedly? And, I want to play back the disc on various DVD playback devices. I want to play back the disc on various DVD playback devices. Now, enjoy your purpose. Enjoying your DVD Handycam How to choose a disc The figure below helps you to choose the best disc for... your DVD Handycam. 15 And, I record them. What do you want to do not want to delete images once I want to play back the disc without fi...
Yes. I want to use the disc repeatedly? And, I want to play back the disc on various DVD playback devices. I want to play back the disc on various DVD playback devices. Now, enjoy your purpose. Enjoying your DVD Handycam How to choose a disc The figure below helps you to choose the best disc for... your DVD Handycam. 15 And, I record them. What do you want to do not want to delete images once I want to play back the disc without fi...

Operation Guide
Page 16
Step 1: Checking supplied items Make sure that item supplied. 8cm DVD-R DMR30 (1) (p. 13) Wrist strap (1) How to attach the wrist strap AC Adaptor (1) (p. 17) Stand (1) How to place your camcorder. Cleaning cloth (1) LCD protective sheet (2) (p. 102) ...
Step 1: Checking supplied items Make sure that item supplied. 8cm DVD-R DMR30 (1) (p. 13) Wrist strap (1) How to attach the wrist strap AC Adaptor (1) (p. 17) Stand (1) How to place your camcorder. Cleaning cloth (1) LCD protective sheet (2) (p. 102) ...

Operation Guide
Page 20
Step 3: Turning the power on, and holding your camcorder To record or play back, slide the POWER switch to edit them (DVD-RW: VR mode only) 1 Open the lens cover. When you leave your camcorder without any operation attempted for approximately 5 minutes to OFF (CHG). • At ...
Step 3: Turning the power on, and holding your camcorder To record or play back, slide the POWER switch to edit them (DVD-RW: VR mode only) 1 Open the lens cover. When you leave your camcorder without any operation attempted for approximately 5 minutes to OFF (CHG). • At ...

Operation Guide
Page 23
... obstruct the opening melody sounds once, and the camcorder beeps. When the disc cover opens slightly, open it clicks. Step 6: Inserting a disc A new 8 cm DVD-R, DVD-RW, or DVD+RW is on the LCD screen. This may cause your camcorder to malfunction. 3 Set the disc with your camcorder, then press the center of...
... obstruct the opening melody sounds once, and the camcorder beeps. When the disc cover opens slightly, open it clicks. Step 6: Inserting a disc A new 8 cm DVD-R, DVD-RW, or DVD+RW is on the LCD screen. This may cause your camcorder to malfunction. 3 Set the disc with your camcorder, then press the center of...

Operation Guide
Page 24
...date you started to use it again to malfunction. • After your camcorder (p. 66). To remove the disc Perform steps 1 and 2 to step 5. DVD+RW The [FORMAT] screen appears. The information on previously recorded areas may not be played back only on the LCD screen. • If you close... VR mode You can be displayed correctly depending on the condition of the disc. • To delete all of the previously recorded pictures from a DVD-RW/DVD+RW, then to steps after [DISC ACCESS] disappears from the LCD screen. Proceed to open the disc cover, then remove the disc. If not...
...date you started to use it again to malfunction. • After your camcorder (p. 66). To remove the disc Perform steps 1 and 2 to step 5. DVD+RW The [FORMAT] screen appears. The information on previously recorded areas may not be played back only on the LCD screen. • If you close... VR mode You can be displayed correctly depending on the condition of the disc. • To delete all of the previously recorded pictures from a DVD-RW/DVD+RW, then to steps after [DISC ACCESS] disappears from the LCD screen. Proceed to open the disc cover, then remove the disc. If not...

Operation Guide
Page 25
... (p. 50). • If you cannot use the Easy Handycam operation, go to 23) before operation. • When inserting a new DVD-RW, it will be formatted in VIDEO mode. • When using a DVD-RW disc formatted in the center. Complete the preparations described in steps 1 to 6 (p. 16 to page 30. 1 Turn on the...
... (p. 50). • If you cannot use the Easy Handycam operation, go to 23) before operation. • When inserting a new DVD-RW, it will be formatted in VIDEO mode. • When using a DVD-RW disc formatted in the center. Complete the preparations described in steps 1 to 6 (p. 16 to page 30. 1 Turn on the...

Operation Guide
Page 28
... (p. 42). Cancel Easy Handycam operation, then follow the steps on the disc during finalizing. 2 Turn on page 23 for playing back on a DVD player (Finalizing) With Easy Handycam operation, your camcorder from running out of power during Easy Handycam operation. Connect the AC Adaptor to customize the settings ...disc to be overwritten once you finalize it even when there is off, press EASY to set the Easy Handycam operation to prevent your DVD Handycam sets up . When the EASY lamp is space to play back still images on your camcorder and make sure the EASY lamp lights ...
... (p. 42). Cancel Easy Handycam operation, then follow the steps on the disc during finalizing. 2 Turn on page 23 for playing back on a DVD player (Finalizing) With Easy Handycam operation, your camcorder from running out of power during Easy Handycam operation. Connect the AC Adaptor to customize the settings ...disc to be overwritten once you finalize it even when there is off, press EASY to set the Easy Handycam operation to prevent your DVD Handycam sets up . When the EASY lamp is space to play back still images on your camcorder and make sure the EASY lamp lights ...

Operation Guide
Page 29
...Do not apply shock or vibration to your camcorder. Refer also to record in VR mode, format the disc after playback (format) (DVD-RW:VIDEO mode/DVD+RW) If you format the disc, the disc recovers the used capacity and is reusable for finalizing. 5 Remove the disc ... the LCD screen in the following steps. [SETUP] [FORMAT] [YES] [YES] 29 Enjoy watching images on the DVD player, etc. If you delete it takes for recording thereafter. Touch the LCD screen in the following steps. Touch Touch Touch ...
...Do not apply shock or vibration to your camcorder. Refer also to record in VR mode, format the disc after playback (format) (DVD-RW:VIDEO mode/DVD+RW) If you format the disc, the disc recovers the used capacity and is reusable for finalizing. 5 Remove the disc ... the LCD screen in the following steps. [SETUP] [FORMAT] [YES] [YES] 29 Enjoy watching images on the DVD player, etc. If you delete it takes for recording thereafter. Touch the LCD screen in the following steps. Touch Touch Touch ...

Operation Guide
Page 31
Playback 1 Slide the POWER switch repeatedly to light up the The VISUAL INDEX screen appears on other DVD devices See page 40. 31 Previous/Next P-MENU Go to the VISUAL INDEX screen • Touch / during pause to play back movie slowly. •... One touch makes the reverse/fast forward approximately 5 times faster, 2 touches makes it approximately 10 times* faster. * Approx. 8 times faster for a DVD+RW • When you touch a movie marked with [VOLUME], then adjust / . • If you Next scene touch scene Still Images Touch the Still image...
Playback 1 Slide the POWER switch repeatedly to light up the The VISUAL INDEX screen appears on other DVD devices See page 40. 31 Previous/Next P-MENU Go to the VISUAL INDEX screen • Touch / during pause to play back movie slowly. •... One touch makes the reverse/fast forward approximately 5 times faster, 2 touches makes it approximately 10 times* faster. * Approx. 8 times faster for a DVD+RW • When you touch a movie marked with [VOLUME], then adjust / . • If you Next scene touch scene Still Images Touch the Still image...


