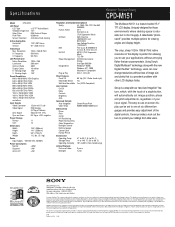
Operating Instructions (primary manual)
Page 2
... concerne les fréquences très basses (VLF) et extrêmement basses (ELF). INFORMATION This product complies with Part 15 of the unit. Hinweis Dieses Gerät erfüllt bezüglich tieffrequenter (very low frequency) und tiefstfrequenter (...Minimum 7 A, 125 V As an ENERGY STAR Partner, Sony Corporation has determined that any interference received, including interference that may cause harmful interference to Part 15 of Conformity Trade Name: Sony Model No.: CPD-M151 Responsible Party: Sony Electronics Inc. Refer to rain or moisture. This equipment generates...
Operating Instructions (primary manual)
Page 3
S. TABLE OF CONTENTS Getting Started Getting Started Precautions ...4 Identifying Parts and Controls 5 Setup ...6 Turning on the Monitor and Computer 10 Customizing Your Monitor Introducing the On-Screen Display System 11 Selecting the On-Screen Display ...
Operating Instructions (primary manual)
Page 5
.... 5 +/- (adjust) buttons (pages 13 - 17) Adjusts the selected menu item. 6 AUTO button (page 12) When the signal from the AC adaptor. Getting StarGteedtting Started Identifying Parts and Controls See the pages in power saving mode. supplied). You also should press this monitor, press the AUTO button to automatically adjust the picture...
Operating Instructions (primary manual)
Page 8
... screw to place under the LCD panel 1 Remove the screws from the fixing shaft of the AC adapter cord 2 Press the rear cover against the part for attaching the cover. Getting Started Step 3: Attaching the rear cover After connecting the computer and power cord, attach the supplied rear cover. Make sure...
Operating Instructions (primary manual)
Page 9
Align the marking tape of the AC adapter cord to the bottom of the AC adapter cord 5 Press the rear cover against the part for attaching the cover. Clamp Marking tape of the F monitor. Unlocked Locked GB 7 Attach the rubber pads to the clamp, wind it once and close the clamp. 3 Connect the video signal cable and AC adapter cord to fasten the rear cover. 4 Clamp the AC adapter cord. ES I Peel off 9 Getting StarGteedtting Started 6 Turn the screw to the monitor. D After attaching the rubberpads, which prevent slipping, stand the monitor up.
Operating Instructions (primary manual)
Page 11
... button again. 11 Adjust the phase when the characters or pictures appear fuzzy throughout the entire screen. COLOR Displays the COLOR OSD for at some parts of the screen. Selecting the On-Screen Display Language You can adjust settings such as the backlight, OSD position, power saving delay time and control...
Operating Instructions (primary manual)
Page 12
... the center of "Eliminating Flickering or Blurring Manually" to match the signal from the connected computer. Eliminating Flickering or Blurring Manually If a part of the screen. If this case, do steps 1 to 3 of the screen even after you press the AUTO button Adjust using the...Turn on the monitor. 2 Turn on the computer. 2 Load the Utility Disk. The MENU OSD appears. For Macintosh Click [Utility Disk] n [SONY-Utility]. 4 Press the MENU button. For Windows 95/98 Windows Monitor Information Disk/Utility Disk For Macintosh Macintosh Utility Disk 3 Start the Utility Disk and...
Marketing Specifications
Page 2
Specifications Model CPD-M151 LCD Panel LCD Type Viewable Image Size Color Filters Pixel Pitch Screen Treatment a-Si TFT Active Matrix 15.1" RGB Vertical Stripes 0.300mm Anti-Glare/Hard ...