Operating Instructions
Page 4
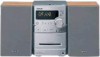
... indicated in the text, for the logical format of discs Audio CDs Disc logo CD-R/CD-RW (audio data/MP3 files) Discs that has the adhesive, cellophane tape, or a sticker still left on this system. A Multi Session CD is used for model CMT-NEZ5 and CMT-NEZ3. How to use this manual • The instructions in... Multi Session** • A disc that enables adding of a session. 4GB For Joliet in the expansion format (file and folder names can be performed using the remote, but the same operations can be played back.
... indicated in the text, for the logical format of discs Audio CDs Disc logo CD-R/CD-RW (audio data/MP3 files) Discs that has the adhesive, cellophane tape, or a sticker still left on this system. A Multi Session CD is used for model CMT-NEZ5 and CMT-NEZ3. How to use this manual • The instructions in... Multi Session** • A disc that enables adding of a session. 4GB For Joliet in the expansion format (file and folder names can be performed using the remote, but the same operations can be played back.

Operating Instructions
Page 18
... indication flashes. 5 Set the time to AUDIO IN jack as the setting is on about 15 seconds before the preset time). • If the system is not canceled manually. or > repeatedly...2 Press . or > repeatedly until the desired sound source appears. Make sure you use the optional component connected to start time, the stop playing following the same procedure as follows: t TUNER y CD ...8 Press ENTER. Press . Start over from the time the system turns on until "OFF" appears, then press ENTER. Use buttons on the remote for Play Timer. • You cannot activate the Play Timer...
... indication flashes. 5 Set the time to AUDIO IN jack as the setting is on about 15 seconds before the preset time). • If the system is not canceled manually. or > repeatedly...2 Press . or > repeatedly until the desired sound source appears. Make sure you use the optional component connected to start time, the stop playing following the same procedure as follows: t TUNER y CD ...8 Press ENTER. Press . Start over from the time the system turns on until "OFF" appears, then press ENTER. Use buttons on the remote for Play Timer. • You cannot activate the Play Timer...
Operating Instructions
Page 22
...8226; Move the remote closer to wall outlet. The system can not be set correctly. • Are the + and - After STANDBY indicator stops flashing, reconnect the power cord and turn VOLUME control on the system. If the problem persists after checking all the above , consult your nearest Sony dealer. 22GB ...General "- -:- -" appears in the display (pages 18 and 19). • Check the timer setting and set the correct time (pages 18 and 19). • Cancel the Sleep Timer Function (page 17). • Make sure the clock is no audio output during...
...8226; Move the remote closer to wall outlet. The system can not be set correctly. • Are the + and - After STANDBY indicator stops flashing, reconnect the power cord and turn VOLUME control on the system. If the problem persists after checking all the above , consult your nearest Sony dealer. 22GB ...General "- -:- -" appears in the display (pages 18 and 19). • Check the timer setting and set the correct time (pages 18 and 19). • Cancel the Sleep Timer Function (page 17). • Make sure the clock is no audio output during...


