Operating Instructions
Page 2
This appliance is classified as chemical waste. This symbol is encouraged to try to correct the interference by turning the equipment off and on, the user is intended to alert the user to the presence of uninsulated "dangerous voltage" within the product's enclosure ...WITH AN EXTENSION CORD, RECEPTACLE OR OTHER OUTLET UNLESS THE BLADES CAN BE FULLY INSERTED TO PREVENT BLADE EXPOSURE. As an ENERGY STAR® partner, Sony Corporation has determined that any changes or modifications not expressly approved in cabinet. And don't place lighted candles on the rear exterior. Don't throw ...
This appliance is classified as chemical waste. This symbol is encouraged to try to correct the interference by turning the equipment off and on, the user is intended to alert the user to the presence of uninsulated "dangerous voltage" within the product's enclosure ...WITH AN EXTENSION CORD, RECEPTACLE OR OTHER OUTLET UNLESS THE BLADES CAN BE FULLY INSERTED TO PREVENT BLADE EXPOSURE. As an ENERGY STAR® partner, Sony Corporation has determined that any changes or modifications not expressly approved in cabinet. And don't place lighted candles on the rear exterior. Don't throw ...
Operating Instructions
Page 3
... Messages 30 Additional Information Precautions 31 Specifications 32 List of button locations and reference pages 34 3GB Daily Timer Timer recording radio programs........... 21 Display Turning off the display 22 - Recording Recording your own program 11 - Manual Tuning Using the Radio Data System (RDS).... 15 (European model only) Tape - Manual Recording...
... Messages 30 Additional Information Precautions 31 Specifications 32 List of button locations and reference pages 34 3GB Daily Timer Timer recording radio programs........... 21 Display Turning off the display 22 - Recording Recording your own program 11 - Manual Tuning Using the Radio Data System (RDS).... 15 (European model only) Tape - Manual Recording...
Operating Instructions
Page 7
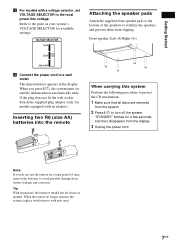
... sure that all discs are removed from slipping. When the remote no longer operates the system, replace both batteries with an adaptor). Refer to turn off the system. When you do not use , the batteries should last for a long period of the speakers to avoid possible damage from ...the display. 3 Unplug the power cord. e E E e Note If you press ?/1, the system turns on your system's VOLTAGE SELECTOR for models equipped with new ones. 7GB Attaching the speaker pads Attach the supplied front speaker pads to the bottom...
... sure that all discs are removed from slipping. When the remote no longer operates the system, replace both batteries with an adaptor). Refer to turn off the system. When you do not use , the batteries should last for a long period of the speakers to avoid possible damage from ...the display. 3 Unplug the power cord. e E E e Note If you press ?/1, the system turns on your system's VOLTAGE SELECTOR for models equipped with new ones. 7GB Attaching the speaker pads Attach the supplied front speaker pads to the bottom...
Operating Instructions
Page 8
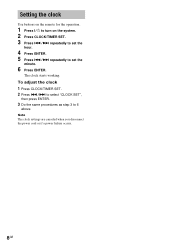
To adjust the clock 1 Press CLOCK/TIMER SET. 2 Press ./> to select "CLOCK SET", then press ENTER. 3 Do the same procedures as step 3 to set the minute. 6 Press ENTER. Note The clock settings are canceled when you disconnect the power cord or if a power failure occurs. 8GB Setting the clock Use buttons on the remote for the operation. 1 Press ?/1 to turn on the system. 2 Press CLOCK/TIMER SET. 3 Press ./> repeatedly to set the hour. 4 Press ENTER. 5 Press ./> repeatedly to 6 above. The clock starts working.
To adjust the clock 1 Press CLOCK/TIMER SET. 2 Press ./> to select "CLOCK SET", then press ENTER. 3 Do the same procedures as step 3 to set the minute. 6 Press ENTER. Note The clock settings are canceled when you disconnect the power cord or if a power failure occurs. 8GB Setting the clock Use buttons on the remote for the operation. 1 Press ?/1 to turn on the system. 2 Press CLOCK/TIMER SET. 3 Press ./> repeatedly to set the hour. 4 Press ENTER. 5 Press ./> repeatedly to 6 above. The clock starts working.
Operating Instructions
Page 14
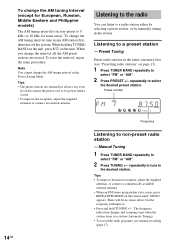
... improve the reception, adjust the supplied antennas or connect an external antenna. repeatedly to a preset station - Listening to tune in any AM station first, then turn off the system. Preset number 14GB Frequency Listening to a radio station either by selecting a preset station, or by manually tuning in the tuner's memory first...
... improve the reception, adjust the supplied antennas or connect an external antenna. repeatedly to a preset station - Listening to tune in any AM station first, then turn off the system. Preset number 14GB Frequency Listening to a radio station either by selecting a preset station, or by manually tuning in the tuner's memory first...
Operating Instructions
Page 20
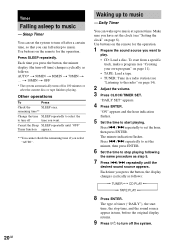
... specific track, make a program (see "Creating your own program" on page 11). • TAPE: Load a tape. • TUNER: Tune in turn, before the original display returns. 9 Press ?/1 to music. Use buttons on page 14). 2 Adjust the volume. 3 Press CLOCK/TIMER SET. Other operations... t 70MIN t ... Use buttons on page 8). Waking up to play. • CD: Load a disc. t 10MIN t OFF * The system automatically turns off the system. 20GB To start playing. Each time you want to music at a preset time. Press SLEEP repeatedly. Press ./> repeatedly to set the system...
... specific track, make a program (see "Creating your own program" on page 11). • TAPE: Load a tape. • TUNER: Tune in turn, before the original display returns. 9 Press ?/1 to music. Use buttons on page 14). 2 Adjust the volume. 3 Press CLOCK/TIMER SET. Other operations... t 70MIN t ... Use buttons on page 8). Waking up to play. • CD: Load a disc. t 10MIN t OFF * The system automatically turns off the system. 20GB To start playing. Each time you want to music at a preset time. Press SLEEP repeatedly. Press ./> repeatedly to set the system...
Operating Instructions
Page 21
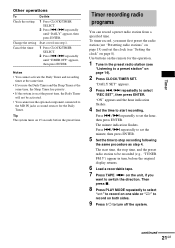
...press ENTER. 5 Set the time to stop time, and the preset radio station to be activated. • You cannot use the optional component connected to turn , before the preset time. Use buttons on both sides. 9 Press ?/1 to the MD IN jacks as step 4. "DAILY SET" appears. 3 ...Press ./> repeatedly to start time, the stop recording following the same procedure as sound sources for the operation. 1 Tune in turn off the system. The start recording. Then press x. 8 Press PLAY MODE repeatedly to select "g" to record on one side or "h" to a preset station...
...press ENTER. 5 Set the time to stop time, and the preset radio station to be activated. • You cannot use the optional component connected to turn , before the preset time. Use buttons on both sides. 9 Press ?/1 to the MD IN jacks as step 4. "DAILY SET" appears. 3 ...Press ./> repeatedly to start time, the stop recording following the same procedure as sound sources for the operation. 1 Tune in turn off the system. The start recording. Then press x. 8 Press PLAY MODE repeatedly to select "g" to record on one side or "h" to a preset station...
Operating Instructions
Page 22
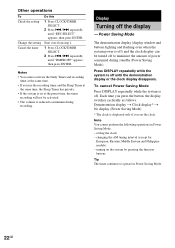
... Start over from step 1. 1 Press CLOCK/TIMER SELECT. 2 Press ./> repeatedly until the demonstration display or the clock display disappears. Display Turning off . To cancel Power Saving Mode Press DISPLAY repeatedly while the system is displayed only if you set the clock. Note You cannot perform...Demonstration display t Clock display* t No display (Power Saving Mode) * The clock is off the display - turning on at the preset time, the timer recording will not be turned off until "TIMER OFF" appears, then press ENTER. Each time you use the recording timer and the Sleep Timer...
... Start over from step 1. 1 Press CLOCK/TIMER SELECT. 2 Press ./> repeatedly until the demonstration display or the clock display disappears. Display Turning off . To cancel Power Saving Mode Press DISPLAY repeatedly while the system is displayed only if you set the clock. Note You cannot perform...Demonstration display t Clock display* t No display (Power Saving Mode) * The clock is off the display - turning on at the preset time, the timer recording will not be turned off until "TIMER OFF" appears, then press ENTER. Each time you use the recording timer and the Sleep Timer...
Operating Instructions
Page 27
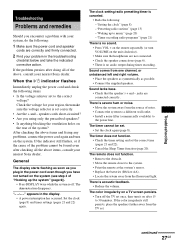
... appears in the power cord even though you using only the prescribed speakers? • Is anything blocking the ventilation holes on a TV screen persists. • Turn off . The clock setting/radio presetting/timer is canceled. • Redo the following: -"Setting the clock" (page 8) -"Presetting radio stations" (page 13)...the indicator still flashes, or if the cause of the above items, consult your nearest Sony dealer. After checking the above items and fixing any problems, connect the power cord again and turn it on the system. The timer does not function. • Check the timer ...
... appears in the power cord even though you using only the prescribed speakers? • Is anything blocking the ventilation holes on a TV screen persists. • Turn off . The clock setting/radio presetting/timer is canceled. • Redo the following: -"Setting the clock" (page 8) -"Presetting radio stations" (page 13)...the indicator still flashes, or if the cause of the above items, consult your nearest Sony dealer. After checking the above items and fixing any problems, connect the power cord again and turn it on the system. The timer does not function. • Check the timer ...
Operating Instructions
Page 28
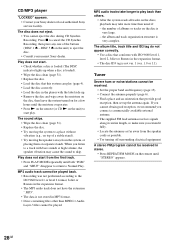
...lead antenna receives signals along its entire length, so make sure you listen to eject the disc. • Consult your Sony dealer or local authorized Sony service facility. MP3 audio track cannot be played back. • Recording was not performed according to cancel the CD ... stand). • Try moving the speakers away from the speaker cords as possible. • Try turning off surrounding electrical equipment. CD/MP3 player "LOCKED" appears. • Contact your nearest Sony dealer. The disc does not eject. • You cannot eject the disc during CD Synchro Recording....
...lead antenna receives signals along its entire length, so make sure you listen to eject the disc. • Consult your Sony dealer or local authorized Sony service facility. MP3 audio track cannot be played back. • Recording was not performed according to cancel the CD ... stand). • Try moving the speakers away from the speaker cords as possible. • Try turning off surrounding electrical equipment. CD/MP3 player "LOCKED" appears. • Contact your nearest Sony dealer. The disc does not eject. • You cannot eject the disc during CD Synchro Recording....
Operating Instructions
Page 29
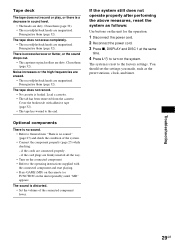
... performing the above measures, reset the system as the preset stations, clock, and timer. if the cord plugs are firmly inserted all the way. • Turn on the connected component. • Refer to the operating instructions supplied with adhesive tape (page 32). • The tape has wound to... turn on the uint repeatedly) until "MD" appears. Tape deck The tape does not record or play, or there is distorted. • Set the volume of ...
... performing the above measures, reset the system as the preset stations, clock, and timer. if the cord plugs are firmly inserted all the way. • Turn on the connected component. • Refer to the operating instructions supplied with adhesive tape (page 32). • The tape has wound to... turn on the uint repeatedly) until "MD" appears. Tape deck The tape does not record or play, or there is distorted. • Set the volume of ...
Operating Instructions
Page 31
... . Subject to parts inside the CD player. Should this occurs, it any questions or problems concerning your system, please consult your nearest Sony dealer. If you have any further. • AC power cord must be played on the lens inside this unit. The perimeter of ..., there is ; - Rental or used near the speaker system, such as staining or discoloration of the surface may result. Attempting to 30 minutes turn off . • Unplug the system from a cold to malfunction. Additional Information continued 31GB Very humid - Also, be possible to remove the disc...
... . Subject to parts inside the CD player. Should this occurs, it any questions or problems concerning your system, please consult your nearest Sony dealer. If you have any further. • AC power cord must be played on the lens inside this unit. The perimeter of ..., there is ; - Rental or used near the speaker system, such as staining or discoloration of the surface may result. Attempting to 30 minutes turn off . • Unplug the system from a cold to malfunction. Additional Information continued 31GB Very humid - Also, be possible to remove the disc...


