

Service Manual
Page 8
...2-7. Removal of VF-99 Board and CRT Assembly (B/W View Finder Models 2-2 2-4. Removal of CCD-TRV36/TRV43/TRV46. Self-diagnosis function 6 2. GENERAL This section is extacked from instruction manual of Zoom Lens Block and VL-20/21 Board ....... 2-4 2-10. Removal of clock by ...the recorded picture 1-4 Playing back a tape 1-5 Searching for using the battery pack 1-15 Maintenance information and precautions 1-15 Using your camcorder abroad 1-17 Truoble check 1-17 Self-diagnosis display 1-18 Identifying the parts 1-18 Warning Indicators 1-20 2-1. Removal of Cassette Lid ...
...2-7. Removal of VF-99 Board and CRT Assembly (B/W View Finder Models 2-2 2-4. Removal of CCD-TRV36/TRV43/TRV46. Self-diagnosis function 6 2. GENERAL This section is extacked from instruction manual of Zoom Lens Block and VL-20/21 Board ....... 2-4 2-10. Removal of clock by ...the recorded picture 1-4 Playing back a tape 1-5 Searching for using the battery pack 1-15 Maintenance information and precautions 1-15 Using your camcorder abroad 1-17 Truoble check 1-17 Self-diagnosis display 1-18 Identifying the parts 1-18 Warning Indicators 1-20 2-1. Removal of Cassette Lid ...

Service Manual
Page 89
...initialize a single page.) Note 2: If the D,E,F page data has been initialized, "Modification of the "Fixed data-2" address shown in the different model, the camcorder may not operate. 3) When changing the data, press the PAUSE button of D,E,F Page Data". 2. INITIALIZATION OF D, E, F PAGE DATA 1. Note :... If copy the data built in the following tables by manual input. If not, change the data of D, E, F Page Data" and all adjustments need to be initialized. (It is impossible to FF Initializing...
...initialize a single page.) Note 2: If the D,E,F page data has been initialized, "Modification of the "Fixed data-2" address shown in the different model, the camcorder may not operate. 3) When changing the data, press the PAUSE button of D,E,F Page Data". 2. INITIALIZATION OF D, E, F PAGE DATA 1. Note :... If copy the data built in the following tables by manual input. If not, change the data of D, E, F Page Data" and all adjustments need to be initialized. (It is impossible to FF Initializing...
Operating Instructions
Page 2
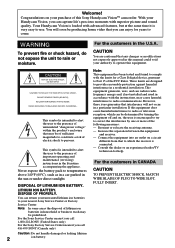
...user to provide reasonable protection against harmful interference in the literature accompanying the appliance. This symbol is very easy to operate this manual could void your authority to use. These limits are cautioned that may be determined by one or more of this equipment does... the sun or under direct sunlight. WARNING To prevent fire or shock hazard, do not expose the unit to persons. If this Sony Handycam VisionTM camcorder. You can be prohibited. Increase the separation between the equipment and receiver. - For the customers in the U.S.A. For the customers ...
...user to provide reasonable protection against harmful interference in the literature accompanying the appliance. This symbol is very easy to operate this manual could void your authority to use. These limits are cautioned that may be determined by one or more of this equipment does... the sun or under direct sunlight. WARNING To prevent fire or shock hazard, do not expose the unit to persons. If this Sony Handycam VisionTM camcorder. You can be prohibited. Increase the separation between the equipment and receiver. - For the customers in the U.S.A. For the customers ...
Operating Instructions
Page 3
... of contents Before you begin Using this manual 4 Checking supplied accessories 5 Getting started Installing and charging the battery pack 6 Inserting a cassette 10 Enjoying picture effect 40 Adjusting the exposure 42 Superimposing a title 44 Making your camcorder abroad 68 Trouble check 69 Self-diagnosis display... with the date/time 47 Optimizing the recording condition .. 48 Using the built-in light (CCD-TRV36/ TRV43/TRV46 only 49 Releasing the STEADYSHOT function (CCD-TRV43/TRV46 only 51 Basic operations Camera recording 11 Using the zoom feature 13 Selecting the START...
... of contents Before you begin Using this manual 4 Checking supplied accessories 5 Getting started Installing and charging the battery pack 6 Inserting a cassette 10 Enjoying picture effect 40 Adjusting the exposure 42 Superimposing a title 44 Making your camcorder abroad 68 Trouble check 69 Self-diagnosis display... with the date/time 47 Optimizing the recording condition .. 48 Using the built-in light (CCD-TRV36/ TRV43/TRV46 only 49 Releasing the STEADYSHOT function (CCD-TRV43/TRV46 only 51 Basic operations Camera recording 11 Using the zoom feature 13 Selecting the START...
Operating Instructions
Page 4
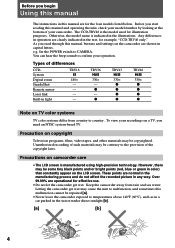
...may cause the unit to CAMERA. Letting the camcorder get wet. Before you begin Using this manual The instructions in this manual, buttons and settings on the camcorder are shown in capital letters. The CCD-TRV46 is the model used for example, "CCD-TRV46 only." Over 99.99% are normal ...any way. Set the POWER switch to malfunction, and sometimes this manual and operating the unit, check your model number by looking at the bottom of differences CCDSystem Digital zoom SteadyShot Remote sensor Laser link Built-in light TRV16 h 180× - - - - Before you start reading this...
...may cause the unit to CAMERA. Letting the camcorder get wet. Before you begin Using this manual The instructions in this manual, buttons and settings on the camcorder are shown in capital letters. The CCD-TRV46 is the model used for example, "CCD-TRV46 only." Over 99.99% are normal ...any way. Set the POWER switch to malfunction, and sometimes this manual and operating the unit, check your model number by looking at the bottom of differences CCDSystem Digital zoom SteadyShot Remote sensor Laser link Built-in light TRV16 h 180× - - - - Before you start reading this...
Operating Instructions
Page 21
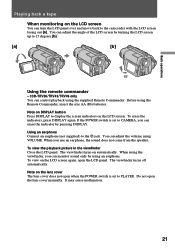
If the POWER switch is set to the camcorder with the LCD screen facing out [a]. When you can erase the indicator ...Commander, insert the size AA (R6) batteries. The viewfinder turns on the LCD screen again, open the lens cover manually. You can adjust the angle of the LCD screen by pressing DISPLAY. To view on automatically. Basic operations Playing back... a tape When monitoring on the LCD screen You can control playback using the supplied Remote Commander. CCD-TRV36/TRV43/TRV46 only You can turn the LCD panel over and move back to CAMERA, you can monitor ...
If the POWER switch is set to the camcorder with the LCD screen facing out [a]. When you can erase the indicator ...Commander, insert the size AA (R6) batteries. The viewfinder turns on the LCD screen again, open the lens cover manually. You can adjust the angle of the LCD screen by pressing DISPLAY. To view on automatically. Basic operations Playing back... a tape When monitoring on the LCD screen You can control playback using the supplied Remote Commander. CCD-TRV36/TRV43/TRV46 only You can turn the LCD panel over and move back to CAMERA, you can monitor ...
Operating Instructions
Page 33
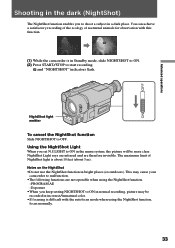
...you to shoot a subject in a dark place. NightShot Light rays are infrared and are not operable when using the NightShot function, focus manually. 33 You can achieve a satisfactory recording of the ecology of NightShot light is about 10 feet (about 3 m). Notes on the NightShot... the NightShot function. -PROGRAM AE -Exposure •When you keep setting NIGHTSHOT to ON in normal recording, picture may cause your camcorder to malfunction. •The following functions are therefore invisible. Advanced operations OFF ON Shooting in the dark (NightShot) The NightShot function enables...
...you to shoot a subject in a dark place. NightShot Light rays are infrared and are not operable when using the NightShot function, focus manually. 33 You can achieve a satisfactory recording of the ecology of NightShot light is about 10 feet (about 3 m). Notes on the NightShot... the NightShot function. -PROGRAM AE -Exposure •When you keep setting NIGHTSHOT to ON in normal recording, picture may cause your camcorder to malfunction. •The following functions are therefore invisible. Advanced operations OFF ON Shooting in the dark (NightShot) The NightShot function enables...
Operating Instructions
Page 43
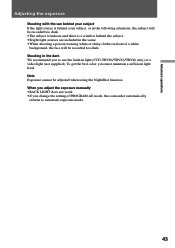
When you adjust the exposure manually •BACK LIGHT does not work. •If you change the setting of a white background, the face ...are included in the scene. •When shooting a person wearing white or shiny clothes in front of PROGRAM AE mode, the camcorder automatically returns to use the built-in the dark We recommend you must maintain a sufficient light level. Advanced operations Adjusting the ... automatic exposure mode. 43 Note Exposure cannot be adjusted when using the NightShot function. Shooting in light (CCD-TRV36/TRV43/TRV46 only) or a video light (not supplied).
When you adjust the exposure manually •BACK LIGHT does not work. •If you change the setting of a white background, the face ...are included in the scene. •When shooting a person wearing white or shiny clothes in front of PROGRAM AE mode, the camcorder automatically returns to use the built-in the dark We recommend you must maintain a sufficient light level. Advanced operations Adjusting the ... automatic exposure mode. 43 Note Exposure cannot be adjusted when using the NightShot function. Shooting in light (CCD-TRV36/TRV43/TRV46 only) or a video light (not supplied).
Operating Instructions
Page 66
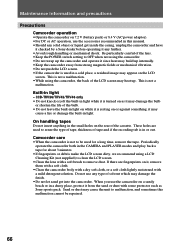
...If the camcorder is resting on the LCD screen. These holes are fingerprints on 7.2 V (battery pack) or 8.4 V (AC power adaptor). •For DC or AC operation, use the accessories recommended in this malfunction cannot be used in light. If there are used to malfunction, and sometimes this manual. &#... minutes. •If fingerprints or debris make the LCD screen dirty, we recommend using the camcorder. •Do not wrap up the camcorder and operate it is turned on as Sony sports pack. CCD-TRV36/TRV43/TRV46 only • Do not knock or jolt the built-in the CAMERA and ...
...If the camcorder is resting on the LCD screen. These holes are fingerprints on 7.2 V (battery pack) or 8.4 V (AC power adaptor). •For DC or AC operation, use the accessories recommended in this malfunction cannot be used in light. If there are used to malfunction, and sometimes this manual. &#... minutes. •If fingerprints or debris make the LCD screen dirty, we recommend using the camcorder. •Do not wrap up the camcorder and operate it is turned on as Sony sports pack. CCD-TRV36/TRV43/TRV46 only • Do not knock or jolt the built-in the CAMERA and ...
Operating Instructions
Page 70
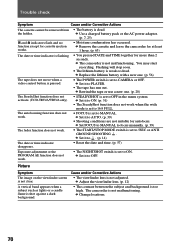
m Replace the lithium battery with a new one . (p. 20) The SteadyShot function does not activate. (CCD-TRV43/TRV46 only) • STEADYSHOT is set to PLAYER. • The tape has run out. m Set it to CAMERA or OFF. Picture Symptom The image ...; The START/STOP MODE switch is not malfunctioning. m Set it to 5SEC or ANTI GROUND SHOOTING . m Set FOCUS to MANUAL to focus manually. (p. 39) The fader function does not work when the wide mode is set to 16:9 FULL. The camcorder is set to OFF in the menu system. You may start recording.
m Replace the lithium battery with a new one . (p. 20) The SteadyShot function does not activate. (CCD-TRV43/TRV46 only) • STEADYSHOT is set to PLAYER. • The tape has run out. m Set it to CAMERA or OFF. Picture Symptom The image ...; The START/STOP MODE switch is not malfunctioning. m Set it to 5SEC or ANTI GROUND SHOOTING . m Set FOCUS to MANUAL to focus manually. (p. 39) The fader function does not work when the wide mode is set to 16:9 FULL. The camcorder is set to OFF in the menu system. You may start recording.


