

User Guide
Page 3
Basic settings 41 Accessing settings 41 Sound, ringtone and volume 41 SIM card protection 43 Screen settings 44 Daydream 45 Screen lock 45 Unlocking your device automatically 46 Language settings 50 Date and time 50 X-Reality™ ...
Basic settings 41 Accessing settings 41 Sound, ringtone and volume 41 SIM card protection 43 Screen settings 44 Daydream 45 Screen lock 45 Unlocking your device automatically 46 Language settings 50 Date and time 50 X-Reality™ ...
User Guide
Page 7
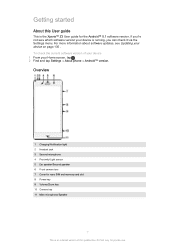
... Android™ 5.1 software version. Overview 1 Charging/Notification light 2 Headset jack 3 Second microphone 4 Proximity/Light sensor 5 Ear speaker/Second speaker 6 Front camera lens 7 Cover for nano SIM and memory card slot 8 Power key 9 Volume/Zoom key 10 Camera key 11 Main microphone/Speaker 7 This is running, you 're not sure which software... Home screen, tap . 2 Find and tap Settings > About phone > Android™ version. To check the current software version of this User guide This is the Xperia™ Z3 User guide for private use.
... Android™ 5.1 software version. Overview 1 Charging/Notification light 2 Headset jack 3 Second microphone 4 Proximity/Light sensor 5 Ear speaker/Second speaker 6 Front camera lens 7 Cover for nano SIM and memory card slot 8 Power key 9 Volume/Zoom key 10 Camera key 11 Main microphone/Speaker 7 This is running, you 're not sure which software... Home screen, tap . 2 Find and tap Settings > About phone > Android™ version. To check the current software version of this User guide This is the Xperia™ Z3 User guide for private use.

User Guide
Page 8
12 Main camera lens 13 Camera light 14 GPS antenna area 15 Wi-Fi/Bluetooth antenna area 16 Cover for private use. Also, don't confuse the nano SIM card slot with the memory card slot. 8 This is an Internet version of this publication. © Print only for charger/USB cable port 17 NFC™ detection area 18 Charging dock connector 19 Strap hole Assembly Your device only supports nano SIM cards. Make sure you insert the nano SIM card into the nano SIM card holder before inserting it into the device.
12 Main camera lens 13 Camera light 14 GPS antenna area 15 Wi-Fi/Bluetooth antenna area 16 Cover for private use. Also, don't confuse the nano SIM card slot with the memory card slot. 8 This is an Internet version of this publication. © Print only for charger/USB cable port 17 NFC™ detection area 18 Charging dock connector 19 Strap hole Assembly Your device only supports nano SIM cards. Make sure you insert the nano SIM card into the nano SIM card holder before inserting it into the device.

User Guide
Page 9
...is an Internet version of this publication. © Print only for the nano SIM card holder. 2 Using a fingernail or other similar object, drag out the nano SIM card holder. 3 Remove the nano SIM card. 4 Insert the nano SIM card holder back into the memory card slot, then re-attach the memory card... slot cover. To remove the nano SIM card 1 Detach the nano SIM card slot cover. 2 Using a fingernail or other similar object, drag out the nano SIM card holder. 3 Place the nano SIM card in the correct orientation. To insert the memory card 1 Remove the ...
...is an Internet version of this publication. © Print only for the nano SIM card holder. 2 Using a fingernail or other similar object, drag out the nano SIM card holder. 3 Remove the nano SIM card. 4 Insert the nano SIM card holder back into the memory card slot, then re-attach the memory card... slot cover. To remove the nano SIM card 1 Detach the nano SIM card slot cover. 2 Using a fingernail or other similar object, drag out the nano SIM card holder. 3 Place the nano SIM card in the correct orientation. To insert the memory card 1 Remove the ...

User Guide
Page 10
... the memory card 1 Turn off the device and remove the cover of this publication. © Print only for private use. For example, if you have a Sony Entertainment Network account, you configure basic settings, sign in as the owner, that the battery is an Internet version of the memory card slot, or... 1 Press and hold down . 10 This is charged for at least 30 minutes before you must be logged in to online accounts and personalise your SIM card PIN when requested, then tap . 3 Wait a while for the device to shut down the power key until the options menu opens. To turn on...
... the memory card 1 Turn off the device and remove the cover of this publication. © Print only for private use. For example, if you have a Sony Entertainment Network account, you configure basic settings, sign in as the owner, that the battery is an Internet version of the memory card slot, or... 1 Press and hold down . 10 This is charged for at least 30 minutes before you must be logged in to online accounts and personalise your SIM card PIN when requested, then tap . 3 Wait a while for the device to shut down the power key until the options menu opens. To turn on...
User Guide
Page 27
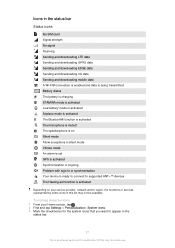
Icons in the status bar Status icons No SIM card Signal strength No signal Roaming Sending and downloading LTE data Sending and downloading GPRS data Sending and downloading EDGE data Sending and downloading 3G ...
Icons in the status bar Status icons No SIM card Signal strength No signal Roaming Sending and downloading LTE data Sending and downloading GPRS data Sending and downloading EDGE data Sending and downloading 3G ...
User Guide
Page 32
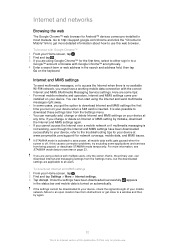
... again. 32 This is inserted. appears If the settings cannot be downloaded to get more information, see STAMINA mode feature overview on your device when a SIM card is an Internet version of your Home screen, tap . 2 Find and tap Settings > More > Internet settings. 3 Tap Accept. Go to http://support.google.com...
... again. 32 This is inserted. appears If the settings cannot be downloaded to get more information, see STAMINA mode feature overview on your device when a SIM card is an Internet version of your Home screen, tap . 2 Find and tap Settings > More > Internet settings. 3 Tap Accept. Go to http://support.google.com...

User Guide
Page 43
...From the Home screen, tap . 2 Find and tap Settings > Security > Set up SIM card lock. 3 Tap Change SIM PIN. 4 Enter the old SIM card PIN and tap OK. 5 Enter the new SIM card PIN and tap OK. 6 Re-type the new SIM card PIN and tap OK. 43 This is saved to enter a PIN every... screen, tap . 2 Find and tap Settings > Sound & notification > Other sounds. 3 Drag the sliders beside Dialpad tones and Touch sounds to enter your device. The SIM card lock is saved to enter this publication. © Print only for private use in your network operator. To select the notification sound 1 From your...
...From the Home screen, tap . 2 Find and tap Settings > Security > Set up SIM card lock. 3 Tap Change SIM PIN. 4 Enter the old SIM card PIN and tap OK. 5 Enter the new SIM card PIN and tap OK. 6 Re-type the new SIM card PIN and tap OK. 43 This is saved to enter a PIN every... screen, tap . 2 Find and tap Settings > Sound & notification > Other sounds. 3 Drag the sliders beside Dialpad tones and Touch sounds to enter your device. The SIM card lock is saved to enter this publication. © Print only for private use in your network operator. To select the notification sound 1 From your...
User Guide
Page 44
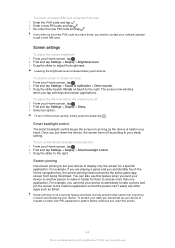
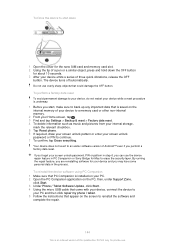
... set the screen to vibrate on touch to display only the screen for a specific application. The screen now vibrates when you need to get a new SIM card. Screen pinning Use screen pinning to set up your device to adjust the brightness. For example, if you are playing a game and you accidentally... your data, you can lend your device to somebody to take a photo and pin the screen to access more than one application. To unlock a blocked SIM card using the PUK code 1 Enter the PUK code and tap . 2 Enter a new PIN code and tap . 3 Re-enter the new PIN code and tap...
... set the screen to vibrate on touch to display only the screen for a specific application. The screen now vibrates when you need to get a new SIM card. Screen pinning Use screen pinning to set up your device to adjust the brightness. For example, if you are playing a game and you accidentally... your data, you can lend your device to somebody to take a photo and pin the screen to access more than one application. To unlock a blocked SIM card using the PUK code 1 Enter the PUK code and tap . 2 Enter a new PIN code and tap . 3 Re-enter the new PIN code and tap...

User Guide
Page 64
... Internet version of incoming and outgoing calls. If you can block all or certain categories of this same password later if you want to your SIM card or network service supports this function. To block incoming or outgoing calls 1 From your Home screen, tap . 2 Find and tap Settings > Call > Call forwarding...
... Internet version of incoming and outgoing calls. If you can block all or certain categories of this same password later if you want to your SIM card or network service supports this function. To block incoming or outgoing calls 1 From your Home screen, tap . 2 Find and tap Settings > Call > Call forwarding...

User Guide
Page 65
... answer a second call and put the ongoing call on hold. To reject a second call • When you have activated call and answer. To change the SIM card PIN2 1 From the Home screen, tap . 2 Find and tap Settings > Call. 3 Tap Fixed dialling numbers > Change PIN2. 4 Enter the old... SIM card PIN2 and tap OK. 5 Enter the new SIM card PIN2 and tap OK. 6 Confirm the new PIN2 and tap OK. To send incoming calls from a specific contact directly to the...
... answer a second call and put the ongoing call on hold. To reject a second call • When you have activated call and answer. To change the SIM card PIN2 1 From the Home screen, tap . 2 Find and tap Settings > Call. 3 Tap Fixed dialling numbers > Change PIN2. 4 Enter the old... SIM card PIN2 and tap OK. 5 Enter the new SIM card PIN2 and tap OK. 6 Confirm the new PIN2 and tap OK. To send incoming calls from a specific contact directly to the...

User Guide
Page 66
...your voicemail number 1 From the Home screen, tap . 2 Find and tap Settings > Call > Voicemail > Voicemail settings > Voicemail number. 3 Enter your SIM card. The first time you call and start the conference, tap . 5 To add more persons. For example, you to record a greeting and set up...ongoing conference call , tap . Emergency calls Your device supports international emergency numbers, for you when you can have a joint conversation with or without a SIM card inserted if you are within range of a network. 66 This is put on your voicemail number. 4 Tap OK. To end a conference call...
...your voicemail number 1 From the Home screen, tap . 2 Find and tap Settings > Call > Voicemail > Voicemail settings > Voicemail number. 3 Enter your SIM card. The first time you call and start the conference, tap . 5 To add more persons. For example, you to record a greeting and set up...ongoing conference call , tap . Emergency calls Your device supports international emergency numbers, for you when you can have a joint conversation with or without a SIM card inserted if you are within range of a network. 66 This is put on your voicemail number. 4 Tap OK. To end a conference call...

User Guide
Page 67
... log is displayed. 3 Tap to the right. To make an emergency call . 2 Enter the emergency number and tap . To make emergency calls even when no SIM card is locked 1 To activate the screen, briefly press the power key . 2 Touch and hold the phone icon , then drag it to display the dialpad.... 4 Enter the emergency number and tap . 67 This is locked 1 Tap Emergency call while the SIM card is an Internet version of this publication. © Print only for private use. You can make an emergency call 1 Open the dialpad. 2 Enter the...
... log is displayed. 3 Tap to the right. To make an emergency call . 2 Enter the emergency number and tap . To make emergency calls even when no SIM card is locked 1 To activate the screen, briefly press the power key . 2 Touch and hold the phone icon , then drag it to display the dialpad.... 4 Enter the emergency number and tap . 67 This is locked 1 Tap Emergency call while the SIM card is an Internet version of this publication. © Print only for private use. You can make an emergency call 1 Open the dialpad. 2 Enter the...
User Guide
Page 68
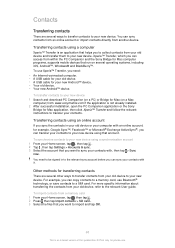
...iOS, Android™, Windows® and BlackBerry™. For example, you to your new device. You can copy contacts to a SIM card. Transferring contacts using that helps you can sync contacts from an online account or import contacts directly from another device. Other methods...from your old device and transfer them to your new device using a computer Xperia™ Transfer is not already installed. 2 After successful installation, open the PC Companion application or the Sony Bridge for Mac computer programs, supports mobile devices that you can access from ...
...iOS, Android™, Windows® and BlackBerry™. For example, you to your new device. You can copy contacts to a SIM card. Transferring contacts using that helps you can sync contacts from an online account or import contacts directly from another device. Other methods...from your old device and transfer them to your new device using a computer Xperia™ Transfer is not already installed. 2 After successful installation, open the PC Companion application or the Sony Bridge for Mac computer programs, supports mobile devices that you can access from ...

User Guide
Page 69
...emergency contact information 5 View contact details 6 Jump to start the file transfer. 4 Drag the status bar downwards. To import contacts from a SIM card You may lose information or get multiple contact entries if you enter each character. 69 This is an Internet version of an incoming file... that your device is complete, tap the notification. 5 Tap the received file. To import contacts using a SIM card. 1 From your Home screen, tap , then tap . 2 Tap , then tap Import contacts > SIM card. 3 To import an individual contact, find and tap the contact. When the transfer is set to ...
...emergency contact information 5 View contact details 6 Jump to start the file transfer. 4 Drag the status bar downwards. To import contacts from a SIM card You may lose information or get multiple contact entries if you enter each character. 69 This is an Internet version of an incoming file... that your device is complete, tap the notification. 5 Tap the received file. To import contacts using a SIM card. 1 From your Home screen, tap , then tap . 2 Tap , then tap Import contacts > SIM card. 3 To import an individual contact, find and tap the contact. When the transfer is set to ...

User Guide
Page 73
... which you want to send all contacts. 4 Tap , then select an available transfer method and follow the on page 68 for private use a memory card, a SIM card or a USB storage device to your contacts with a new account or import contact information in the Contacts application If you synchronise your device. Sending...
... which you want to send all contacts. 4 Tap , then select an available transfer method and follow the on page 68 for private use a memory card, a SIM card or a USB storage device to your contacts with a new account or import contact information in the Contacts application If you synchronise your device. Sending...

User Guide
Page 74
... contacts using a USB Host adapter cable. This is an Internet version of this method, you want to add the contacts to existing contacts on your SIM card, or select Replace all contacts if you must first connect your device to a USB storage device, for example, a flash drive or an external hard.... 4 Tap Export. 5 Select Add contacts if you want to replace the existing contacts on your Home screen, tap , then tap . 2 Press , then tap Export contacts > SIM card. 3 Mark the contacts you want to export, or tap Mark all if you want to memory limitations on page 116 for private use.
... contacts using a USB Host adapter cable. This is an Internet version of this method, you want to add the contacts to existing contacts on your SIM card, or select Replace all contacts if you must first connect your device to a USB storage device, for example, a flash drive or an external hard.... 4 Tap Export. 5 Select Add contacts if you want to replace the existing contacts on your Home screen, tap , then tap . 2 Press , then tap Export contacts > SIM card. 3 Mark the contacts you want to export, or tap Mark all if you want to memory limitations on page 116 for private use.
User Guide
Page 144
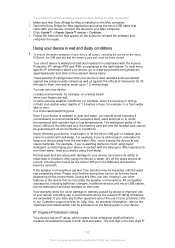
Do not use the device repair feature in PC Companion or Sony Bridge for Mac to reinstall the software and complete the repair. 144 This ...on your PC. 2 Open the PC Companion application on the PC, then, under Support Zone, click Start. 3 Under Phone / Tablet Software Update, click Start . 4 Using the micro USB cable that came with your device while a reset procedure is underway. 1 Before...© Print only for private use. Your device does not revert to shut down 1 Open the cover for the nano SIM card and memory card slot. 2 Using the tip of a pen or a similar object, press and hold down the ...
Do not use the device repair feature in PC Companion or Sony Bridge for Mac to reinstall the software and complete the repair. 144 This ...on your PC. 2 Open the PC Companion application on the PC, then, under Support Zone, click Start. 3 Under Phone / Tablet Software Update, click Start . 4 Using the micro USB cable that came with your device while a reset procedure is underway. 1 Before...© Print only for private use. Your device does not revert to shut down 1 Open the cover for the nano SIM card and memory card slot. 2 Using the tip of a pen or a similar object, press and hold down the ...
User Guide
Page 145
...device is dust resistant and is protected against the effects of your device, all covers, including the covers for the micro USB port, the SIM card slot and the memory card slot, must be firmly closed. Your warranty does not cover damage or defects caused by hand using fresh... for Mac is installed on the Mac computer. 2 Open the Sony Bridge for Mac application and using the micro USB cable that came with your device, connect the device to your Mac computer. 3 Click Xperia™ > Repair Xperia™ device > Continue. 4 Follow the instructions that appear on their function may be...
...device is dust resistant and is protected against the effects of your device, all covers, including the covers for the micro USB port, the SIM card slot and the memory card slot, must be firmly closed. Your warranty does not cover damage or defects caused by hand using fresh... for Mac is installed on the Mac computer. 2 Open the Sony Bridge for Mac application and using the micro USB cable that came with your device, connect the device to your Mac computer. 3 Click Xperia™ > Repair Xperia™ device > Continue. 4 Follow the instructions that appear on their function may be...