User Guide
Page 2
Contents Getting started 7 About This User Guide 7 Overview 8 Assembly 9 Screen Protection 10 Starting Your Device for the First Time 10 Why do I need a Google™ account 11 Device security 12 Making sure your device is protected 12 Screen lock 12 Fingerprint Manager 14 Unlocking your device automatically 14 SIM Card Protection 18 Finding the Identification Number of Your Device 18 Finding a lost device using Android™ Device Manager 19 Learning the basics 21 Using the touchscreen 21 Locking and Unlocking the Screen 24 Homescreen 24 Application screen 26 Navigating...
Contents Getting started 7 About This User Guide 7 Overview 8 Assembly 9 Screen Protection 10 Starting Your Device for the First Time 10 Why do I need a Google™ account 11 Device security 12 Making sure your device is protected 12 Screen lock 12 Fingerprint Manager 14 Unlocking your device automatically 14 SIM Card Protection 18 Finding the Identification Number of Your Device 18 Finding a lost device using Android™ Device Manager 19 Learning the basics 21 Using the touchscreen 21 Locking and Unlocking the Screen 24 Homescreen 24 Application screen 26 Navigating...
User Guide
Page 3
Internet and networks 50 Browsing the web 50 Internet and MMS settings 50 Wi-Fi 51 Sharing your cellular data connection 53 Controlling Data Usage 55 Selecting cellular networks 56 Virtual private networks (VPNs 56 Synchronizing data on your device 58 Synchronizing with Online Accounts 58 Synchronizing with Microsoft® Exchange ActiveSync 58 Basic settings 60 Accessing settings 60 Volume settings 60 Do Not Disturb Mode 61 Screen settings 62 Application settings 64 Resetting Your Applications 65 Screen Saver 65 Language Settings 66 Date and time 66 X-Reality™ for ...
Internet and networks 50 Browsing the web 50 Internet and MMS settings 50 Wi-Fi 51 Sharing your cellular data connection 53 Controlling Data Usage 55 Selecting cellular networks 56 Virtual private networks (VPNs 56 Synchronizing data on your device 58 Synchronizing with Online Accounts 58 Synchronizing with Microsoft® Exchange ActiveSync 58 Basic settings 60 Accessing settings 60 Volume settings 60 Do Not Disturb Mode 61 Screen settings 62 Application settings 64 Resetting Your Applications 65 Screen Saver 65 Language Settings 66 Date and time 66 X-Reality™ for ...
User Guide
Page 4
Contacts 82 Searching and viewing contacts 82 Adding and editing contacts 83 Transferring contacts 84 Adding Medical and Emergency Contact Information 85 Favorites 86 Sending contact information 86 Avoiding Duplicate Entries in the Contacts Application 87 Backing up Contacts 87 Messaging and chat 88 Reading and sending messages 88 Organizing your messages 89 Calling from Messaging 89 Messaging settings 90 Video Chat 90 Email 91 Setting Up Email 91 Sending and Receiving Email Messages 91 Organizing your email messages 92 Email account settings 93 Gmail 93 Music 95 ...
Contacts 82 Searching and viewing contacts 82 Adding and editing contacts 83 Transferring contacts 84 Adding Medical and Emergency Contact Information 85 Favorites 86 Sending contact information 86 Avoiding Duplicate Entries in the Contacts Application 87 Backing up Contacts 87 Messaging and chat 88 Reading and sending messages 88 Organizing your messages 89 Calling from Messaging 89 Messaging settings 90 Video Chat 90 Email 91 Setting Up Email 91 Sending and Receiving Email Messages 91 Organizing your email messages 92 Email account settings 93 Gmail 93 Music 95 ...
User Guide
Page 5
... and Features That Save You Time 133 Google Search & Now 133 Using the News Suite Application 133 Using your Device as a Wallet 133 Lifelog 134 Xperia™ Actions 135 Travel and maps 136 Using Location Services 136 Google Maps™ and navigation 136 Using Data Traffic when Traveling 137 Airplane Mode... Font Size 141 Color Correction 141 TalkBack 141 Mono Audio 142 TTY (Teletypewriter) Mode 142 Switch Access 142 Support and Legal 143 Support Application 143 Xperia™ Tips 143 5
... and Features That Save You Time 133 Google Search & Now 133 Using the News Suite Application 133 Using your Device as a Wallet 133 Lifelog 134 Xperia™ Actions 135 Travel and maps 136 Using Location Services 136 Google Maps™ and navigation 136 Using Data Traffic when Traveling 137 Airplane Mode... Font Size 141 Color Correction 141 TalkBack 141 Mono Audio 142 TTY (Teletypewriter) Mode 142 Switch Access 142 Support and Legal 143 Support Application 143 Xperia™ Tips 143 5
User Guide
Page 6
Help in Menus and Applications 143 Restarting, Resetting, and Repairing 143 Help Us Improve Our Software 144 Warranty, SAR, and Usage Guidelines 145 Recycling your device 145 Legal information 145 6
Help in Menus and Applications 143 Restarting, Resetting, and Repairing 143 Help Us Improve Our Software 144 Warranty, SAR, and Usage Guidelines 145 Recycling your device 145 Legal information 145 6
User Guide
Page 7
... Device 1 From your Home screen, tap . 2 Find and tap Settings > About phone > Android™ version. Getting started About This User Guide This is the Xperia™ XZ Premium User Guide for private use of certain features and applications described in this guide may require access to the internet. Limitations to the cellphone network...
... Device 1 From your Home screen, tap . 2 Find and tap Settings > About phone > Android™ version. Getting started About This User Guide This is the Xperia™ XZ Premium User Guide for private use of certain features and applications described in this guide may require access to the internet. Limitations to the cellphone network...
User Guide
Page 8
Overview 8 This is an internet version of this publication. © Print only for private use.
Overview 8 This is an internet version of this publication. © Print only for private use.
User Guide
Page 9
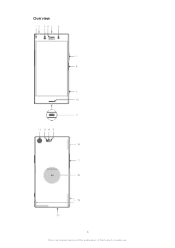
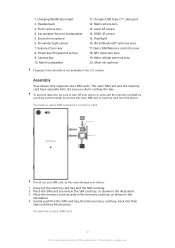
1. Volume/Zoom key 8. Main loudspeaker 11. Laser AF sensor 14. Flashlight 16. Wi-Fi/Bluetooth® antenna area 17. NFC detection area 19. The nano SIM card and the memory card have separate slots. Be sure you drag out the holder to remove the nano SIM card or memory card from the device. To prevent data loss, be sure to turn off your device or unmount the memory card before you don't confuse the two. Camera key 10. Main camera lens 13. Nano SIM/Memory card slot cover 18. Main microphone Fingerprint functionality is an internet version of this may damage your SIM card, ...
1. Volume/Zoom key 8. Main loudspeaker 11. Laser AF sensor 14. Flashlight 16. Wi-Fi/Bluetooth® antenna area 17. NFC detection area 19. The nano SIM card and the memory card have separate slots. Be sure you drag out the holder to remove the nano SIM card or memory card from the device. To prevent data loss, be sure to turn off your device or unmount the memory card before you don't confuse the two. Camera key 10. Main camera lens 13. Nano SIM/Memory card slot cover 18. Main microphone Fingerprint functionality is an internet version of this may damage your SIM card, ...
User Guide
Page 10
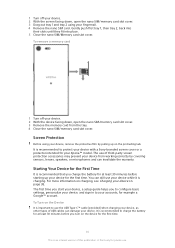
...charge the battery for at least 30 minutes before you to configure basic settings, personalize your device, and sign in to protect your device with a Sony-branded screen cover or a protector intended for example a Google™ account. For more information on charging, see Charging your device on page 38...fingernail. 4 Remove the nano SIM card. You can damage your device. To Turn on the Device It is recommended to your accounts, for your Xperia™ model. It is recommended to use the USB Type-C™ cable (provided) when charging your device, as other types of USB cables ...
...charge the battery for at least 30 minutes before you to configure basic settings, personalize your device, and sign in to protect your device with a Sony-branded screen cover or a protector intended for example a Google™ account. For more information on charging, see Charging your device on page 38...fingernail. 4 Remove the nano SIM card. You can damage your device. To Turn on the Device It is recommended to your accounts, for your Xperia™ model. It is recommended to use the USB Type-C™ cable (provided) when charging your device, as other types of USB cables ...
User Guide
Page 11
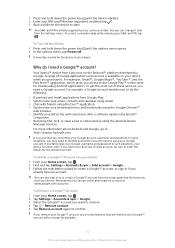
...8226; Synchronize your browsing history and bookmarks using the Google Chrome™ web browser. • Identify yourself as the authorized user after a software repair using Xperia™ Companion. • Remotely find, lock, or clear a lost or stolen device using your Google account. To Set Up a Google™ Account...from the setup guide the first time you fail to give your Google username and password in to or create a Google™ account from Sony runs on your Device 1 From your Google™ account will no longer be sure to confirm. To correct a mistake made while entering ...
...8226; Synchronize your browsing history and bookmarks using the Google Chrome™ web browser. • Identify yourself as the authorized user after a software repair using Xperia™ Companion. • Remotely find, lock, or clear a lost or stolen device using your Google account. To Set Up a Google™ Account...from the setup guide the first time you fail to give your Google username and password in to or create a Google™ account from Sony runs on your Device 1 From your Google™ account will no longer be sure to confirm. To correct a mistake made while entering ...
User Guide
Page 12
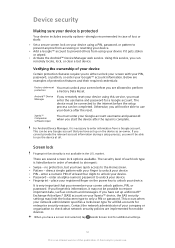
... device using this service, you can remotely locate, lock, or clear a lost device. Otherwise, you start the device after the reset. Xperia™ Companion software repair You must be able to use your device after the repair is complete. Screen lock Fingerprint functionality is an internet ...device if it may not be any Google account that you have set up a Microsoft® Exchange ActiveSync® (EAS) account on your Xperia™ device, the EAS security settings may limit the lockscreen type to either unlock your screen with your finger to the Homescreen. • ...
... device using this service, you can remotely locate, lock, or clear a lost device. Otherwise, you start the device after the reset. Xperia™ Companion software repair You must be able to use your device after the repair is complete. Screen lock Fingerprint functionality is an internet ...device if it may not be any Google account that you have set up a Microsoft® Exchange ActiveSync® (EAS) account on your Xperia™ device, the EAS security settings may limit the lockscreen type to either unlock your screen with your finger to the Homescreen. • ...
User Guide
Page 13
To Create a Screen Lock PIN 1 From your PIN, then tap OK. Enter a numeric PIN, and then tap CONTINUE. 4 Re-enter and confirm your Home screen, tap . 2 Find and tap Settings > Lock screen & security > Screen lock > PIN. 3 Choose an option. You can use your fingerprint to quickly unlock your device. Selecting other screen lock types will clear all fingerprint settings. To Change the Screen Lock Pattern 1 From your Home screen, tap . 2 Find and tap Settings > Lock screen & security > Screen lock. 3 Draw your screen unlock pattern. 4 Tap Pattern, choose an option, and follow the instructions ...
To Create a Screen Lock PIN 1 From your PIN, then tap OK. Enter a numeric PIN, and then tap CONTINUE. 4 Re-enter and confirm your Home screen, tap . 2 Find and tap Settings > Lock screen & security > Screen lock > PIN. 3 Choose an option. You can use your fingerprint to quickly unlock your device. Selecting other screen lock types will clear all fingerprint settings. To Change the Screen Lock Pattern 1 From your Home screen, tap . 2 Find and tap Settings > Lock screen & security > Screen lock. 3 Draw your screen unlock pattern. 4 Tap Pattern, choose an option, and follow the instructions ...
User Guide
Page 14
To Rename a Registered Fingerprint 1 From your Home screen, tap . 2 Find and tap Settings > Lock screen & security > Fingerprint Manager. 3 Tap a registered fingerprint in the US market. Fingerprint Manager Fingerprint functionality is not available in the list and then enter a fingerprint name. 4 Tap OK. Fingerprint Manager registers fingerprint information that can be available in every market, country, or region. 14 This is clean and without any visible moisture. You are also prompted to set your device to unlock automatically in a familiar, secure location, such as an ...
To Rename a Registered Fingerprint 1 From your Home screen, tap . 2 Find and tap Settings > Lock screen & security > Fingerprint Manager. 3 Tap a registered fingerprint in the US market. Fingerprint Manager Fingerprint functionality is not available in the list and then enter a fingerprint name. 4 Tap OK. Fingerprint Manager registers fingerprint information that can be available in every market, country, or region. 14 This is clean and without any visible moisture. You are also prompted to set your device to unlock automatically in a familiar, secure location, such as an ...
User Guide
Page 15
Follow the instructions on your hand or in your device, then tap FINISHED. 4 To remove a trusted face, tap Remove trusted face > REMOVE. Keeping Your Device Unlocked while You're Carrying It Using the On-body detection feature, you can take between 5 and 10 minutes to change your device may not lock automatically, so be aware of the vehicle, just unlock it once and your device. To disable the function, tap the slider beside On. 15 This is an internet version of this publication. © Print only for as long as you have not already done so. 2 From your Home screen, tap . 3 ...
Follow the instructions on your hand or in your device, then tap FINISHED. 4 To remove a trusted face, tap Remove trusted face > REMOVE. Keeping Your Device Unlocked while You're Carrying It Using the On-body detection feature, you can take between 5 and 10 minutes to change your device may not lock automatically, so be aware of the vehicle, just unlock it once and your device. To disable the function, tap the slider beside On. 15 This is an internet version of this publication. © Print only for as long as you have not already done so. 2 From your Home screen, tap . 3 ...
User Guide
Page 16
... to manually unlock your device before the trusted device can add it . Bluetooth® connectivity range can vary depending on your Xperia™ device and may need to determine whether your connection is paired and connected to the Bluetooth® device that you connect... 3 Tap Trusted devices > ADD TRUSTED DEVICE > NFC. 4 Follow the on these factors, Bluetooth® connections can work , you can keep your Xperia™ device unlocked by imitating your Bluetooth® connection, even if your trusted device is suitable if you're normally in a designated trusted location. This...
... to manually unlock your device before the trusted device can add it . Bluetooth® connectivity range can vary depending on your Xperia™ device and may need to determine whether your connection is paired and connected to the Bluetooth® device that you connect... 3 Tap Trusted devices > ADD TRUSTED DEVICE > NFC. 4 Follow the on these factors, Bluetooth® connections can work , you can keep your Xperia™ device unlocked by imitating your Bluetooth® connection, even if your trusted device is suitable if you're normally in a designated trusted location. This...
User Guide
Page 17
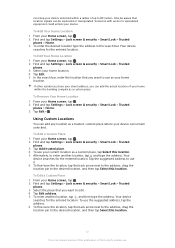
Your device searches for the entered location. To Edit a Custom Place 1 From your device can remain unlocked. Using Custom Locations You can add any location as your home location. To Add a Custom Place 1 From your Home screen, tap . 2 Find and tap Settings > Lock screen & security > Smart Lock > Trusted places. 3 Tap Add trusted place. 4 To use as a trusted, custom place where your Home screen, tap . 2 Find and tap Settings > Lock screen & security > Smart Lock > Trusted places. 3 Select the place that you want to edit. 4 Tap Edit address. 5 To enter another location, tap and ...
Your device searches for the entered location. To Edit a Custom Place 1 From your device can remain unlocked. Using Custom Locations You can add any location as your home location. To Add a Custom Place 1 From your Home screen, tap . 2 Find and tap Settings > Lock screen & security > Smart Lock > Trusted places. 3 Tap Add trusted place. 4 To use as a trusted, custom place where your Home screen, tap . 2 Find and tap Settings > Lock screen & security > Smart Lock > Trusted places. 3 Select the place that you want to edit. 4 Tap Edit address. 5 To enter another location, tap and ...
User Guide
Page 18
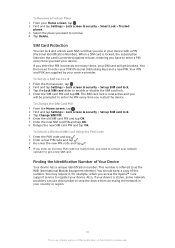
... unlock each SIM card that you restart the device. Finding the Identification Number of this publication. © Print only for example, when you access the Xperia™ Care support service to register your Home screen, tap . 2 Find and tap Settings > Lock screen & security > Smart Lock > Trusted places. 3 Select the place you...
... unlock each SIM card that you restart the device. Finding the Identification Number of this publication. © Print only for example, when you access the Xperia™ Care support service to register your Home screen, tap . 2 Find and tap Settings > Lock screen & security > Smart Lock > Trusted places. 3 Select the place you...
User Guide
Page 19
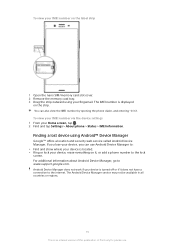
If you lose your device, you can also view the IMEI number by opening the phone dialer, and entering *#06#. You can use . To view your IMEI number via the device settings 1 From your fingernail. For additional information about Android Device Manager, go to the lock screen. Finding a lost device using your Home screen, tap . 2 Find and tap Settings > About phone > Status > IMEI information. The Android Device Manager service may not be available in all countries or regions. 19 This is an internet version of this publication. © Print only for private use Android Device ...
If you lose your device, you can also view the IMEI number by opening the phone dialer, and entering *#06#. You can use . To view your IMEI number via the device settings 1 From your fingernail. For additional information about Android Device Manager, go to the lock screen. Finding a lost device using your Home screen, tap . 2 Find and tap Settings > About phone > Status > IMEI information. The Android Device Manager service may not be available in all countries or regions. 19 This is an internet version of this publication. © Print only for private use Android Device ...
User Guide
Page 20
To activate Android™ Device Manager 1 If you are sharing a device with multiple users, be sure you have an active data connection and location services are enabled. 3 From your Google™ account. You can locate your device after you activate the service, go to www.android.com/devicemanager and sign in as the owner. 2 Be sure you are logged in using your Home screen, tap . 4 Find and tap Settings > Google > Security > Android Device Manager. 5 Tap the sliders beside Remotely locate this device and Allow remote lock and erase to enable both functions. 6 If prompted, agree to the...
To activate Android™ Device Manager 1 If you are sharing a device with multiple users, be sure you have an active data connection and location services are enabled. 3 From your Google™ account. You can locate your device after you activate the service, go to www.android.com/devicemanager and sign in as the owner. 2 Be sure you are logged in using your Home screen, tap . 4 Find and tap Settings > Google > Security > Android Device Manager. 5 Tap the sliders beside Remotely locate this device and Allow remote lock and erase to enable both functions. 6 If prompted, agree to the...
User Guide
Page 21
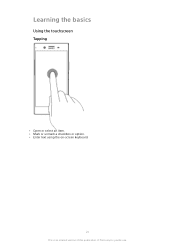
Learning the basics Using the touchscreen Tapping • Open or select an item. • Mark or unmark a checkbox or option. • Enter text using the on-screen keyboard. 21 This is an internet version of this publication. © Print only for private use.
Learning the basics Using the touchscreen Tapping • Open or select an item. • Mark or unmark a checkbox or option. • Enter text using the on-screen keyboard. 21 This is an internet version of this publication. © Print only for private use.