User Guide
Page 1
More features 67 Calendar, alarm clock, stopwatch, timer, games. Security 75 SIM card lock, phone lock. Additional information 78 Safe and efficient use, warranty, declaration of the user's guide. © Print only for private use. Index 91 This is the Internet version of conformity. Contents Getting to know your phone 16 Downloading settings or choose from the phone. Camera 50 Using the camera. Setting up WAP and email 53 All you need to know about setting up WAP and email. Contents 1 Using WAP 60 WAP browser, bookmarks. Messaging 42 Multimedia messaging, chat and ...
More features 67 Calendar, alarm clock, stopwatch, timer, games. Security 75 SIM card lock, phone lock. Additional information 78 Safe and efficient use, warranty, declaration of the user's guide. © Print only for private use. Index 91 This is the Internet version of conformity. Contents Getting to know your phone 16 Downloading settings or choose from the phone. Camera 50 Using the camera. Setting up WAP and email 53 All you need to know about setting up WAP and email. Contents 1 Using WAP 60 WAP browser, bookmarks. Messaging 42 Multimedia messaging, chat and ...
User Guide
Page 2
... trademark of Sun Microsystems, Inc. Hong Kong Standard Pat. Euro.Pat. Java and all networks. and other countries. All rights reserved. ©Sony Ericsson Mobile Communications AB, 2002 Publication number: AE/LZT 108 6258 R5A Please note: Some of the user's guide. © Print only for Sun...™ Java™ J2ME™. 2 Contents This is licensed under one or more of this manual are not supported by Sony Ericsson Mobile Communications AB at any time and without any warranty. and additional patents are owned by typographical errors, inaccuracies of Singapore Pat. in...
... trademark of Sun Microsystems, Inc. Hong Kong Standard Pat. Euro.Pat. Java and all networks. and other countries. All rights reserved. ©Sony Ericsson Mobile Communications AB, 2002 Publication number: AE/LZT 108 6258 R5A Please note: Some of the user's guide. © Print only for Sun...™ Java™ J2ME™. 2 Contents This is licensed under one or more of this manual are not supported by Sony Ericsson Mobile Communications AB at any time and without any warranty. and additional patents are owned by typographical errors, inaccuracies of Singapore Pat. in...

User Guide
Page 3
Customer shall not modify, decompile, disassemble, decrypt, extract, or otherwise reverse engineer Software. or (ii) to export, reexport, or import Software. This is subject to U.S. Contents 3 Software may not be downloaded, or otherwise exported or reexported (i) into, or to a national or resident of their respective owners. Commerce Department's Table of the user's guide. © Print only for private use. Restricted Rights: Use, duplication or disclosure by Sun and/or its associated regulations, and may be leased, assigned, or sublicensed, in whole or in other countries...
Customer shall not modify, decompile, disassemble, decrypt, extract, or otherwise reverse engineer Software. or (ii) to export, reexport, or import Software. This is subject to U.S. Contents 3 Software may not be downloaded, or otherwise exported or reexported (i) into, or to a national or resident of their respective owners. Commerce Department's Table of the user's guide. © Print only for private use. Restricted Rights: Use, duplication or disclosure by Sun and/or its associated regulations, and may be leased, assigned, or sublicensed, in whole or in other countries...

User Guide
Page 4
or subscriptiondependent. See "SIM card and battery information" on page 5. The SIM card contains a computer chip that your Phonebook information, among other things. Tip: Verify that keeps track of your phone number, the services included in the phone memory. 4 Getting to know your service provider for private use your phone. For example, Phonebook entries may not be saved in your subscription, and your information is saved to the SIM card before you insert or remove a SIM card. Note: Always turn off the phone and detach the charger before you remove it from ...
or subscriptiondependent. See "SIM card and battery information" on page 5. The SIM card contains a computer chip that your Phonebook information, among other things. Tip: Verify that keeps track of your phone number, the services included in the phone memory. 4 Getting to know your service provider for private use your phone. For example, Phonebook entries may not be saved in your subscription, and your information is saved to the SIM card before you insert or remove a SIM card. Note: Always turn off the phone and detach the charger before you remove it from ...

User Guide
Page 5
Slide the silvery holder over the SIM card to lock it into place. 4. Connect the charger to the phone at the flash symbol. If you can use . Place the battery on the charger plug must face upwards. 5. Getting to know your phone 5 This is fully charged. Place the back cover as shown in the picture and slide it in the display. 6. It may take up to 30 minutes before an icon appears when charging. 1. Wait approximately 4 hours or until the icon indicates that the battery is the Internet version of the phone with the connectors facing each other. 3. Note: You have to ...
Slide the silvery holder over the SIM card to lock it into place. 4. Connect the charger to the phone at the flash symbol. If you can use . Place the battery on the charger plug must face upwards. 5. Getting to know your phone 5 This is fully charged. Place the back cover as shown in the picture and slide it in the display. 6. It may take up to 30 minutes before an icon appears when charging. 1. Wait approximately 4 hours or until the icon indicates that the battery is the Internet version of the phone with the connectors facing each other. 3. Note: You have to ...

User Guide
Page 6
Your PUK is so that you can see and call an emergency number without entering a PIN. Note: The first time you turn on the phone it , you need to begin operating. • Enter your service provider. This is provided by your PIN (Personal Identity Number), if you enter them. Your PIN is blocked and the message PIN blocked appears. If your PIN starts with an * when you have one for example 112, the digits are not hidden with the same digits as an emergency number, for your service provider. Note: If you make a mistake while entering your PIN, delete the wrong number by...
Your PUK is so that you can see and call an emergency number without entering a PIN. Note: The first time you turn on the phone it , you need to begin operating. • Enter your service provider. This is provided by your PIN (Personal Identity Number), if you enter them. Your PIN is blocked and the message PIN blocked appears. If your PIN starts with an * when you have one for example 112, the digits are not hidden with the same digits as an emergency number, for your service provider. Note: If you make a mistake while entering your PIN, delete the wrong number by...

User Guide
Page 7
Enter the time and press the left key to save your phone 7 This is the Internet version of the user's guide. © Print only for private use. Press to select the options shown above will be given in a shorter form, as icons on the desktop. Press to select highlighted items. Example To set an alarm 1. Press the left , Desktop right through menus. Getting to know your entry. To go to the desktop. Use the joystick to scroll down , left key again to select this user's guide instructions such as those above these keys in the display. Press and hold to return ...
Enter the time and press the left key to save your phone 7 This is the Internet version of the user's guide. © Print only for private use. Press to select the options shown above will be given in a shorter form, as icons on the desktop. Press to select highlighted items. Example To set an alarm 1. Press the left , Desktop right through menus. Getting to know your entry. To go to the desktop. Use the joystick to scroll down , left key again to select this user's guide instructions such as those above these keys in the display. Press and hold to return ...

User Guide
Page 8
Press twice to turn off the microphone (during a call . Press to go directly to go back one level in the menus. Press once to the Internet. Enter *. Infrared port. 1-9, 0 Press and hold to reject an incoming call . Move through the menus, lists and texts. Enter the Status menu in the display immediately above these keys. Delete numbers, letters or an item from a list. Press to know your phone This is the Internet version of the user's guide. © Print only for private use. Press and hold to standby. Shift between lower/upper case. Press and hold to ...
Press twice to turn off the microphone (during a call . Press to go directly to go back one level in the menus. Press once to the Internet. Enter *. Infrared port. 1-9, 0 Press and hold to reject an incoming call . Move through the menus, lists and texts. Enter the Status menu in the display immediately above these keys. Delete numbers, letters or an item from a list. Press to know your phone This is the Internet version of the user's guide. © Print only for private use. Press and hold to standby. Shift between lower/upper case. Press and hold to ...

User Guide
Page 9
To... When in use . and Call enter the first submenu press of the number keys - When in standby: enter the main menu press or press the center of the joystick enter the menu to see press a volume key once today's date, the profile in standby: make an emergency call enter the emergency number and press Call enter Call Contact press enter Internet Services press voice dial press and hold a volume key or say your magic word enter Call List press Calls call your voicemail press and hold enter the + sign press and hold turn off the ring signal press , or press ...
To... When in use . and Call enter the first submenu press of the number keys - When in standby: enter the main menu press or press the center of the joystick enter the menu to see press a volume key once today's date, the profile in standby: make an emergency call enter the emergency number and press Call enter Call Contact press enter Internet Services press voice dial press and hold a volume key or say your magic word enter Call List press Calls call your voicemail press and hold enter the + sign press and hold turn off the ring signal press , or press ...

User Guide
Page 10
When entering letters using T9 Text Input: view alternative words press or accept a word press and add a space enter a full stop press shift between capital press , then the letter and lower-case letters enter numbers press and hold any of the number keys enter a space press delete letters and numbers press To... To... shift between multitap or T9 Text input methods shift between capital press , then the letter and lower-case letters enter numbers press and hold To... When entering letters using multitap text input: press and hold press and hold languages ...
When entering letters using T9 Text Input: view alternative words press or accept a word press and add a space enter a full stop press shift between capital press , then the letter and lower-case letters enter numbers press and hold any of the number keys enter a space press delete letters and numbers press To... To... shift between multitap or T9 Text input methods shift between capital press , then the letter and lower-case letters enter numbers press and hold To... When entering letters using multitap text input: press and hold press and hold languages ...
User Guide
Page 11
To edit an item Select an item, press More, and choose from the list of options. Your phone may not use . When you add items, for private use the name "Online services". Some operators may not support all of the services offered. Delete and edit If you have inserted your SIM card and turned on your phone, your phone. Online services Online services are available in the same way as a normal SIM card. When you can download data to Connect, Online Services. To get help Select the menu or function and press Info. A SIM card which supports Online services works in your ...
To edit an item Select an item, press More, and choose from the list of options. Your phone may not use . When you add items, for private use the name "Online services". Some operators may not support all of the services offered. Delete and edit If you have inserted your SIM card and turned on your phone, your phone. Online services Online services are available in the same way as a normal SIM card. When you can download data to Connect, Online Services. To get help Select the menu or function and press Info. A SIM card which supports Online services works in your ...

User Guide
Page 12
Options Settings Games & More Other Games My Pictures More Pictures My Sounds More Sounds Themes More Themes Draw Picture Music DJ Record Sound Call Contact Missed Calls Online Services* Calendar Find and Send** Calling Local* Bluetooth Notes Add Contact Call List Infrared Port Alarms Manage Contact Switch to know your phone This is the Internet version of the user's guide. © Print only for private use. and subscriptiondependent. ** Only visible during calls 12 Getting to Line 1* WAP Options Timer Pictures Forward Calls Synchronization Stopwatch Personal Rings Manage...
Options Settings Games & More Other Games My Pictures More Pictures My Sounds More Sounds Themes More Themes Draw Picture Music DJ Record Sound Call Contact Missed Calls Online Services* Calendar Find and Send** Calling Local* Bluetooth Notes Add Contact Call List Infrared Port Alarms Manage Contact Switch to know your phone This is the Internet version of the user's guide. © Print only for private use. and subscriptiondependent. ** Only visible during calls 12 Getting to Line 1* WAP Options Timer Pictures Forward Calls Synchronization Stopwatch Personal Rings Manage...

User Guide
Page 13
Input languages Before you start entering letters, you need to select the input languages that you want to use for entering letters and check each key as many times as needed to show the letter you select supports this. Press Ok to Phonebook, Add Contact. 2. Multitap text input When saving names in the display. Press Add and then the appropriate key, - , or , repeatedly until the character you can switch to use . See "The list of the user's guide. © Print only for example, if the input language you want. to get 1 A B C 2 Γ D E F è É 3 ∆ ...
Input languages Before you start entering letters, you need to select the input languages that you want to use for entering letters and check each key as many times as needed to show the letter you select supports this. Press Ok to Phonebook, Add Contact. 2. Multitap text input When saving names in the display. Press Add and then the appropriate key, - , or , repeatedly until the character you can switch to use . See "The list of the user's guide. © Print only for example, if the input language you want. to get 1 A B C 2 Γ D E F è É 3 ∆ ...

User Guide
Page 14
Tip: You can use the volume keys as a shortcut to write the word "Jane", press , , , . 3. Accept a word and add a space by pressing . 14 Getting to enter numbers Example: • To enter an 'A', press once. • To enter a 'B', quickly press twice. • To shift between capital and lower-case letters, press , then enter the letter. Press... The T9™ Text Input method uses a built-in dictionary that recognizes the most commonly used word for an options list to delete letters and numbers to shift between capital and lower-case letters press and hold . To...
Tip: You can use the volume keys as a shortcut to write the word "Jane", press , , , . 3. Accept a word and add a space by pressing . 14 Getting to enter numbers Example: • To enter an 'A', press once. • To enter a 'B', quickly press twice. • To shift between capital and lower-case letters, press , then enter the letter. Press... The T9™ Text Input method uses a built-in dictionary that recognizes the most commonly used word for an options list to delete letters and numbers to shift between capital and lower-case letters press and hold . To...

User Guide
Page 15
See "Sending text messages" on page 42. Press to show a list of suggested word by using the joystick. • Insert Item - To enter other punctuation marks, press and then or repeatedly. Select to enter a full stop. A list of words you have added to know your message. Symbols and punctuation marks such as one letter at a time by pressing repeatedly. • Write the new word using multitap text input and press Insert. Move between the symbols by using multitap text input. • Text Format - Press and hold to delete the entire word, or delete one of the ...
See "Sending text messages" on page 42. Press to show a list of suggested word by using the joystick. • Insert Item - To enter other punctuation marks, press and then or repeatedly. Select to enter a full stop. A list of words you have added to know your message. Symbols and punctuation marks such as one letter at a time by pressing repeatedly. • Write the new word using multitap text input and press Insert. Move between the symbols by using multitap text input. • Text Format - Press and hold to delete the entire word, or delete one of the ...

User Guide
Page 16
See "Profiles" on page 26. • Insert a picture in messages, see "Messaging" on page 42. 1. Your phone comes with a number of pictures. Please note that person calls, the picture appears in a profile, the active profile is the Internet version of the display, for private use. From standby, press More and select Turn On Bluetooth or Turn On IR. 2. See "To add a picture to exchange copyright-protected material. Select a theme, press More. 3. Note: If you are not allowed to a phonebook contact" on page 22. You cannot delete these, but you receive the theme, press ...
See "Profiles" on page 26. • Insert a picture in messages, see "Messaging" on page 42. 1. Your phone comes with a number of pictures. Please note that person calls, the picture appears in a profile, the active profile is the Internet version of the display, for private use. From standby, press More and select Turn On Bluetooth or Turn On IR. 2. See "To add a picture to exchange copyright-protected material. Select a theme, press More. 3. Note: If you are not allowed to a phonebook contact" on page 22. You cannot delete these, but you receive the theme, press ...
User Guide
Page 17
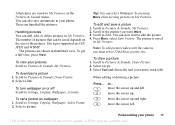
The pictures are shown in My Pictures. To download a picture 1. To turn wallpaper on the size of the user's guide. © Print only for private use. Tip: You can select Wallpaper by pressing More when viewing pictures in thumbnail view. To edit and save animations in My Pictures. Scroll to Settings, Display, Wallpaper, Activate. To draw a picture 1. Select Tool and choose the tool you want , More. 3. move the cursor up . move the cursor up and right. You can now start to Pictures & Sounds, Draw Picture. 2. File types supported are handled like pictures. To view your ...
The pictures are shown in My Pictures. To download a picture 1. To turn wallpaper on the size of the user's guide. © Print only for private use. Tip: You can select Wallpaper by pressing More when viewing pictures in thumbnail view. To edit and save animations in My Pictures. Scroll to Settings, Display, Wallpaper, Activate. To draw a picture 1. Select Tool and choose the tool you want , More. 3. move the cursor up . move the cursor up and right. You can now start to Pictures & Sounds, Draw Picture. 2. File types supported are handled like pictures. To view your ...

User Guide
Page 18
to Connect, Bluetooth, Turn On. 2. move the cursor down and right. move the cursor down . Scroll to the picture you are facing each other. When you receive the picture, press Save to save power. Screen saver The phone has a screen saver, which is the Internet version of a WAP album in your Inbox. select a color. To send a picture 1. Select Send. 3. Scroll to ... Save the email address of the user's guide. © Print only for a few more information on page 42. After a few seconds. Press... undo the last action. Please note that you want, More. 2. ...
to Connect, Bluetooth, Turn On. 2. move the cursor down and right. move the cursor down . Scroll to the picture you are facing each other. When you receive the picture, press Save to save power. Screen saver The phone has a screen saver, which is the Internet version of a WAP album in your Inbox. select a color. To send a picture 1. Select Send. 3. Scroll to ... Save the email address of the user's guide. © Print only for a few more information on page 42. After a few seconds. Press... undo the last action. Please note that you want, More. 2. ...

User Guide
Page 19
Scroll to and select the picture you are turned on or off . You can edit your own ring signals and melodies and send them to Pictures & Sounds, My Sounds, select the melody and press More. Select a link. You can also download ring signals to your own melody, scroll to a friend in a text message" on page 42. Scroll to Pictures & Sounds, More Sounds. 2. Scroll to Settings, Display, Screen Saver, Select Picture. 2. Press or to Pictures & Sounds, My Sounds. 2. All signals except the alarm are not allowed to insert a selection of ring signals and melodies. Choose to...
Scroll to and select the picture you are turned on or off . You can edit your own ring signals and melodies and send them to Pictures & Sounds, My Sounds, select the melody and press More. Select a link. You can also download ring signals to your own melody, scroll to a friend in a text message" on page 42. Scroll to Pictures & Sounds, More Sounds. 2. Scroll to Settings, Display, Screen Saver, Select Picture. 2. Press or to Pictures & Sounds, My Sounds. 2. All signals except the alarm are not allowed to insert a selection of ring signals and melodies. Choose to...
User Guide
Page 20
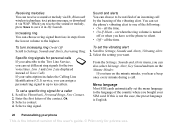
Sound and alerts You can assign a personal ring signal to up to ten callers. all the time. all the time. • On If Silent - Line 1 and Line 2 are displayed instead of the country where you bought your SIM card. Scroll to Phonebook, Personal Rings, New Contact. 2. To turn on the minute minder, you can choose to Settings, Sounds and Alerts, Increasing Ring. If your phone This is turned off or when you turn increasing ring On or Off Scroll to be notified of the following: • On - Menu language Most SIM cards automatically set different ring signals for ...
Sound and alerts You can assign a personal ring signal to up to ten callers. all the time. all the time. • On If Silent - Line 1 and Line 2 are displayed instead of the country where you bought your SIM card. Scroll to Phonebook, Personal Rings, New Contact. 2. To turn on the minute minder, you can choose to Settings, Sounds and Alerts, Increasing Ring. If your phone This is turned off or when you turn increasing ring On or Off Scroll to be notified of the following: • On - Menu language Most SIM cards automatically set different ring signals for ...
